
Gear:
Sony a7IV
Sony FE 2.8/16–35 mm GM
Sony FE 100–400 mm GM
DJI Mini 3 Pro
You can see the VLOG to the BLOG at the bottom of the page or you can reach it via this button:
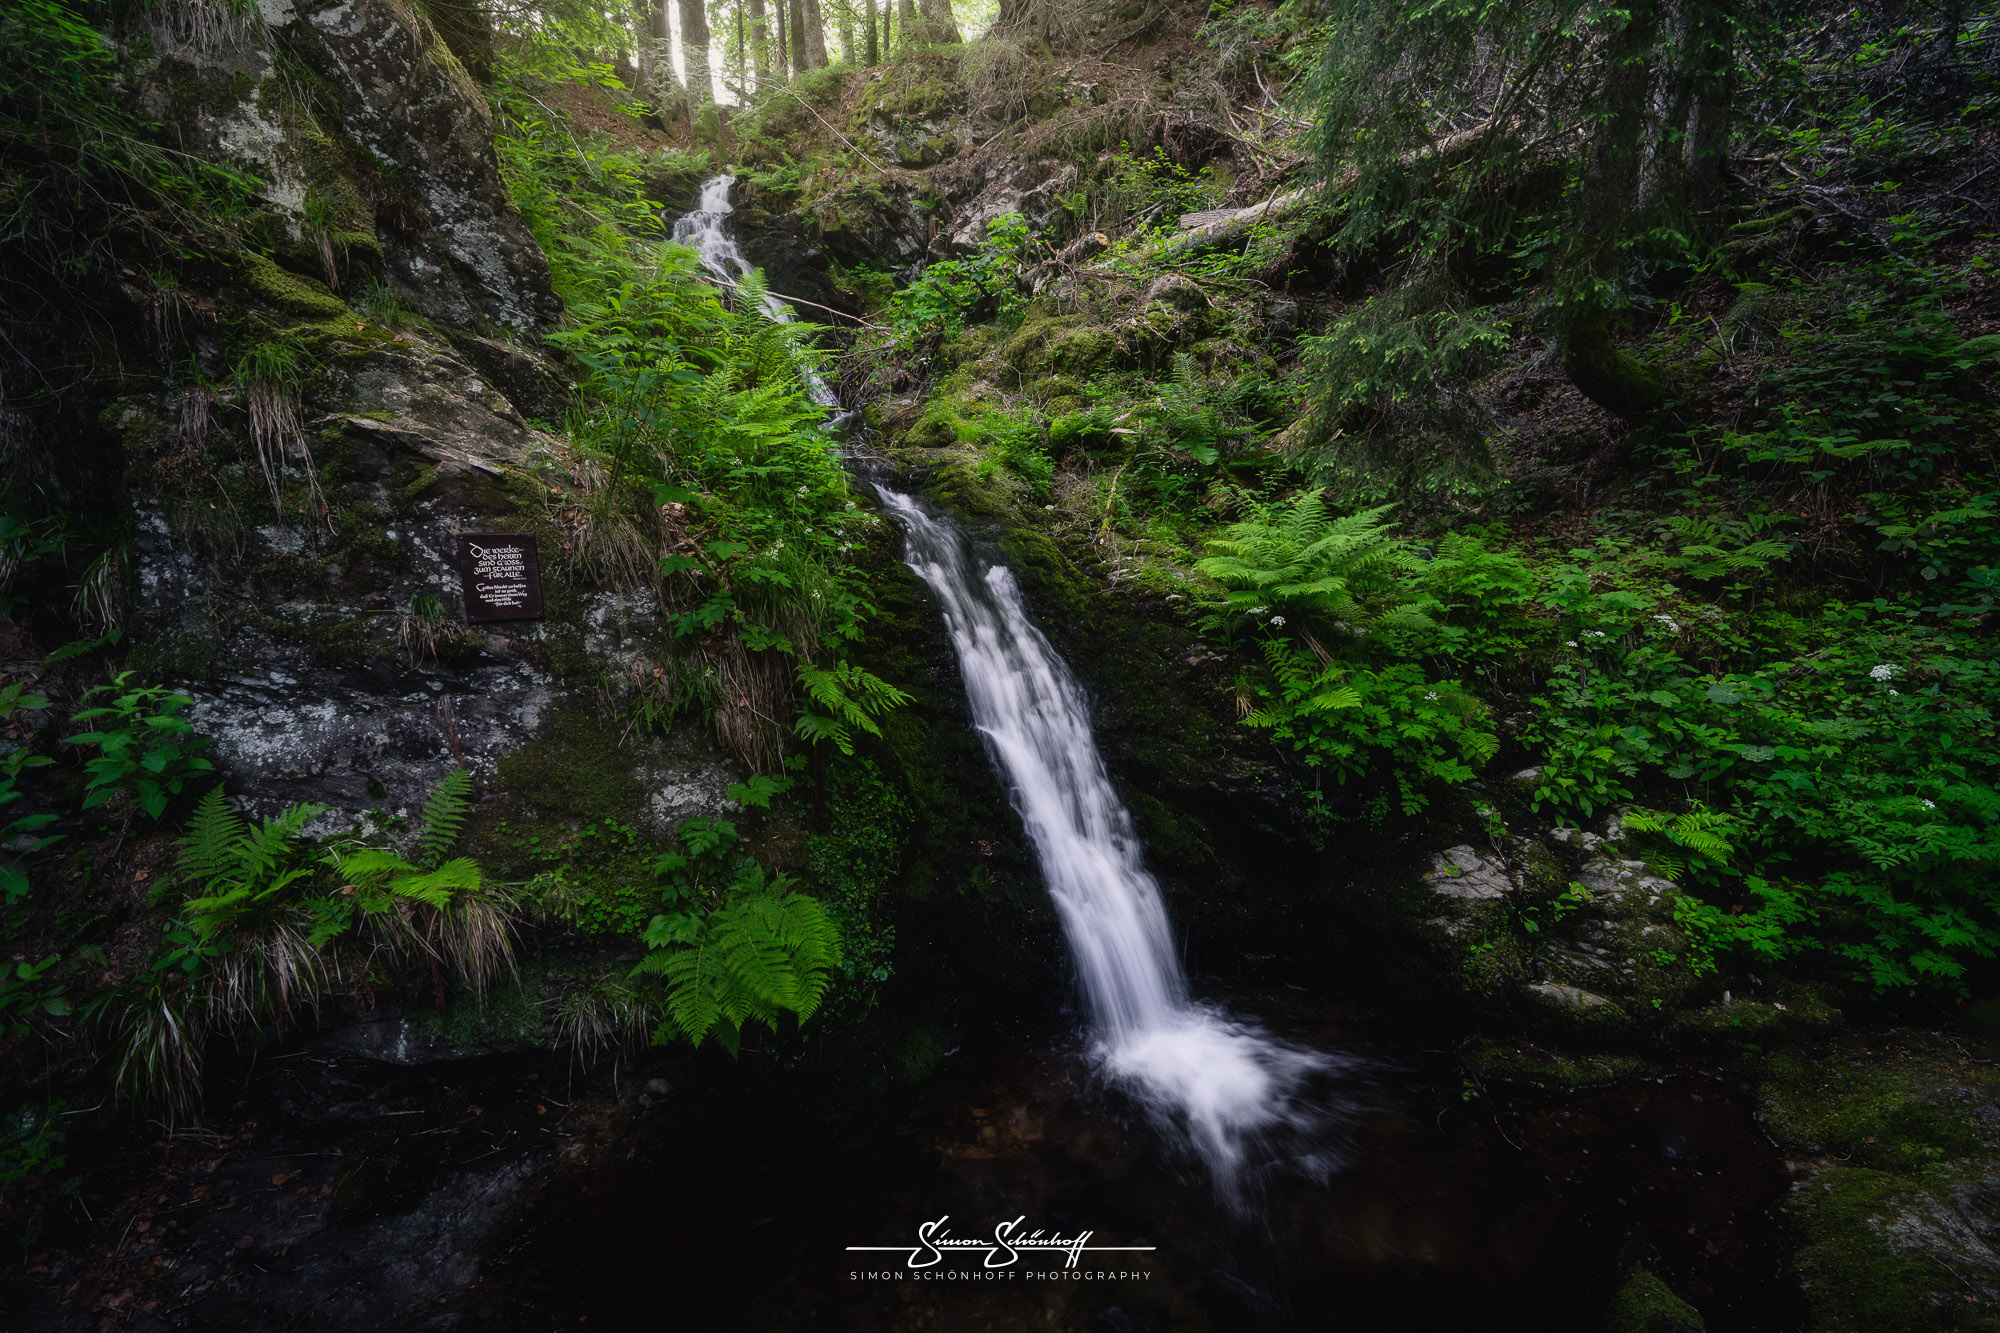
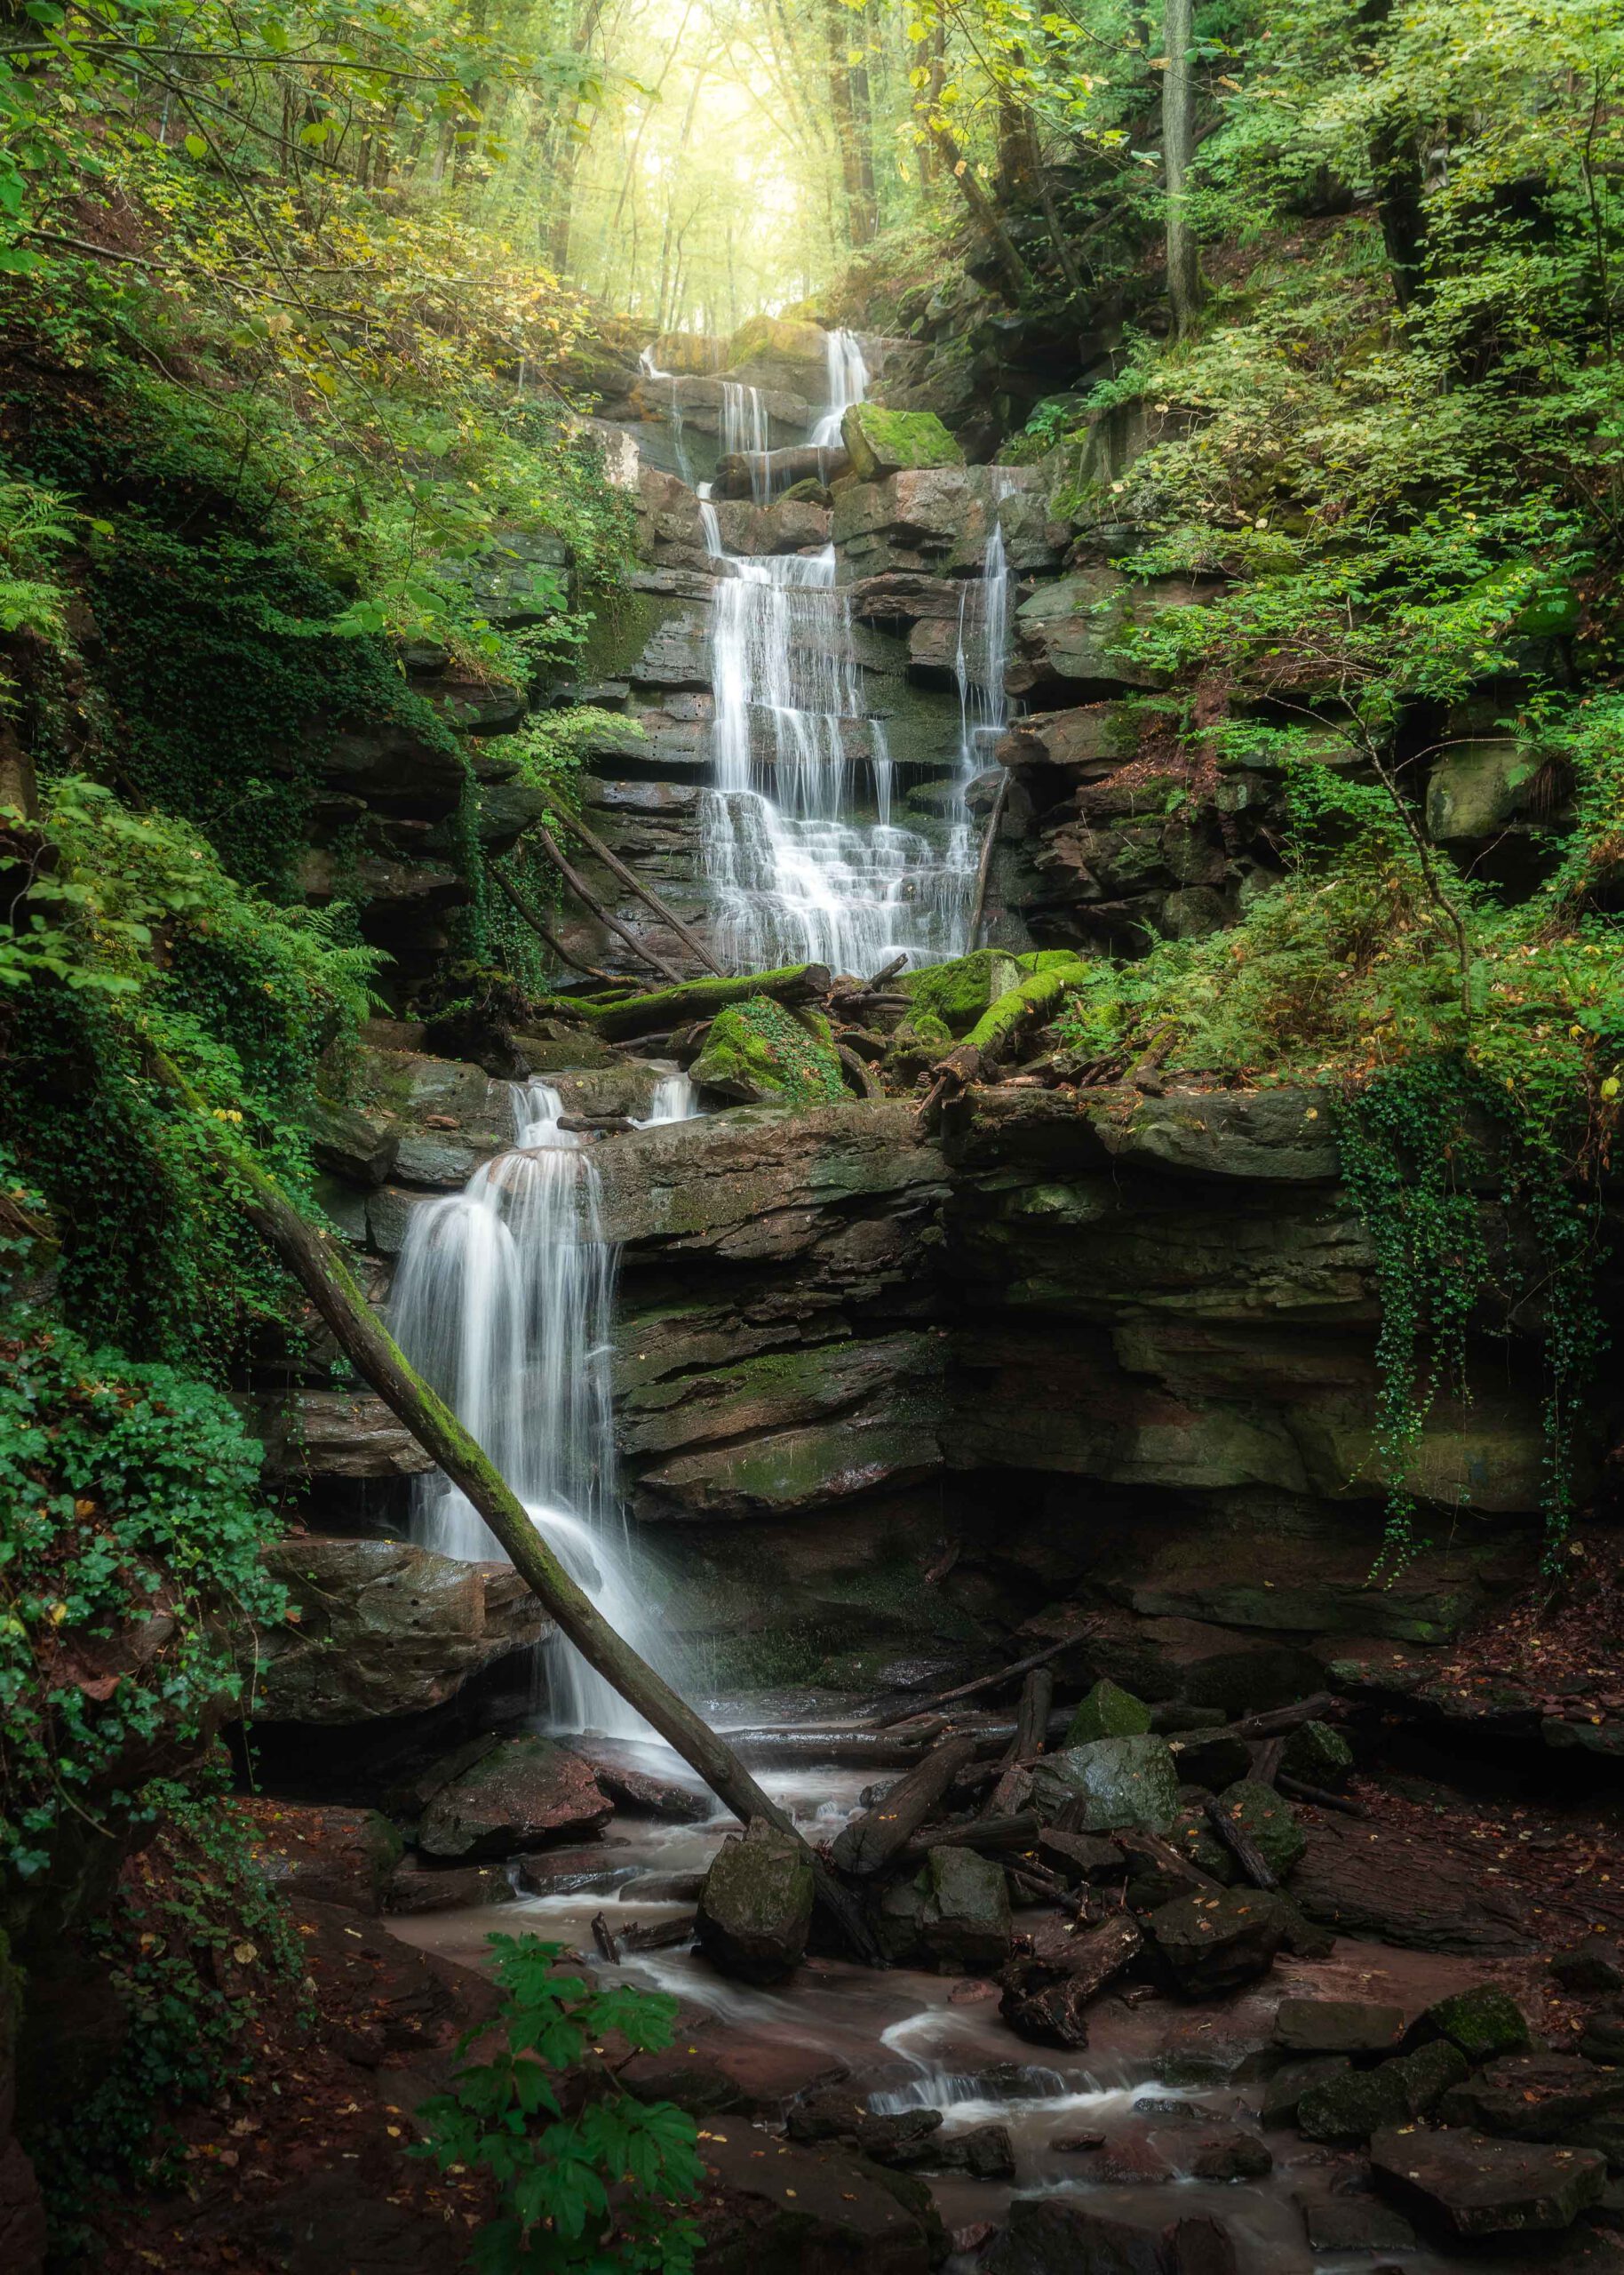
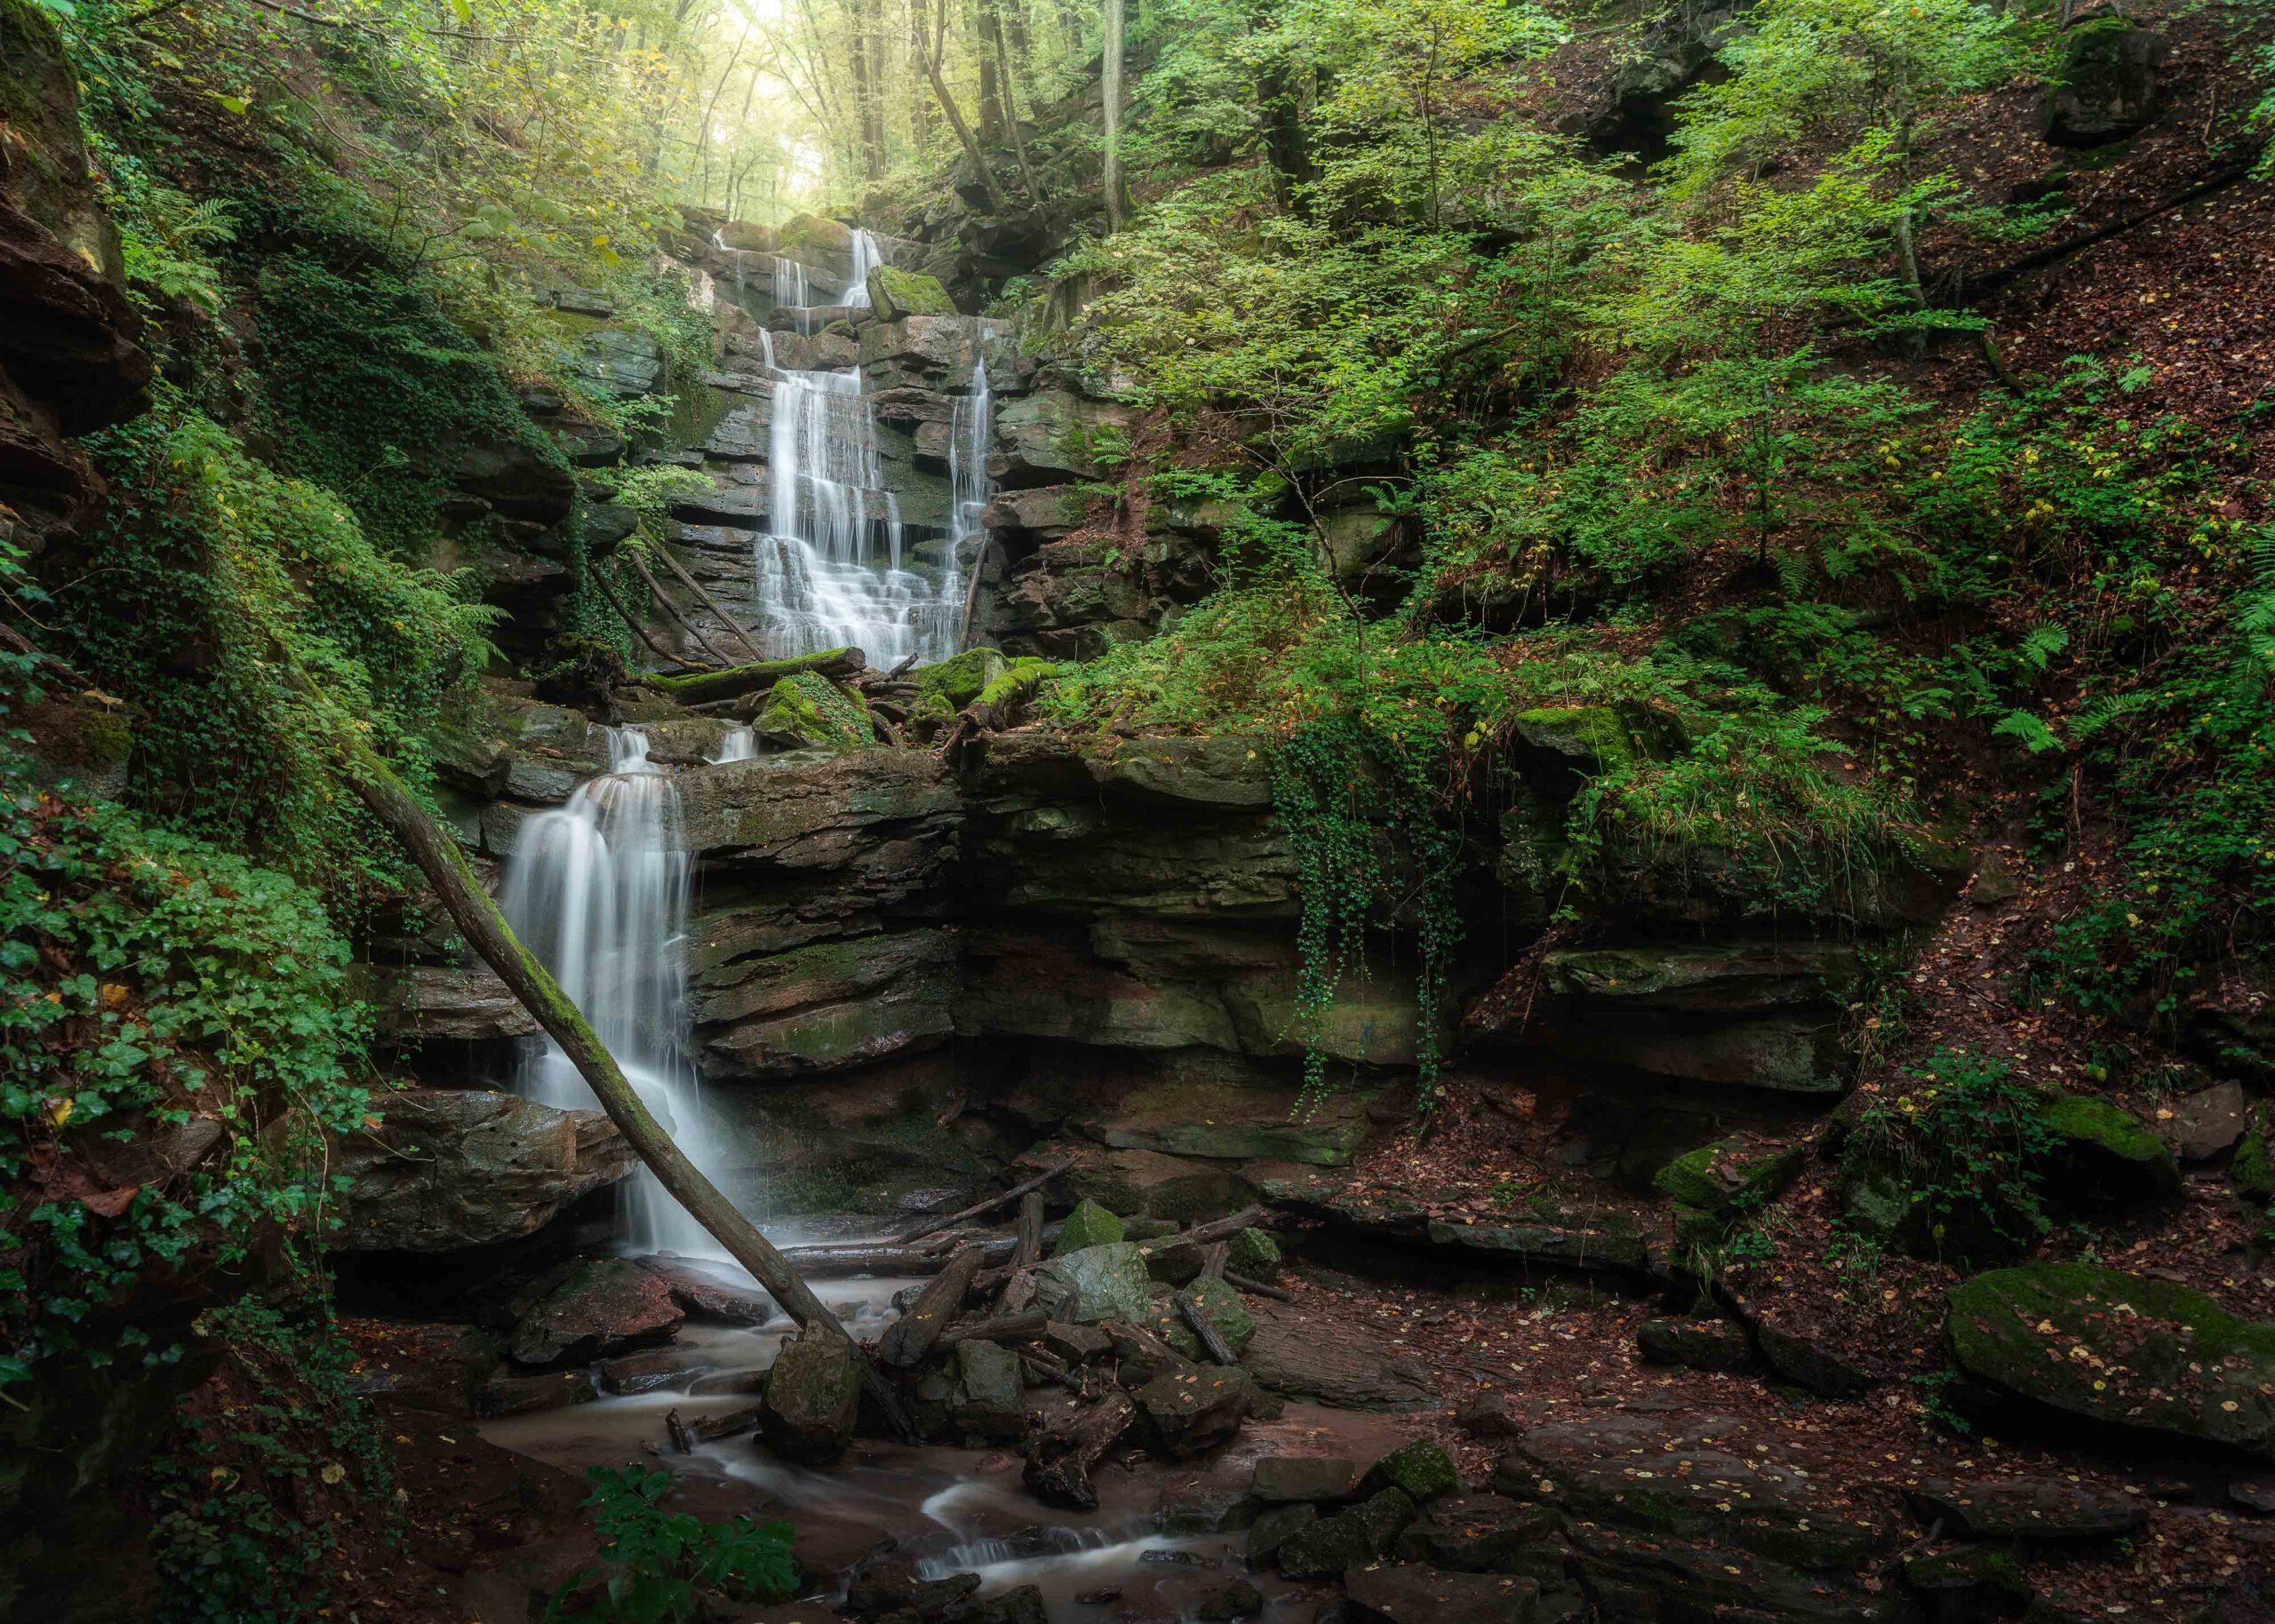
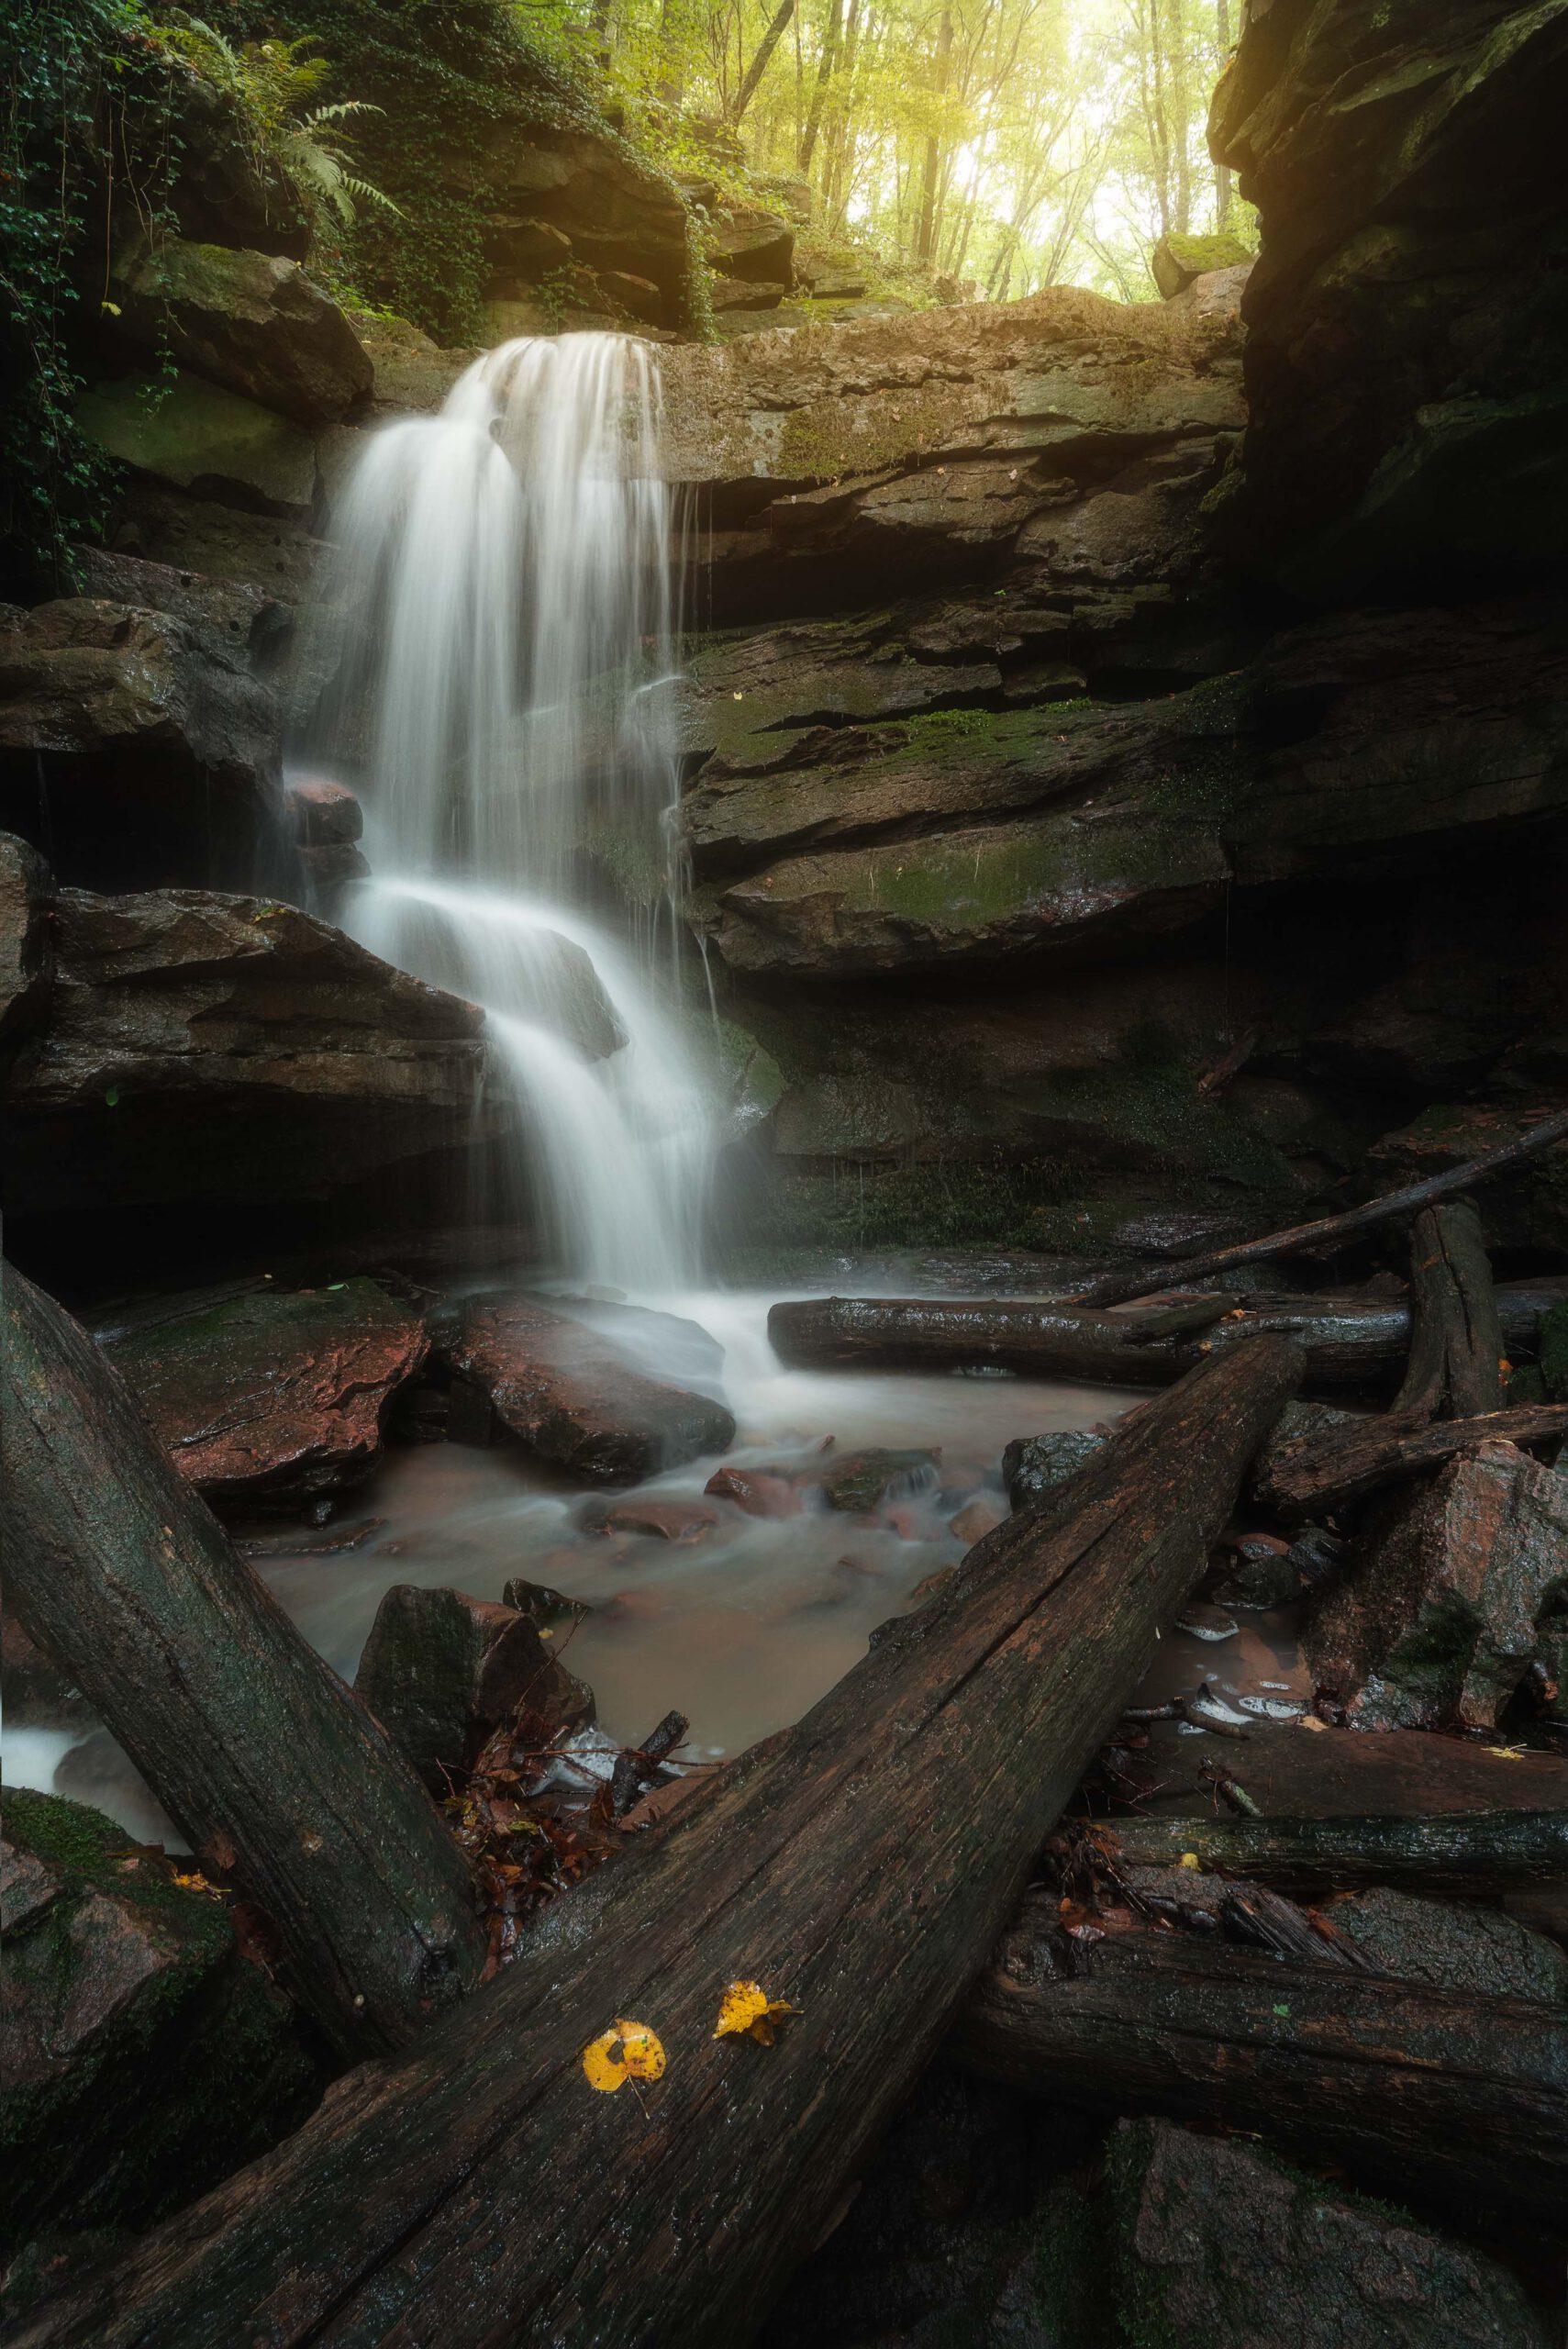
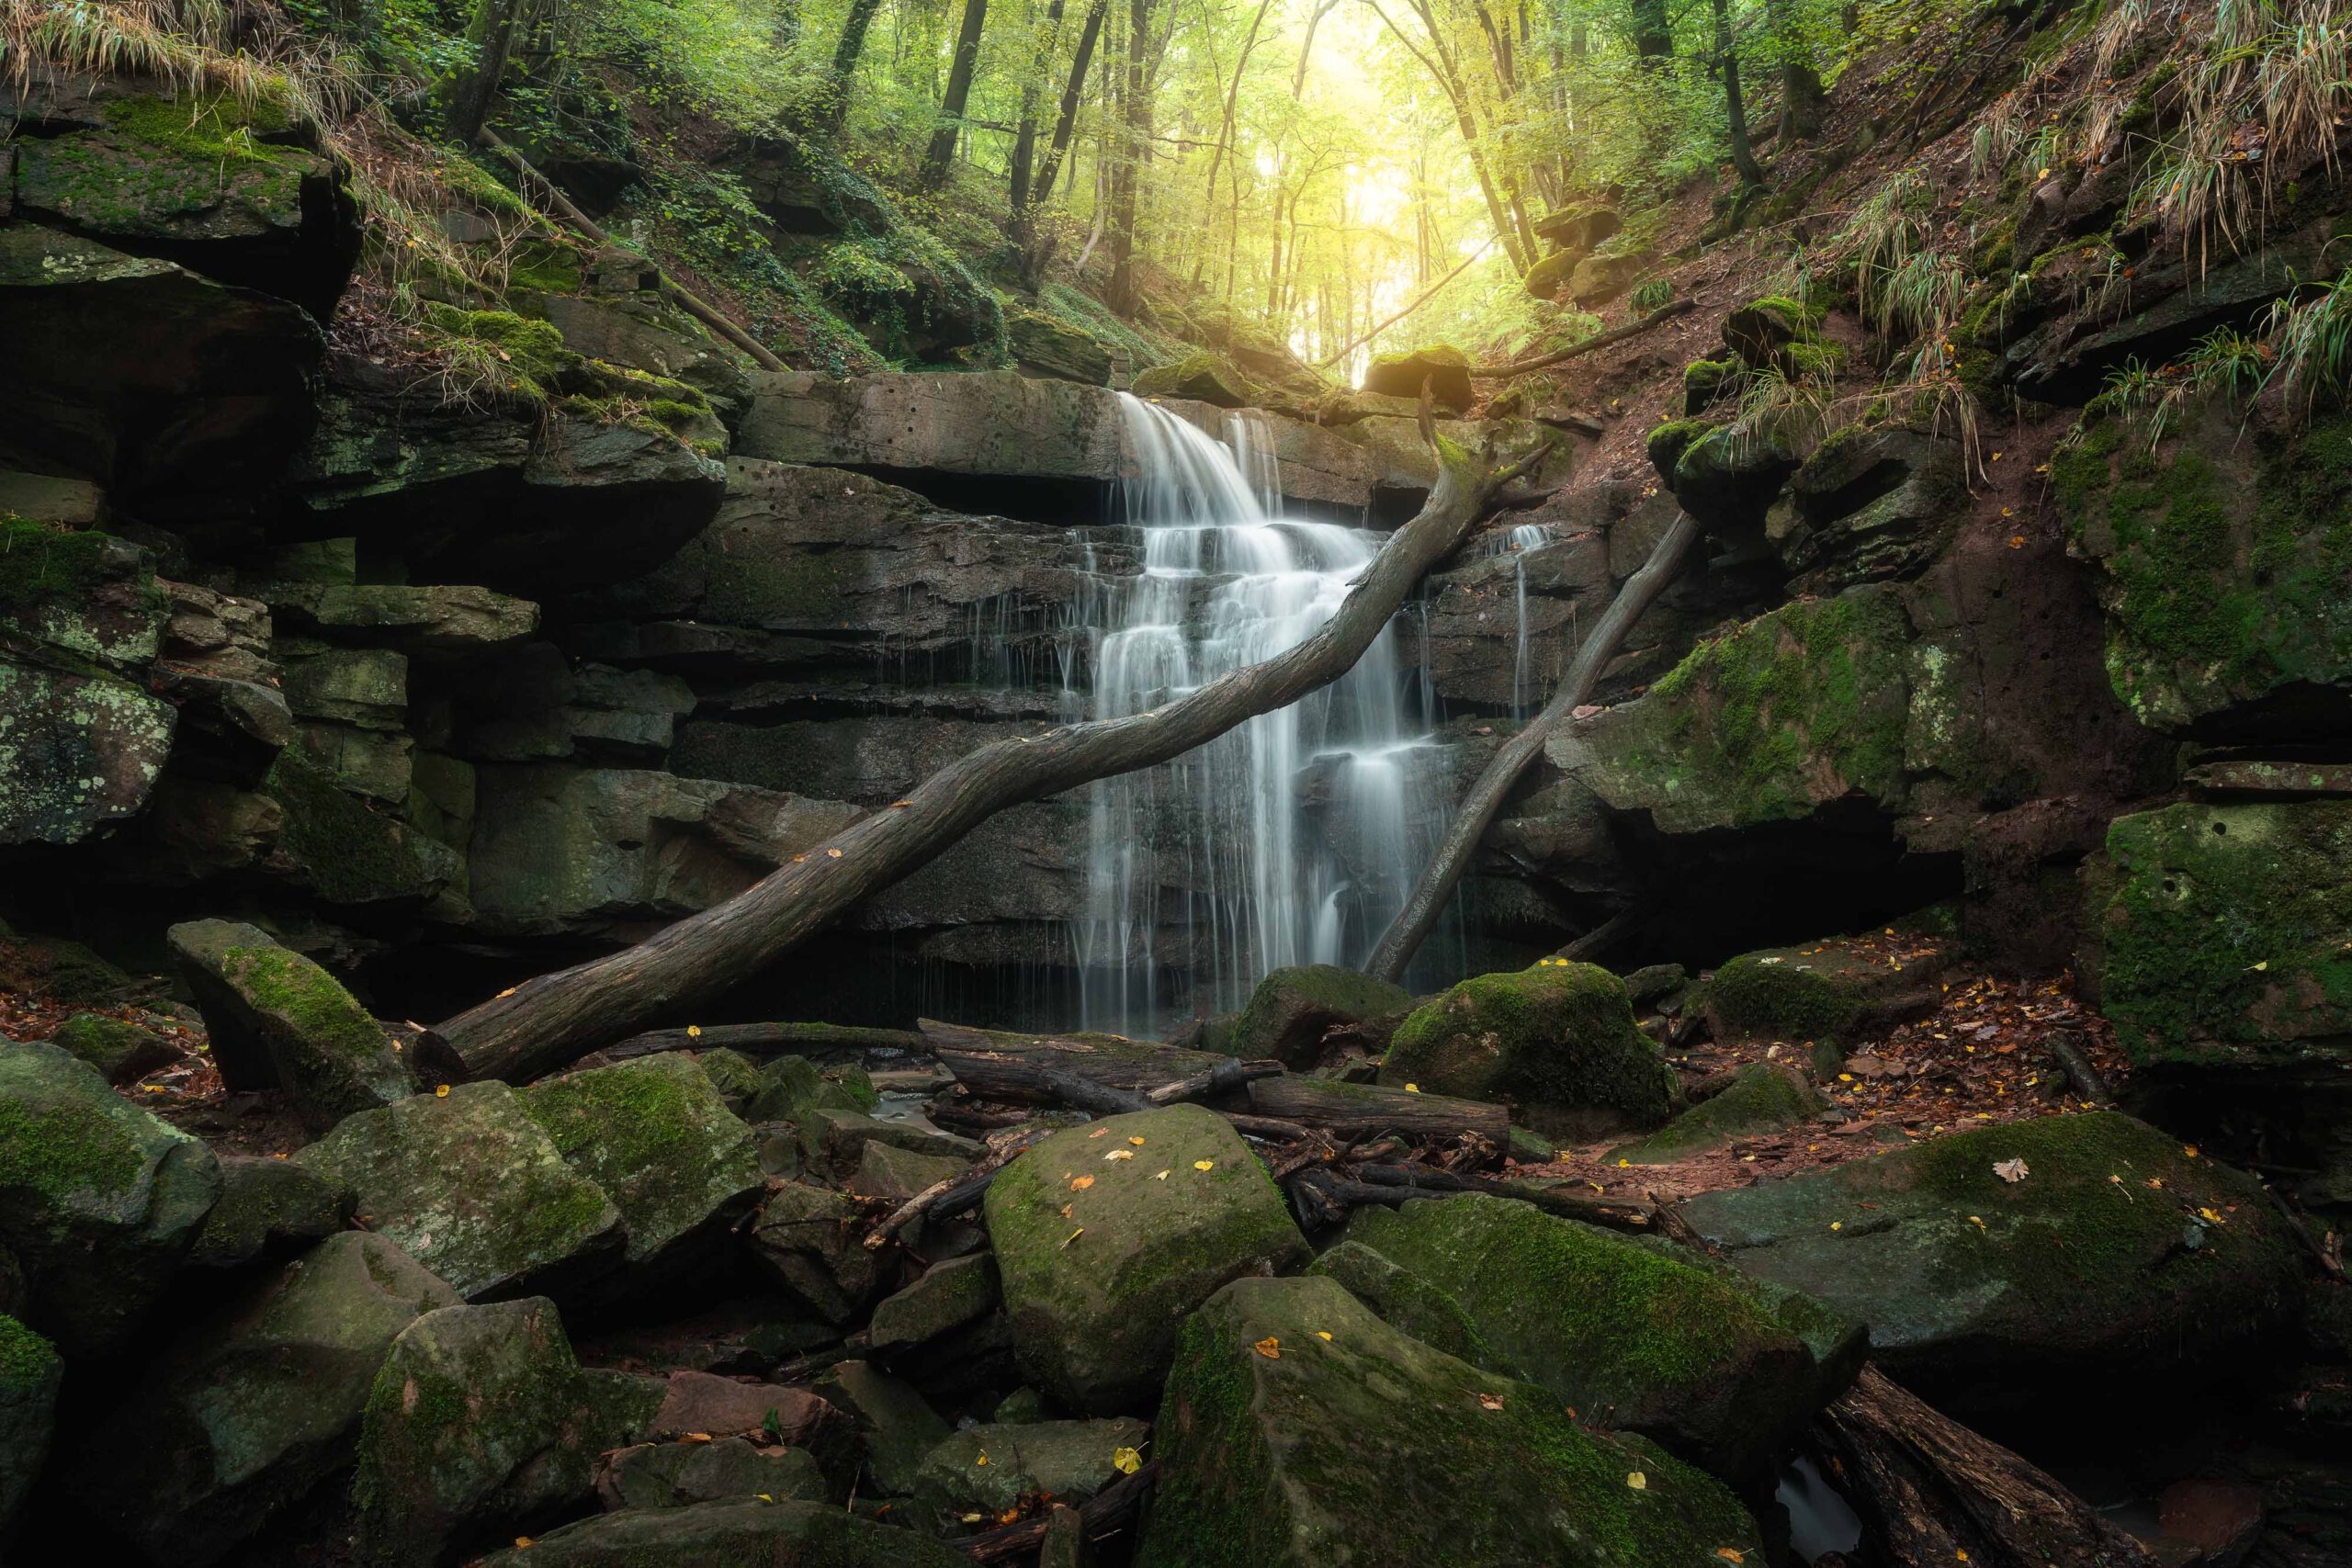
I’m not usually a resentful person, but when there’s such a gem in my home region, I naturally want to capture it in photographs. If I don’t succeed at first, it makes me all the more determined. It can’t be that someone (in this case, me) can’t take great pictures in such a beautiful place, can it?
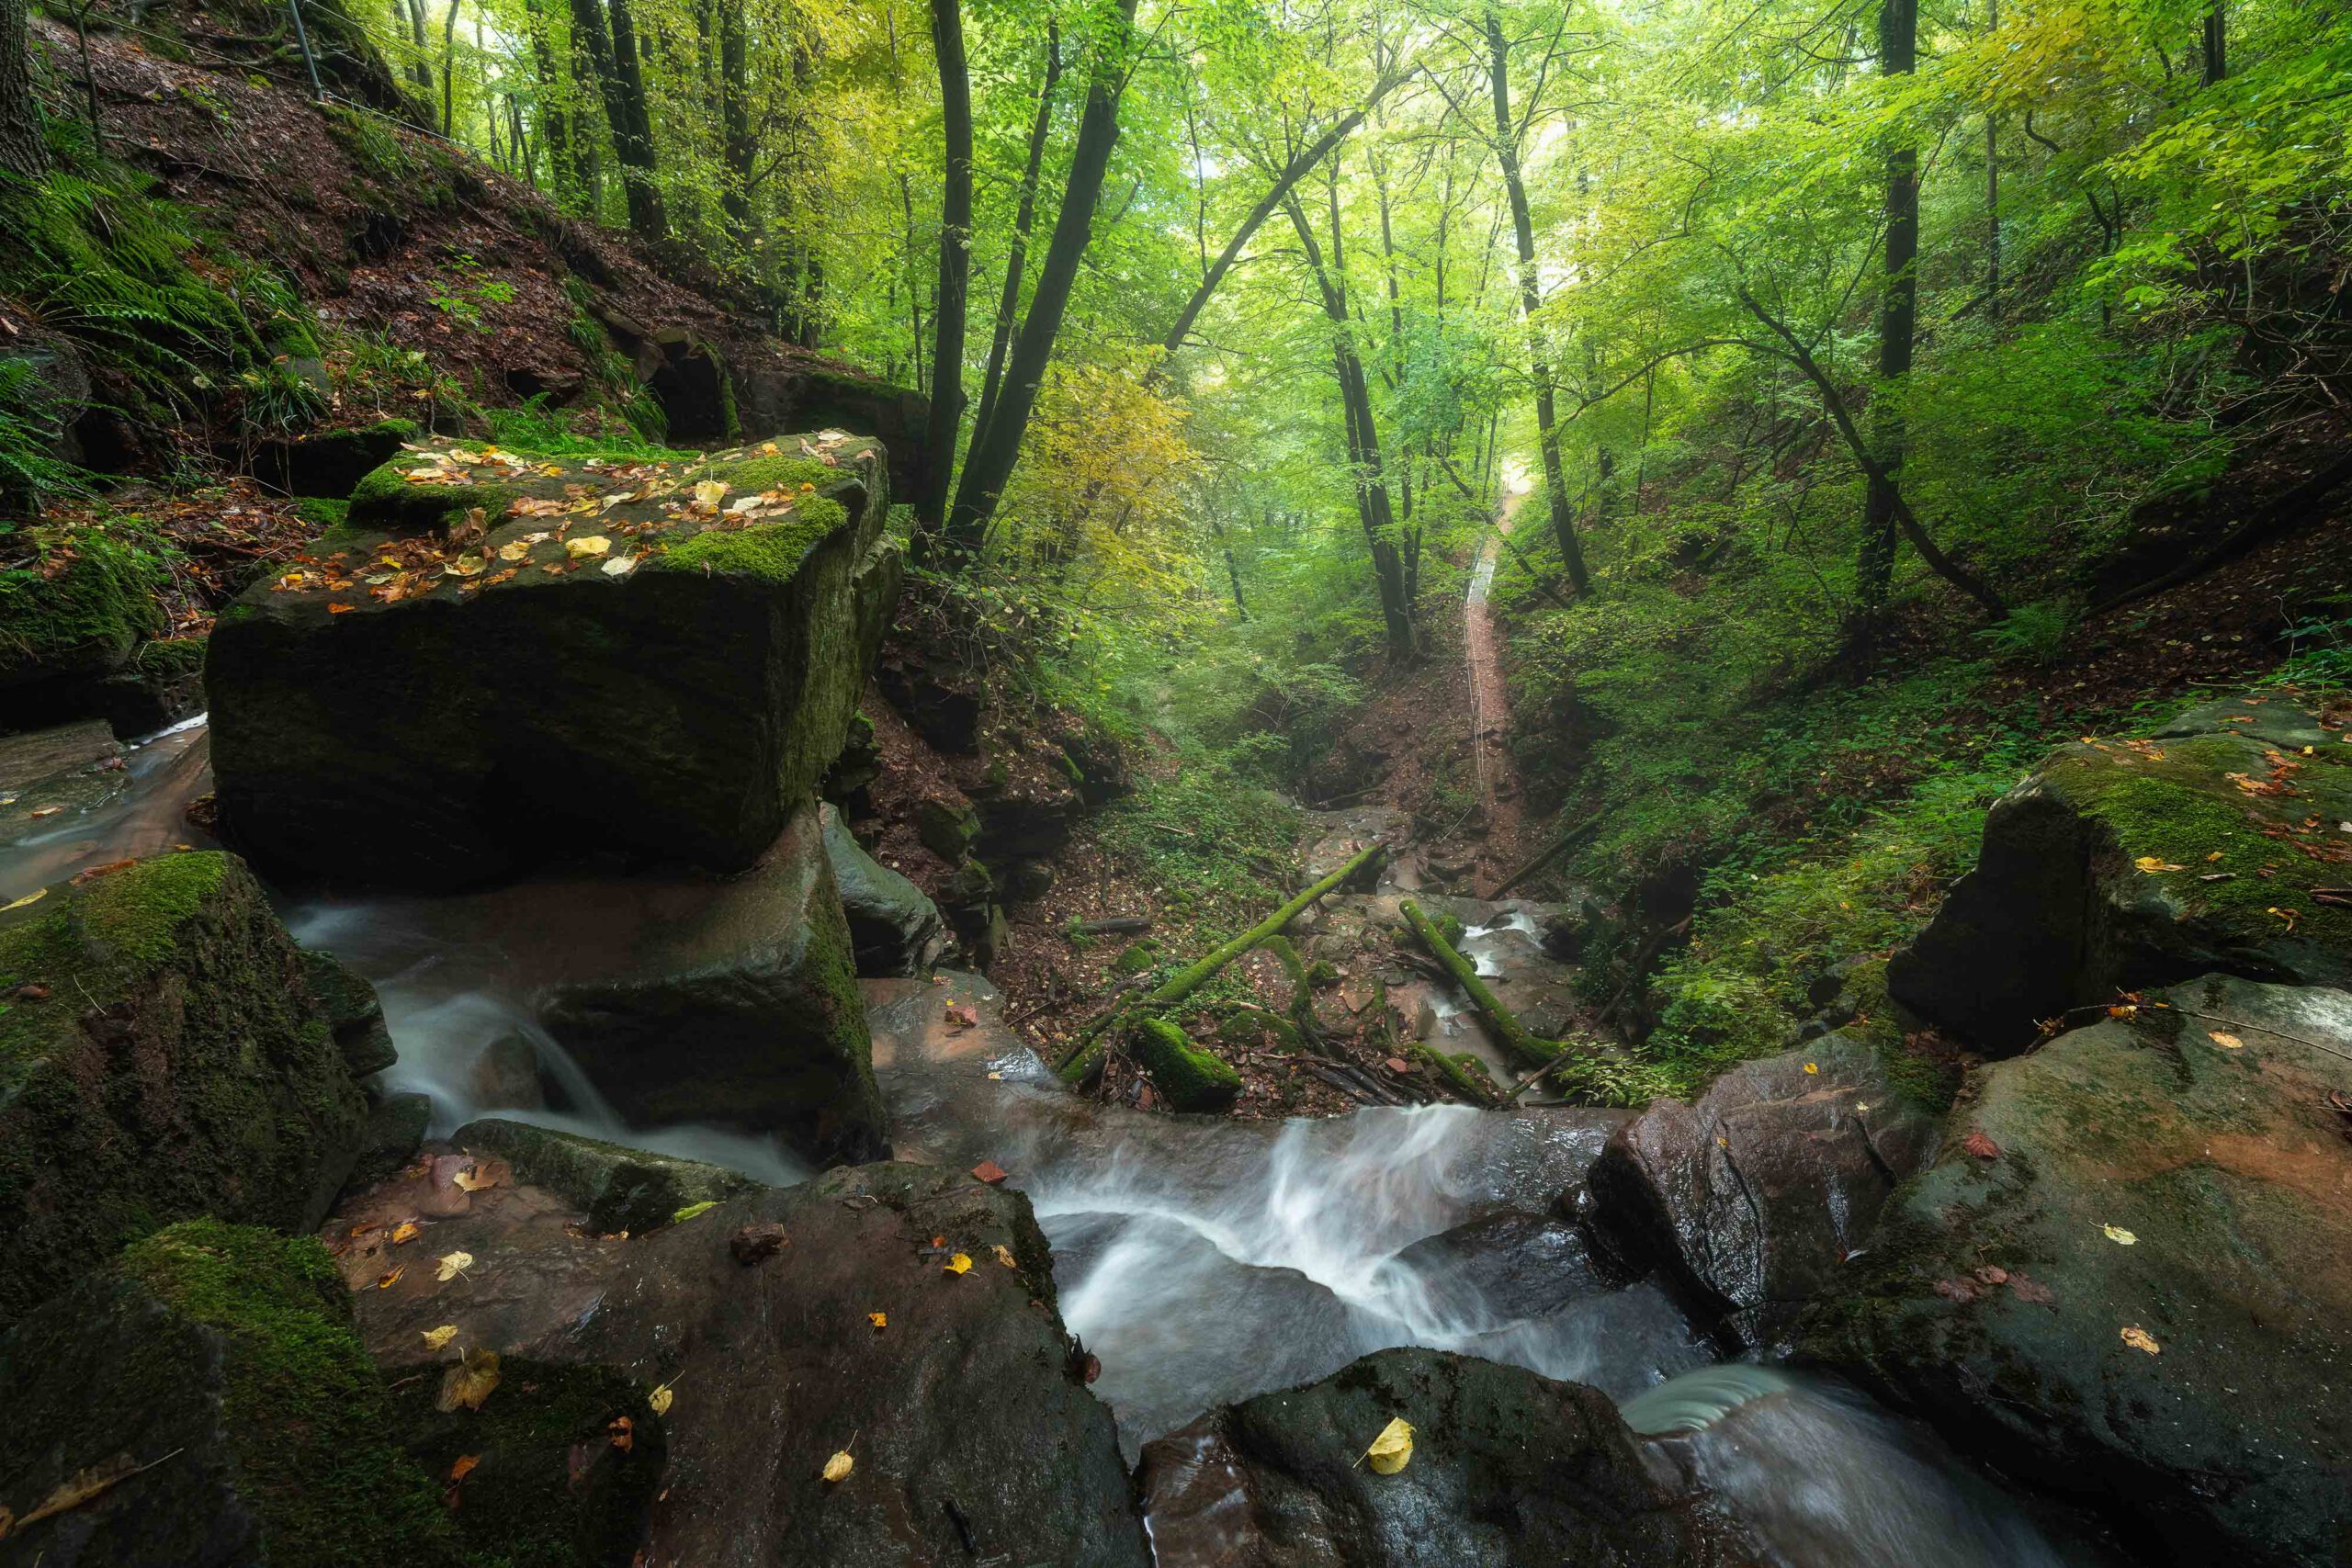
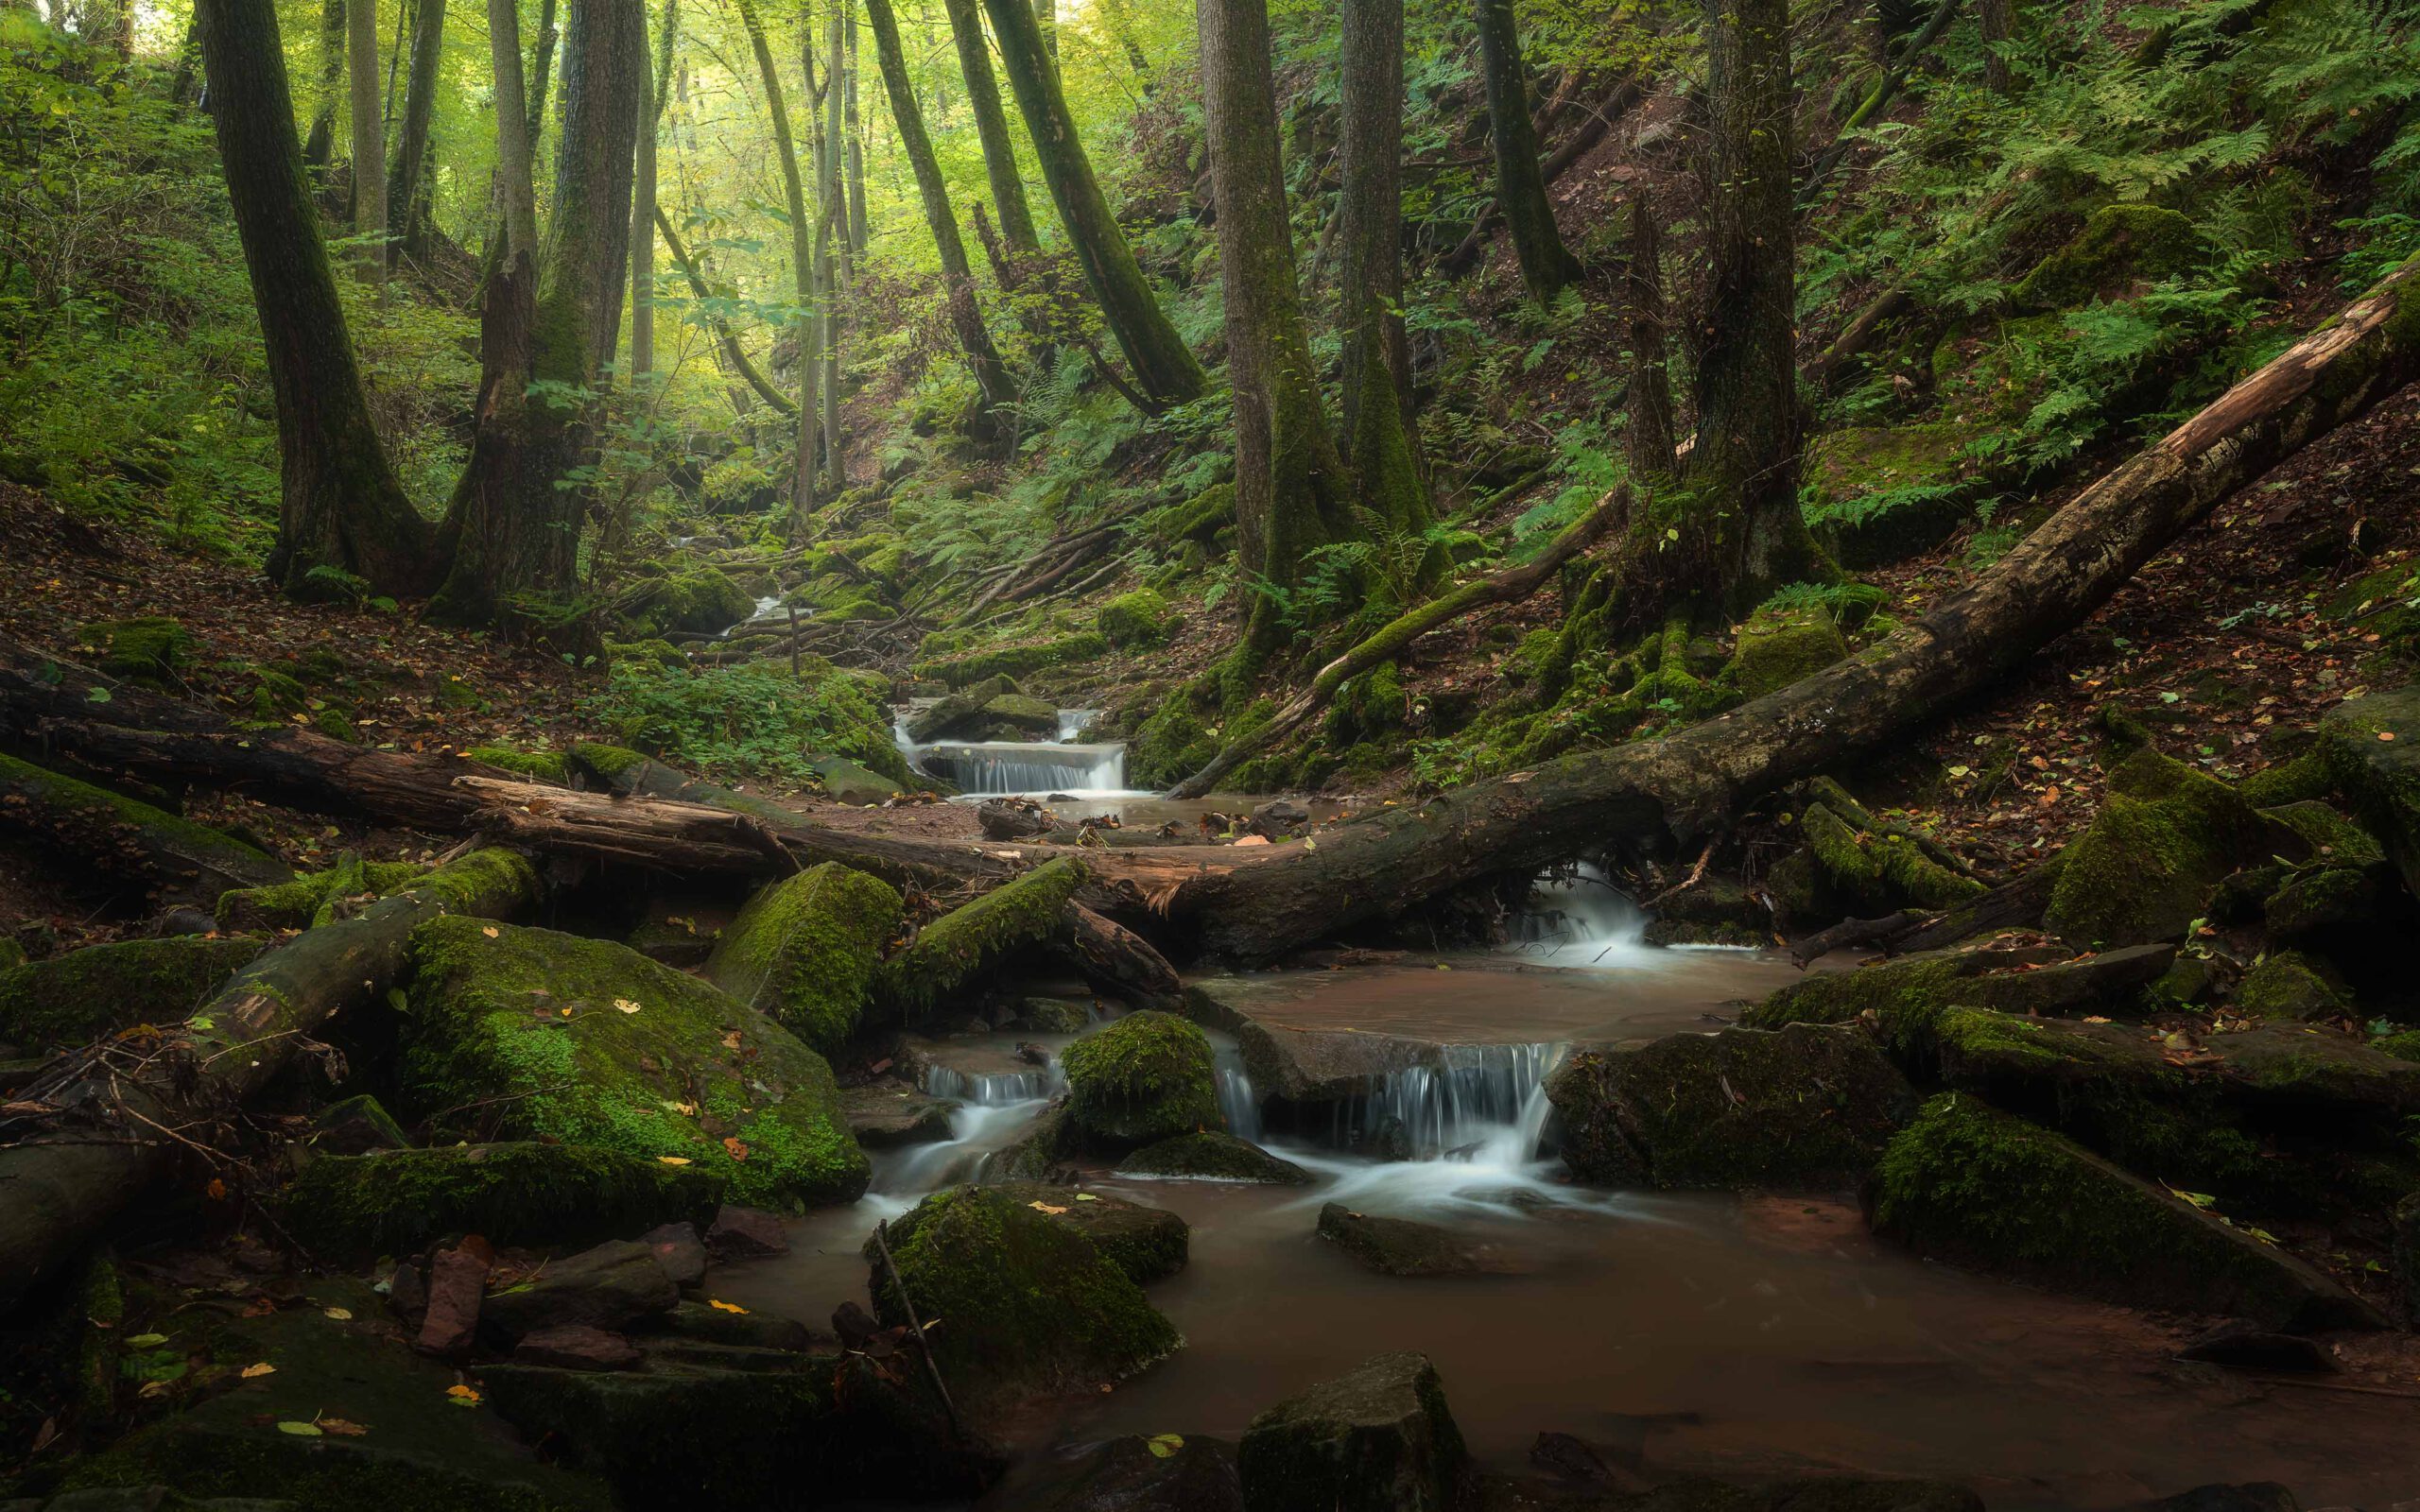
It has been a while since my first visit to this place. At that time, I wasn’t looking for great landscape photos. It was just a little family outing where we hiked up this gorge. Back then, there were no steel bridges, and I don’t remember any steel cables for safety either. But I do remember the beautiful waterfall. Now, several years later, having developed a keen interest in nature and landscape photography in particular, it was clear that I had to return to this place, to this gorge.
On my first attempt, which was already a little late, I made a beginner’s mistake. I had disregarded the topology and characteristics of the area. The waterfall does not actually carry water every day of the year. Especially when it has been dry for a long time, the gorge is dry. It had rained where we were, but not a few kilometres further on. Perhaps the little rain that had fallen was not enough to fill the gorge. So there I stood, in front of dry rock faces. At least the hike was easy to manage in dry conditions.
The conditions were better on my second attempt. The waterfall was rushing. But the waterfall didn’t have quite as much water as I had hoped. I was also here on a Sunday, and many visitors were out and about in the gorge, enjoying good hiking conditions and not too much humidity. There wasn’t a minute when a hiker didn’t want to pass by, or stand in the picture, or, or, or. It’s not her fault. I could have been smarter, arrived earlier, or simply come here on another day.
So I came home with one or two pictures that were okay. But they still don’t convince me, which is why they don’t appear in any portfolio. This time, I didn’t want to compromise. Attempt three had to work.
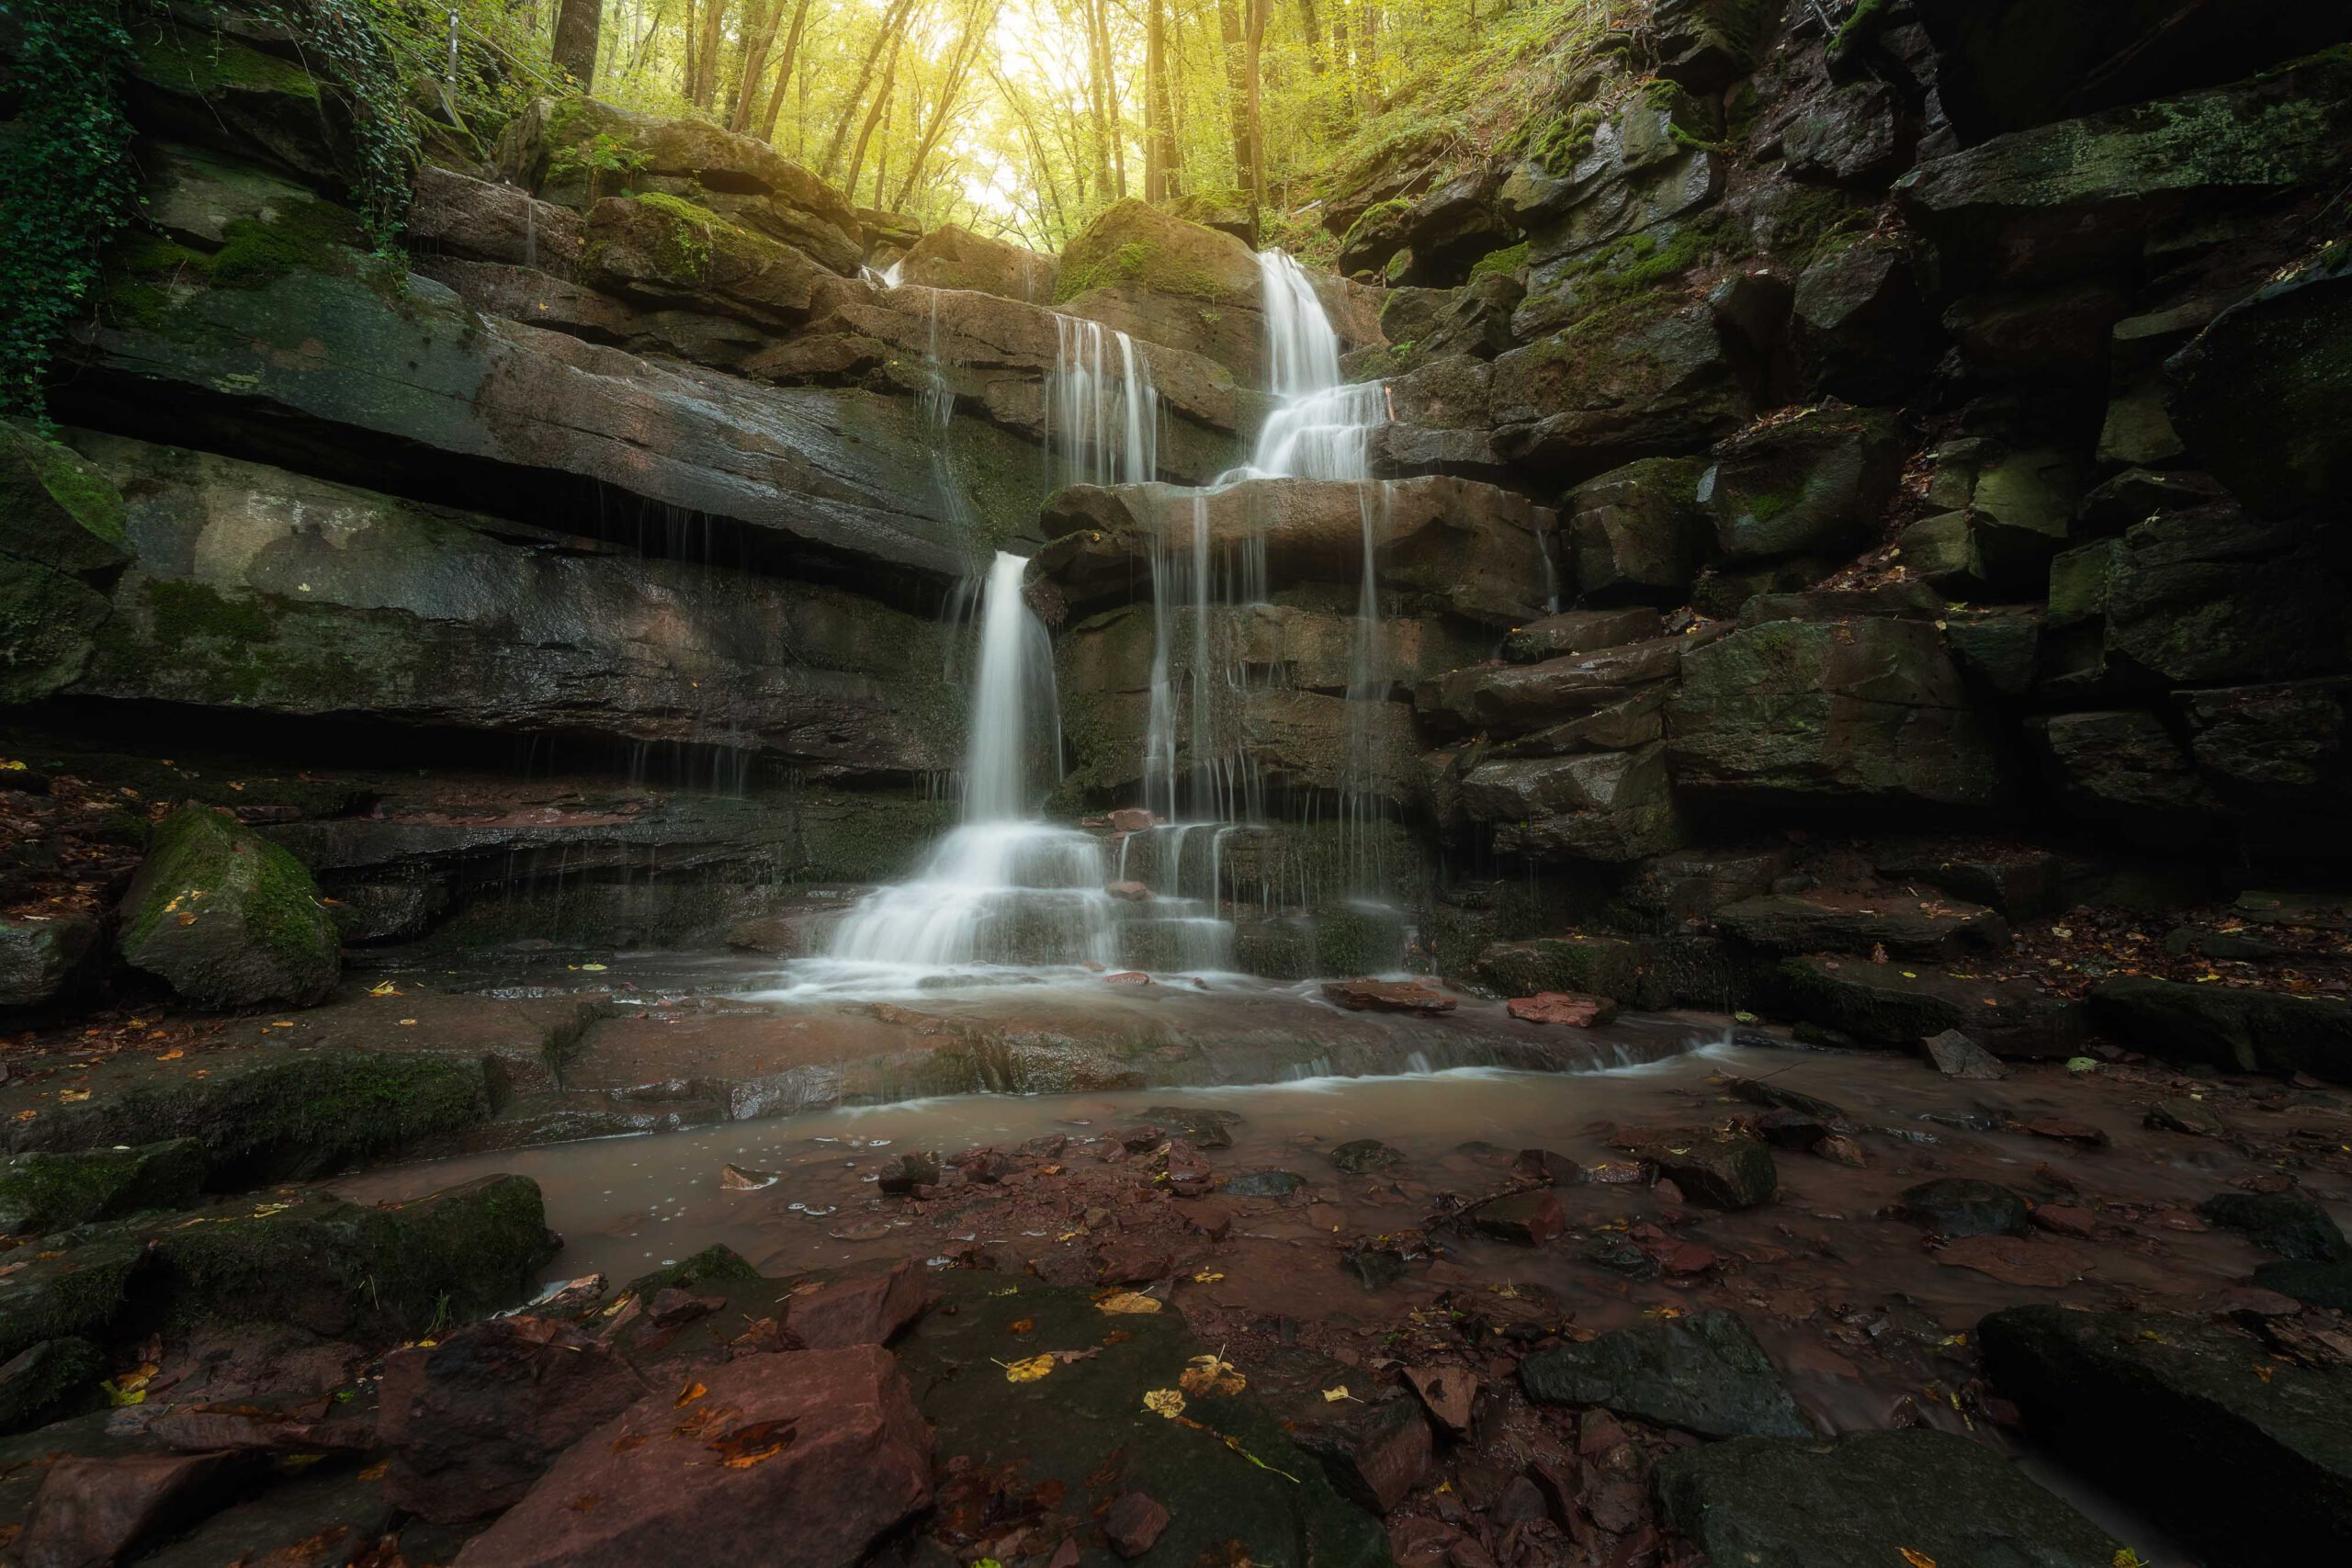
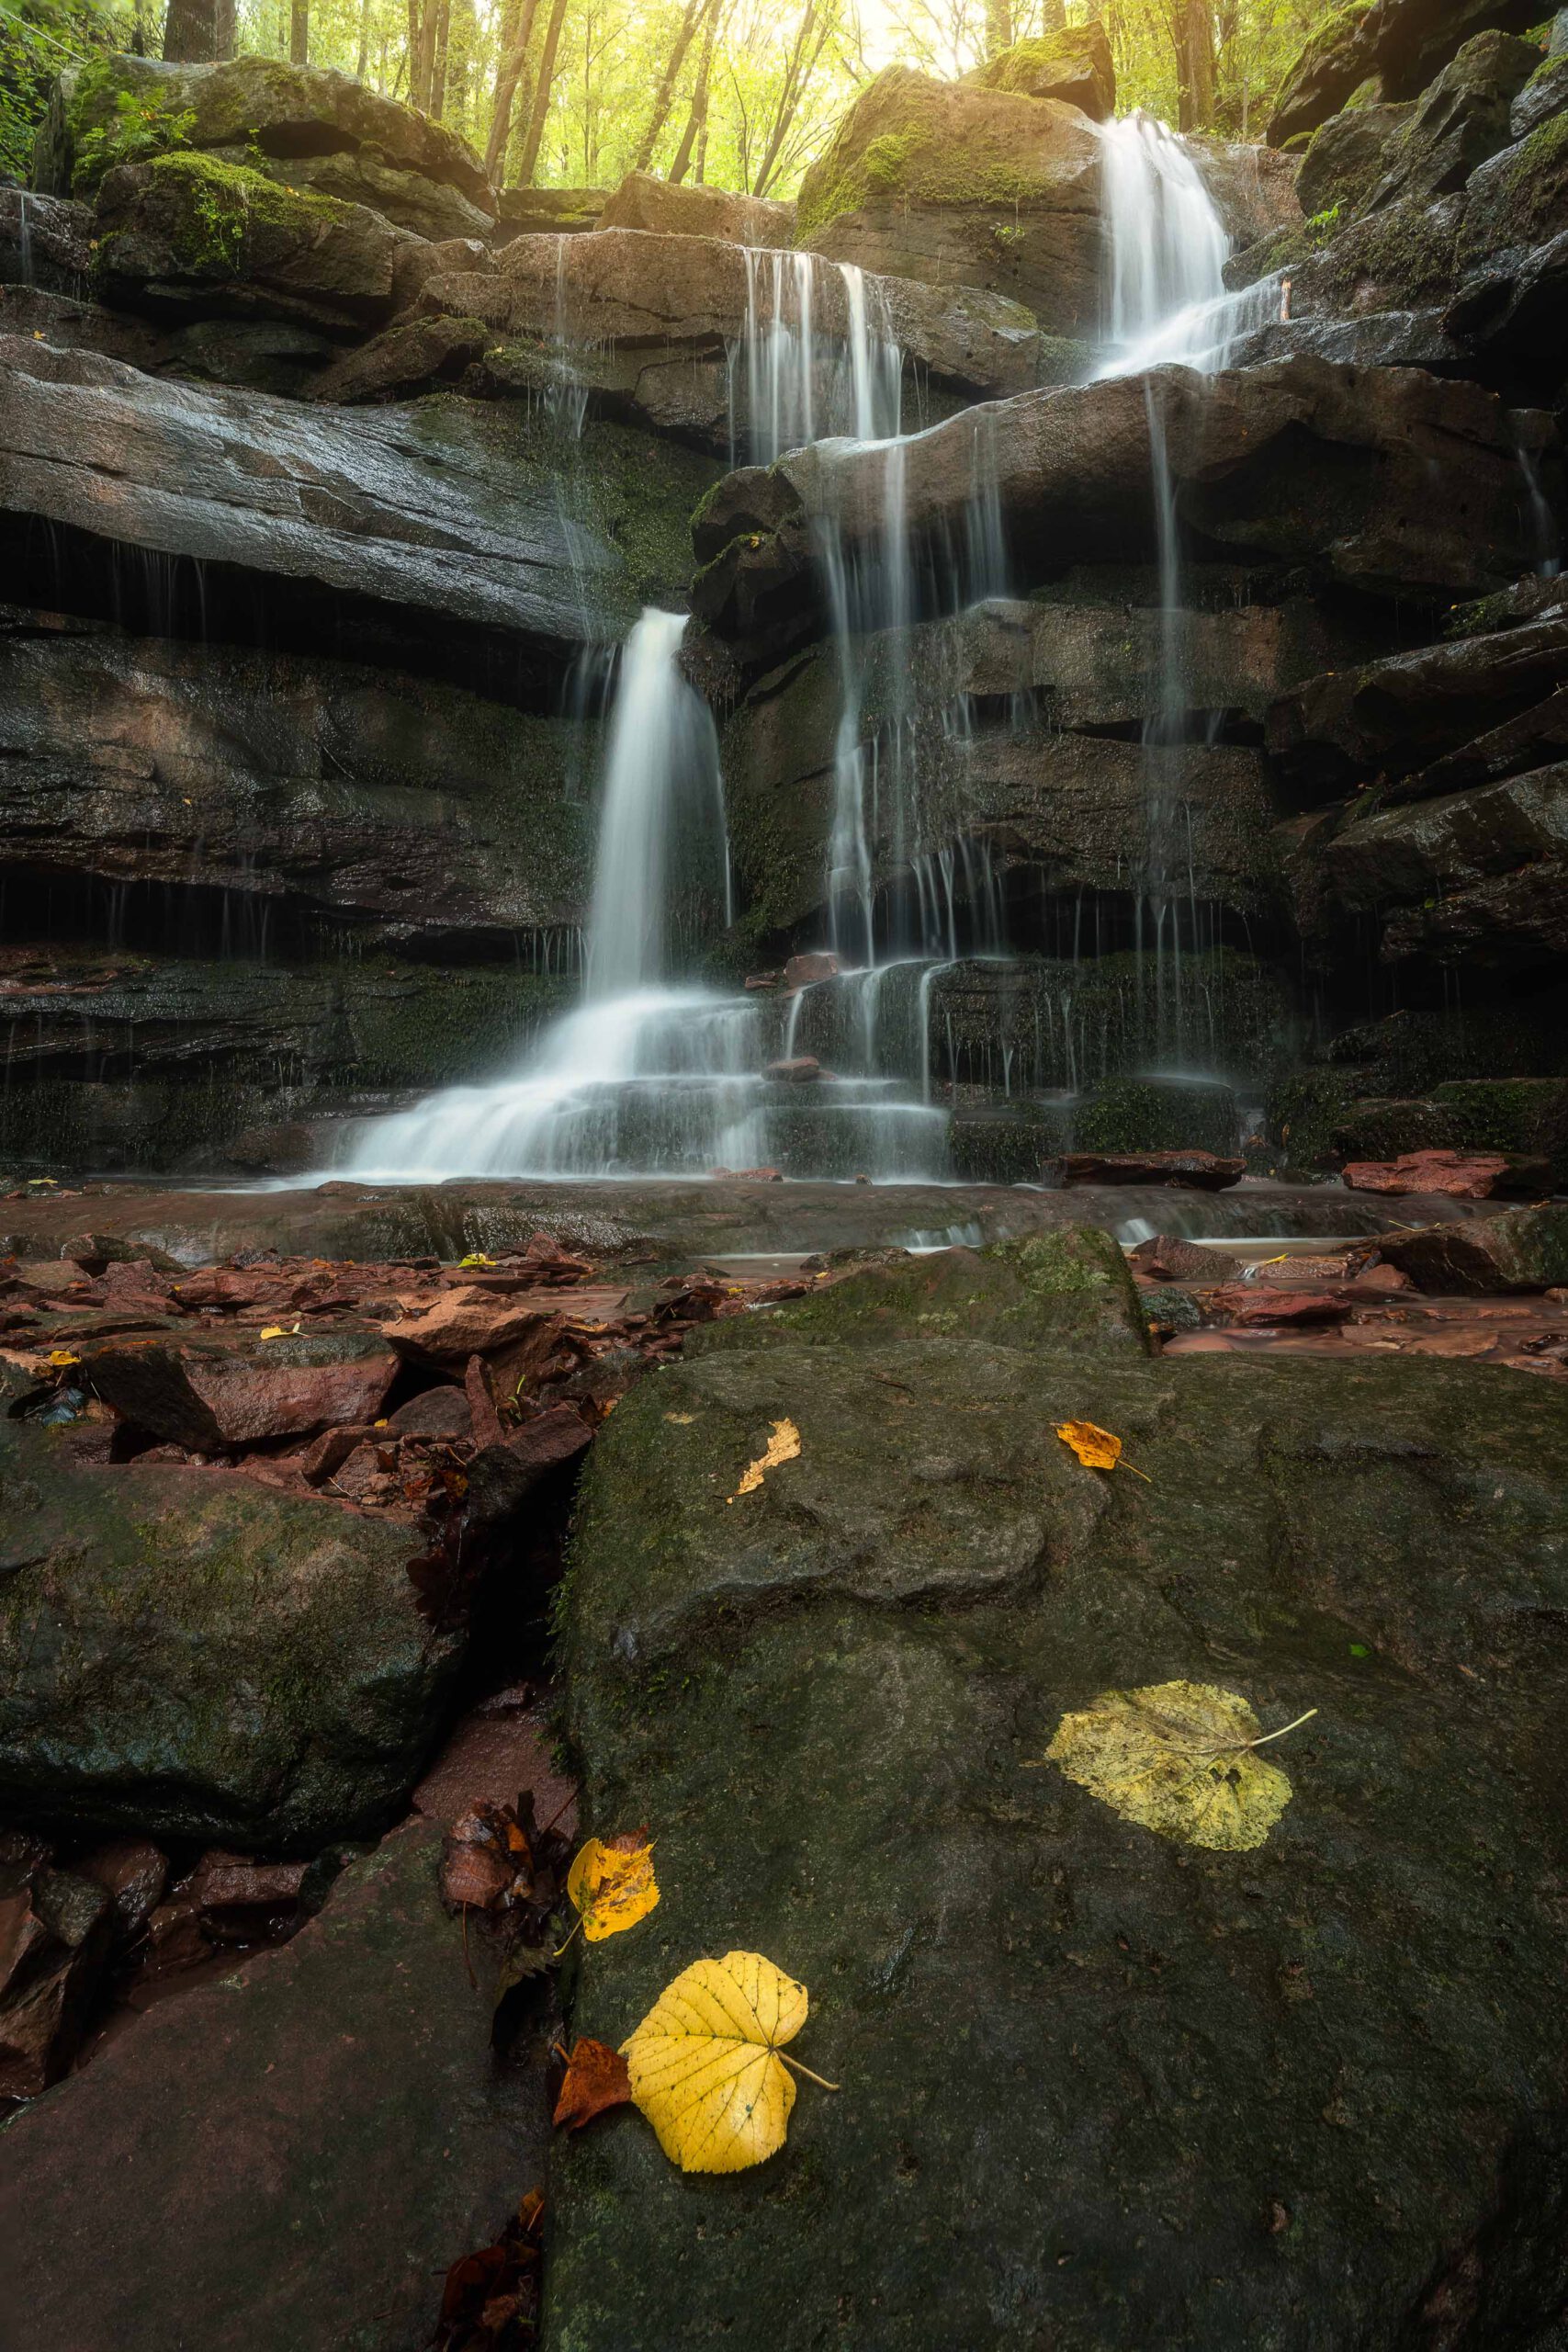
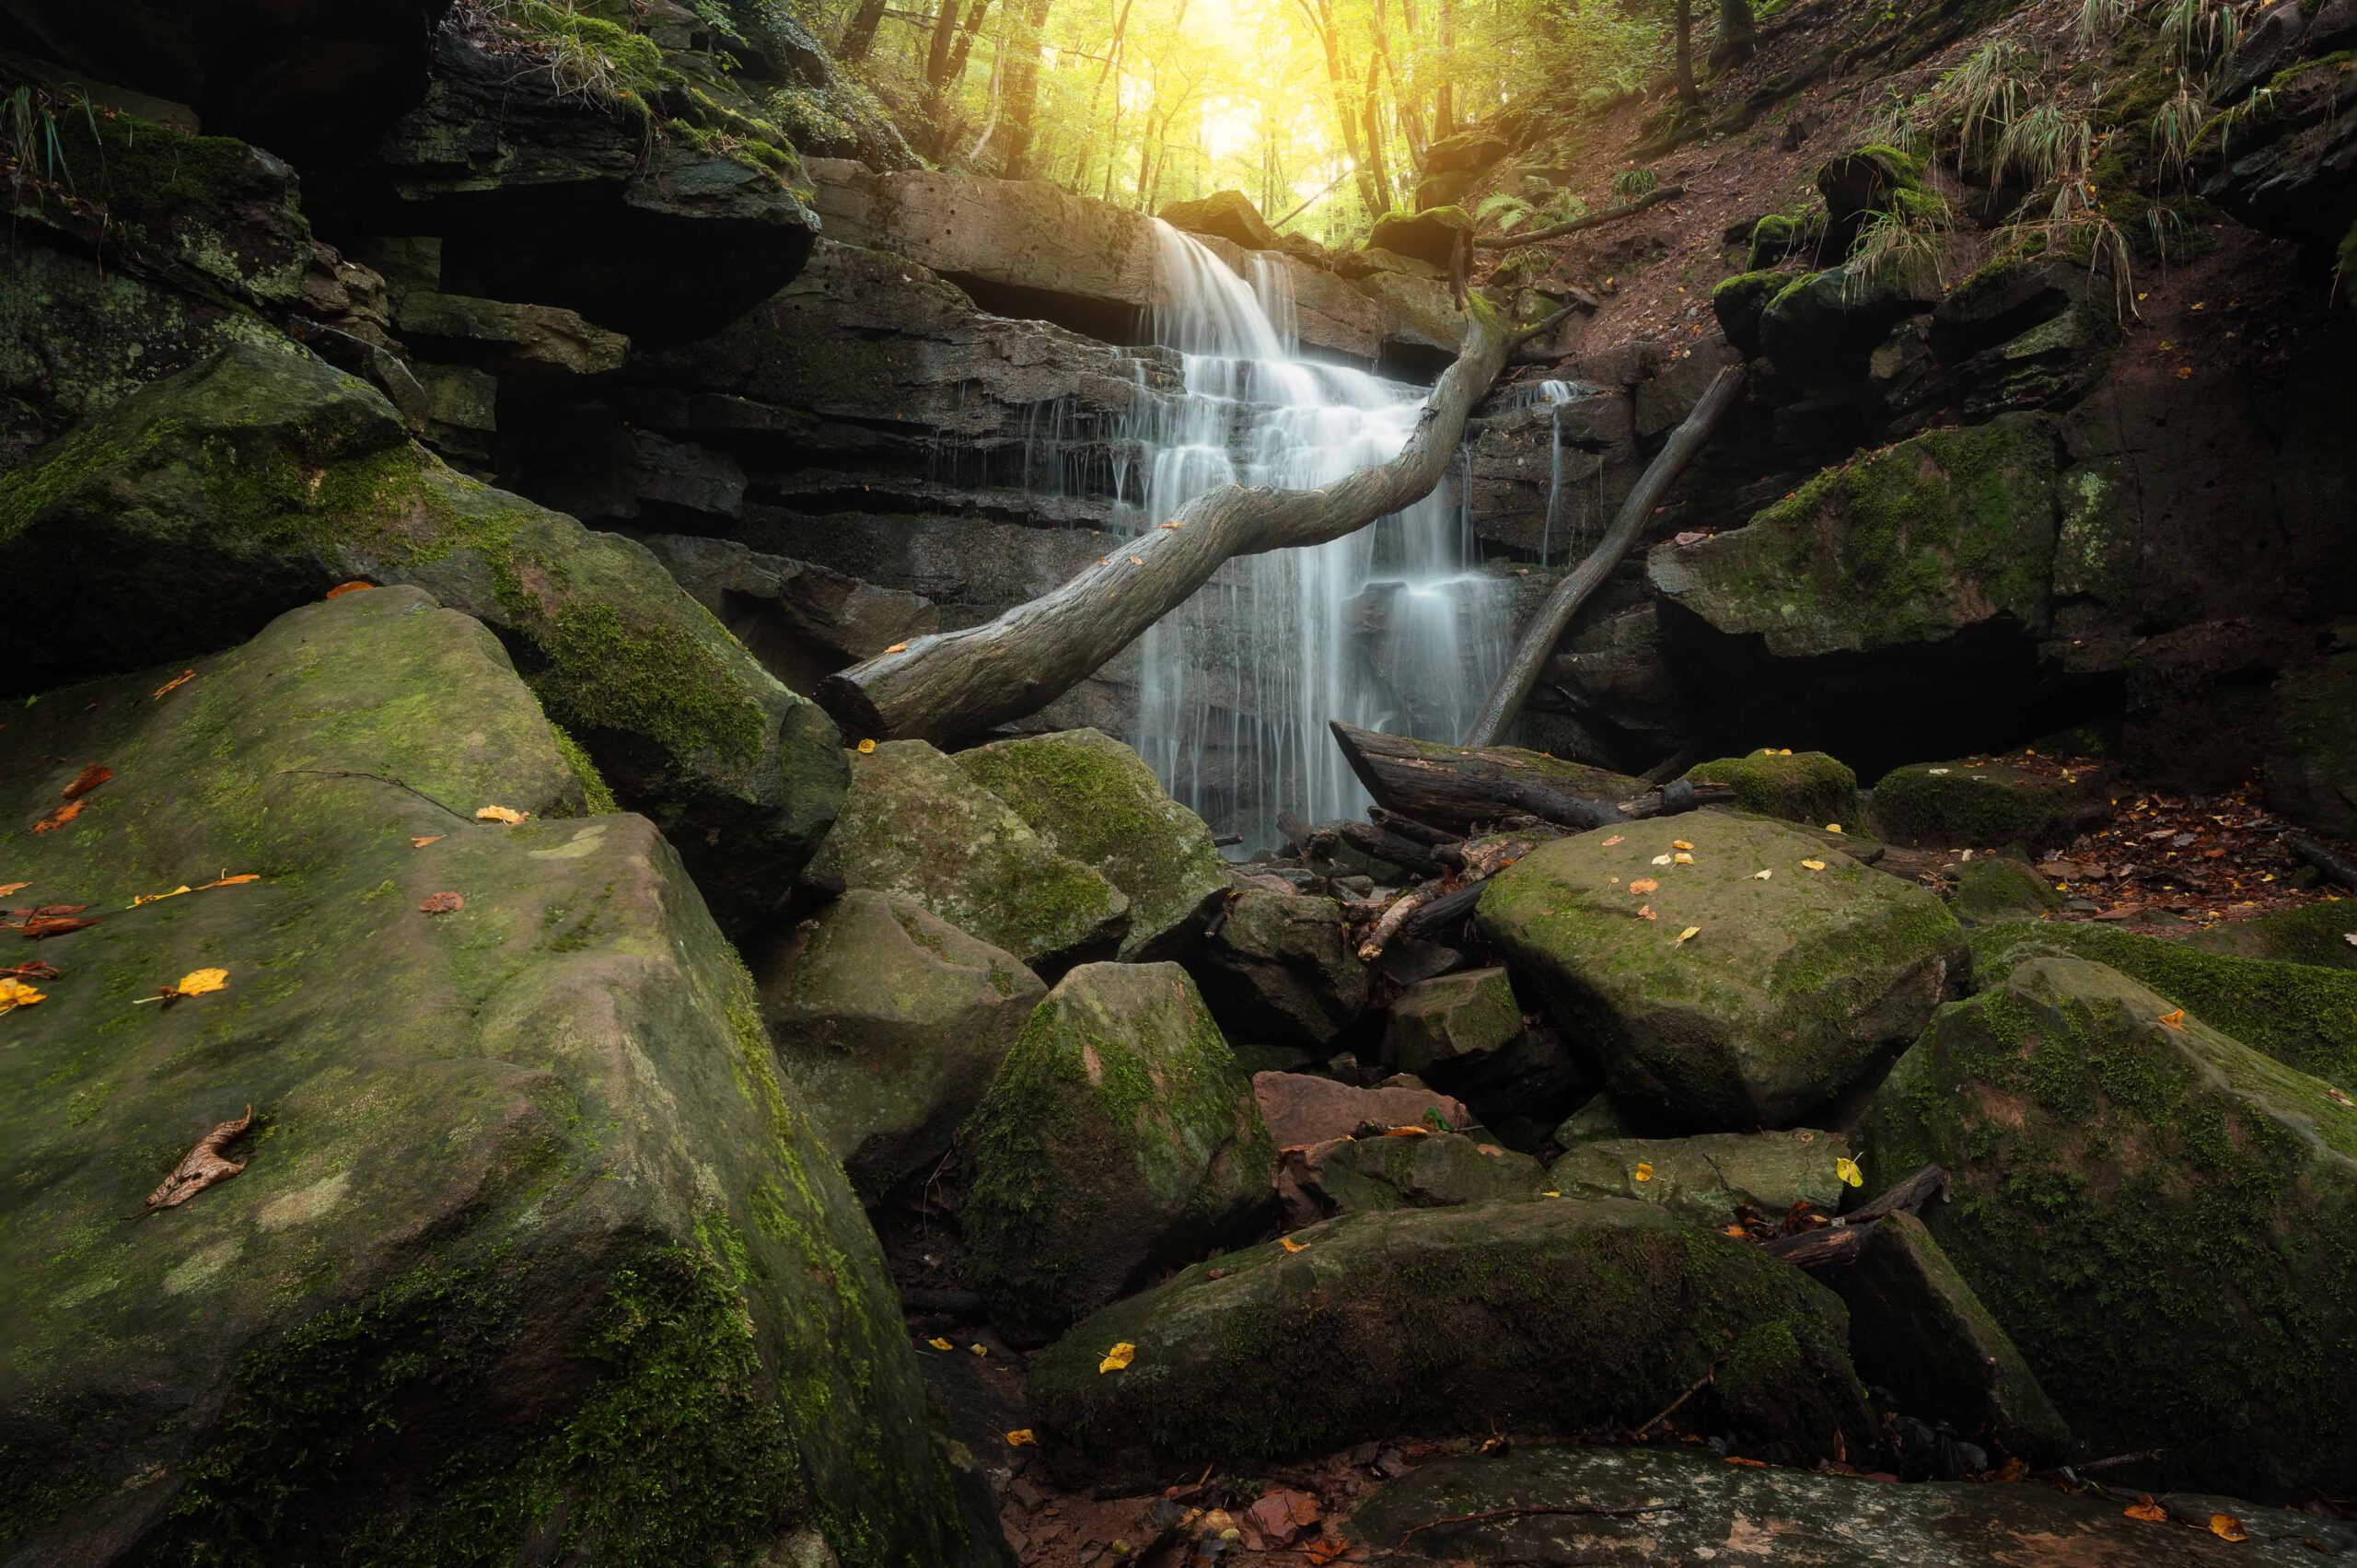
I took a morning off. It was a weekday morning after three days of heavy, widespread rain across our region. So there had to be plenty of water. There were few hikers, as it wasn’t holiday season, weekend or a long weekend. And the weather was foggy, cloudy to clear. Nothing could go wrong, I thought.
Since I wanted to vlog a little bit for you, I had to leave early in the morning to have enough time to offer a few more shots than just the usual selfie view in the VLOG. Of course, it’s still a long way from ‘cinematic,’ but at least everything worked out in parallel. (Except for the noise reduction of the waterfall on site).
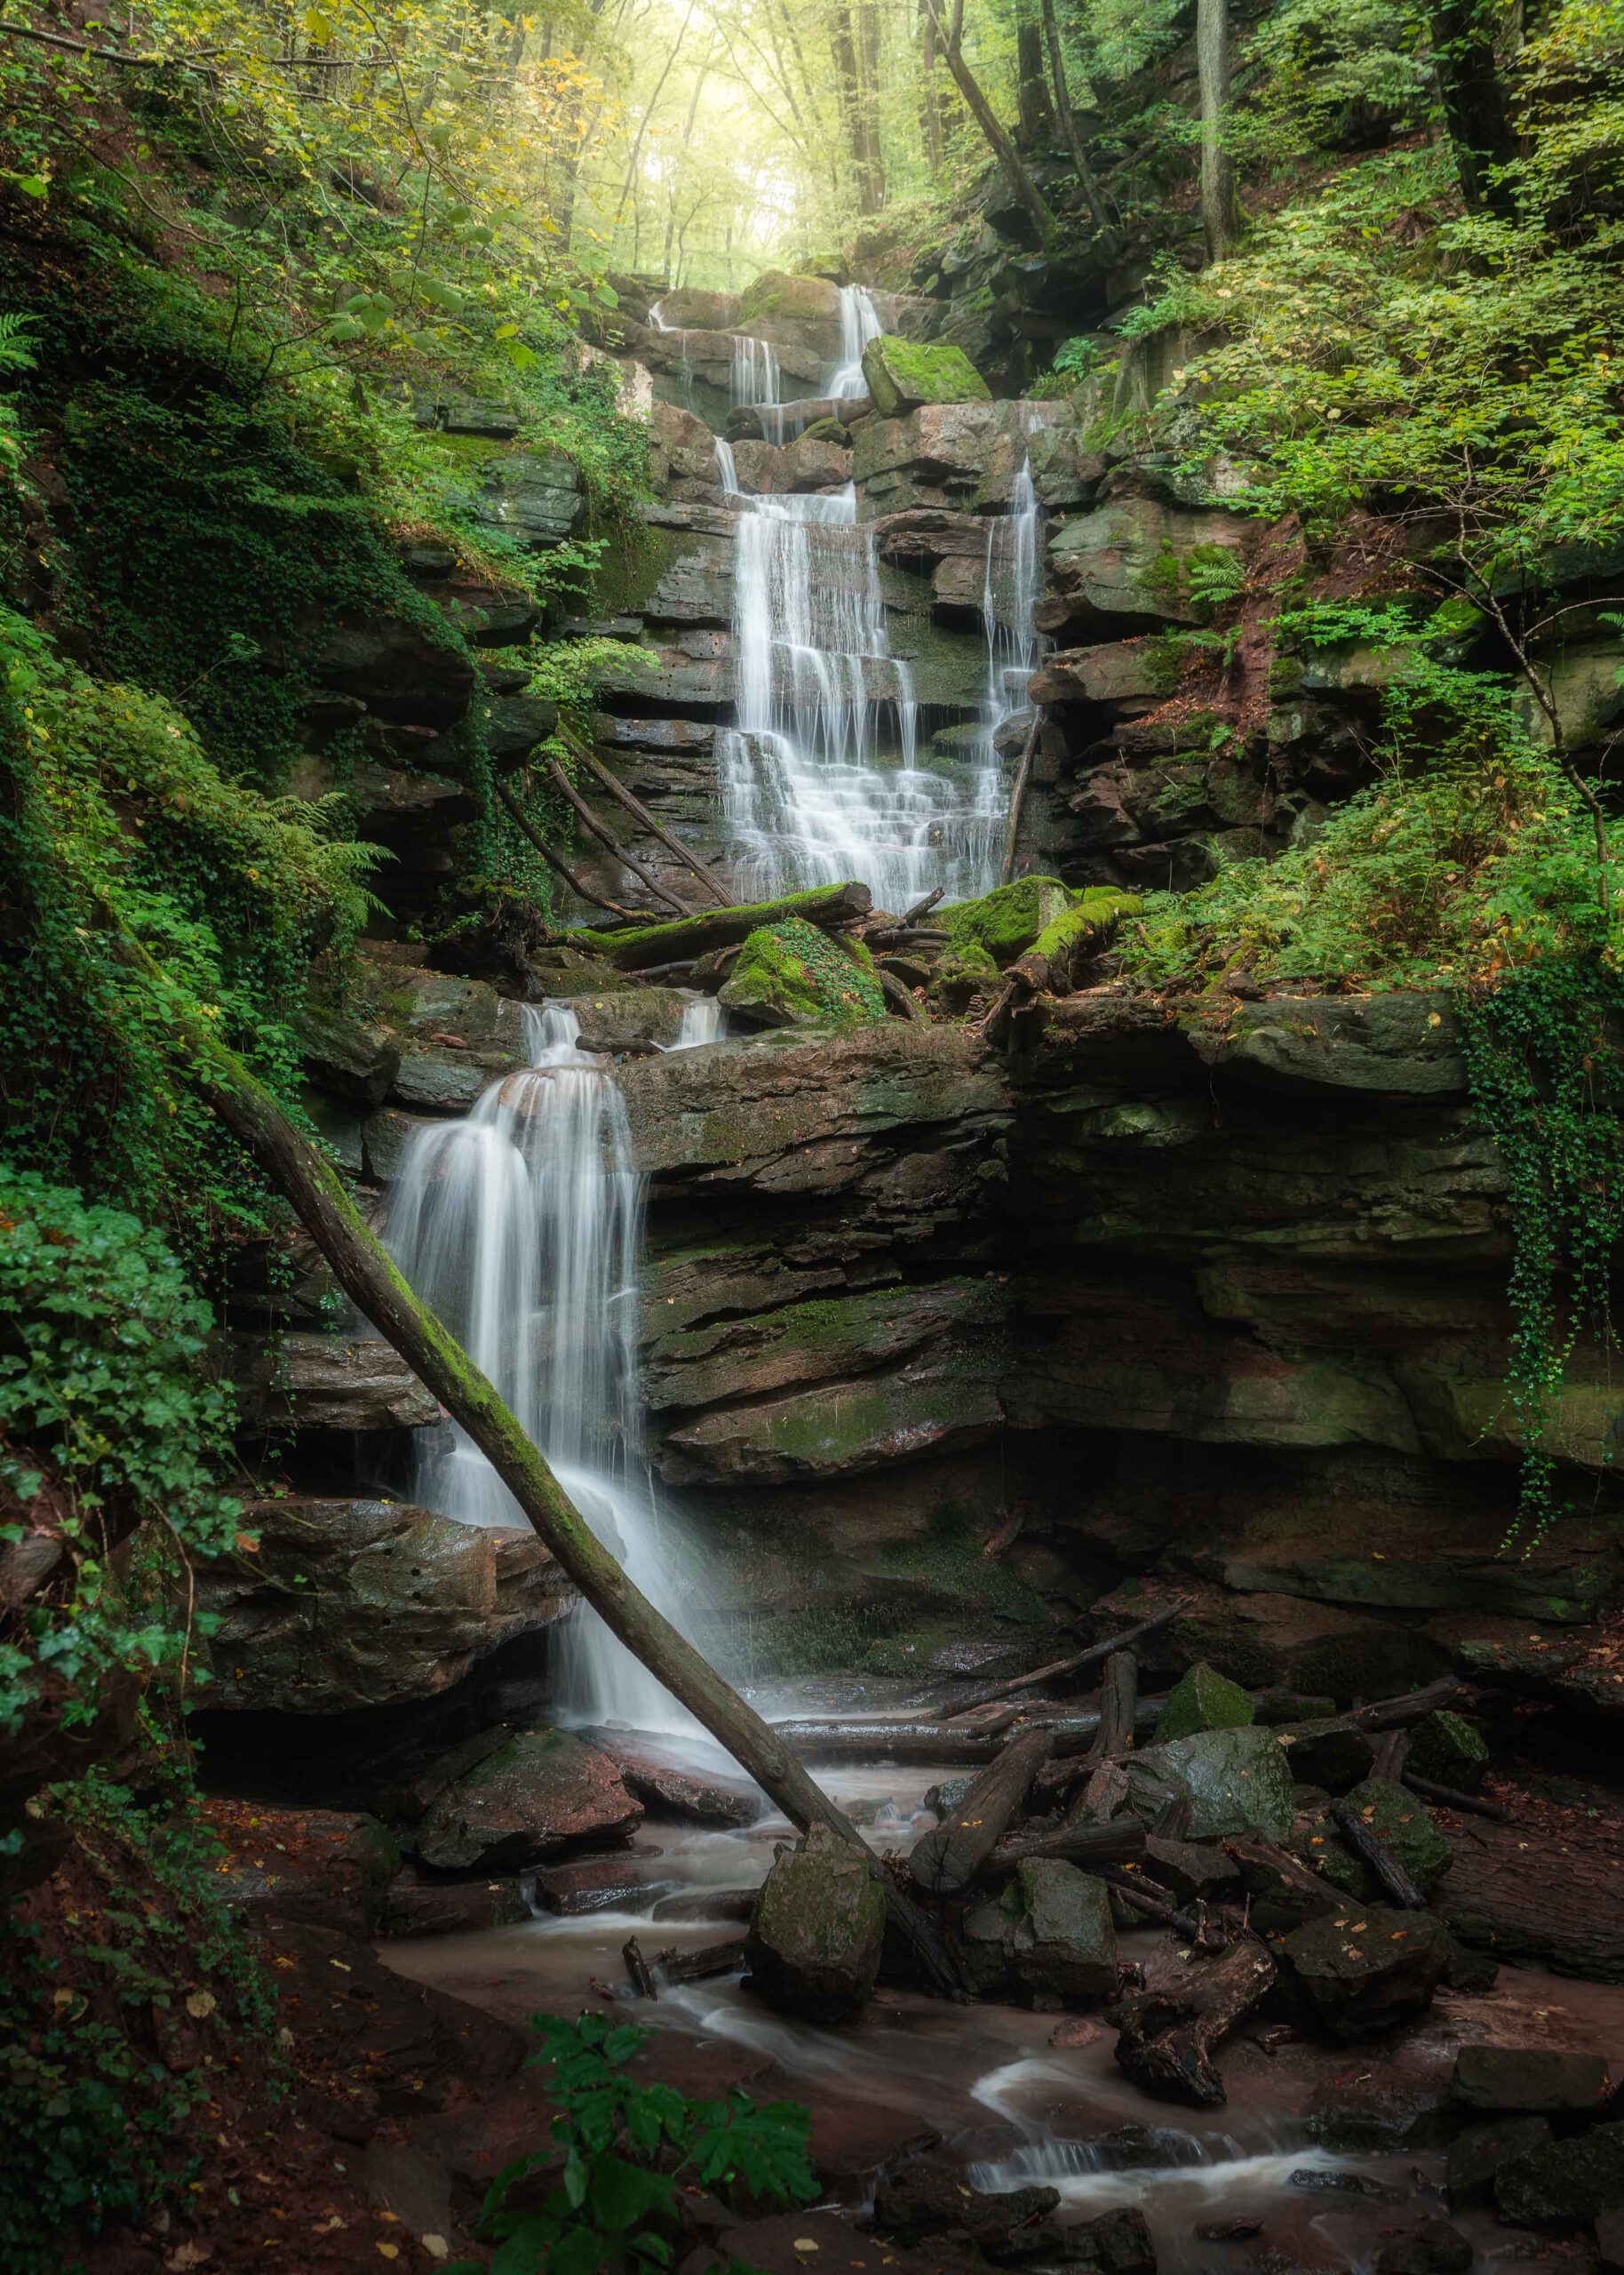
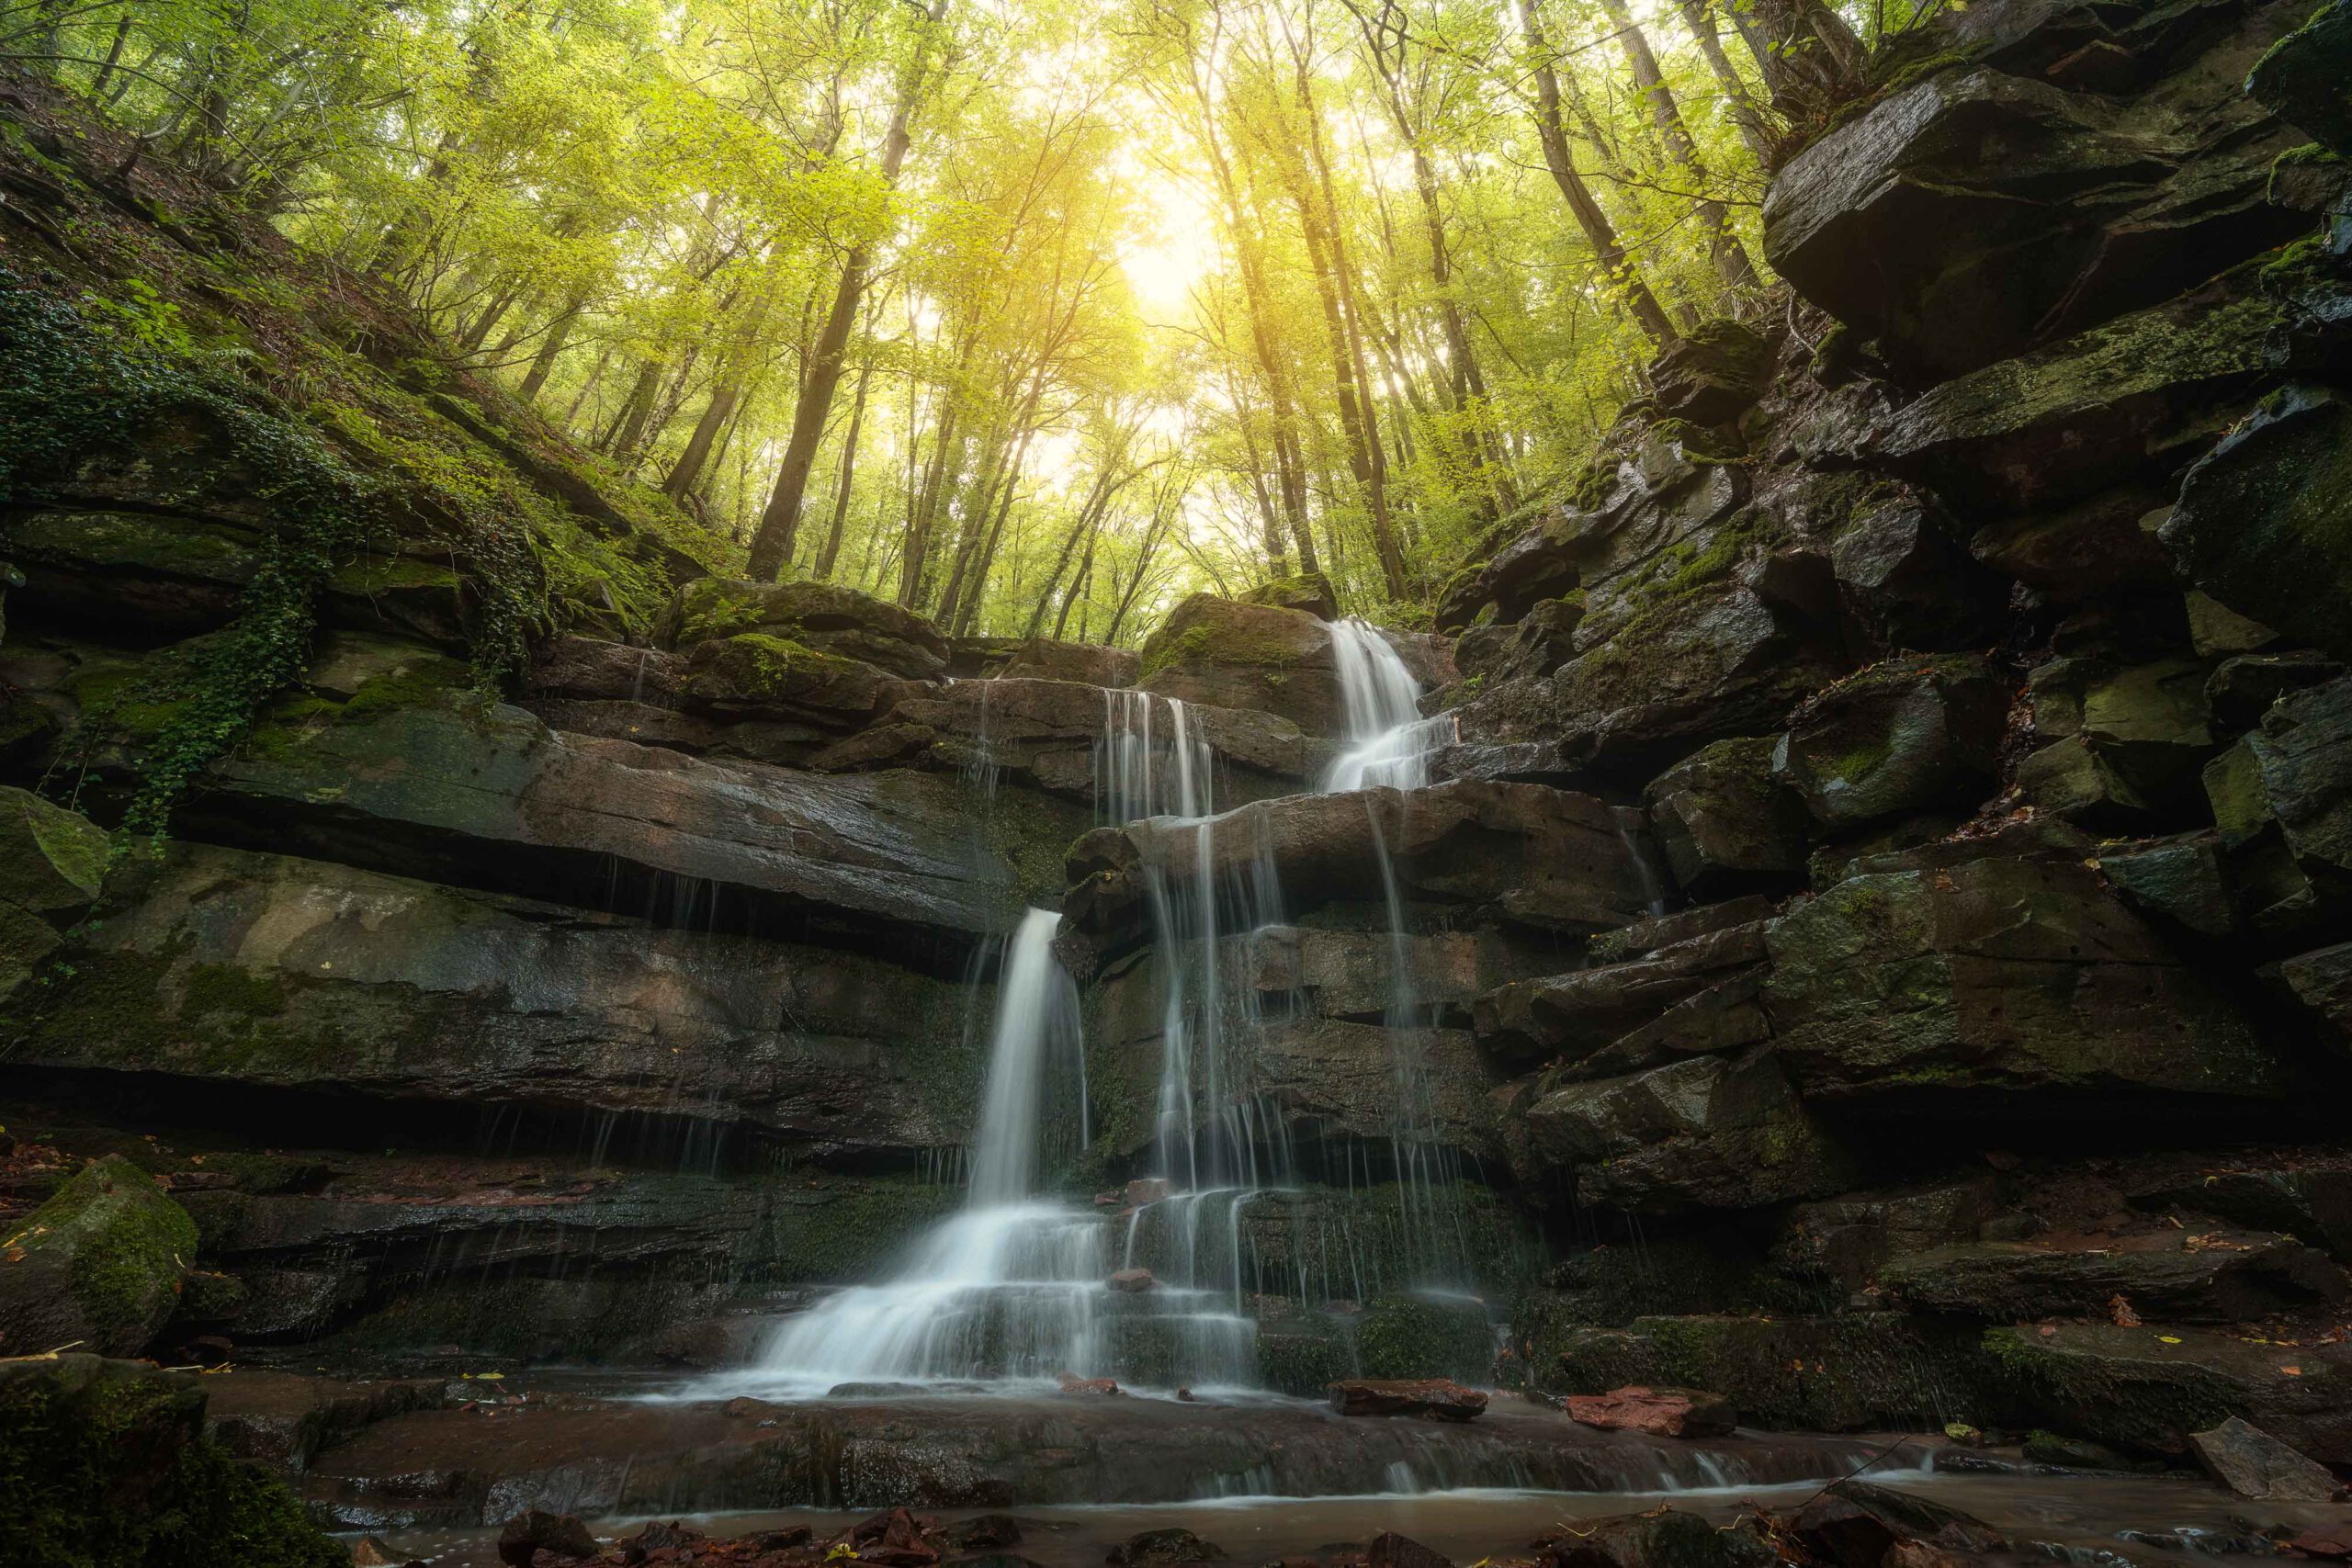
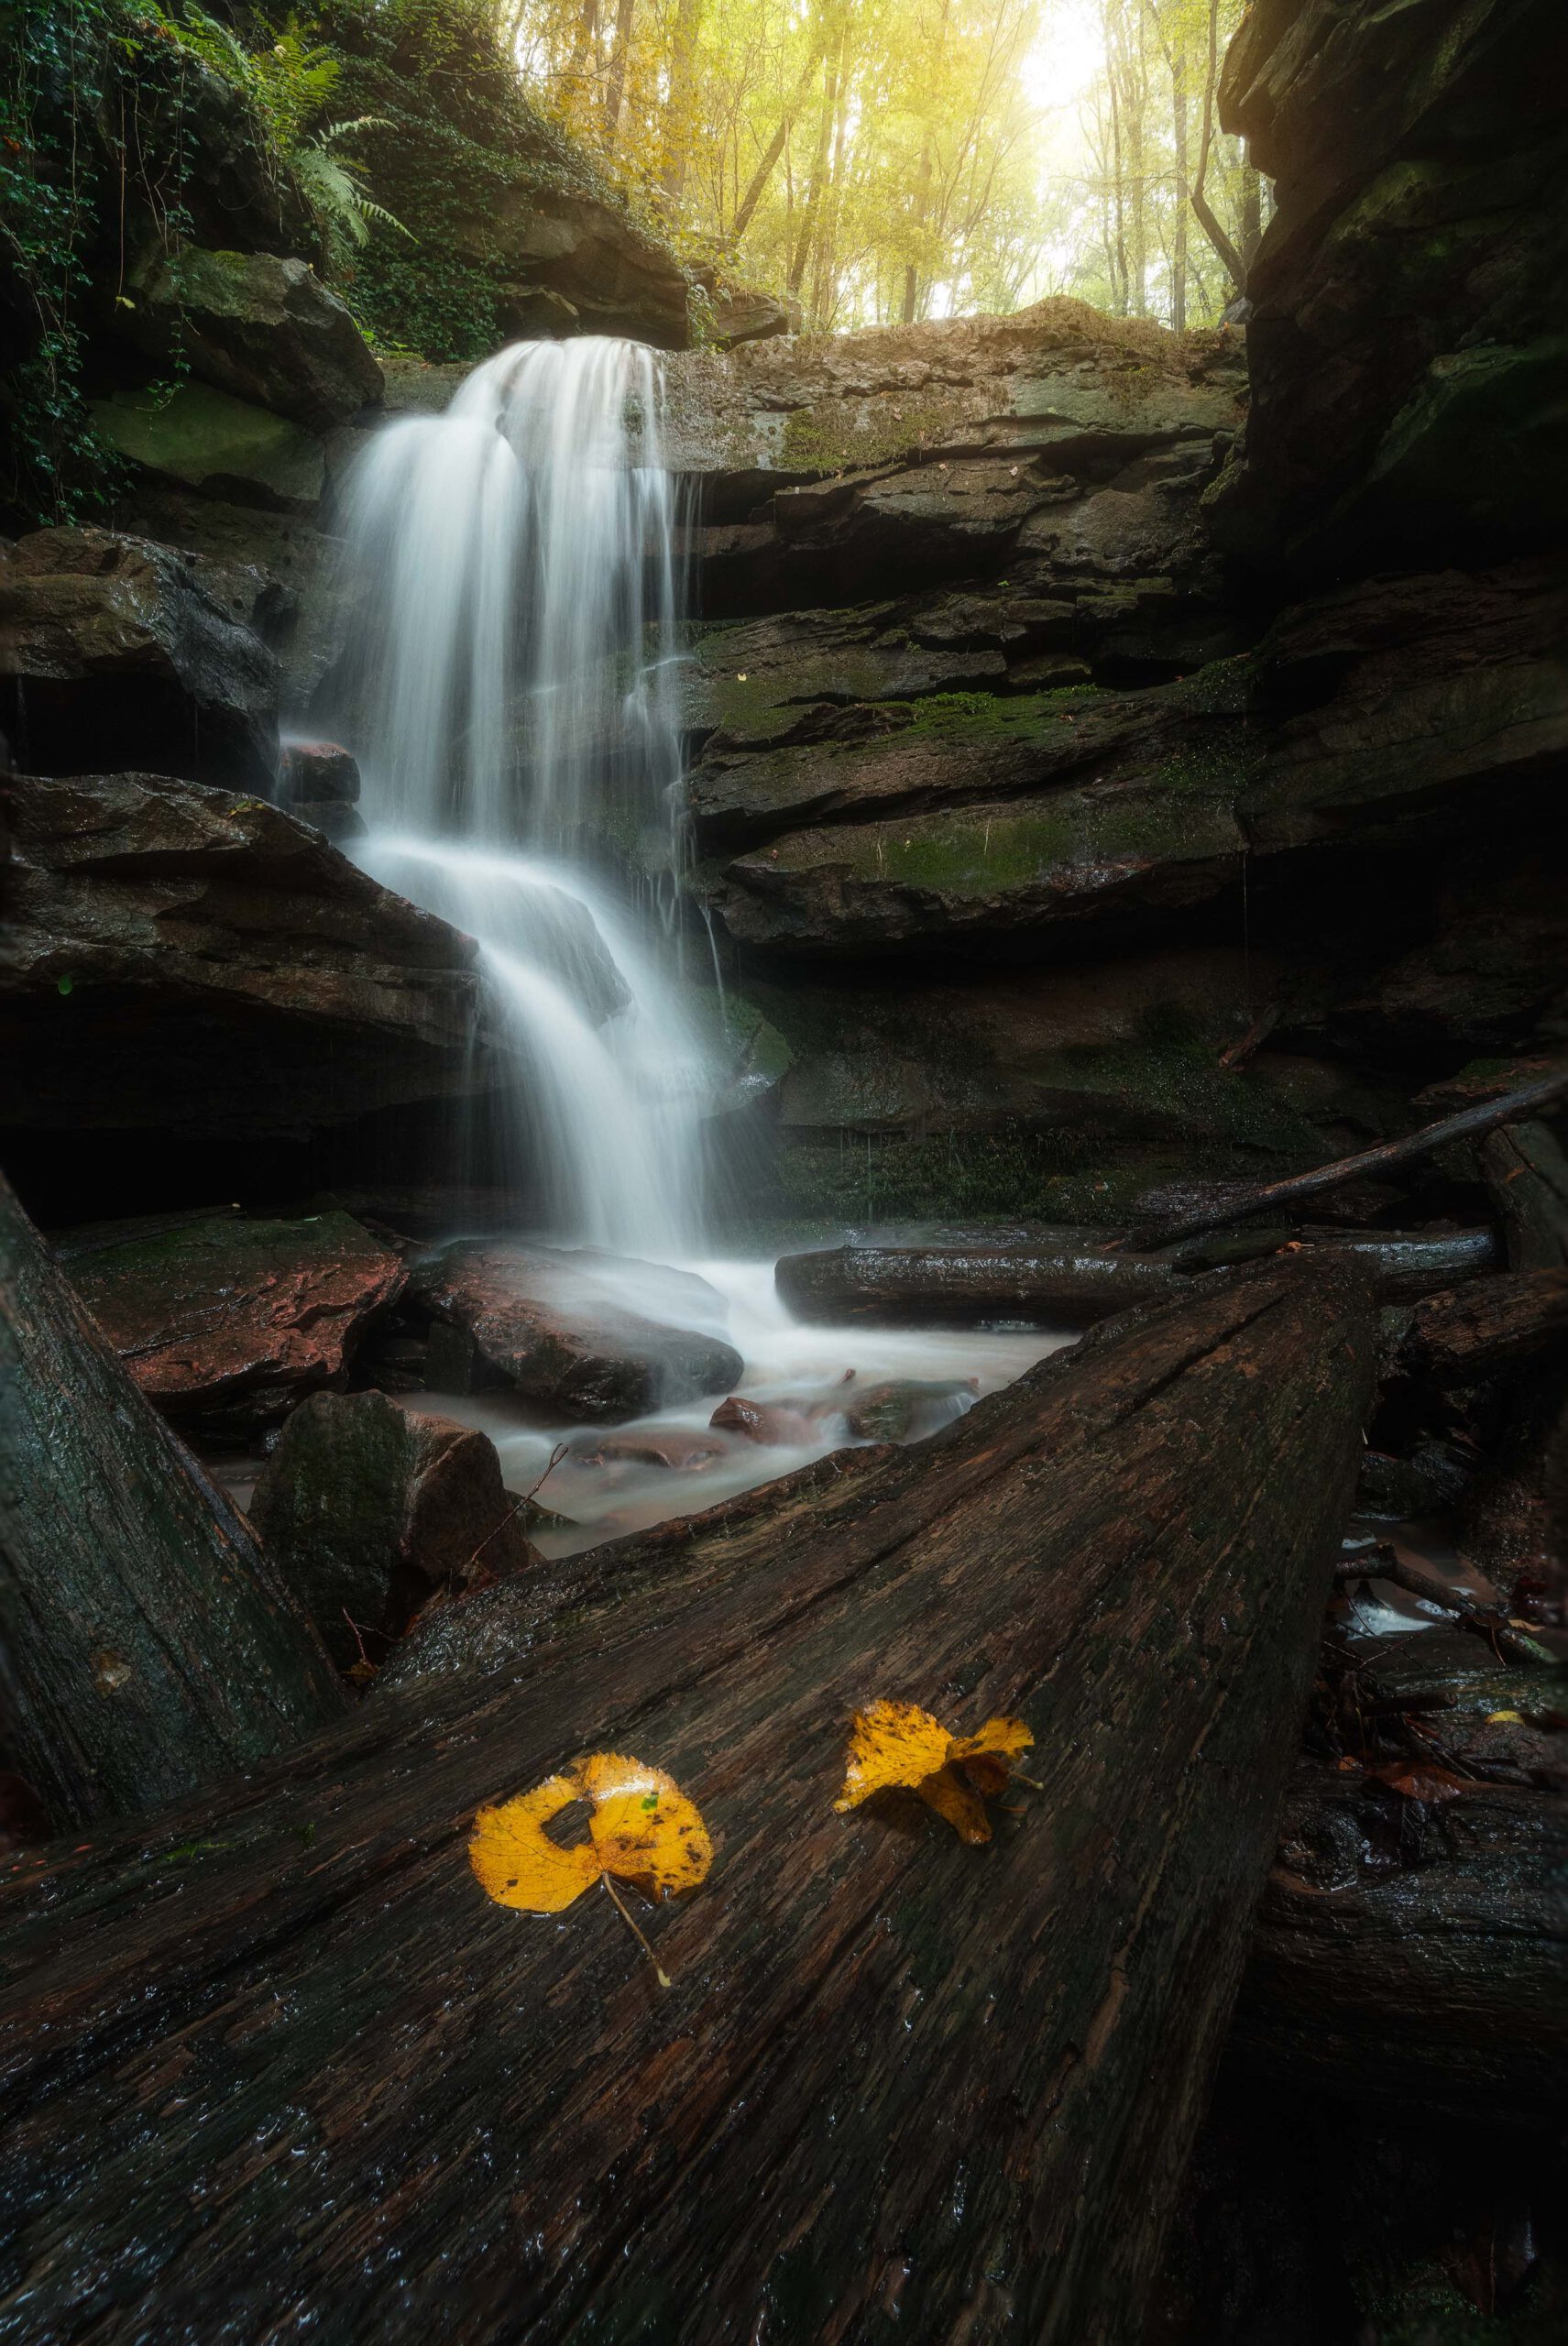
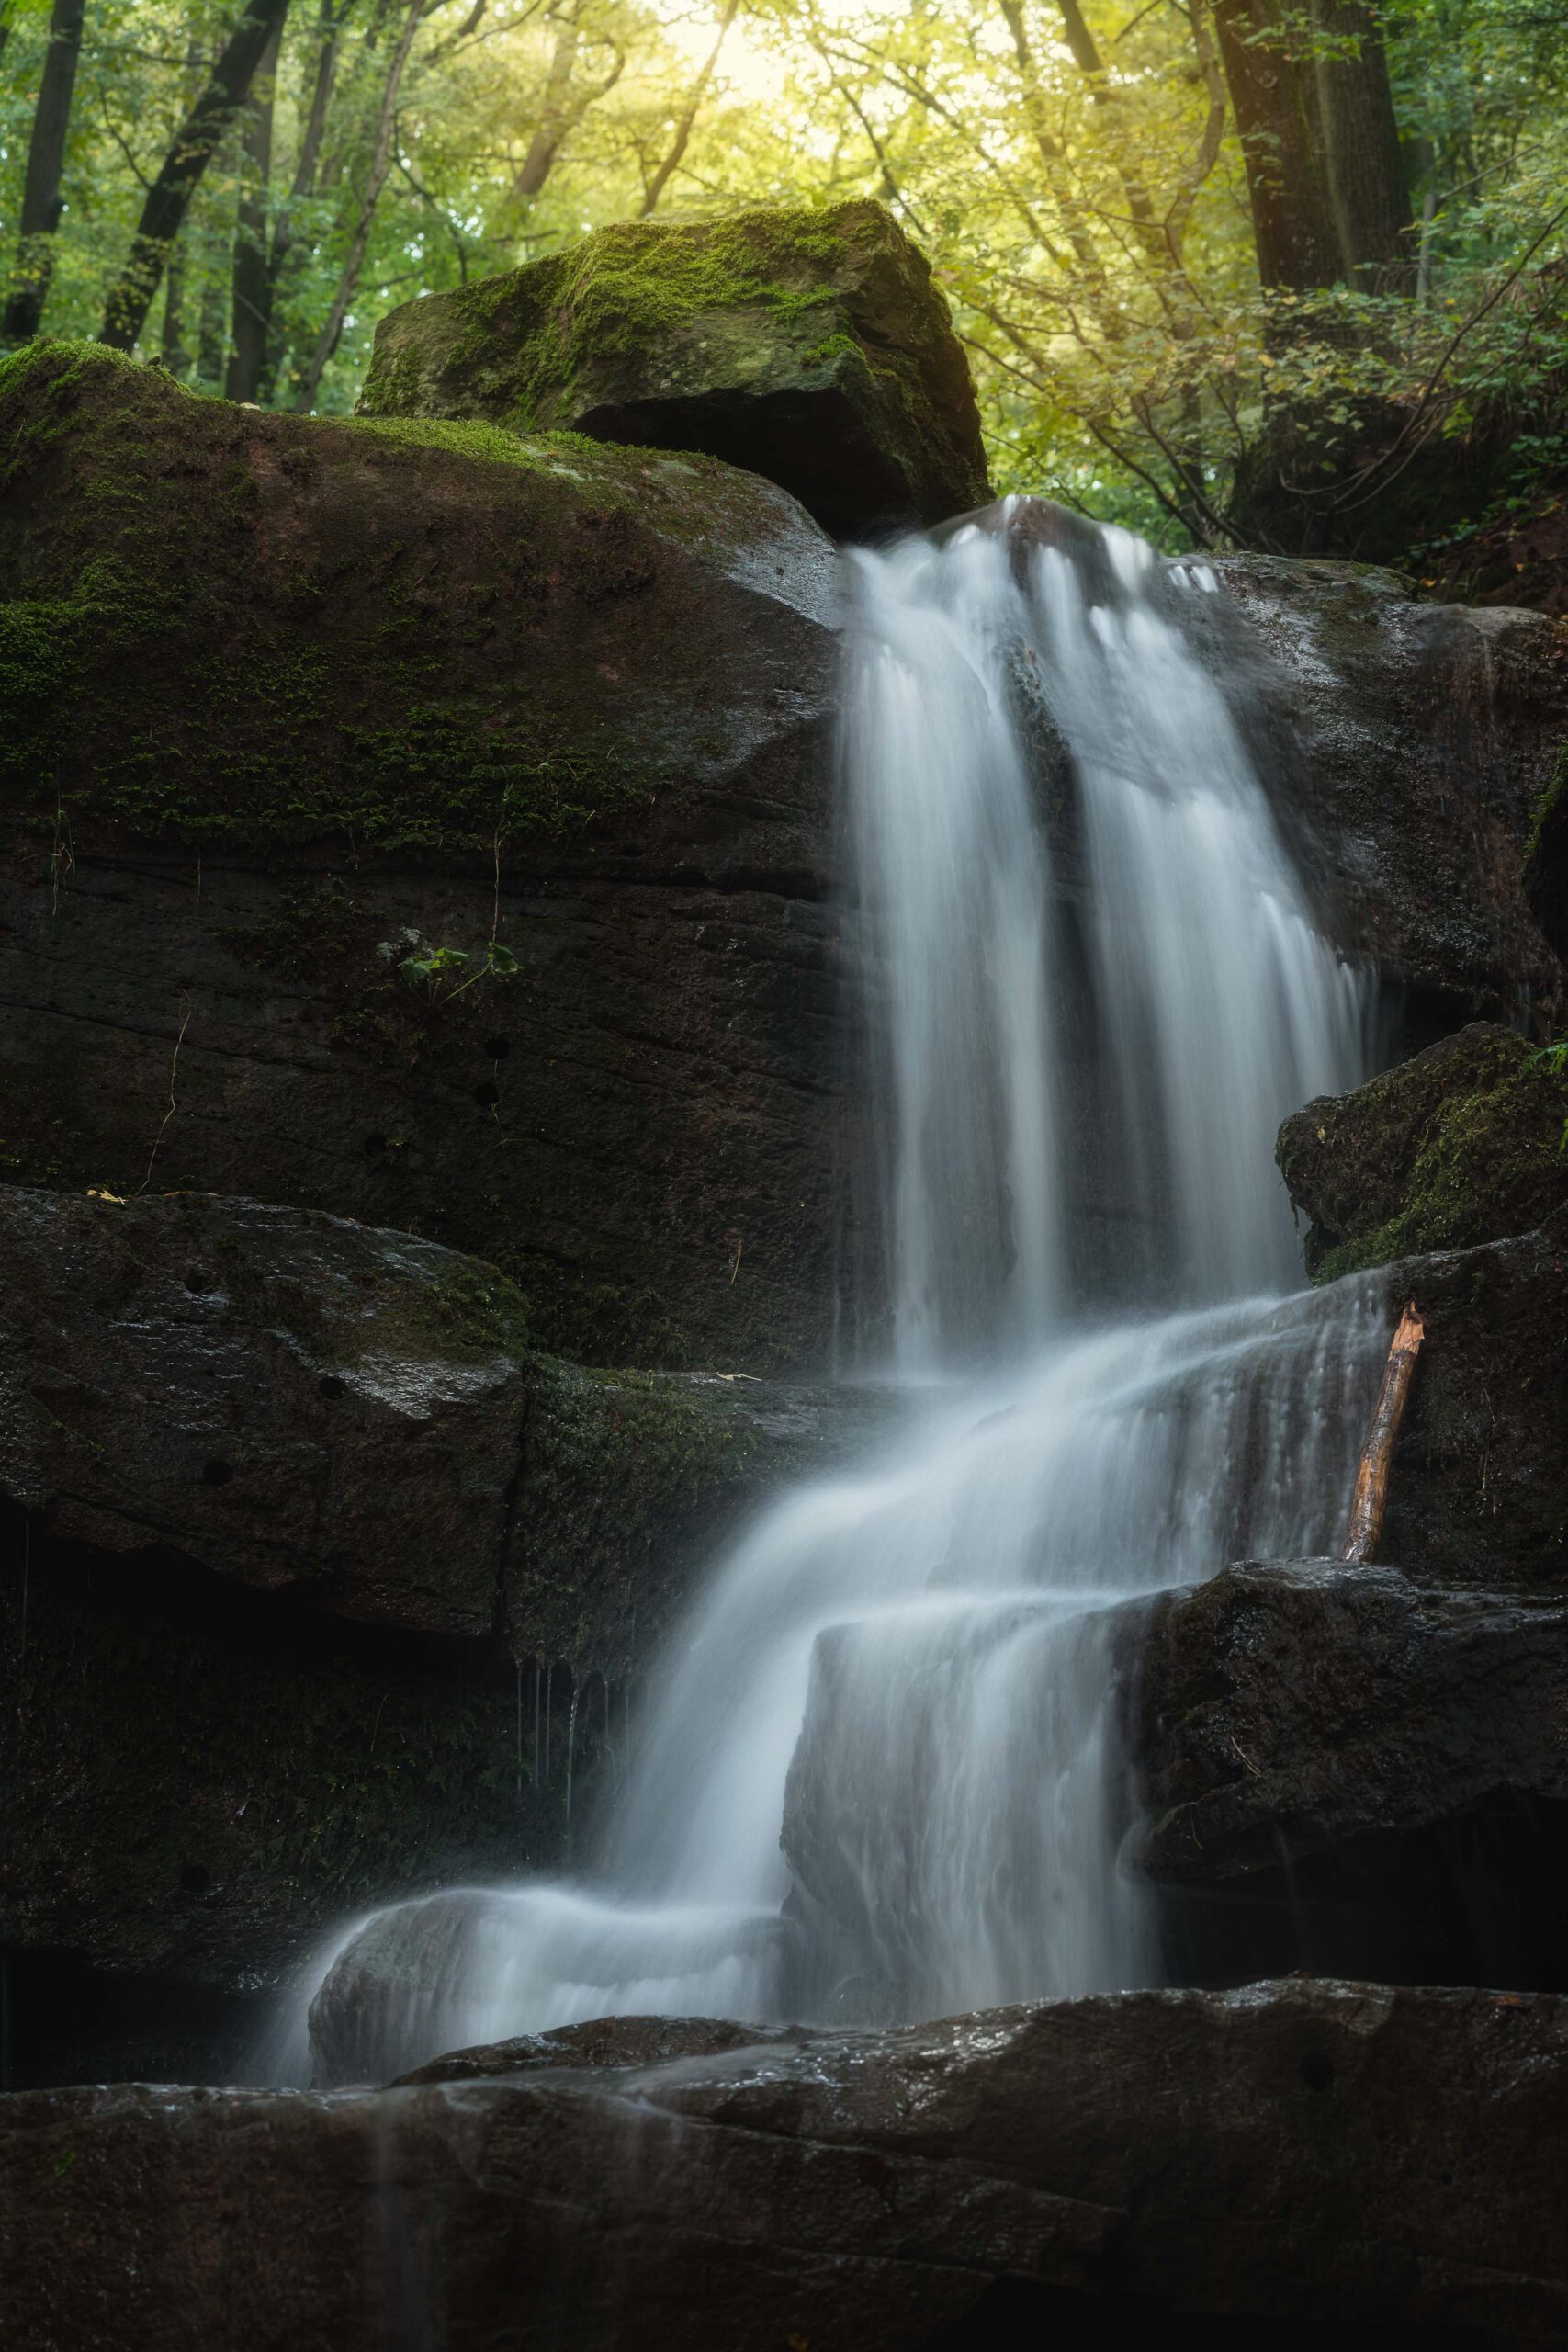
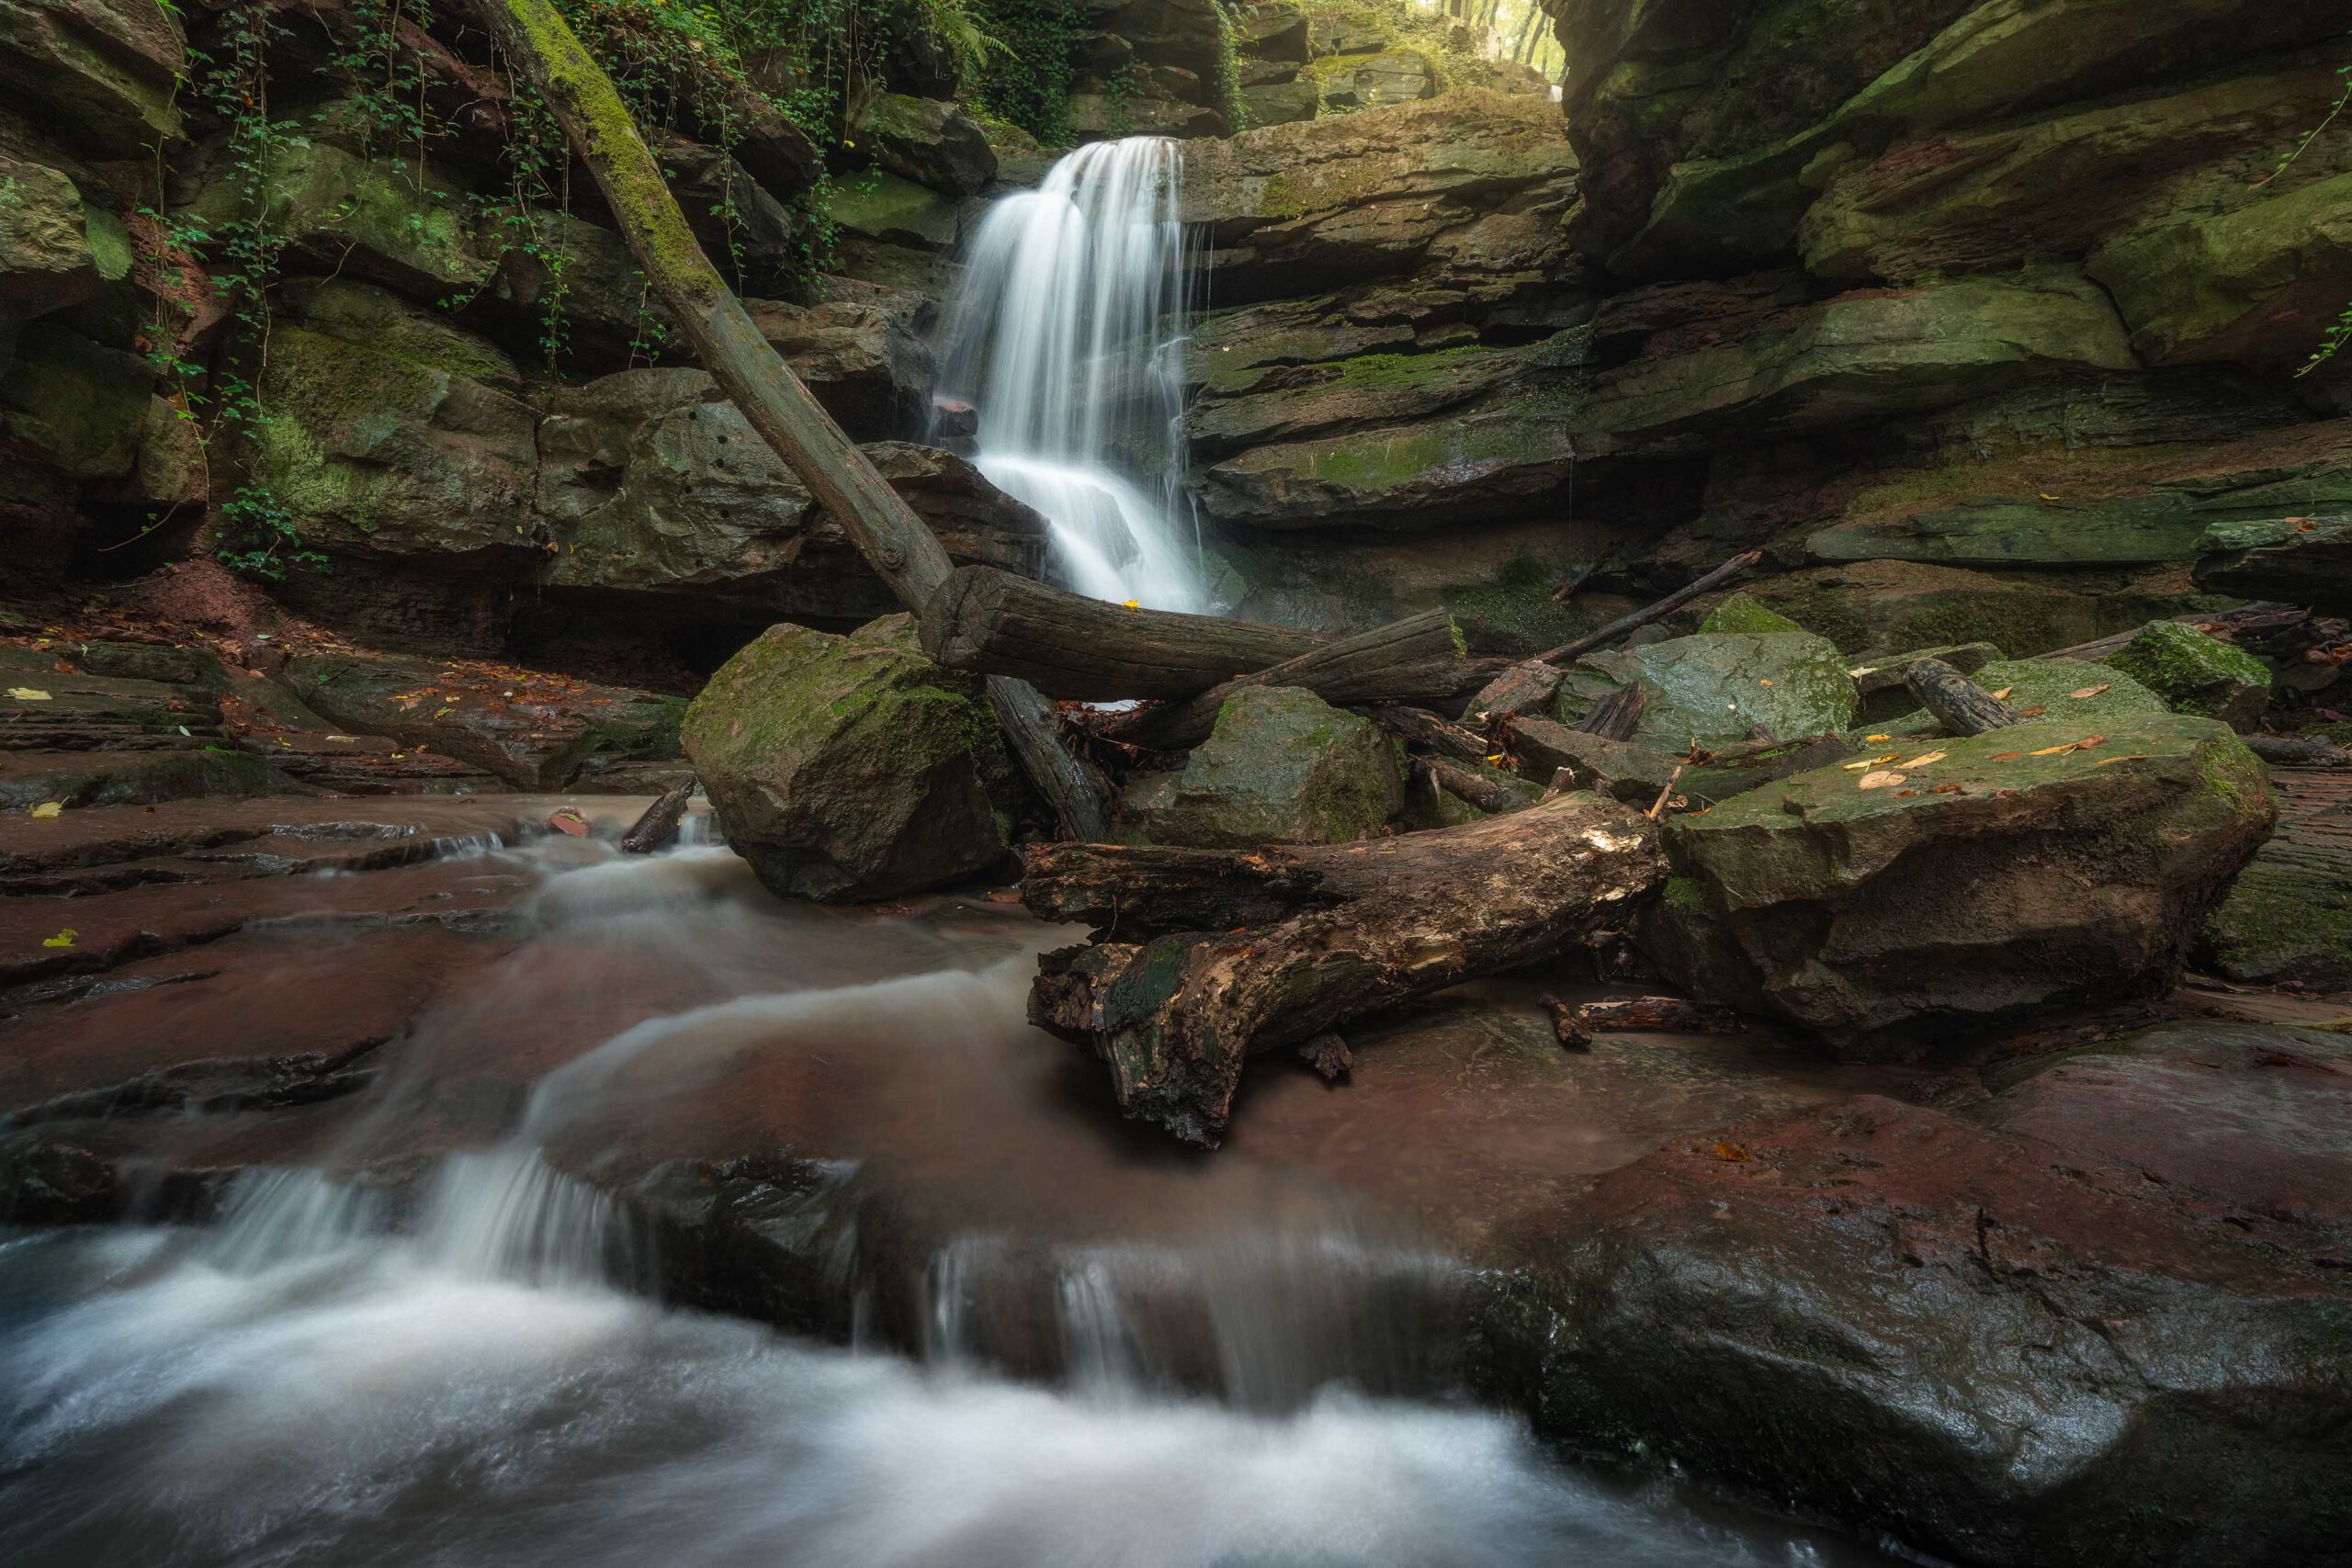
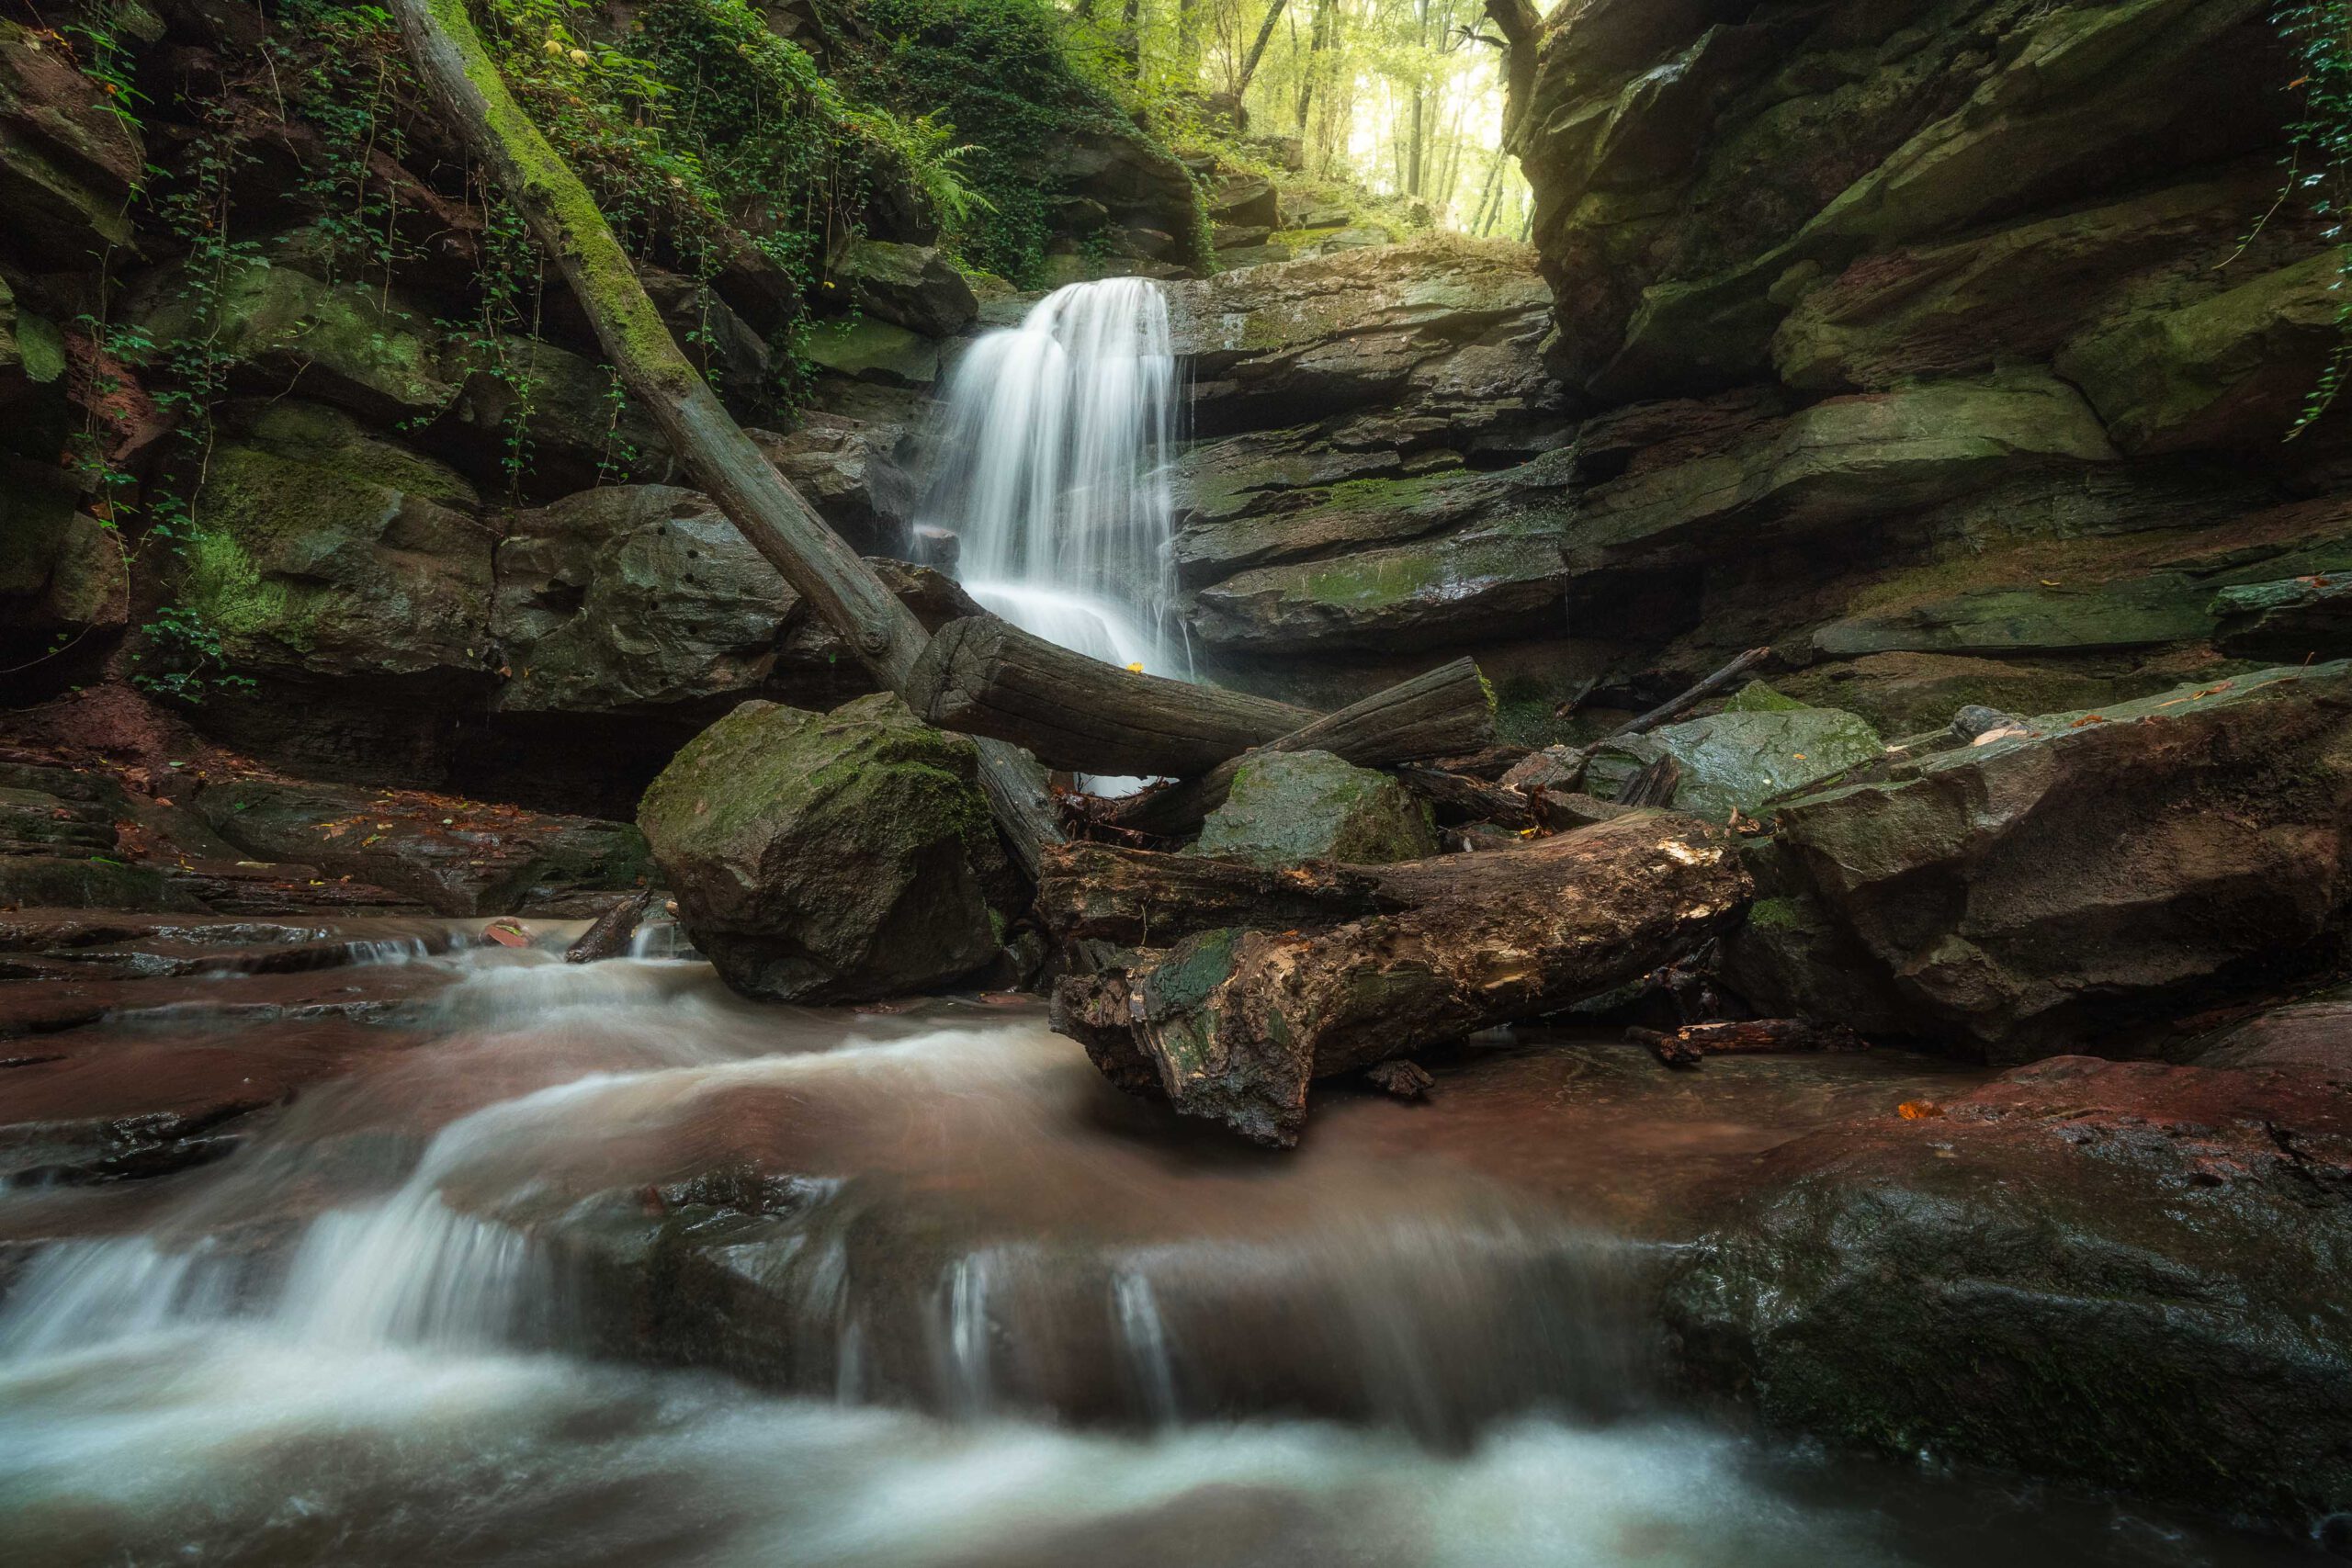
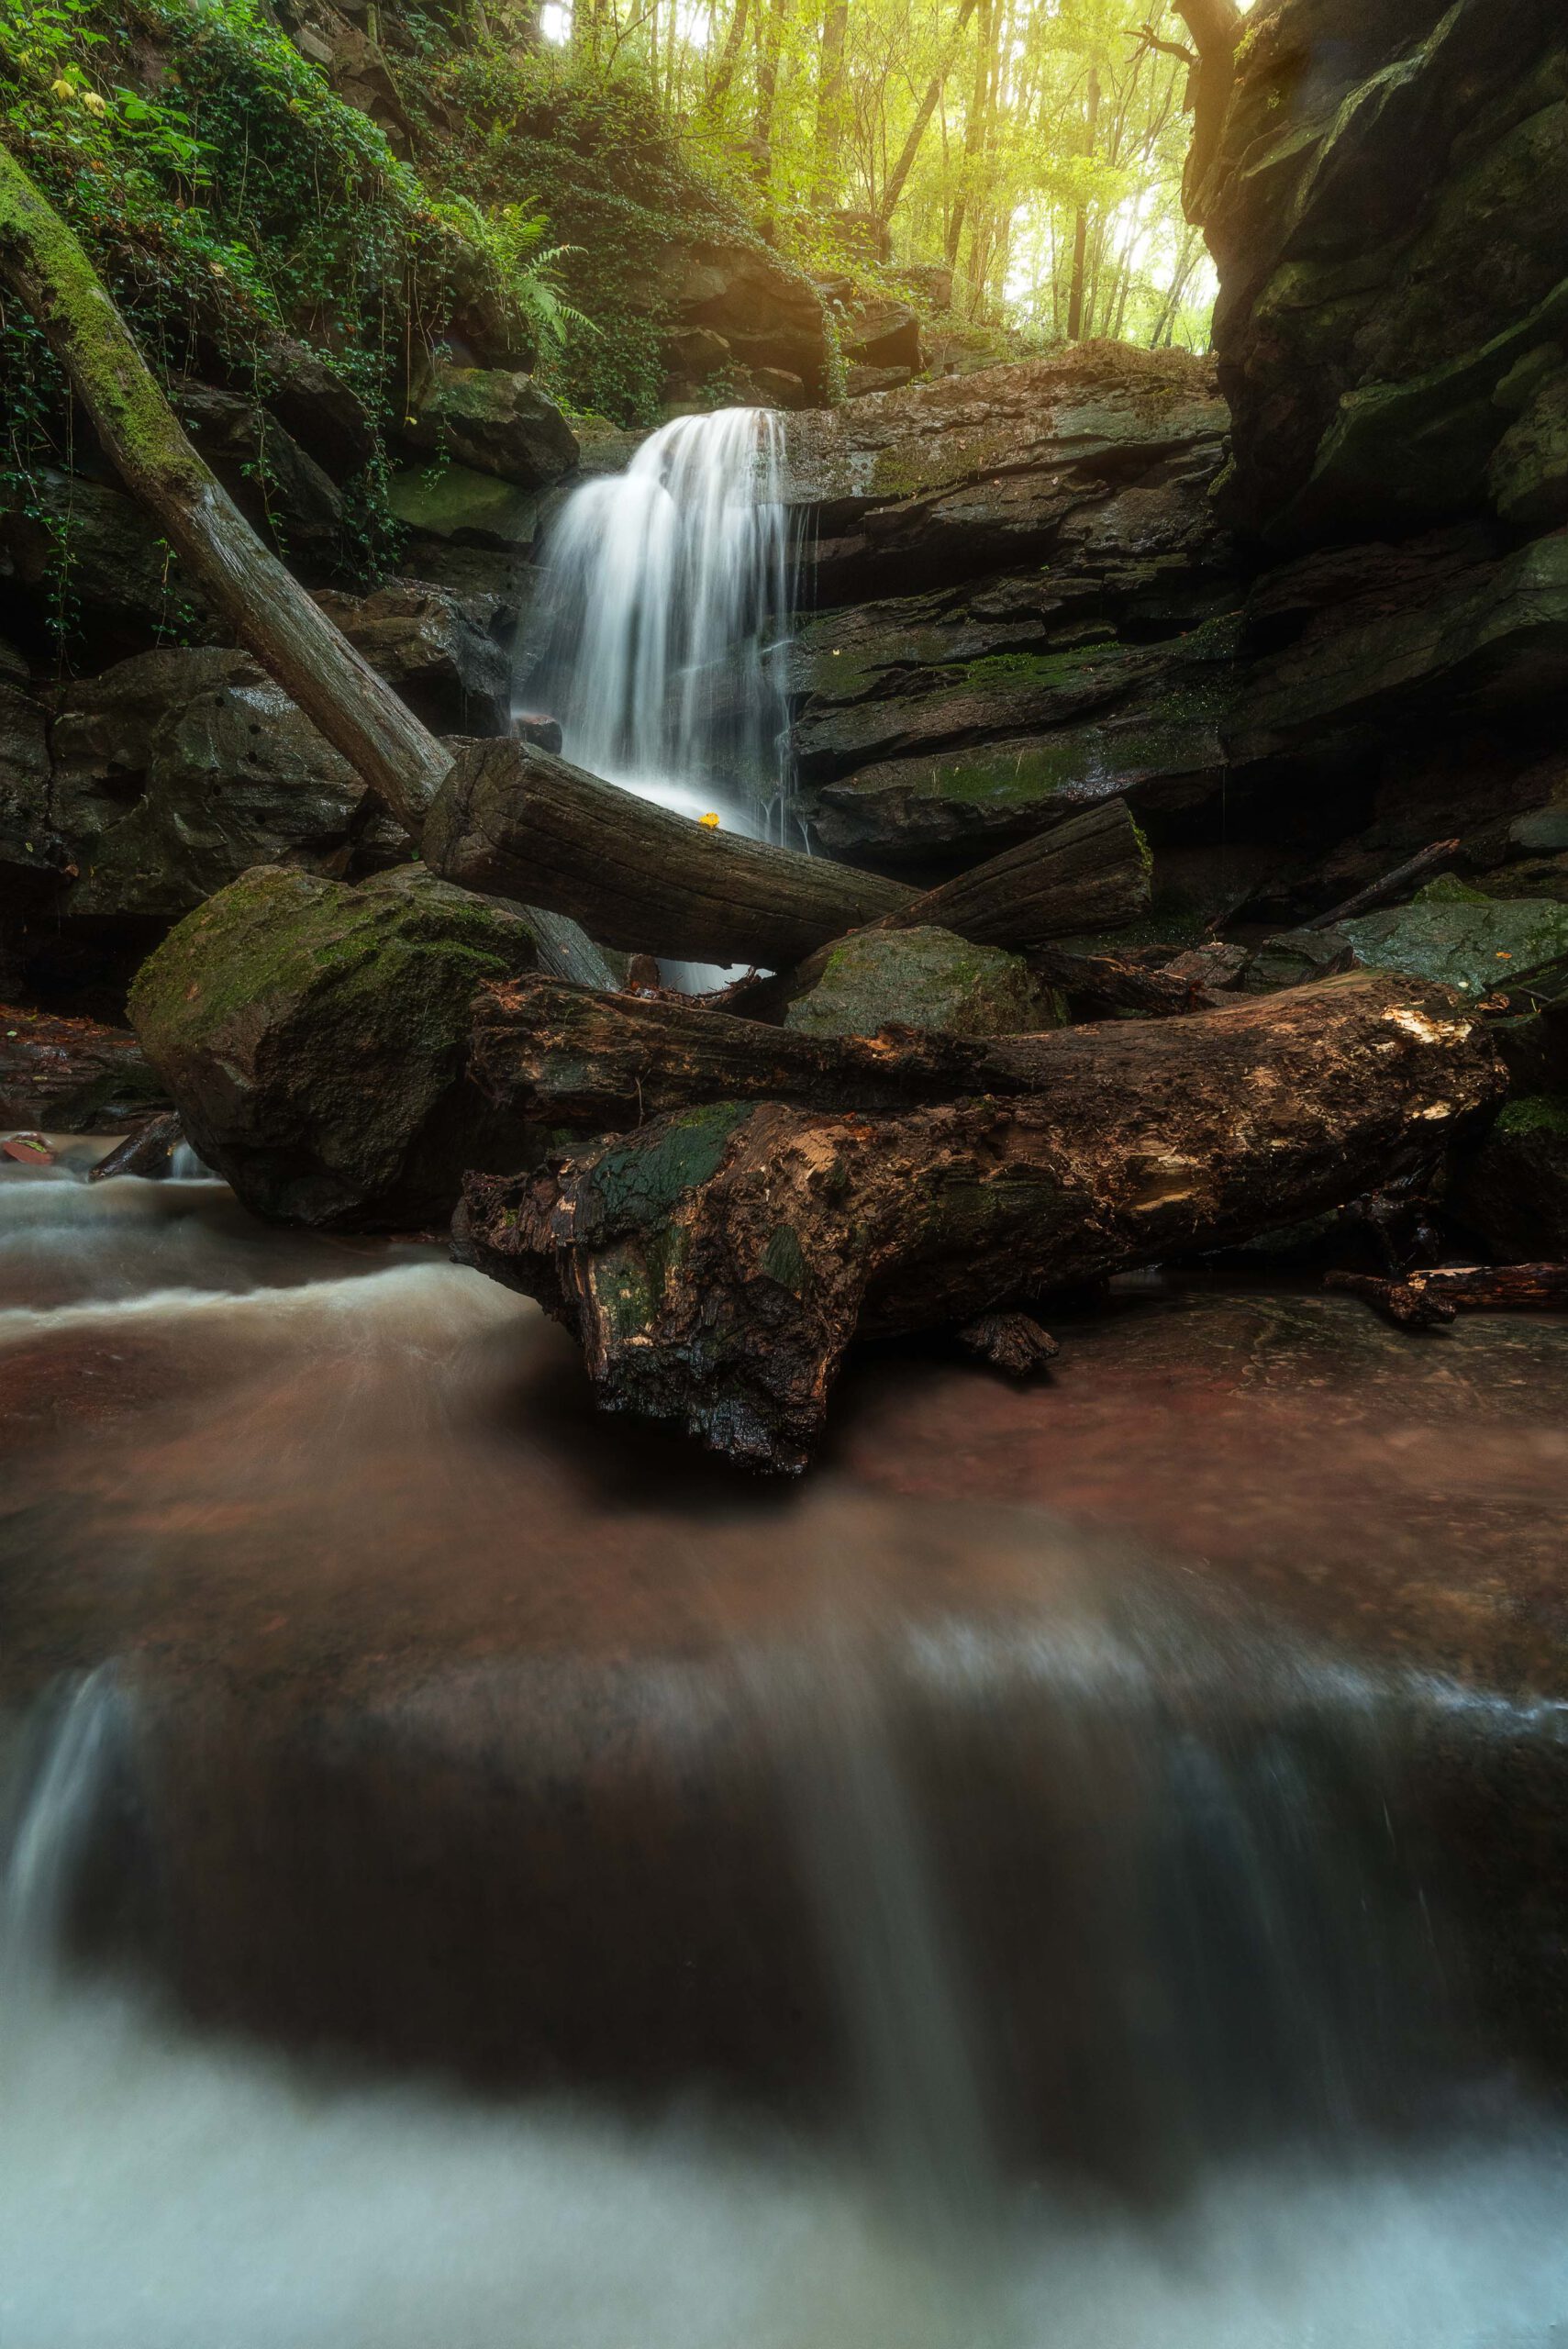
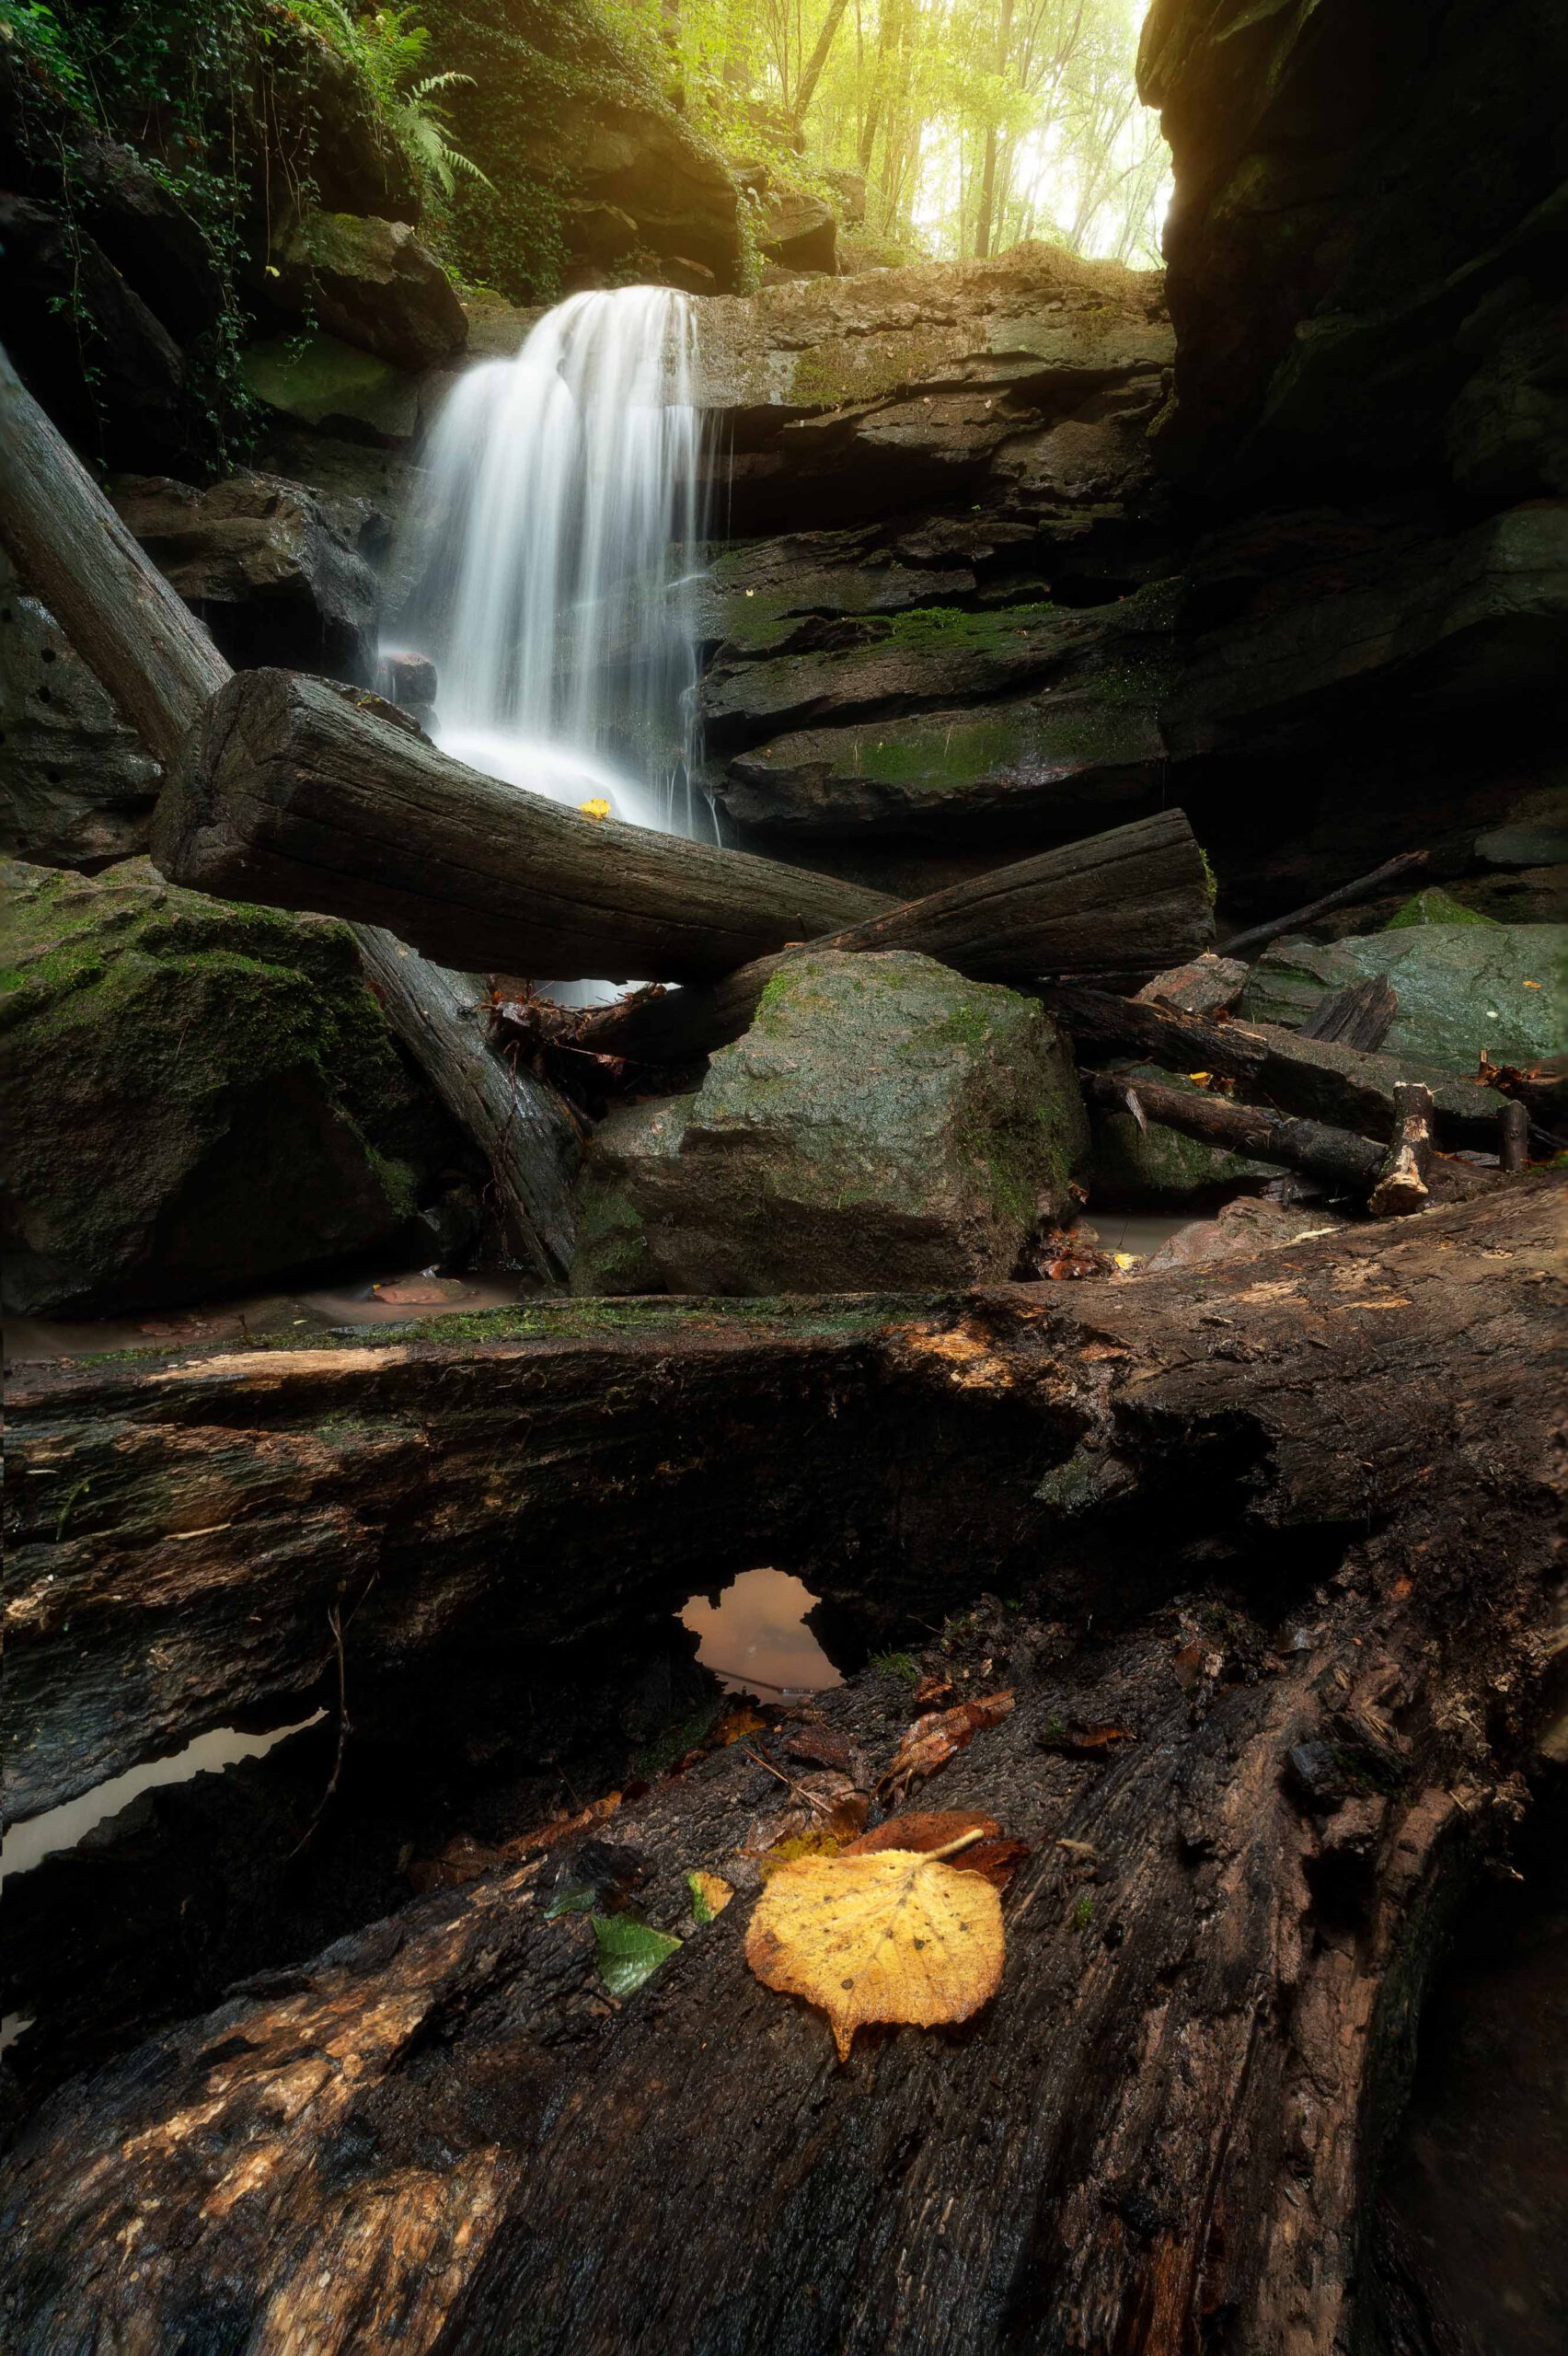
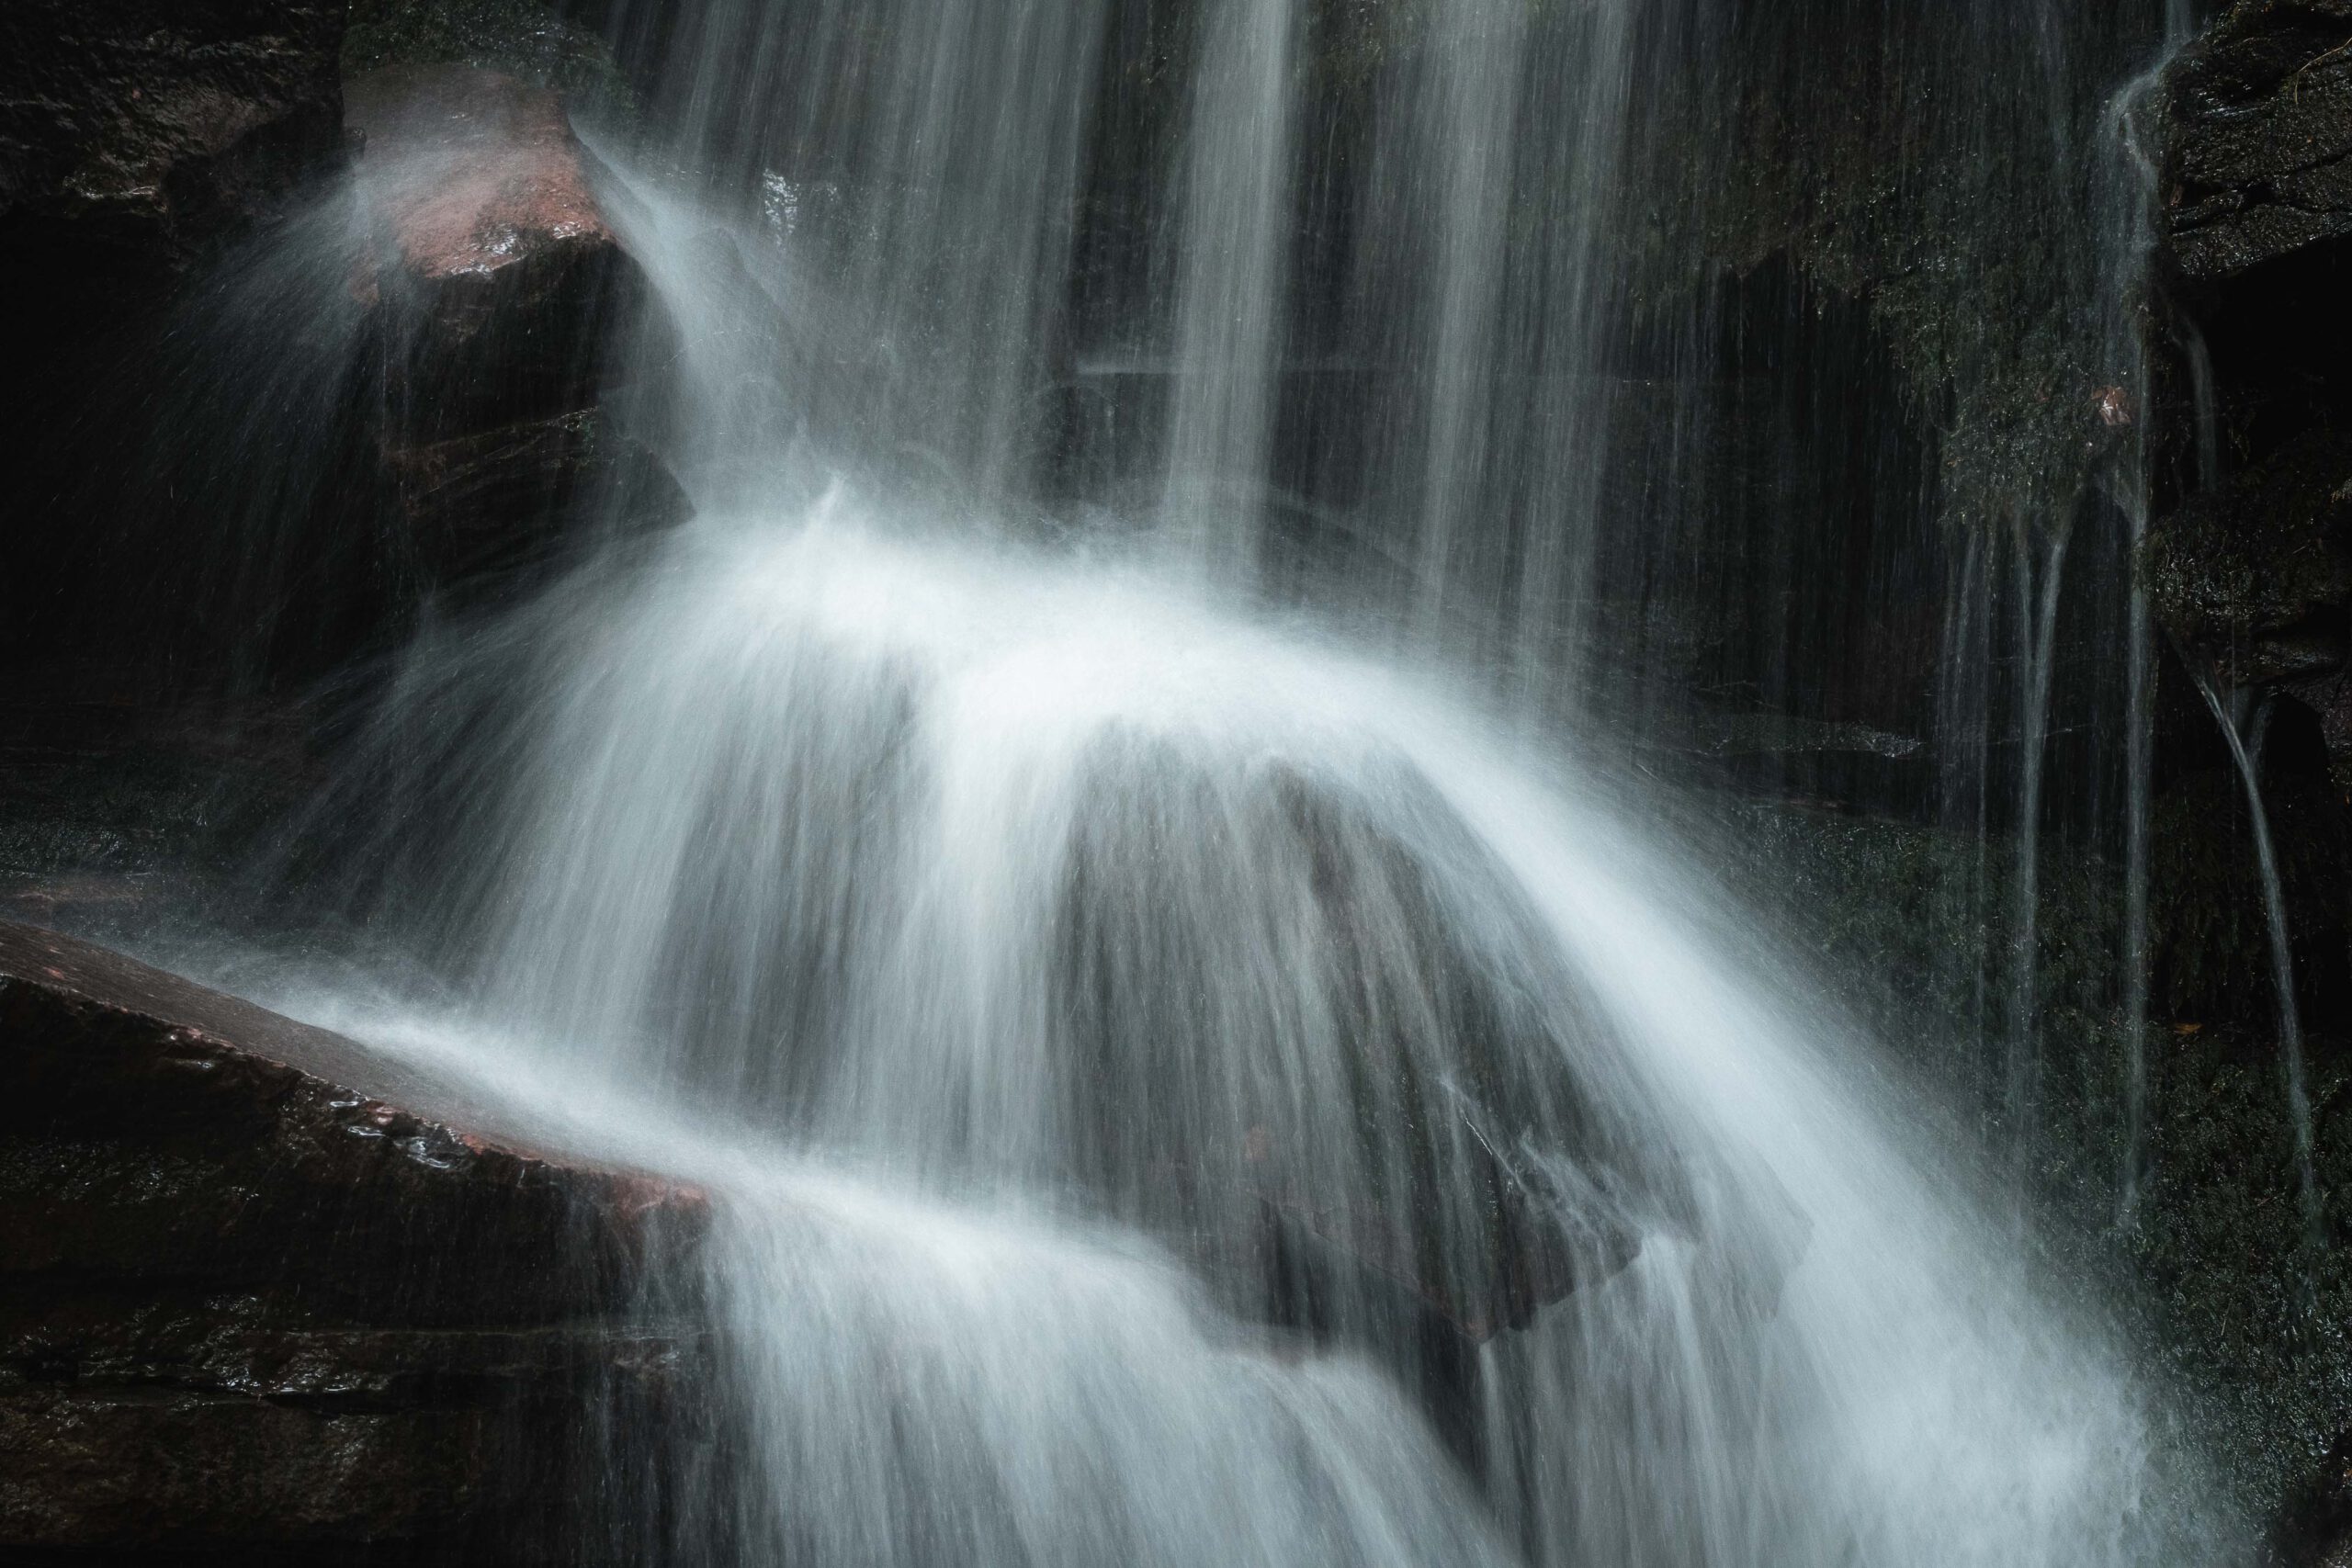
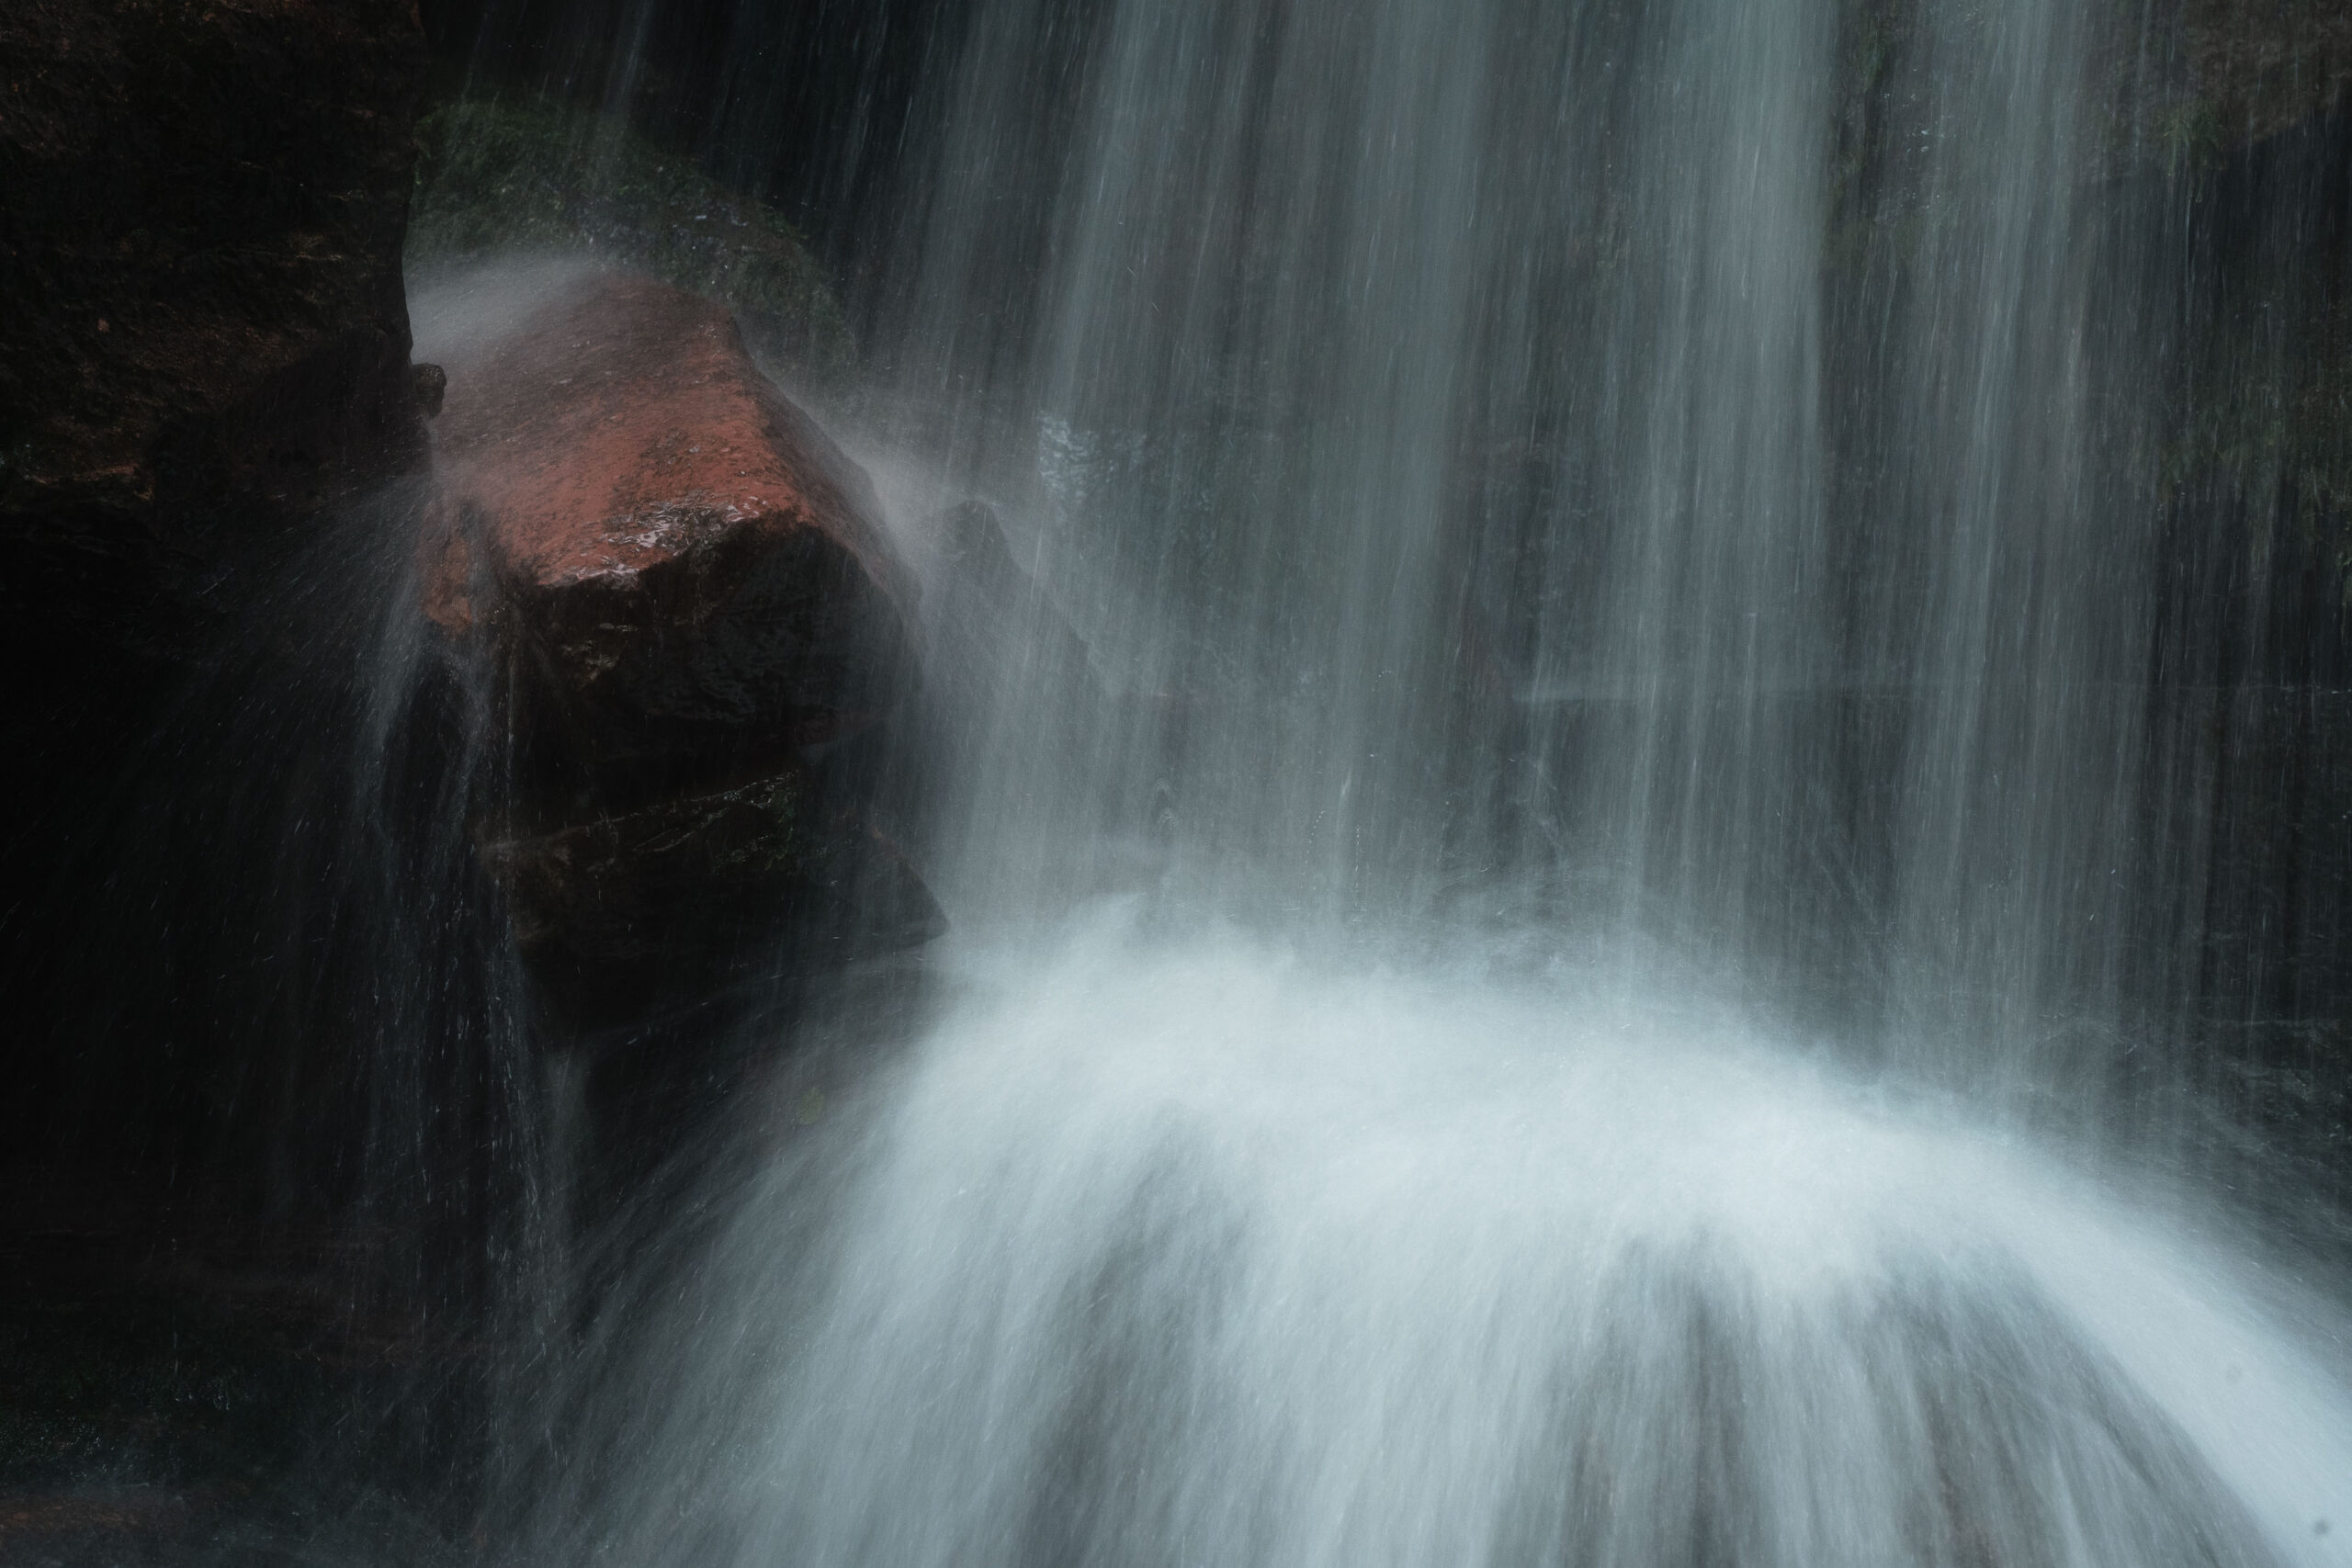
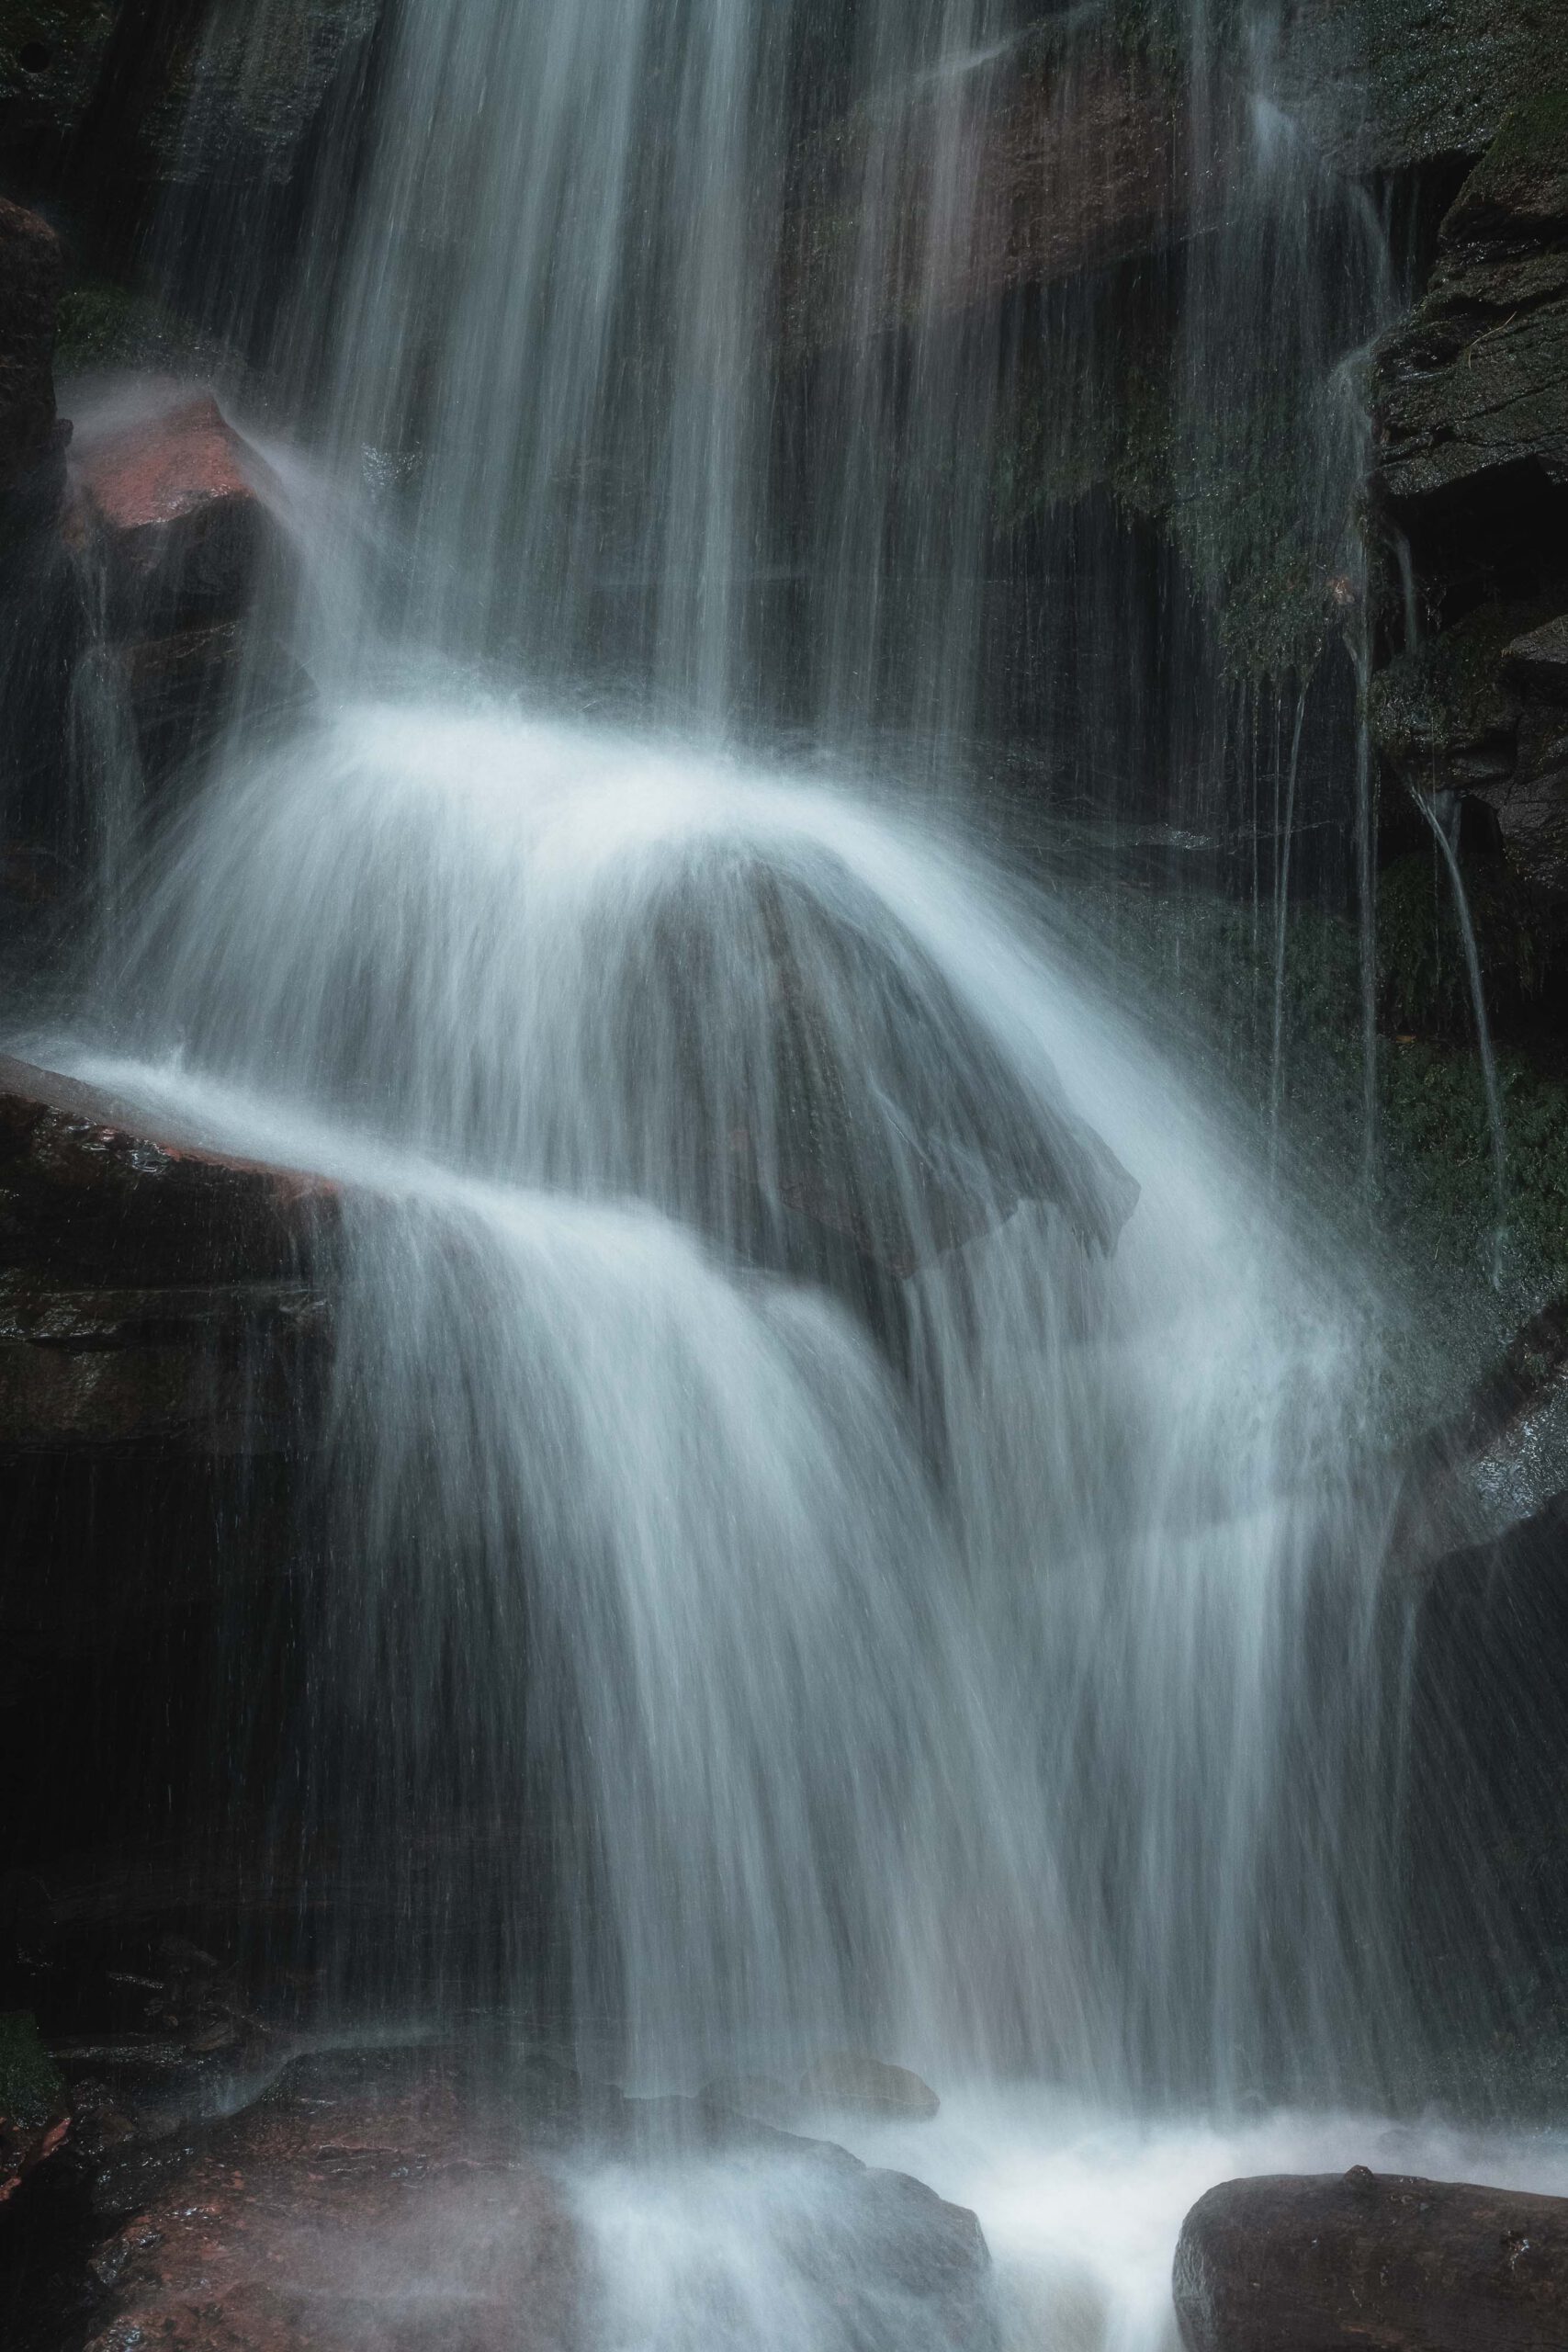
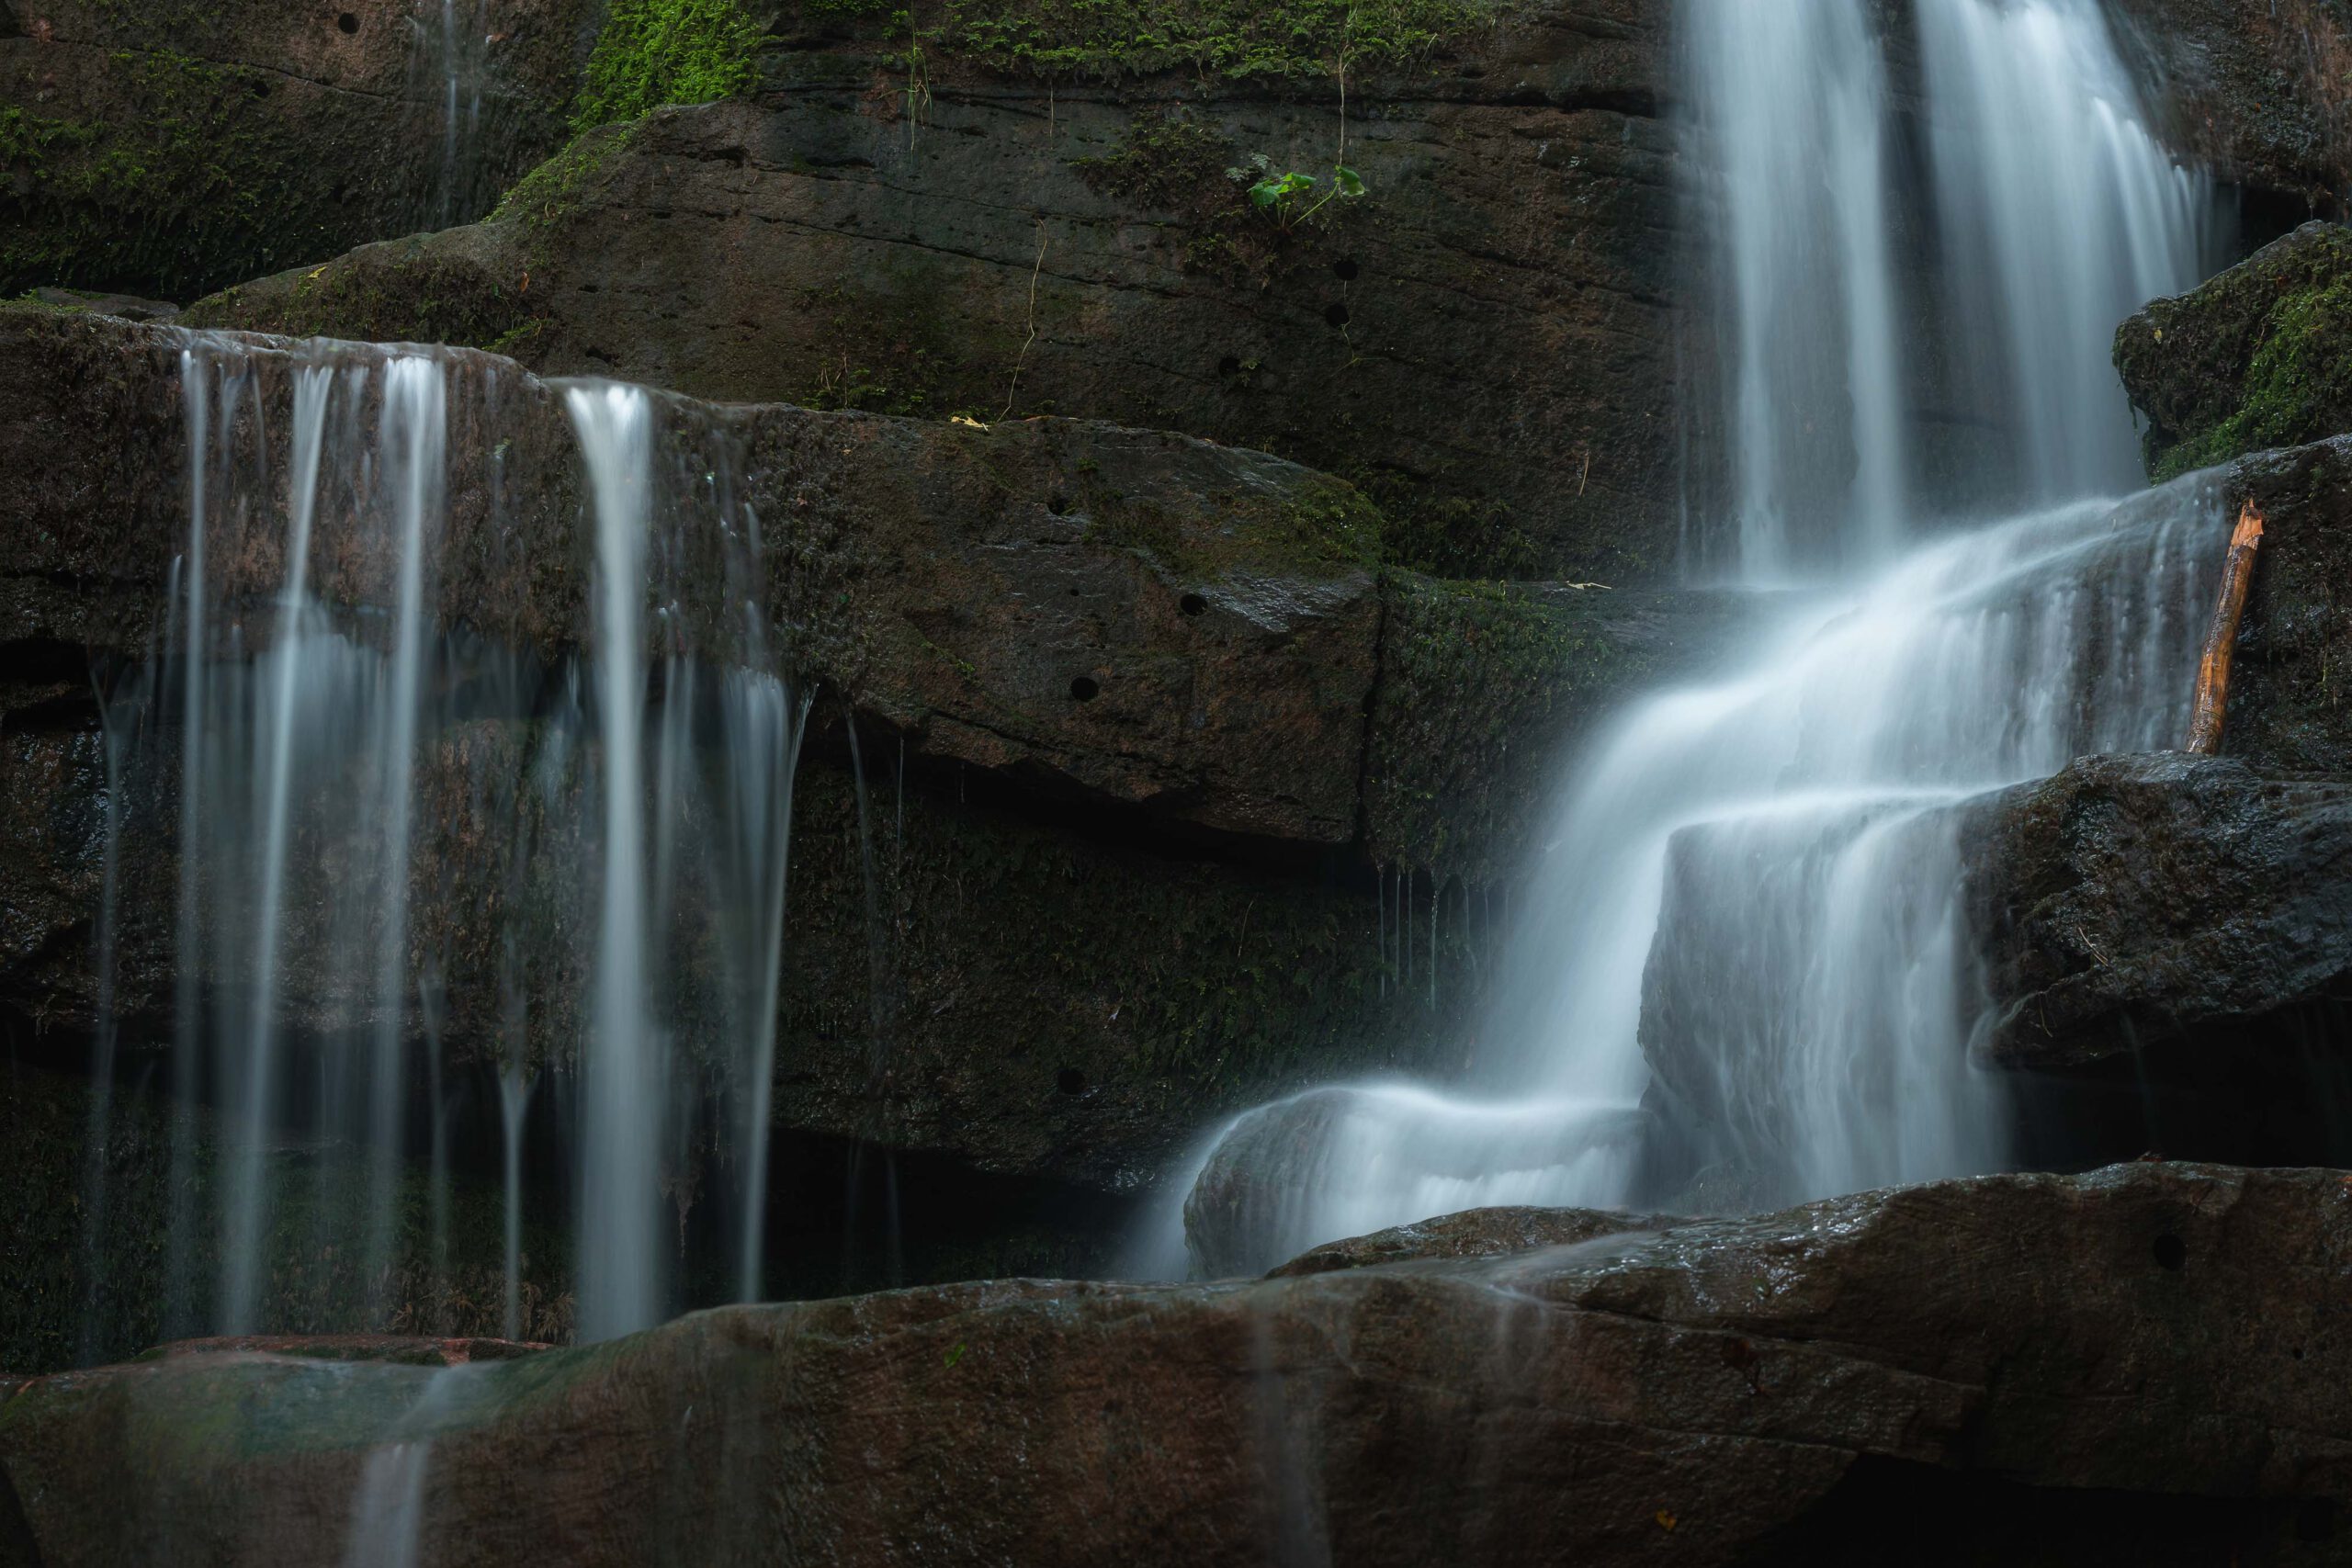
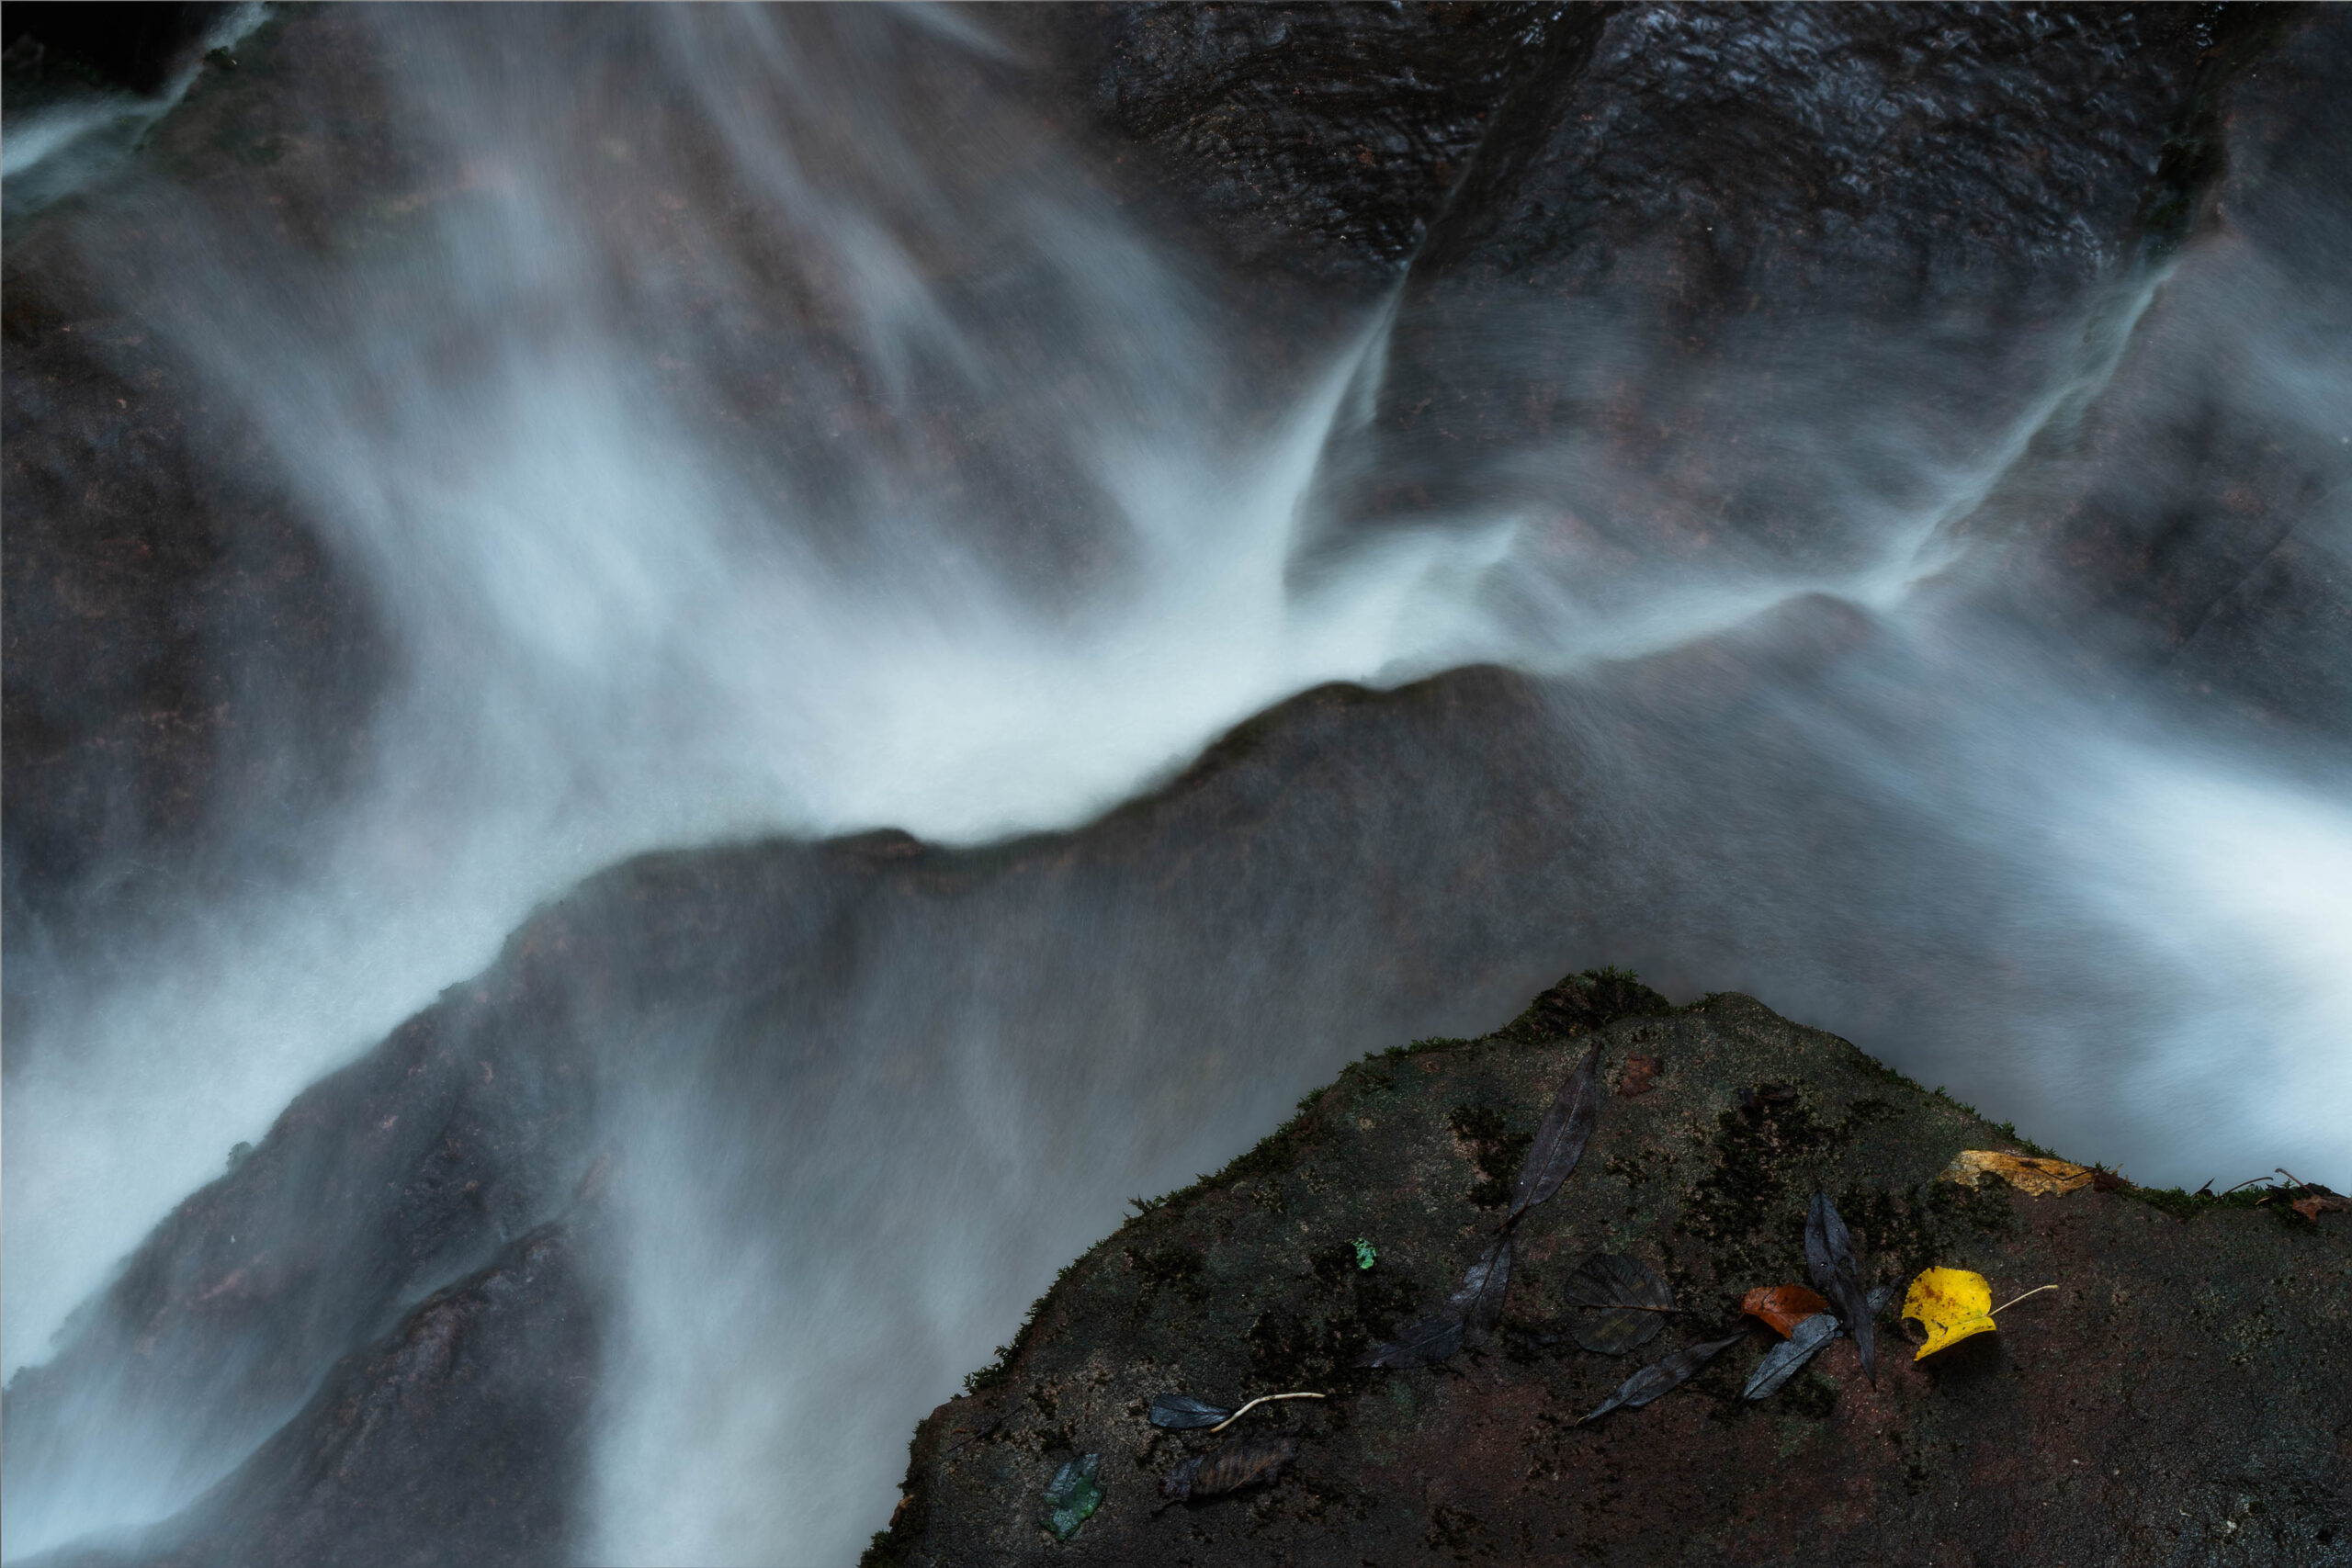
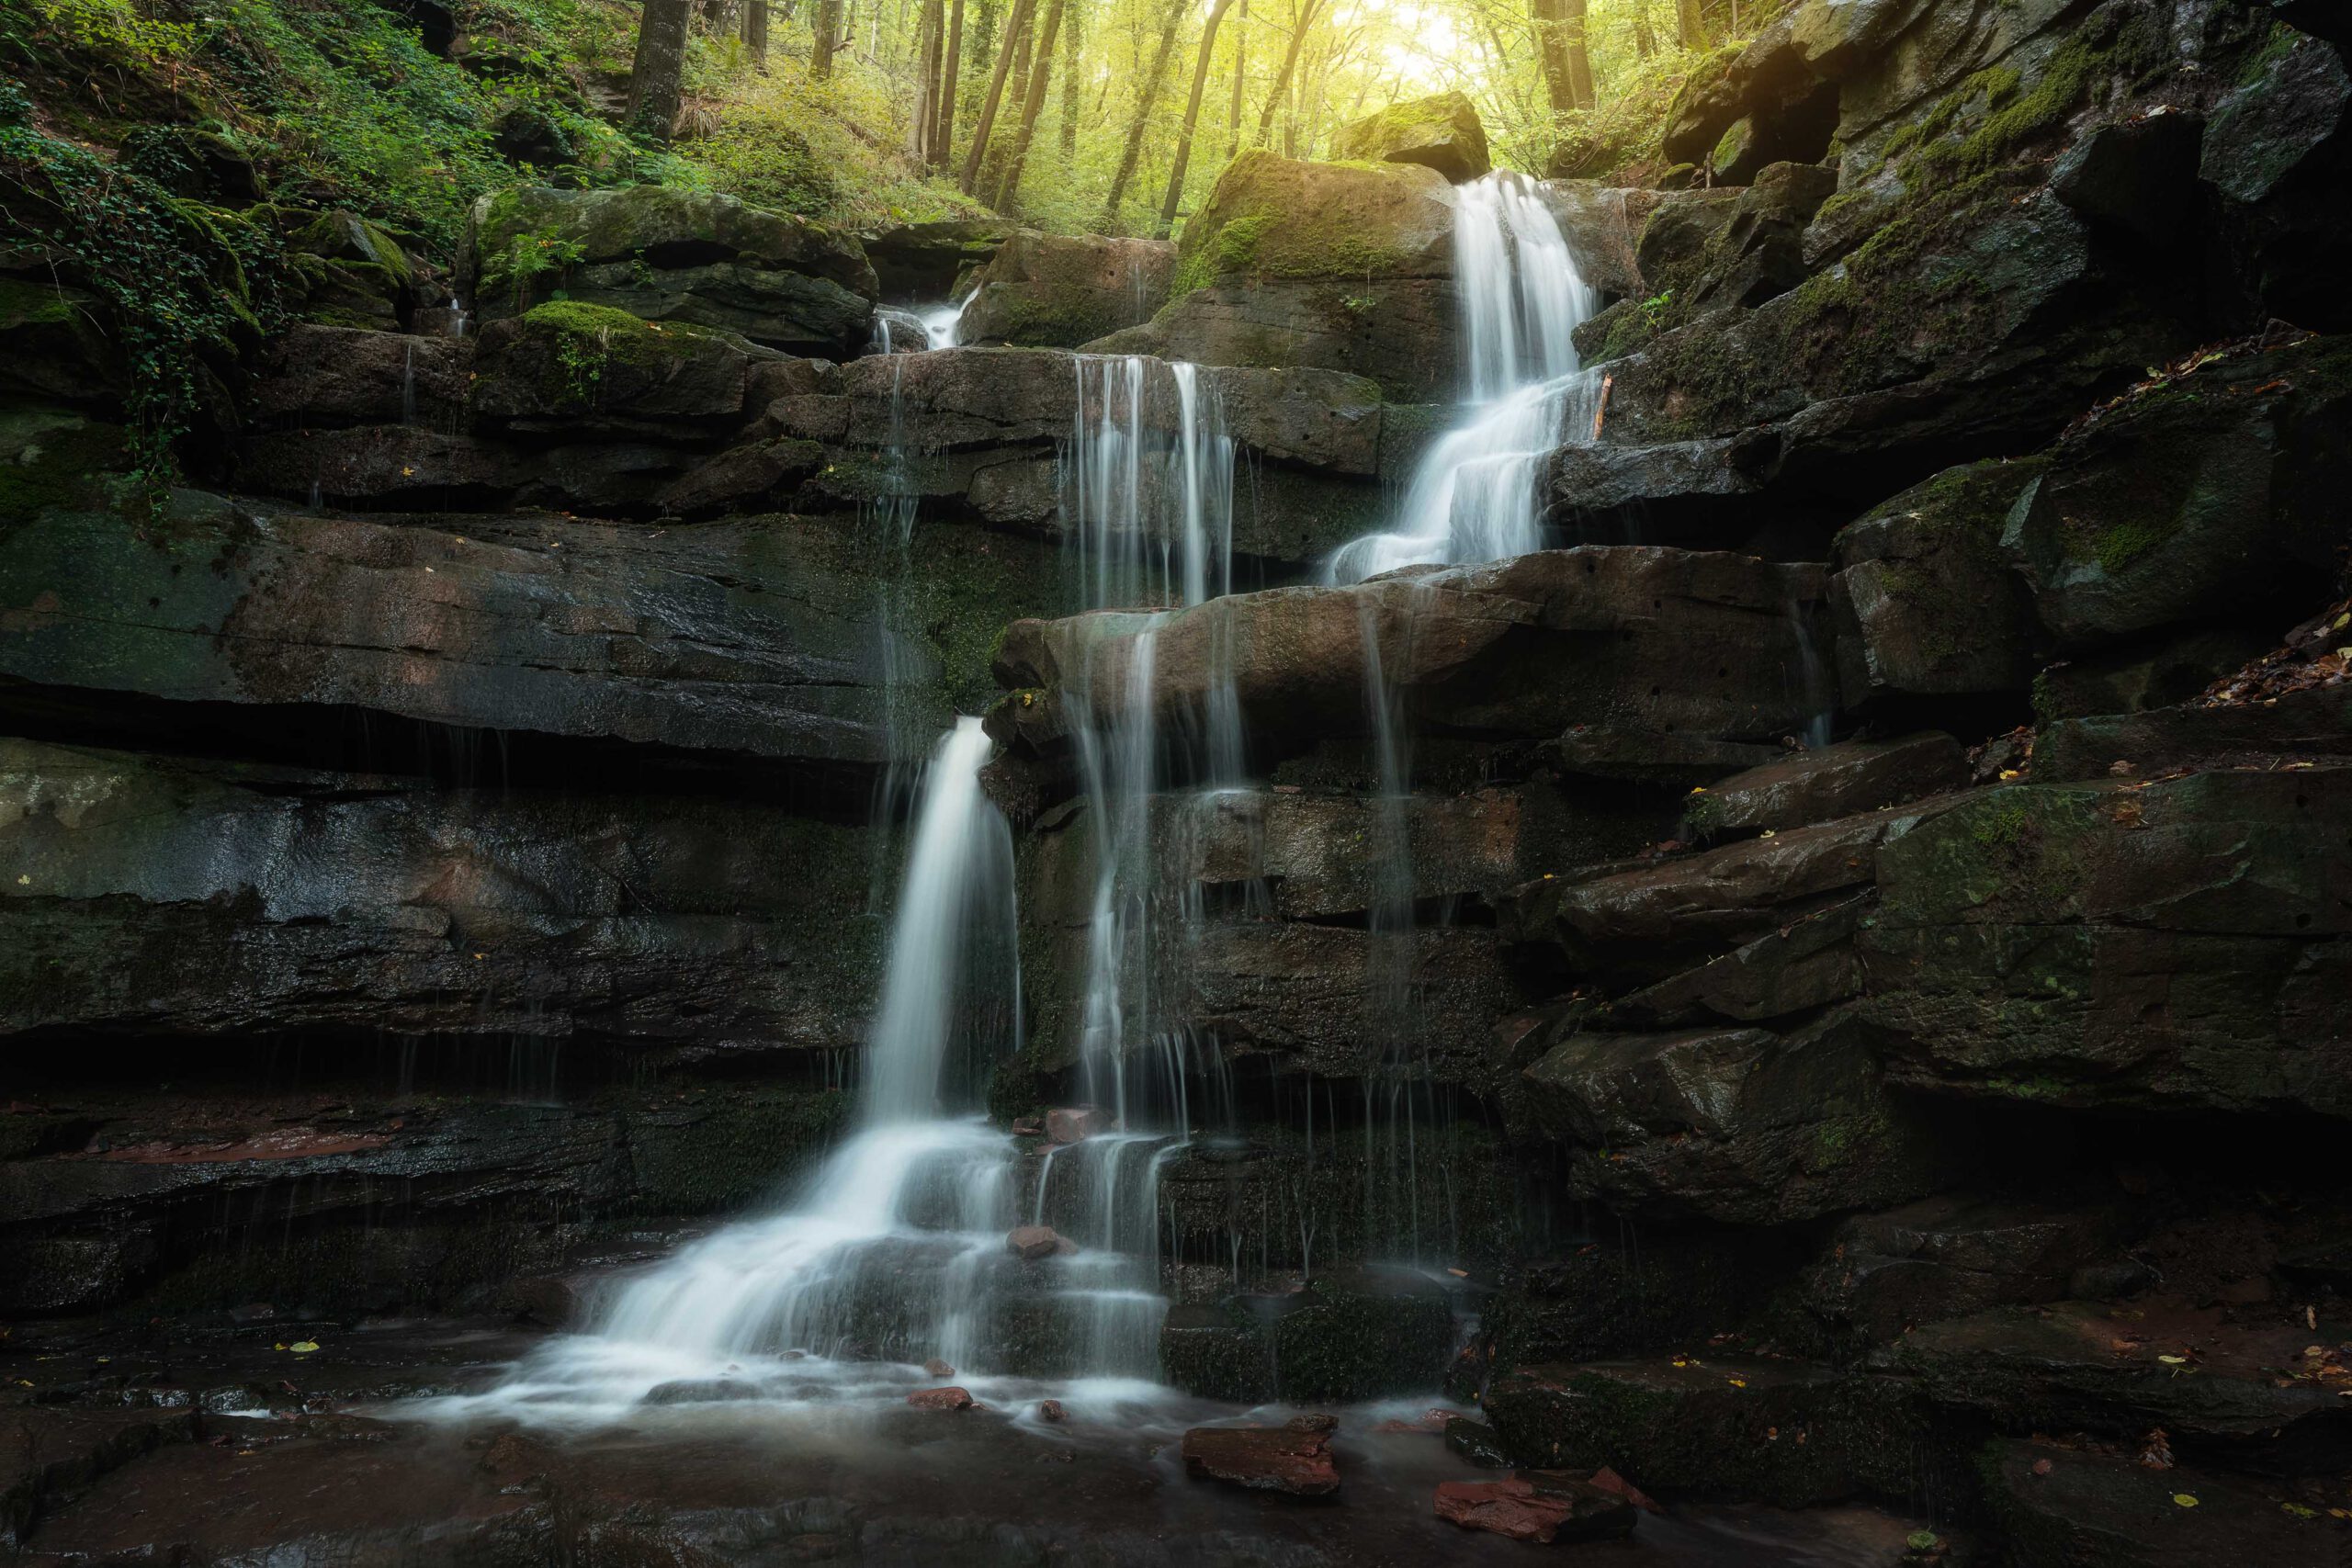
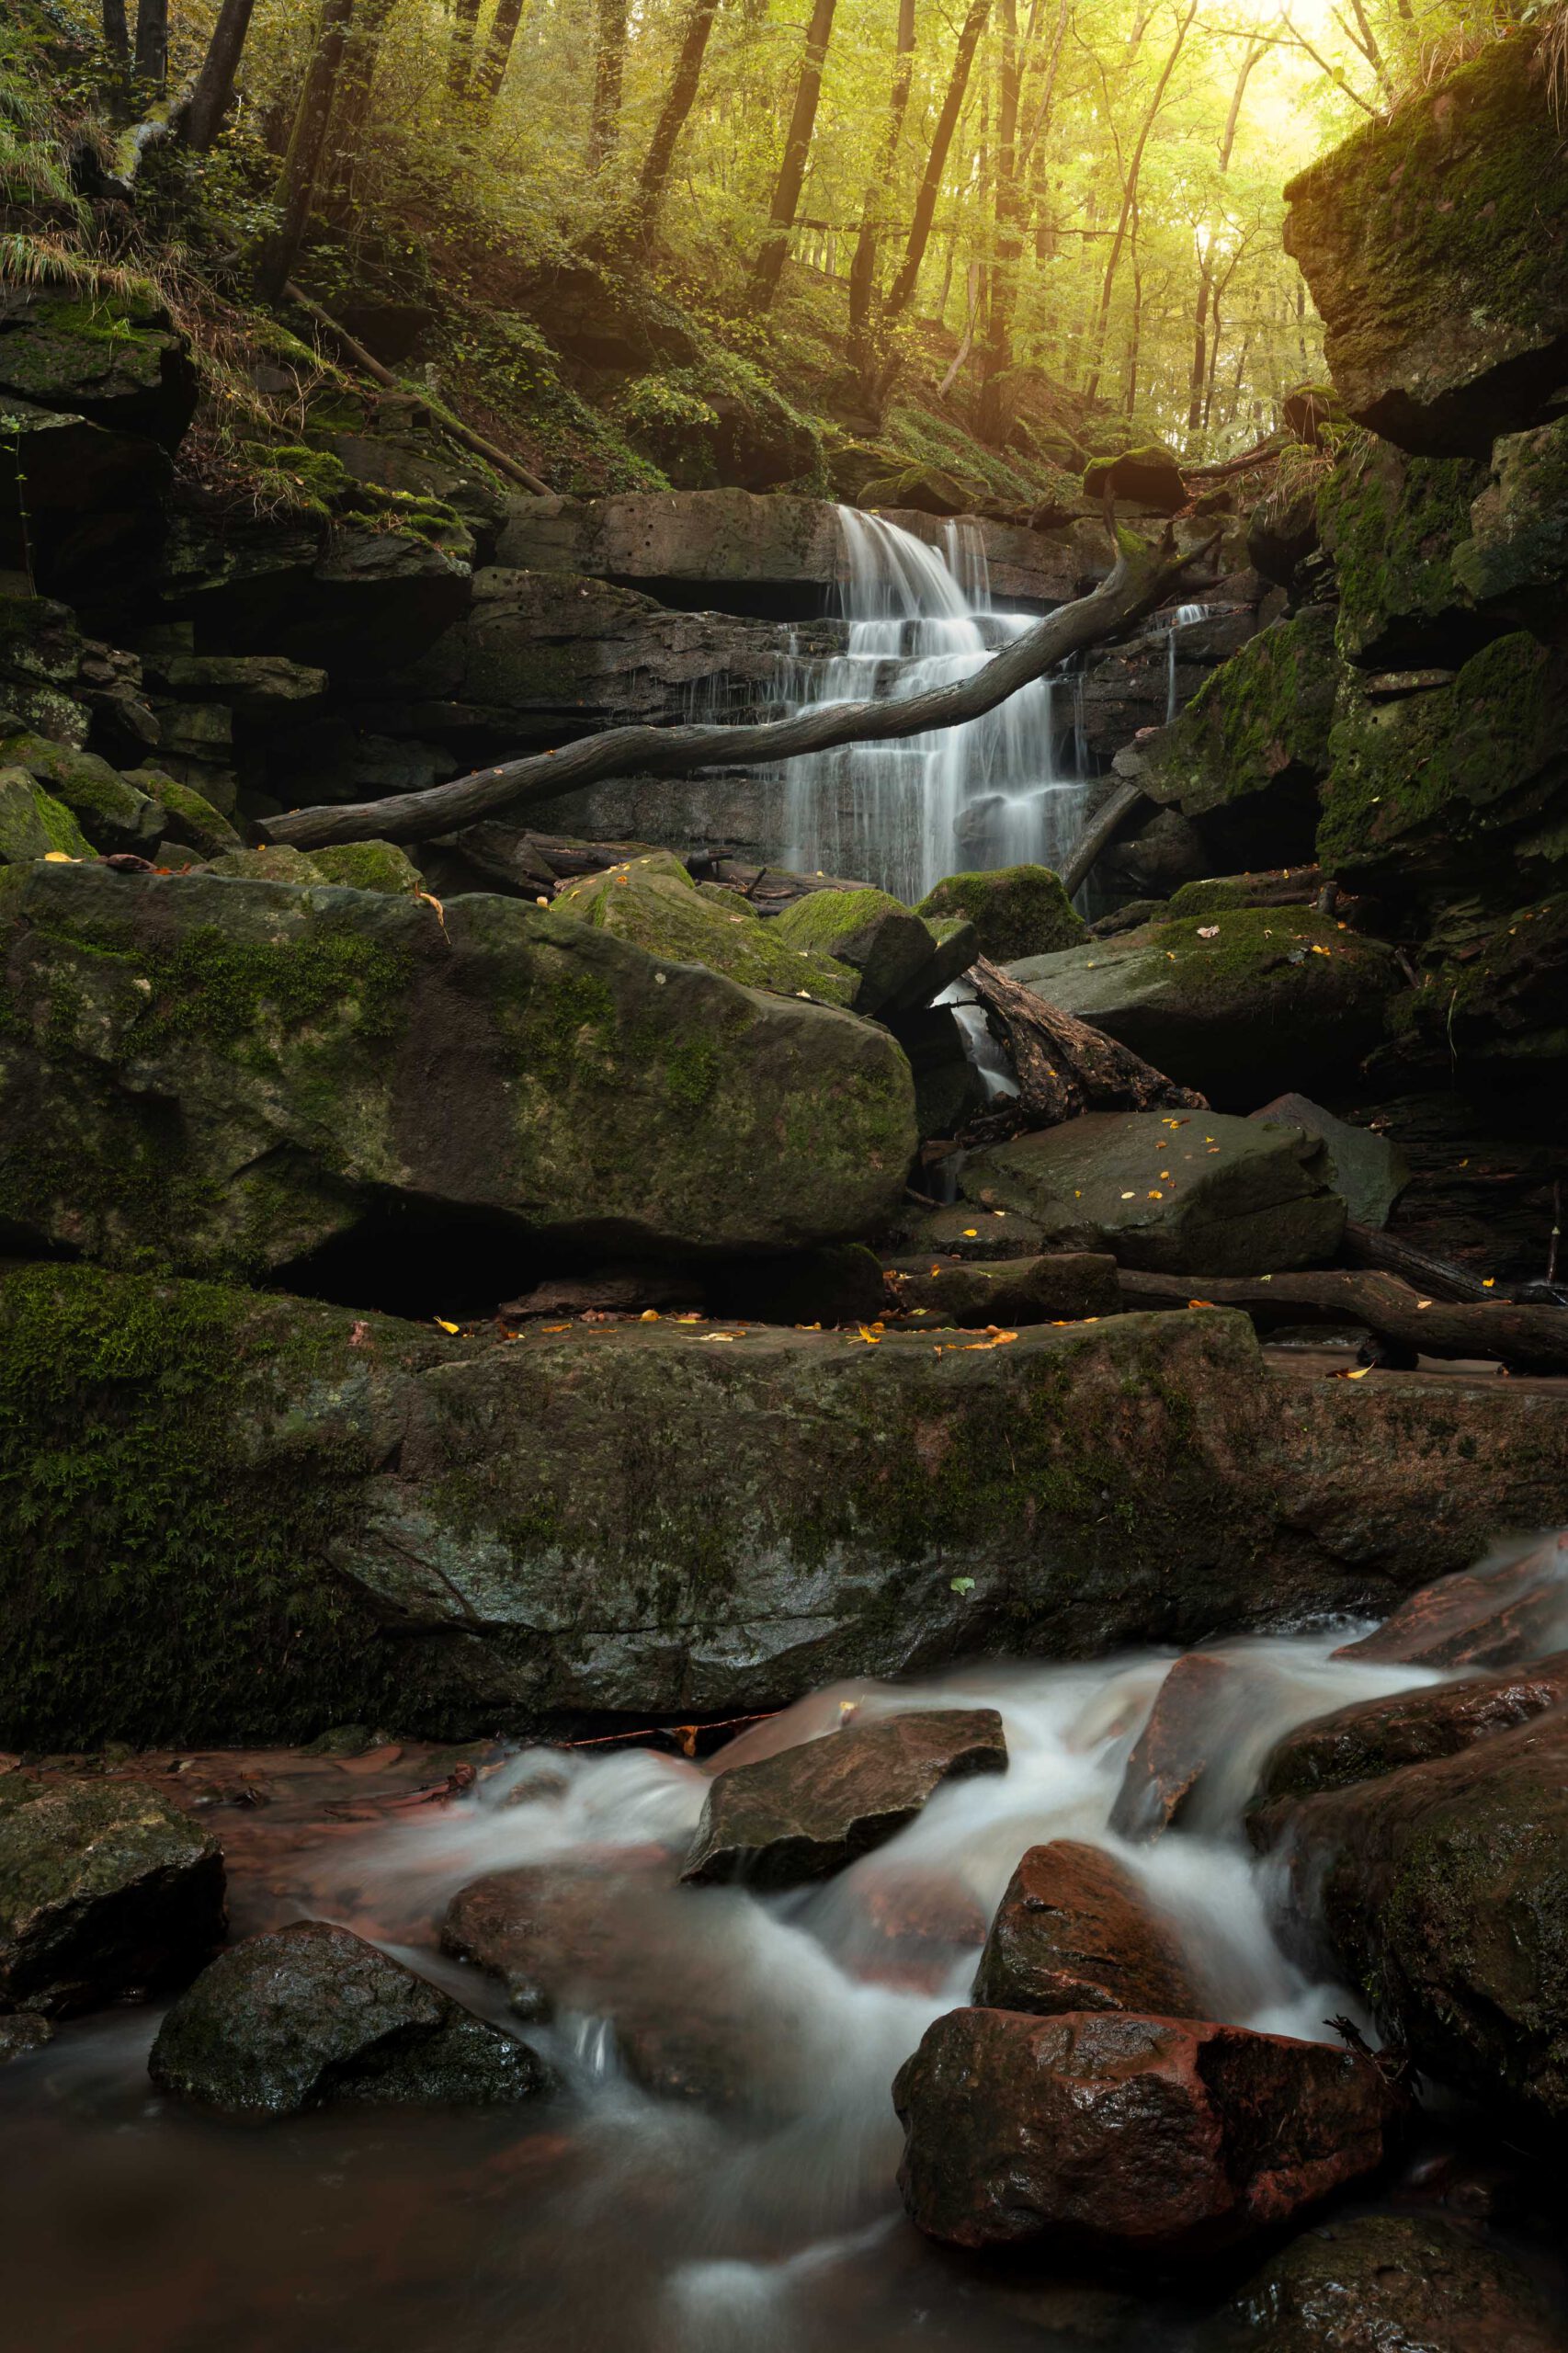
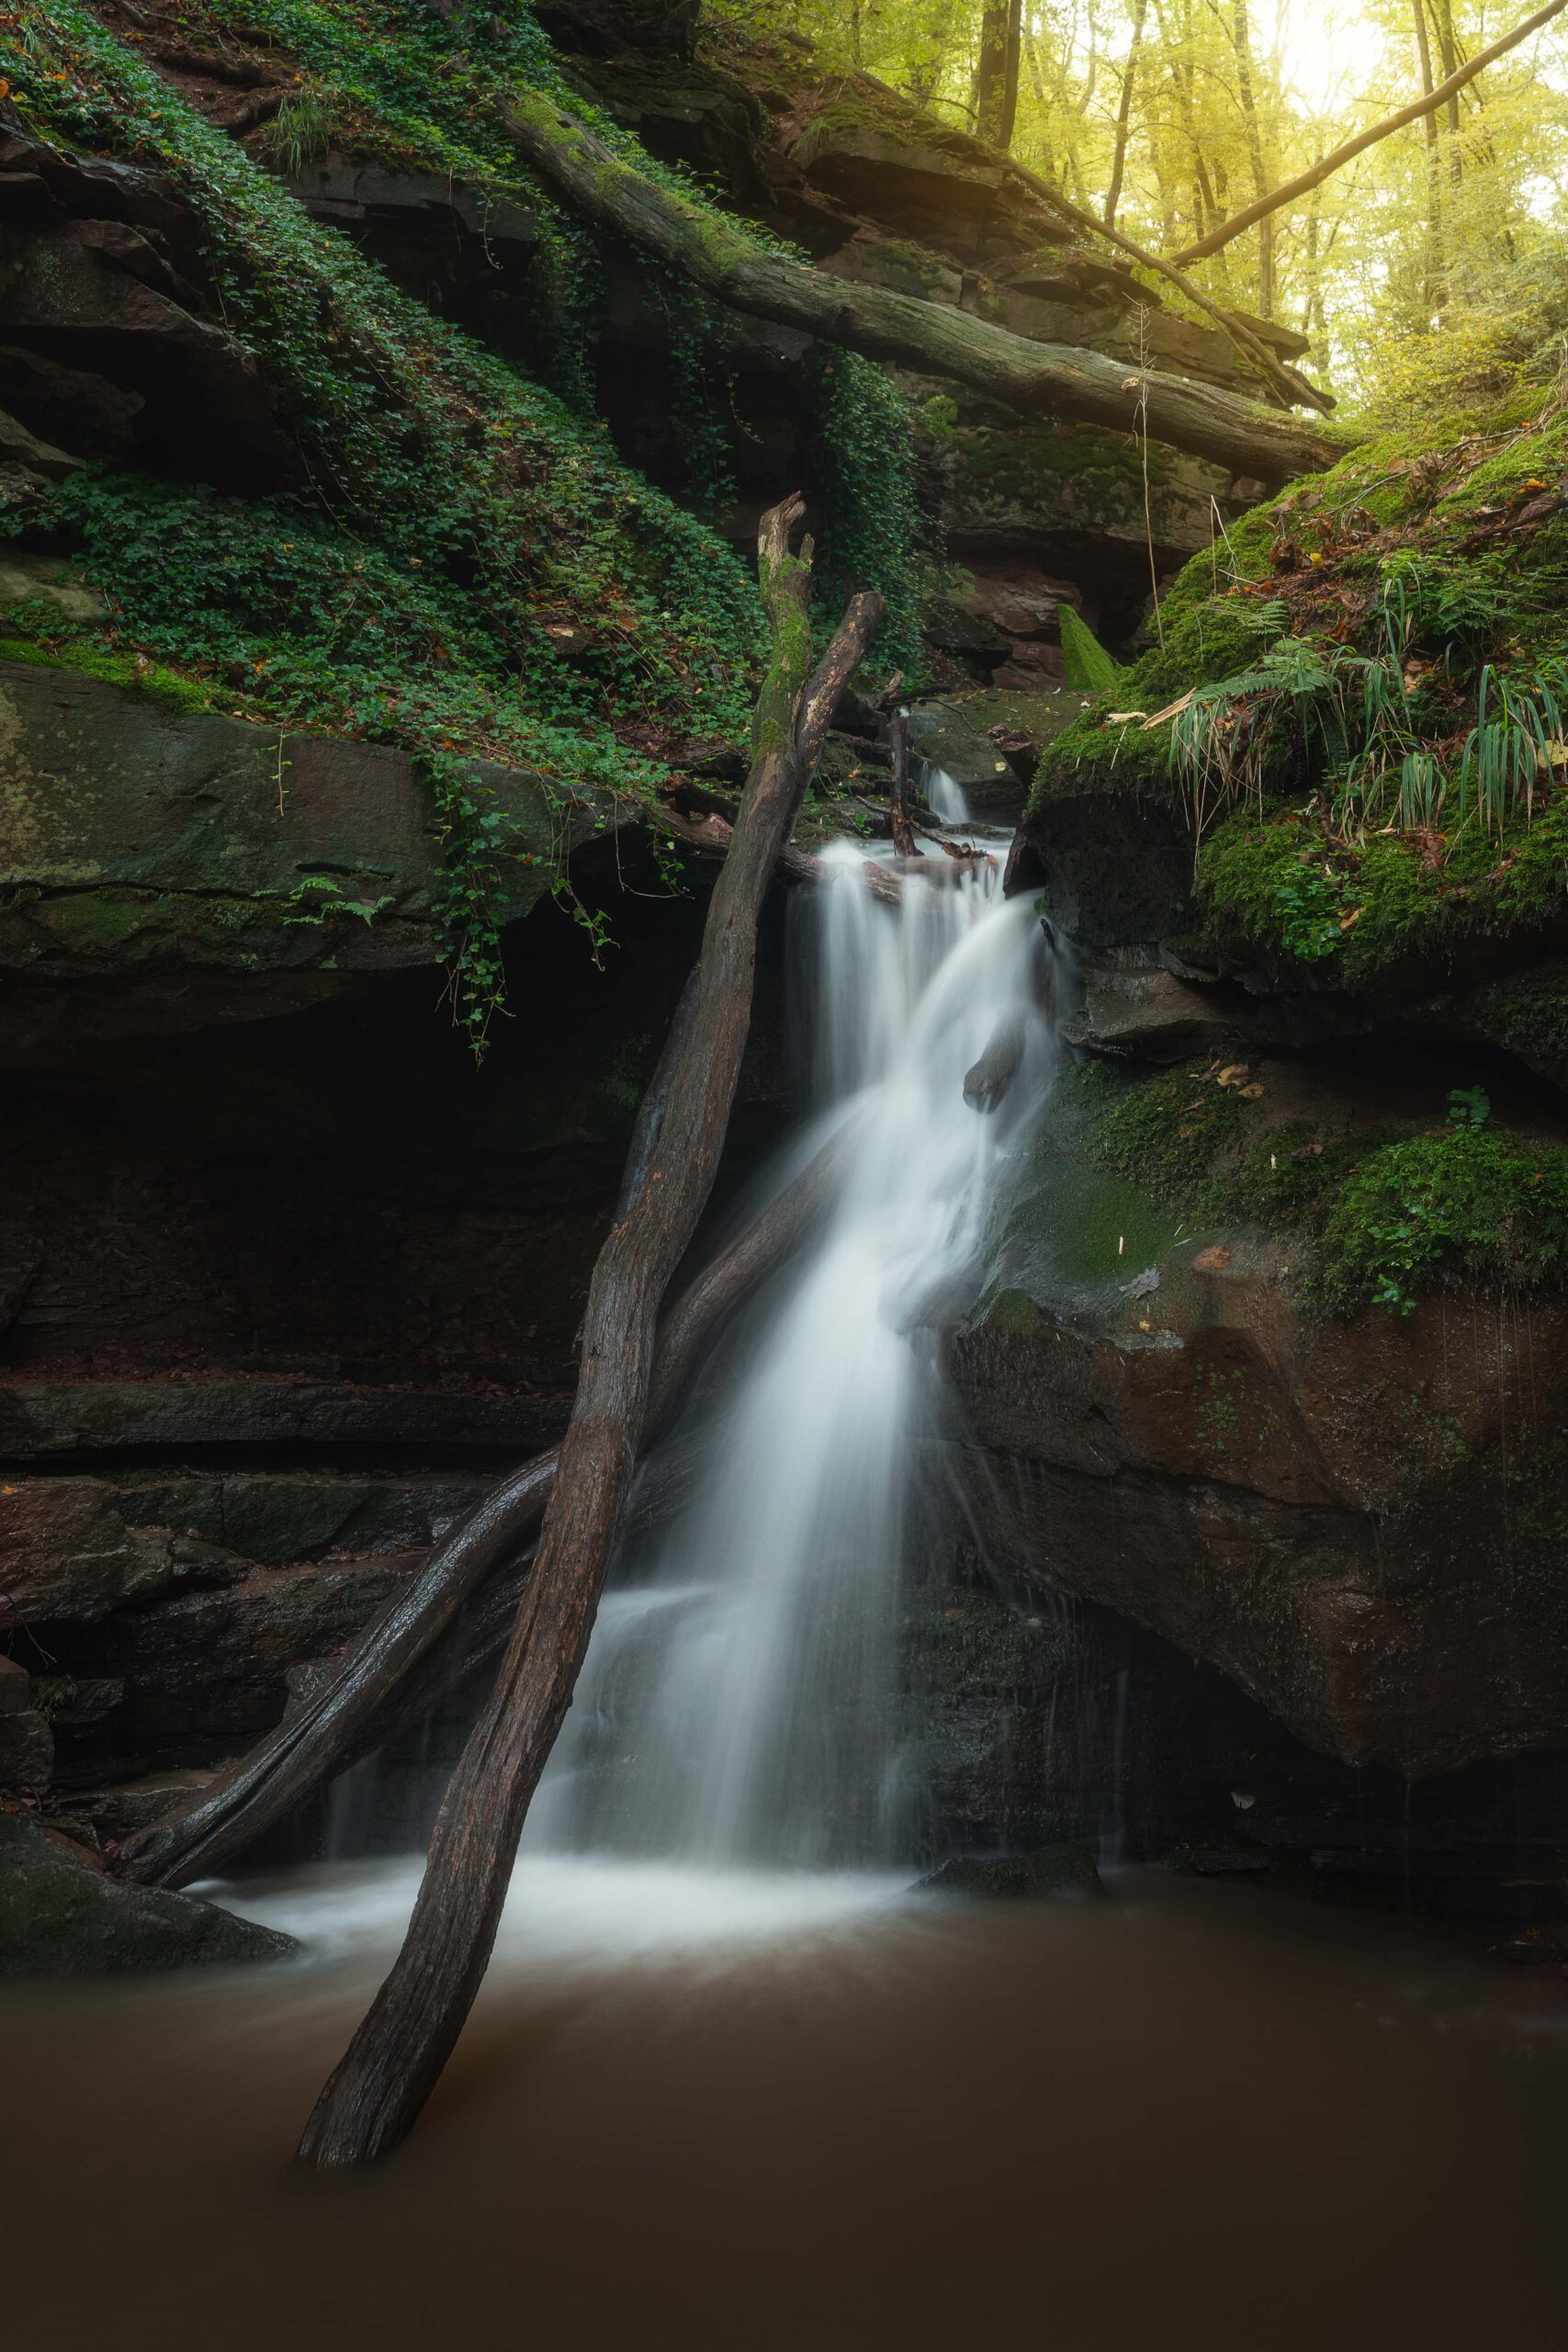
What can I say? I was able to take photographs, photographs, photographs. All morning long. It was only around noon, when I had already reached the last cascade, that some friendly hikers joined me. And since I had already captured everything, I was even able to chat with them for a while. Having enough time to search for great compositions, let the motifs sink in and calmly adjust the camera settings resulted in many, many pictures that I like. I am curious to see which one will emerge as the highlight over time.
This and all other shots of this post you can request under “Prints” as an art print for your wall at home directly from me.
When taking photographs, it doesn’t really matter what focal length you use. Telephoto lenses above 100 mm are usually good for details or sections of the waterfall. Focal lengths in the lower range are naturally better for capturing the entire waterfall. The exact focal length depends a little on the size of the waterfall and, of course, on where you can position the camera. In other words, whether you have more or less space to move around.
However, the following tips are universally applicable
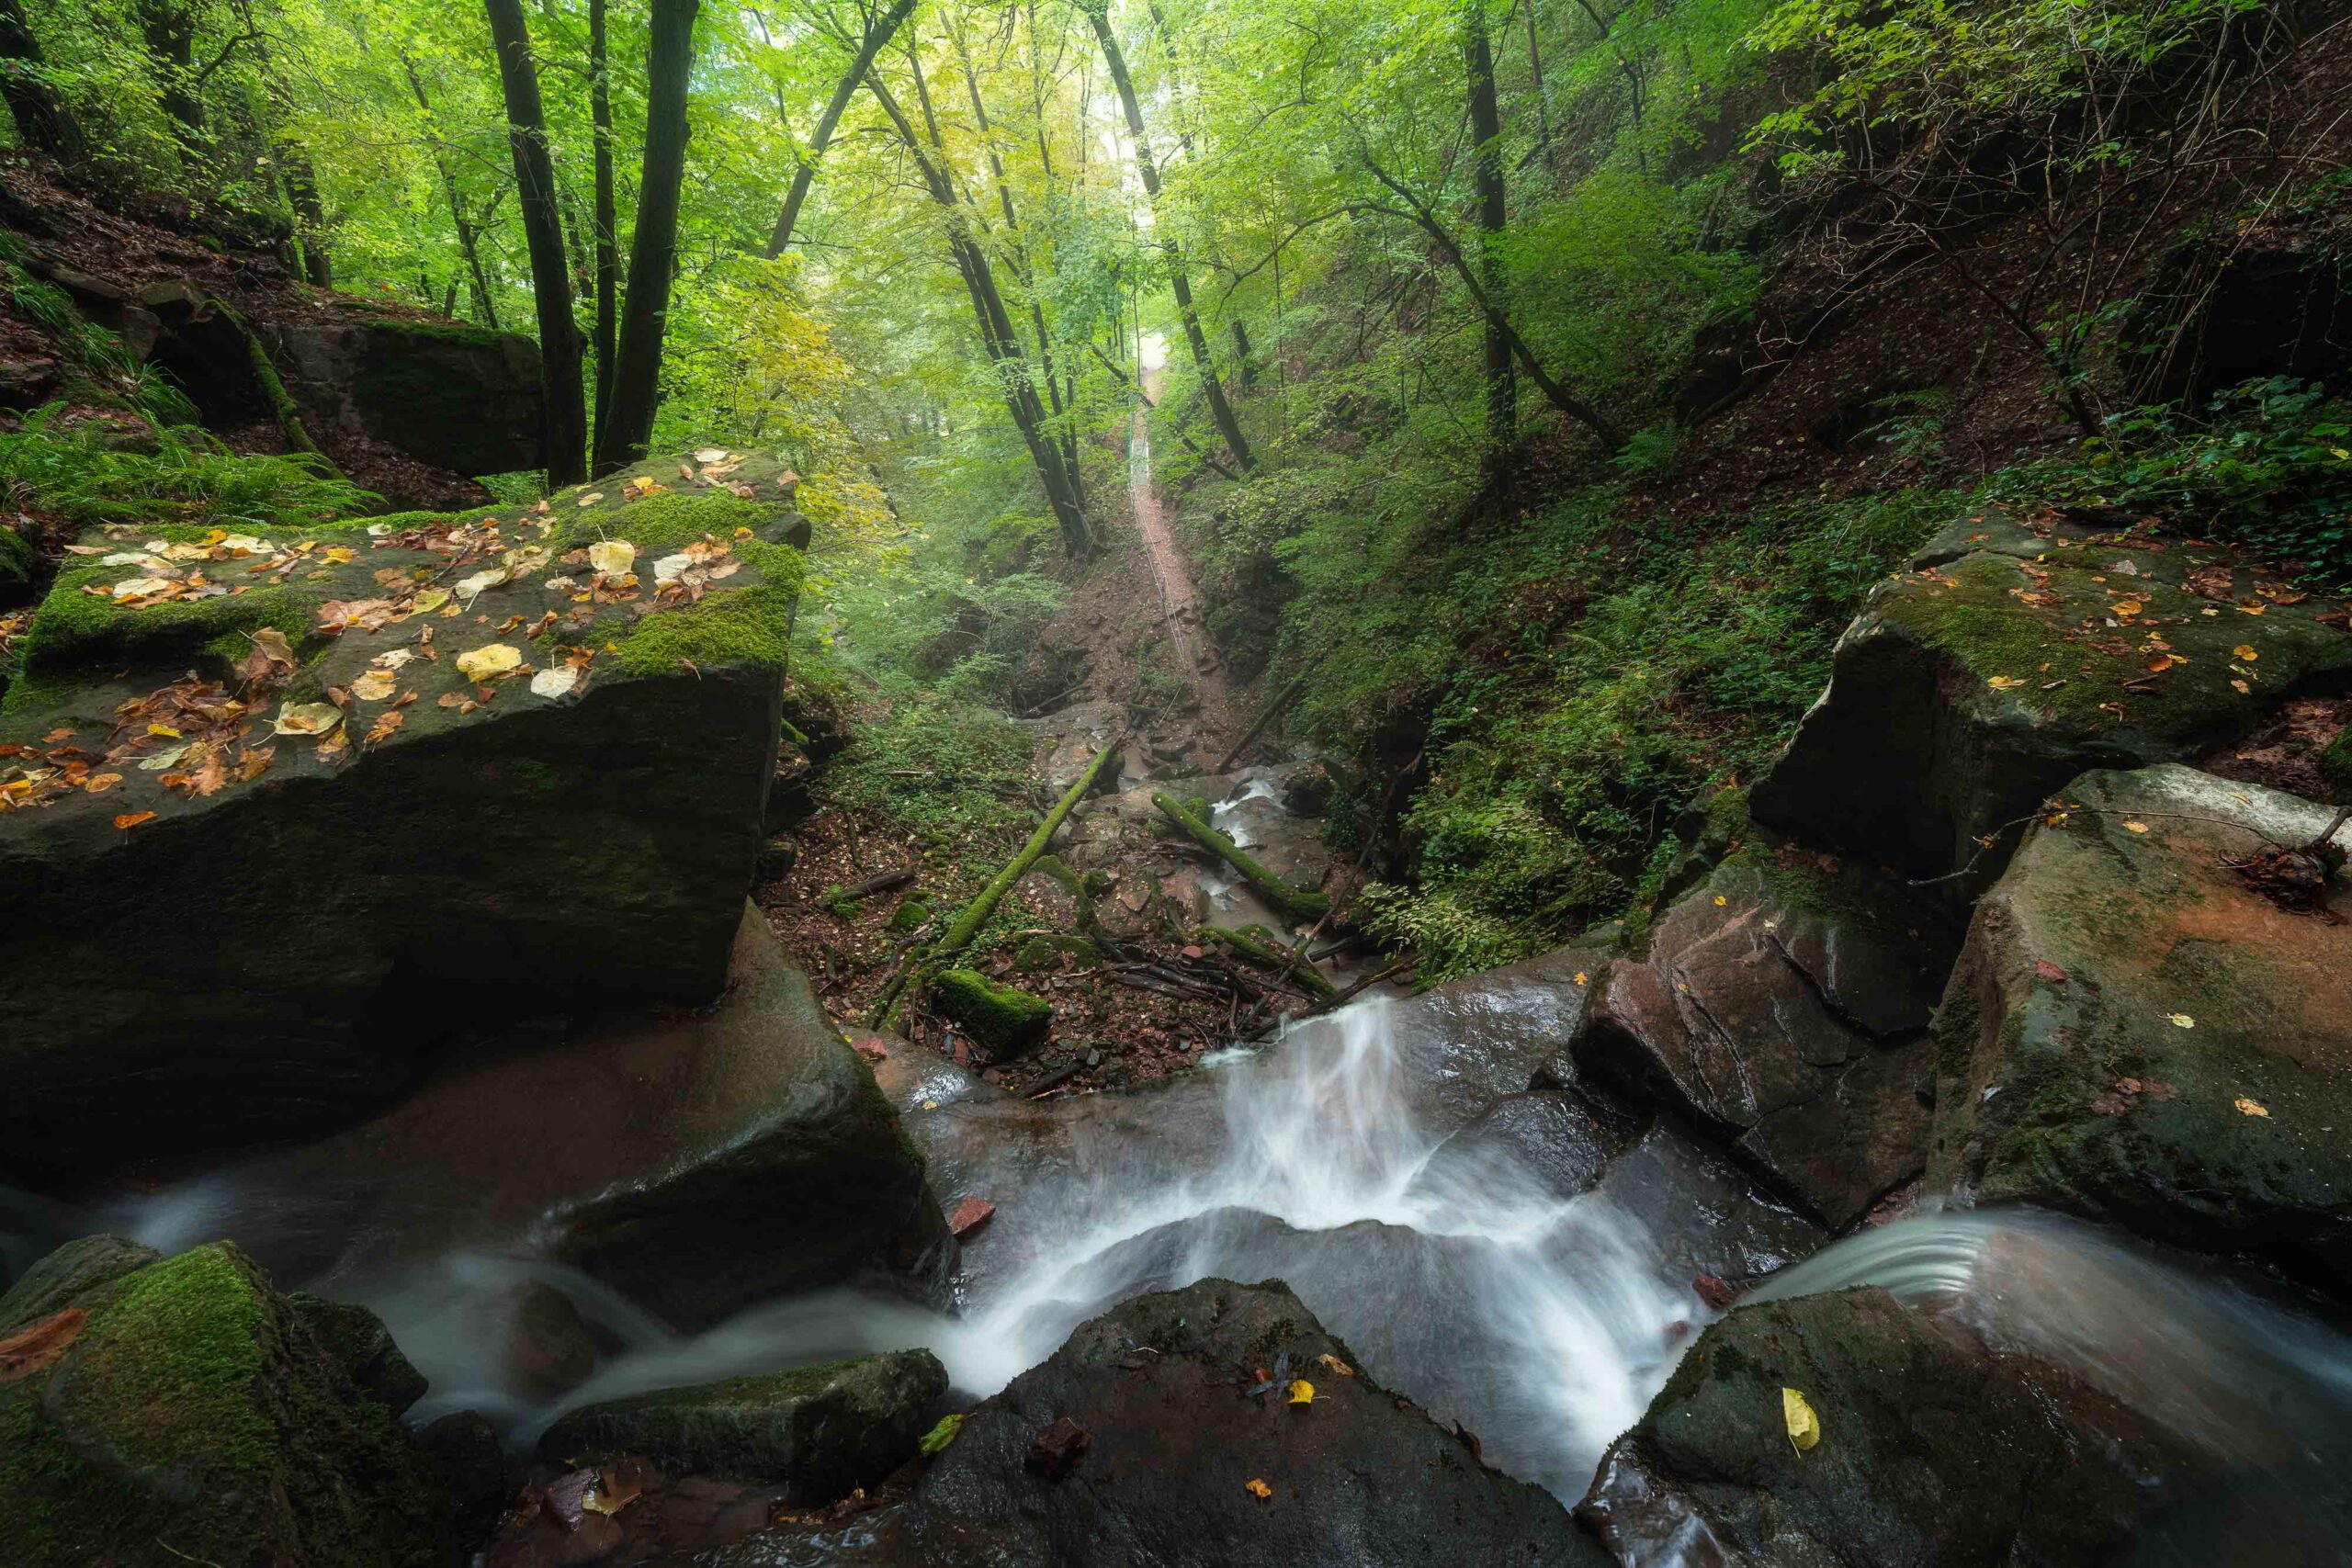
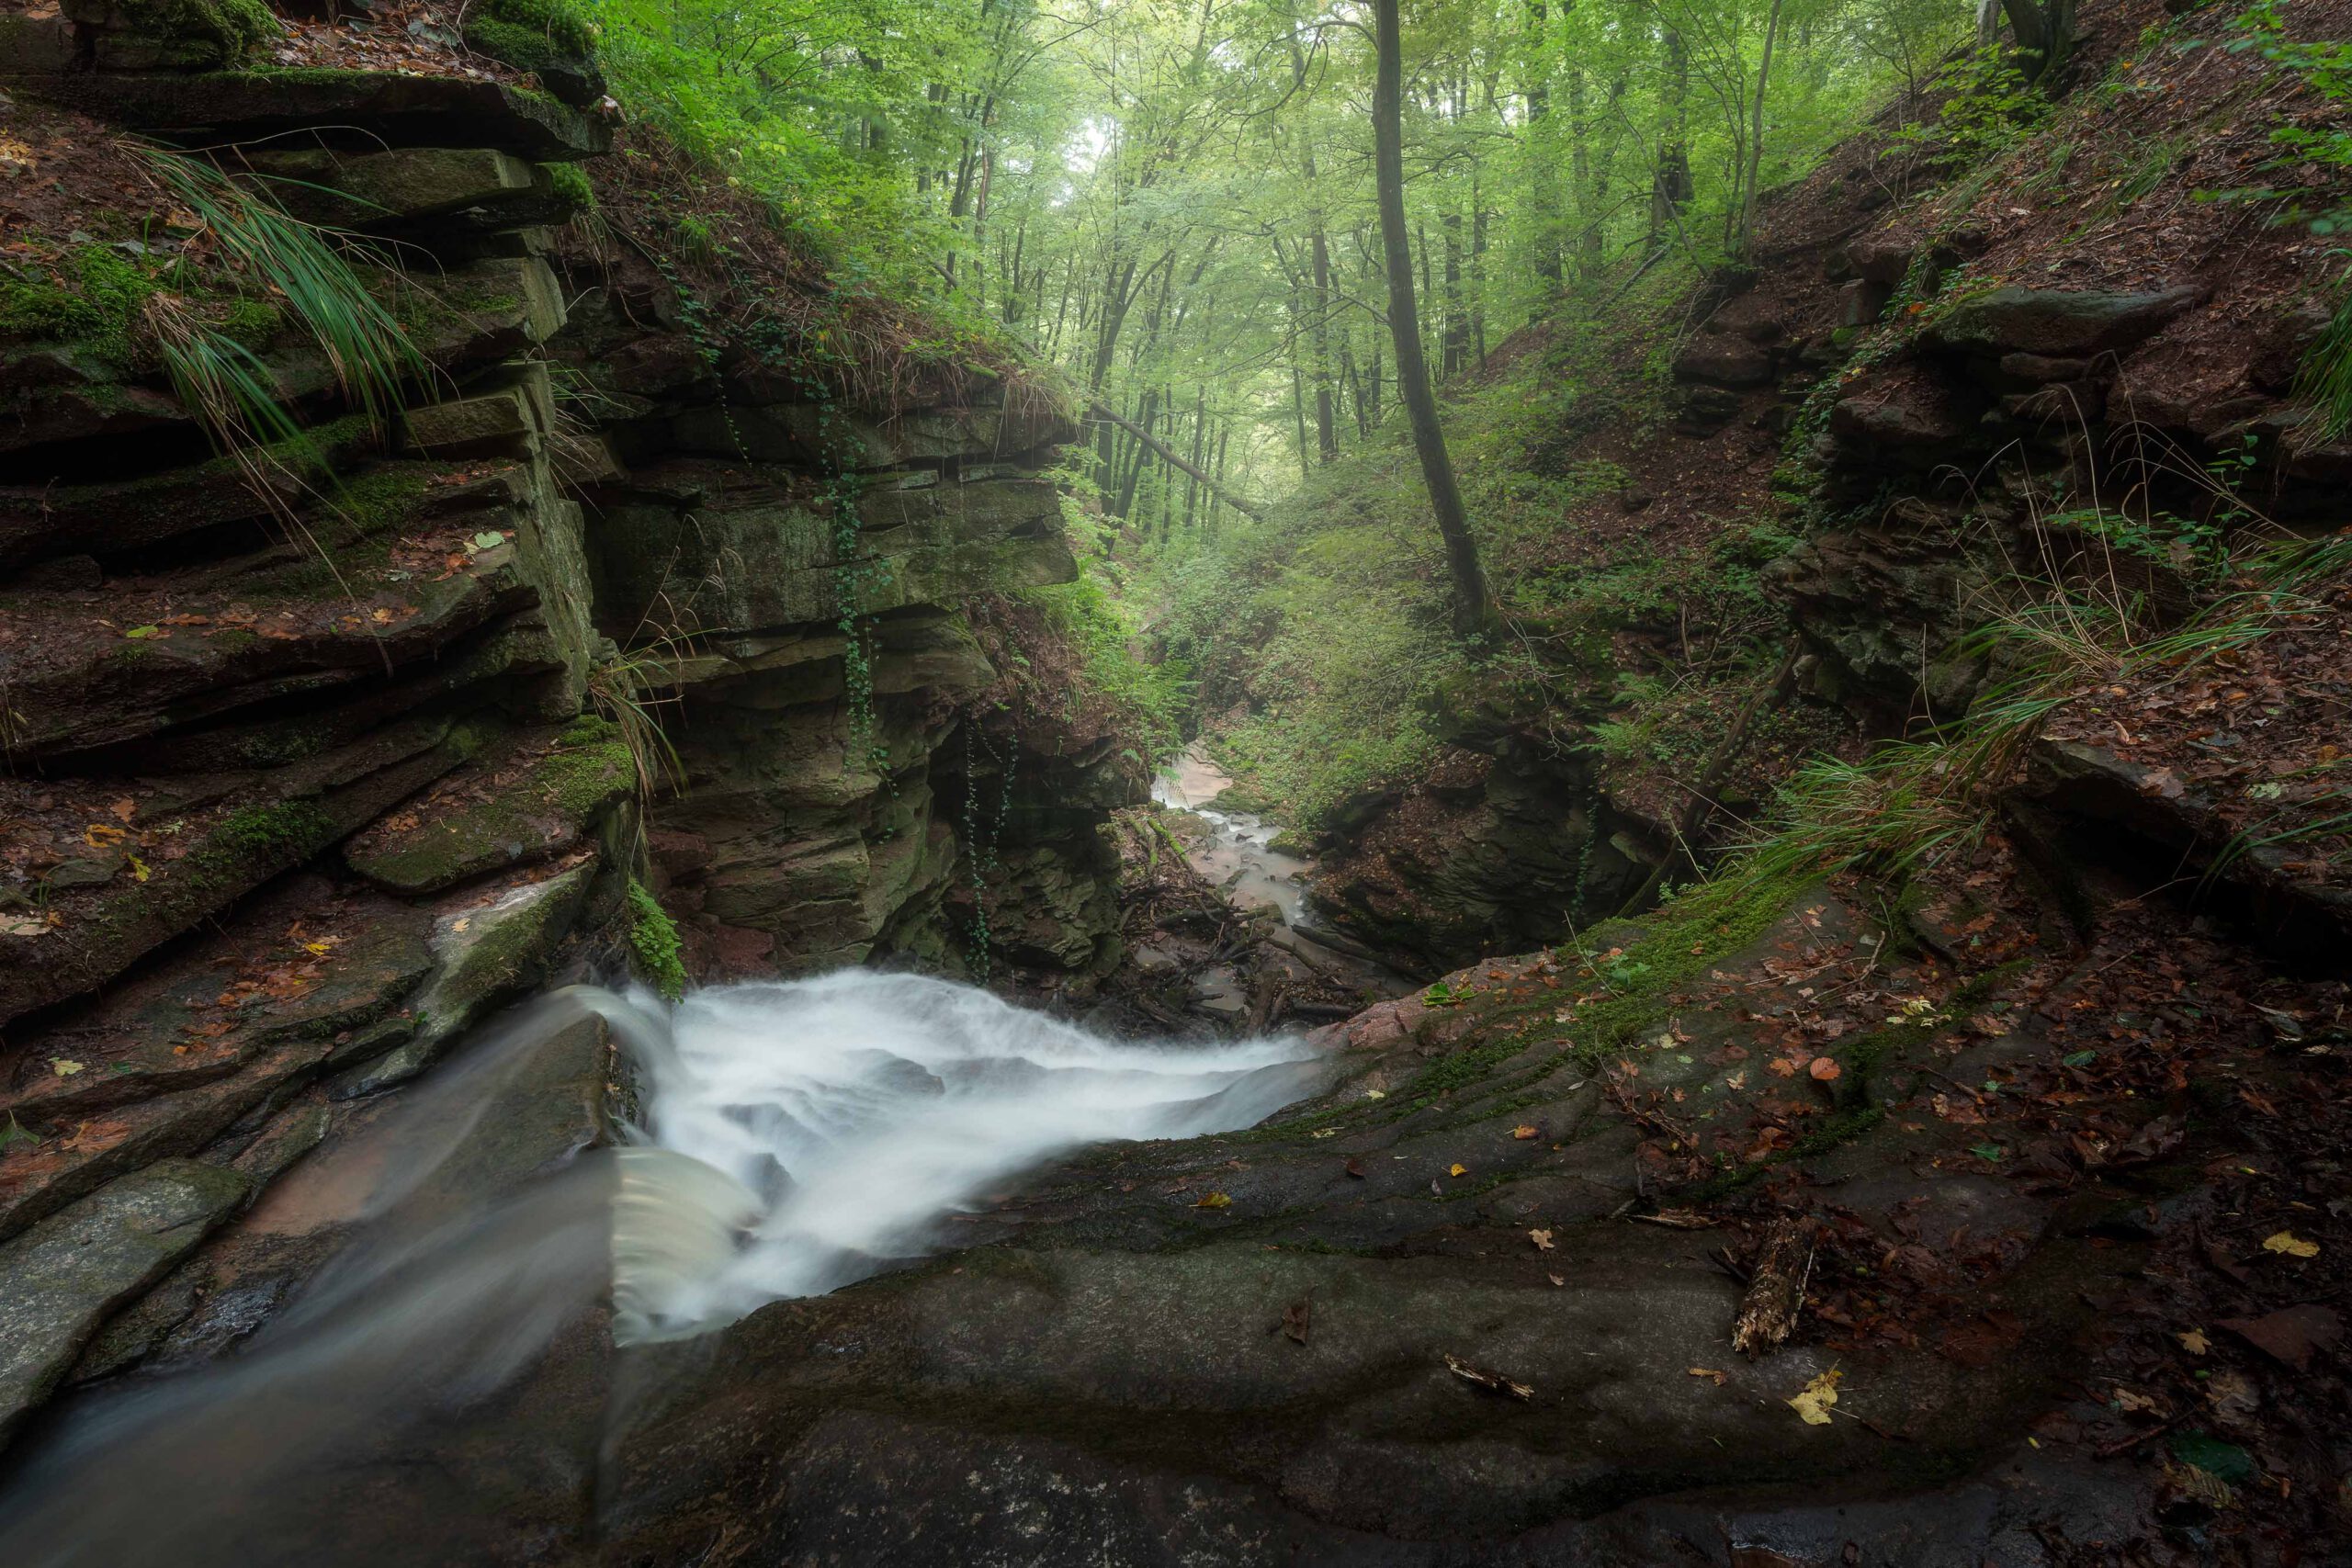
I emphasise this several times in the VLOG, and although it may sound a little amusing, I am quite serious about it. Walking through the gorge is definitely not something you should do in trainers. At the very least, you should wear light hiking boots with a good tread, because even then it can get really slippery here if it has rained in the previous days.
We recommend taking a short circular walk and climbing the gorge from bottom to top. This will allow you to warm up slowly and get into your stride before you reach the more difficult and narrow sections. Children should at least understand that some sections are dangerous and that they must be careful and stay away from the edge. Thin wire ropes as railings are not actually proper protection, but rather an indication that the path descends steeply from here. If you want to take children with you in a child carrier, there are one or two places where this is not really possible because it is very narrow and rocks overhang the path, making it impossible to carry the child carrier on your back.
Photographically speaking, rainy weather is perfect, but it does make hiking more difficult. Before visiting, consider whether slippery and difficult terrain would be a problem for you.
You can see what a wonderful and interesting gorge is hidden here in the Odenwald from my pictures. Popular with many hikers, but known to only a few photographers as a real gem for landscape photography. I am really happy that I was able to photograph it extensively. A lot of time went into this gallery, so I would be delighted if you would appreciate it accordingly. Feel free to write to me if you like the pictures. Or better still, sign up for my newsletter below to find out a little more about this place.
All good things come in threes. That was certainly the case here. On my third attempt to photograph this gorge, I finally succeeded. On my first attempt a few years ago, I was unhappy with the pictures I took. Too many visitors interfered with my ability to freely ‘compose’ the pictures, and there wasn’t a single picture that really convinced me. On my second attempt, I hesitated too long and the gorge was ‘empty’. No water was rushing down the rocks. But on my third attempt, well… see for yourself!
Feel free to share:
6 Responses
hallo,
tolles Video zu deinem Odenwald Wasserfall. verrätst Du mir die Location..würde mich dehr freuen
LG Gerald
Hi Gerald,
habe dir eine persönliche E‑Mail geschrieben!
Viele Grüße,
Simon
Sehr gelungene Aufnahmen. Ist die Location in der Margaretenschlucht.
Hi Arsène,
habe dir eine persönliche E‑Mail geschrieben!
Viele Grüße,
Simon
Hi Simon,
bin ebenfalls leidenschaftlicher Fotograf und würde mir gerne eines Tages diese Location anschauen. Würdest Du sie mir verraten? Bin heute Morgen zufällig auf Deinen Kanal gestoßen und finde Deine Fotos beeindruckend schön!
Beste Grüße,
Eddie
Hi Eddie,
danke für deinen Kommentar, ich habe dir eine E‑Mail geschickt.
Viele Grüße,
Simon