You can see the VLOG to the BLOG at the bottom of the page or you can reach it via this button:
Gear:
Sony a7IV
Sony FE 2.8/16–35 mm GM
Sony FE 4/24–105 mm G
I’m standing at home, son in my arms, daughter by the hand, and I look at my wife with a slightly pleading look: ‘I’ll go shopping straight afterwards so that’s done!’. She looks at me, hesitates and then says: ‘All right, then just go…’. In no time at all, I packed my photo equipment, put on my old shoes and outdoor trousers, grabbed my jacket and off I went. ‘Thank you!’ I said and I was off.
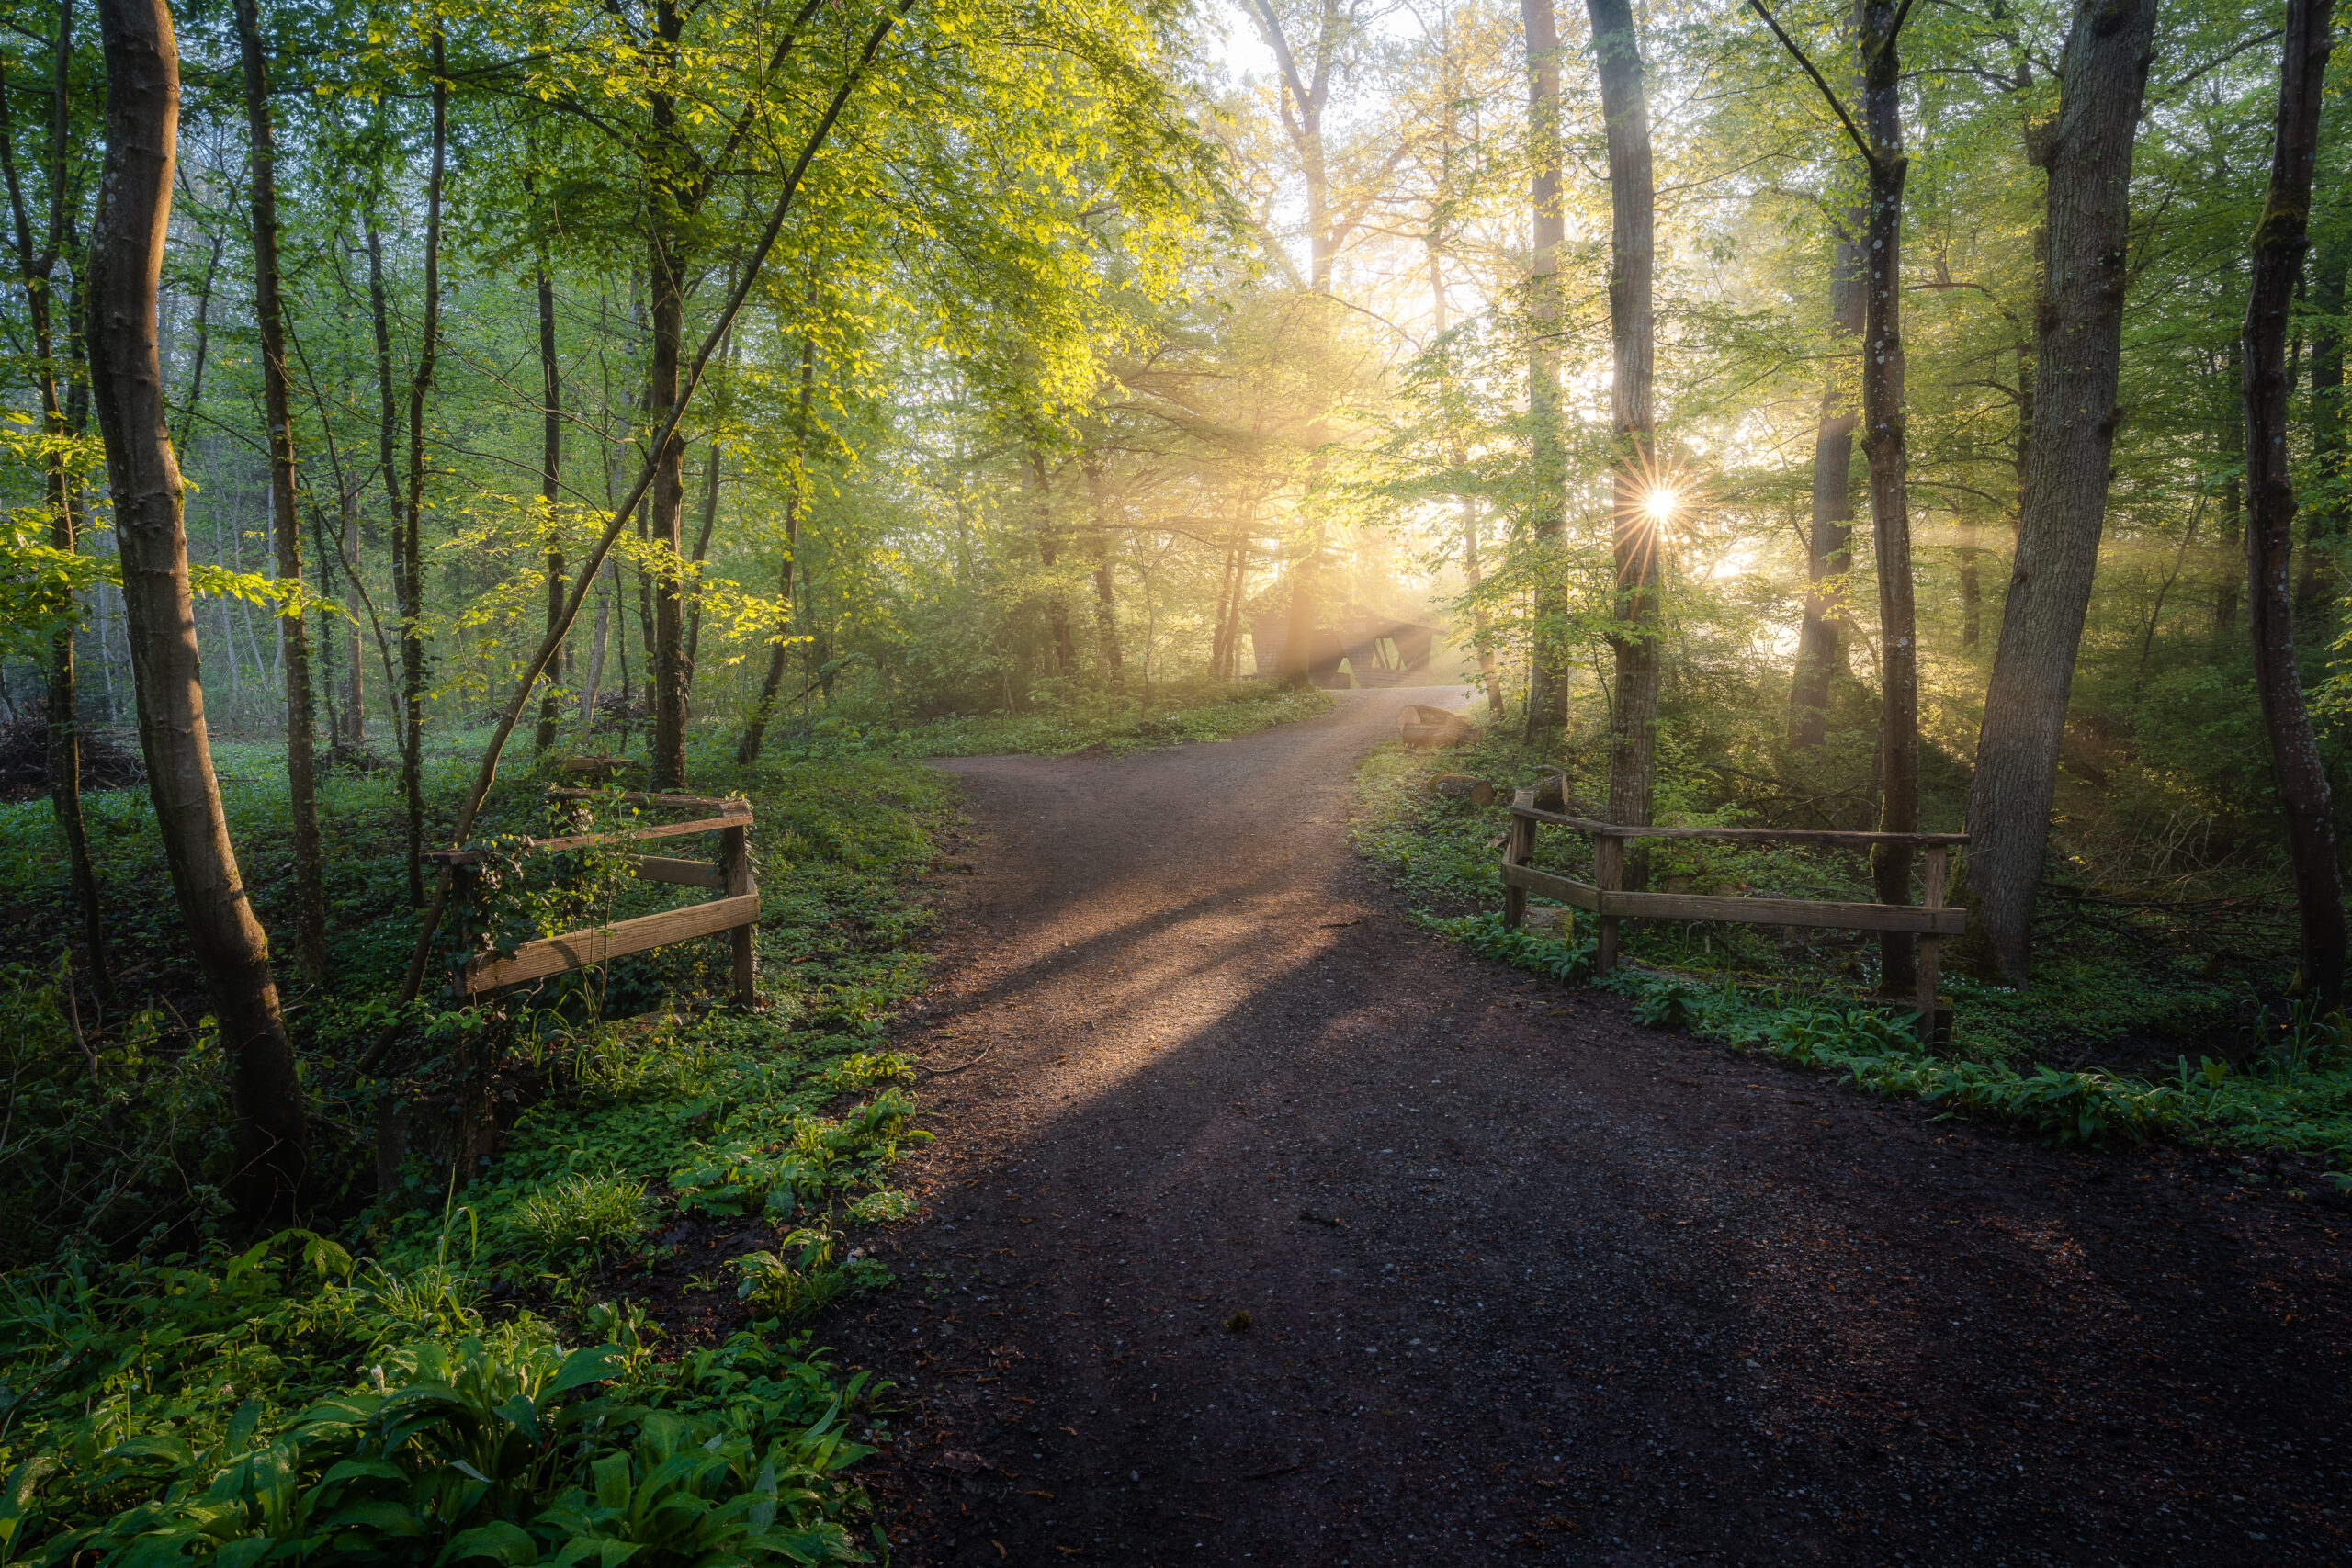
I knew the conditions could be perfect and when I looked out of the window early in the morning, it was confirmed. But I also know that it’s not always a given that you can take advantage of perfect conditions with all your family and work commitments. My employer allows a certain degree of flexibility, which I sometimes utilise and therefore greatly appreciate. Not my children. If it wasn’t for my wife, who always gives me these spontaneous concessions and allows me to photograph in ideal conditions. I am infinitely grateful for that!
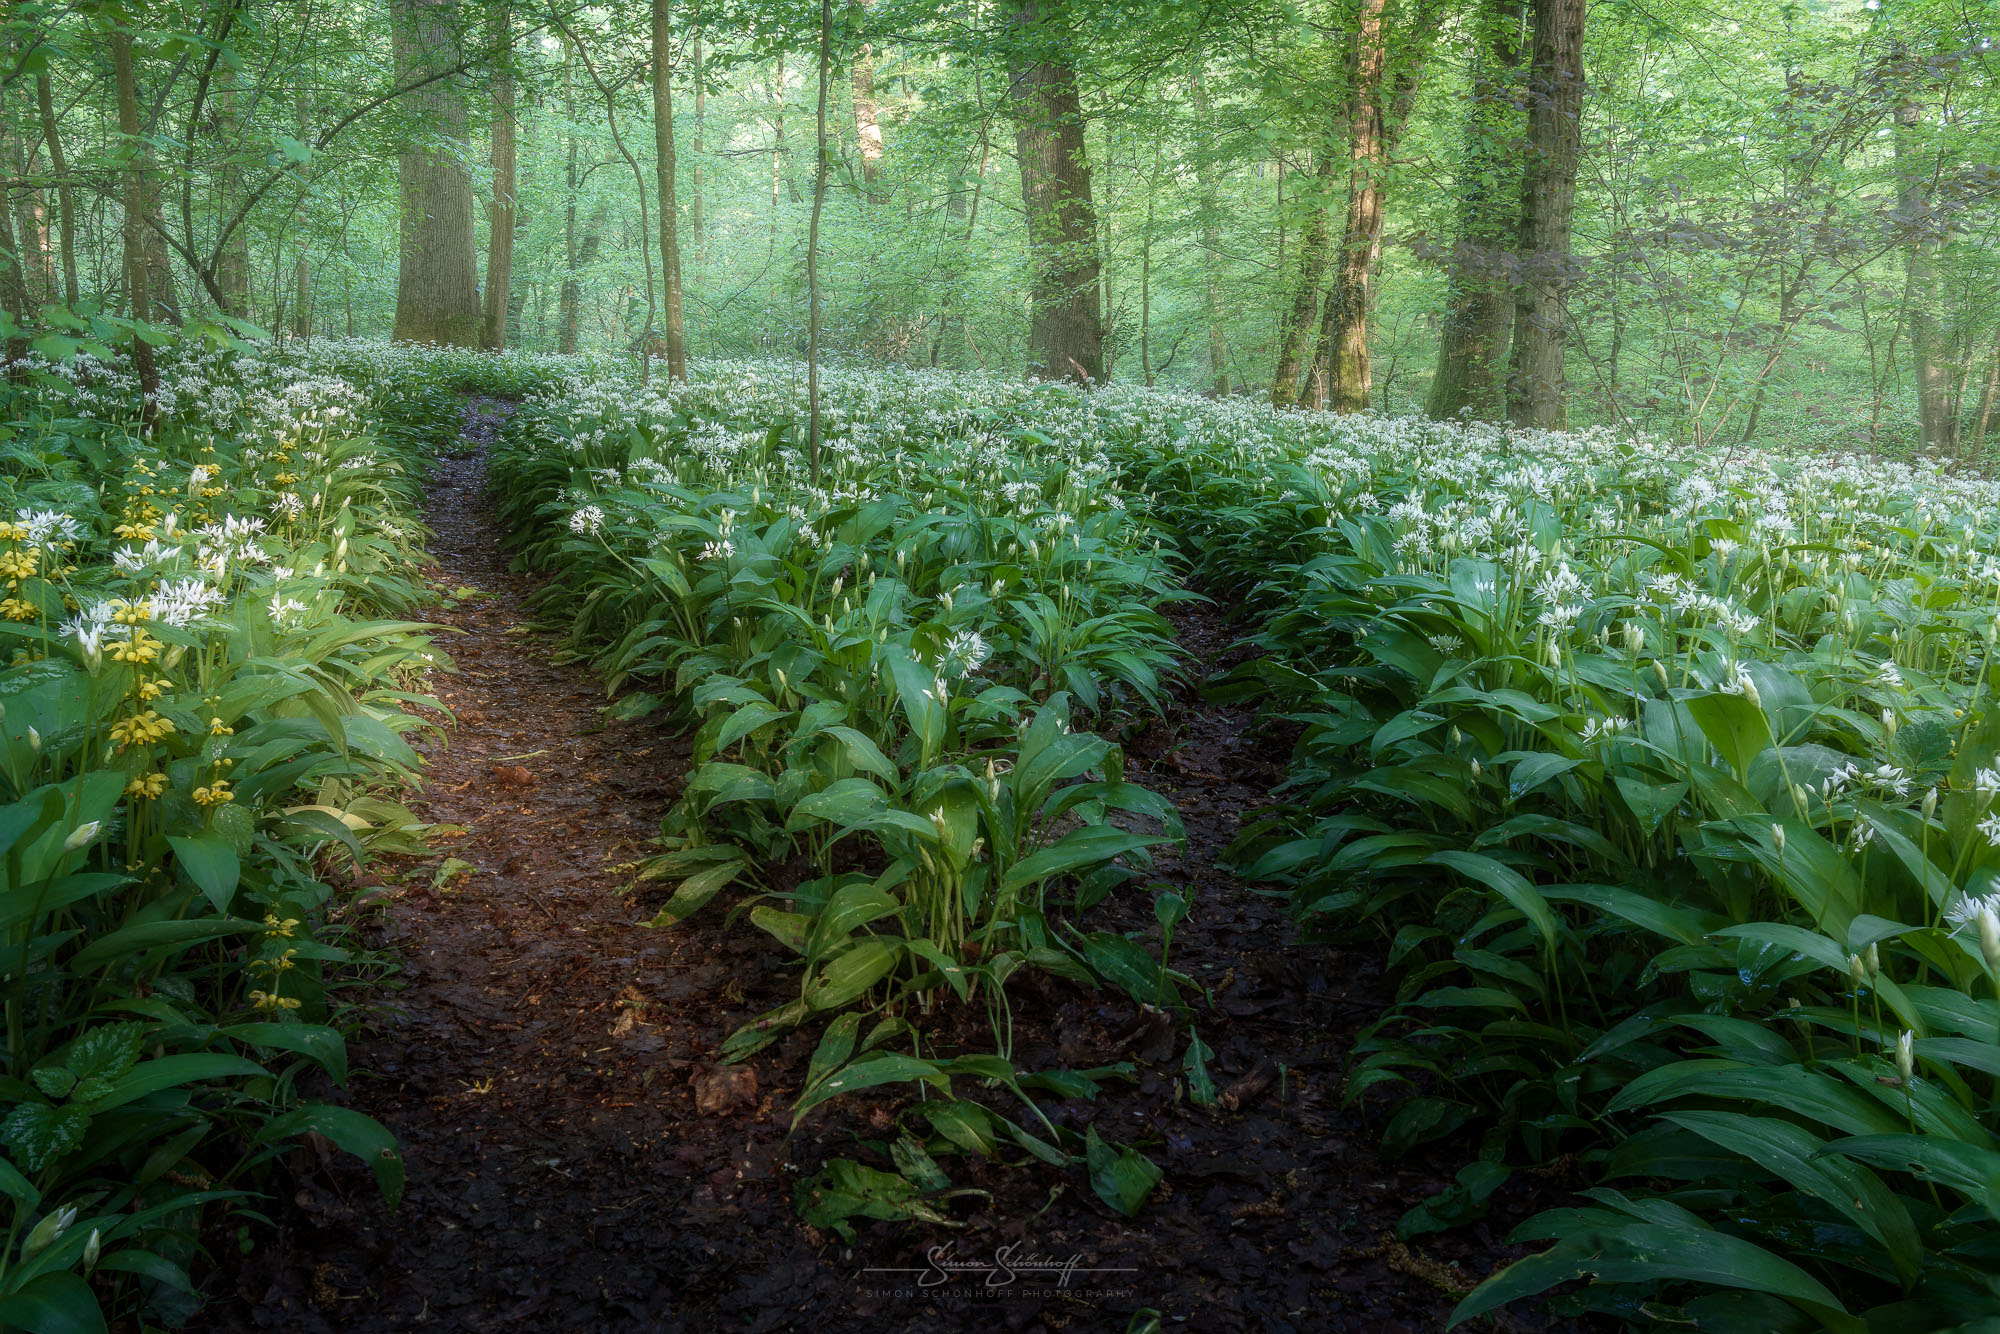
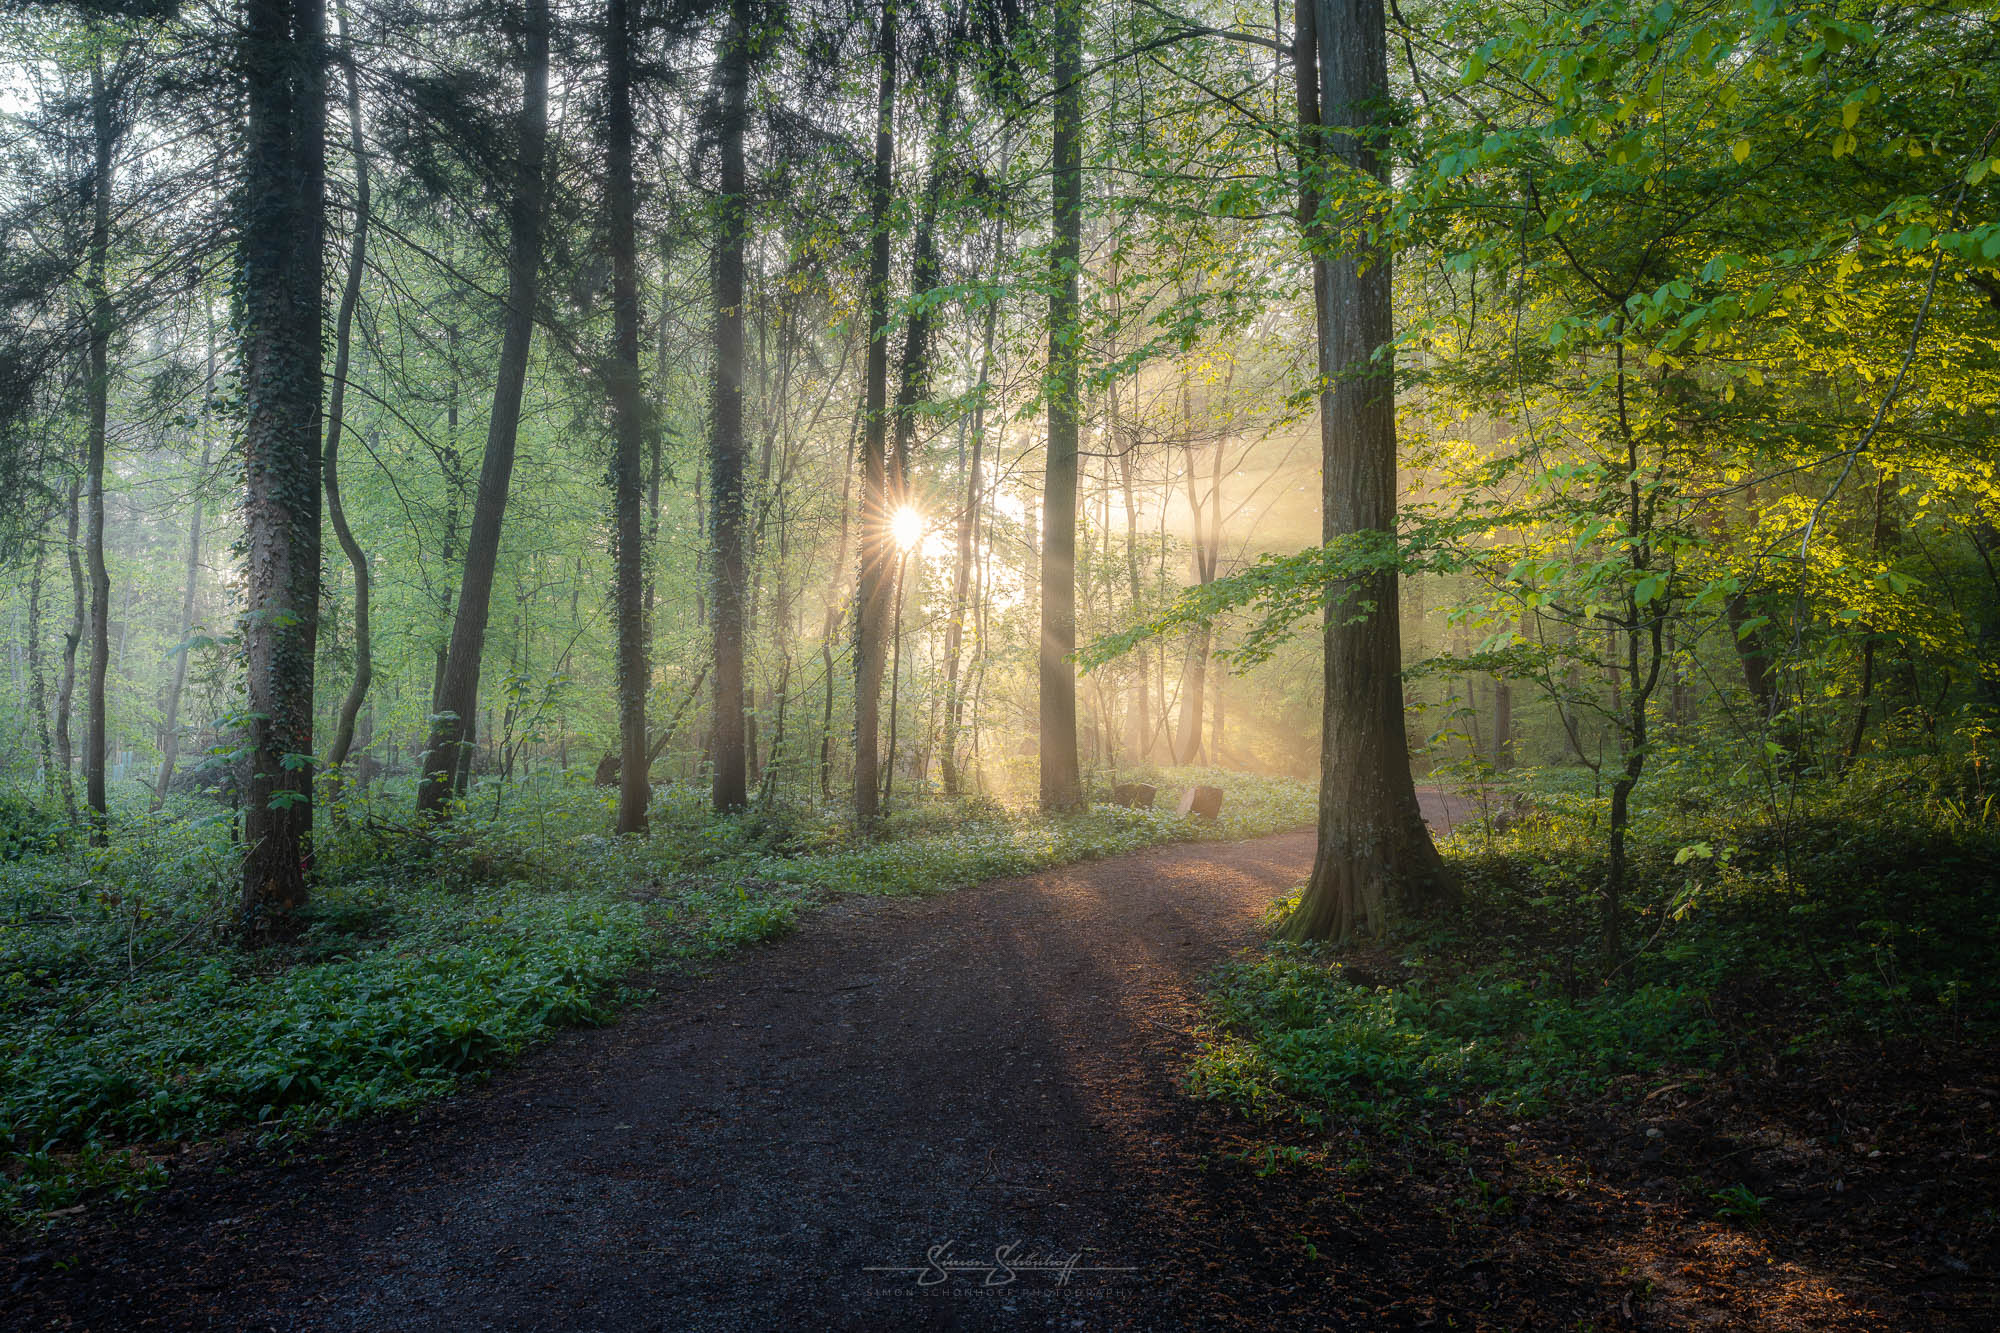
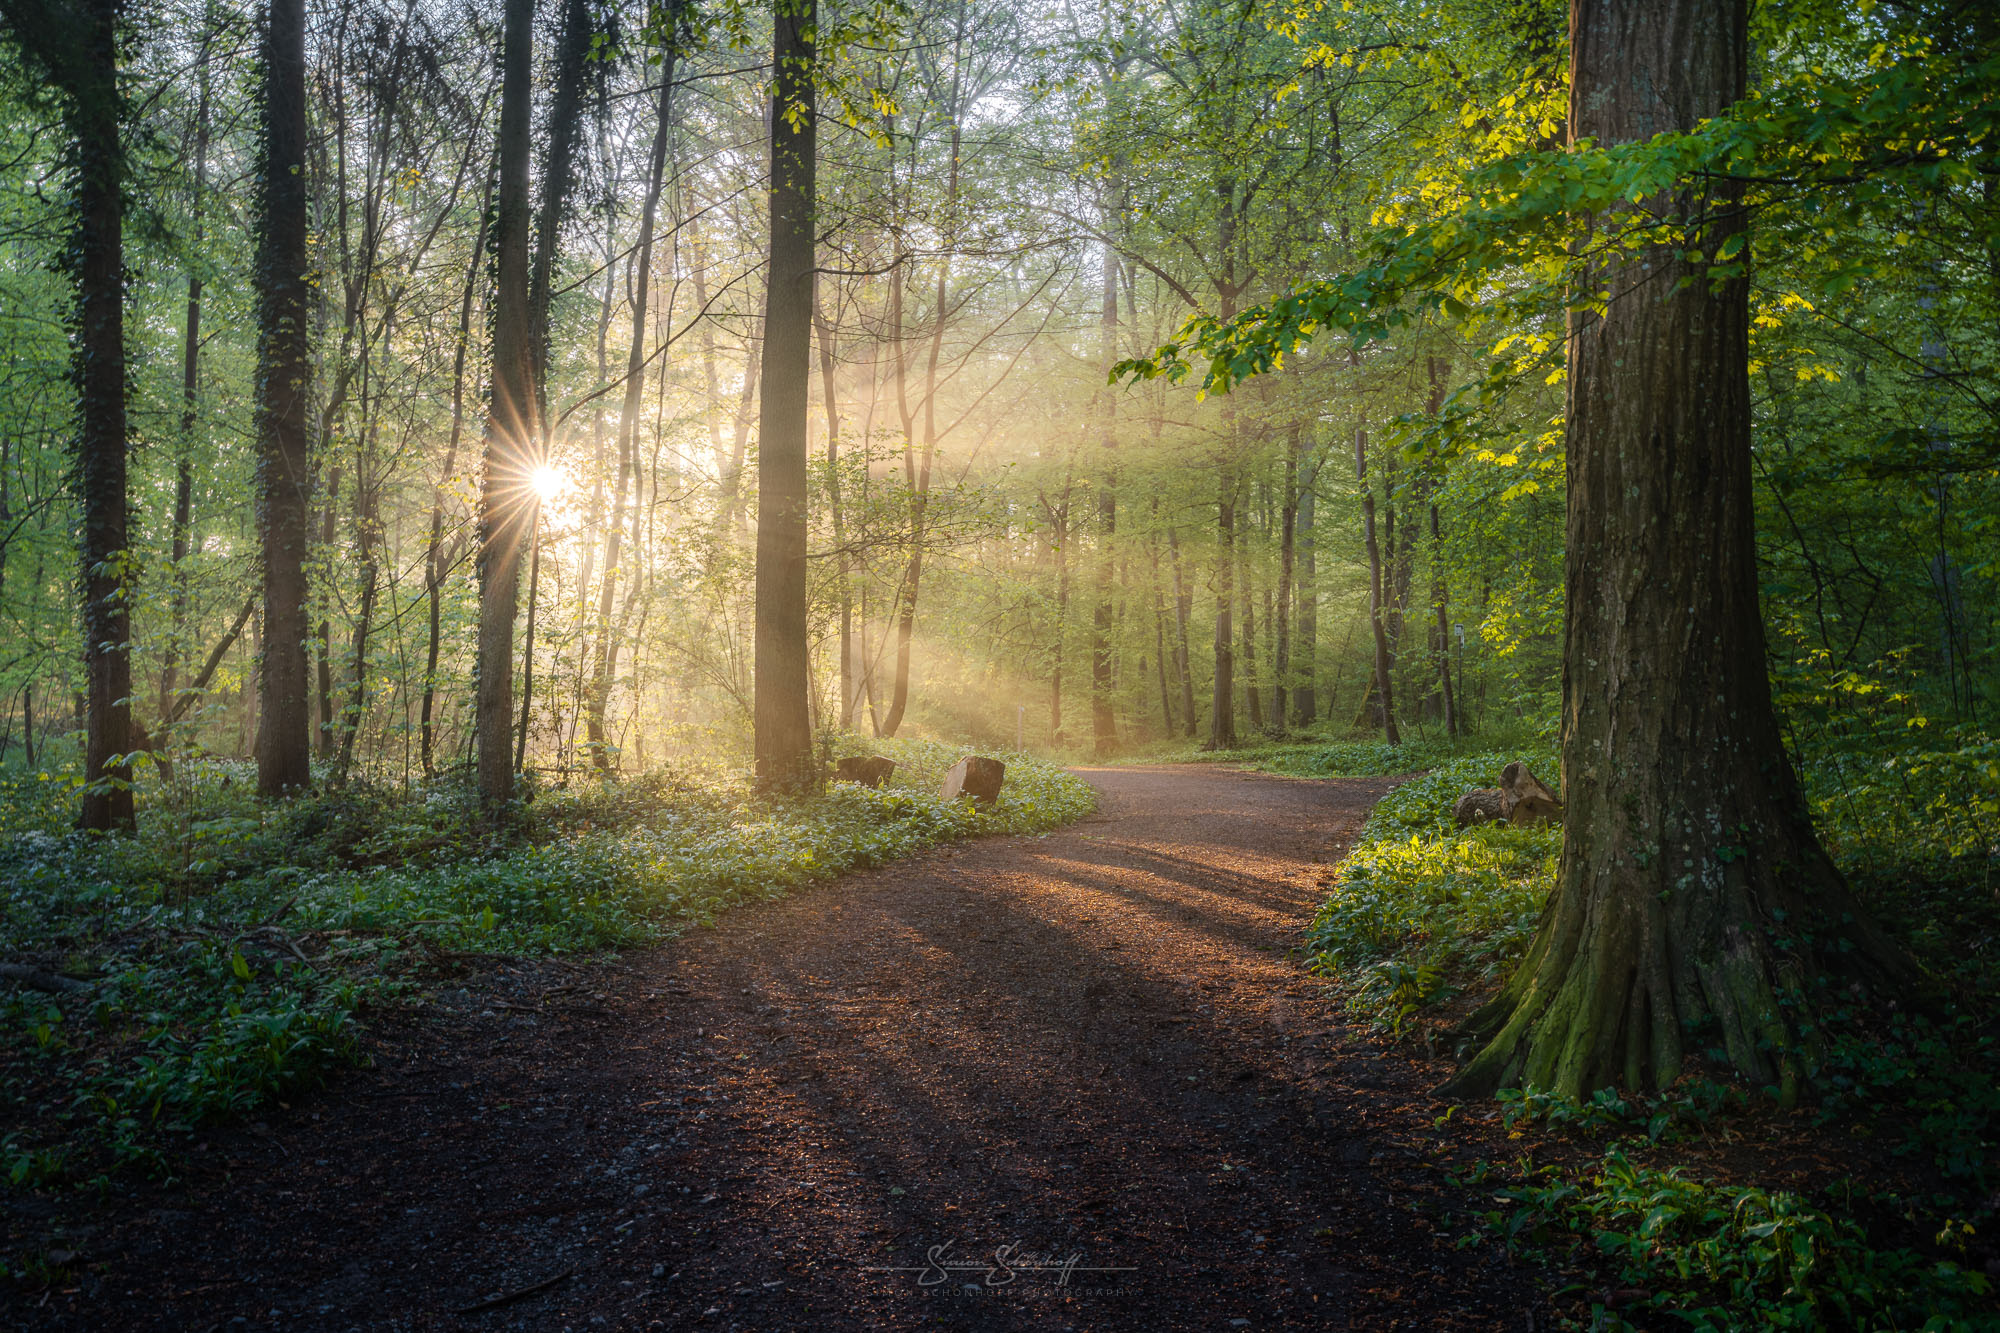
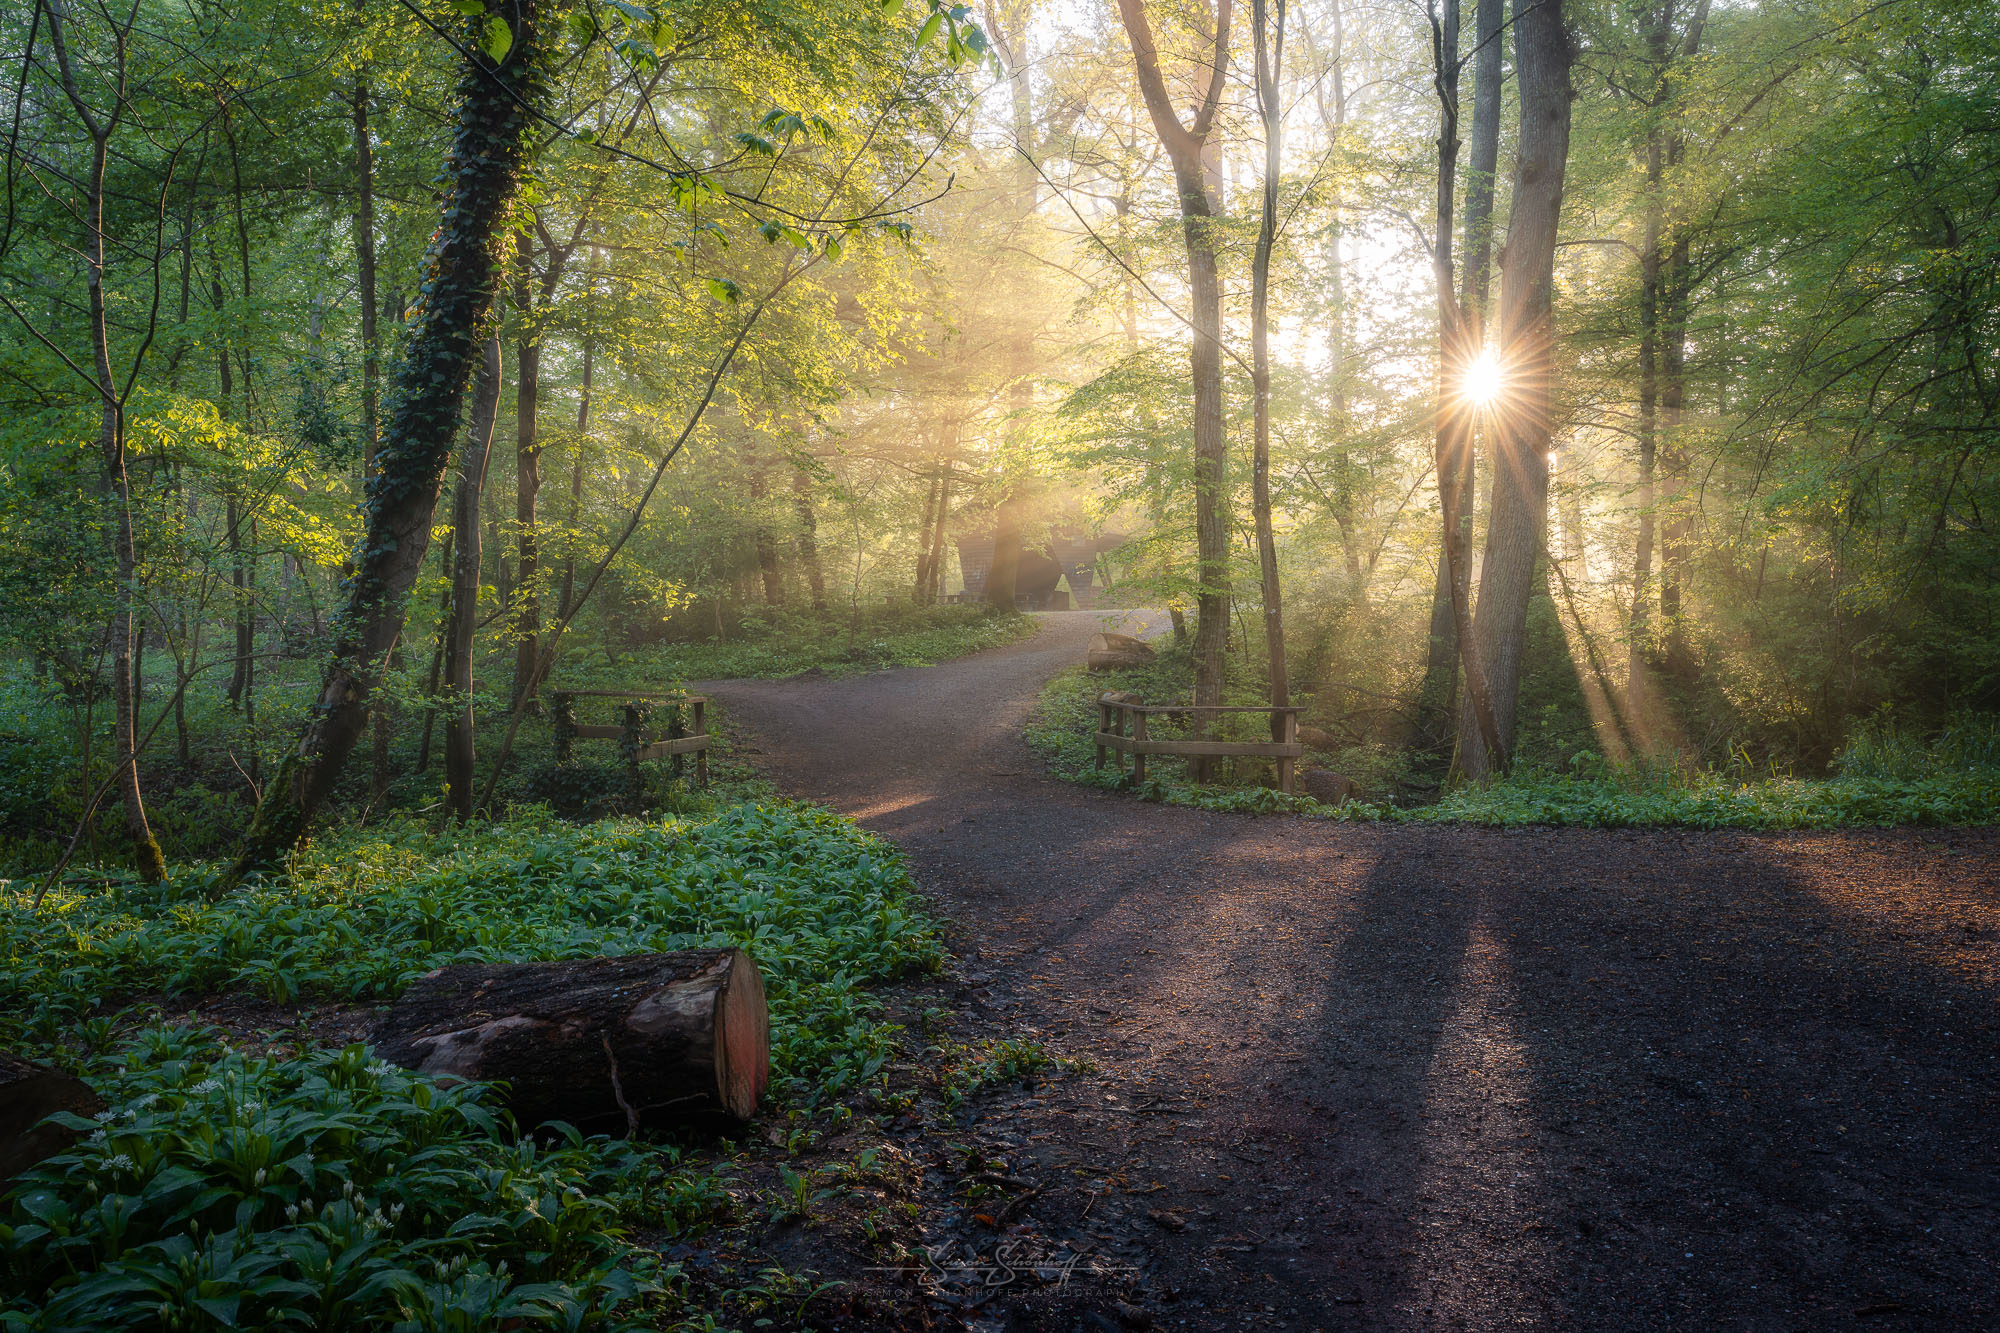
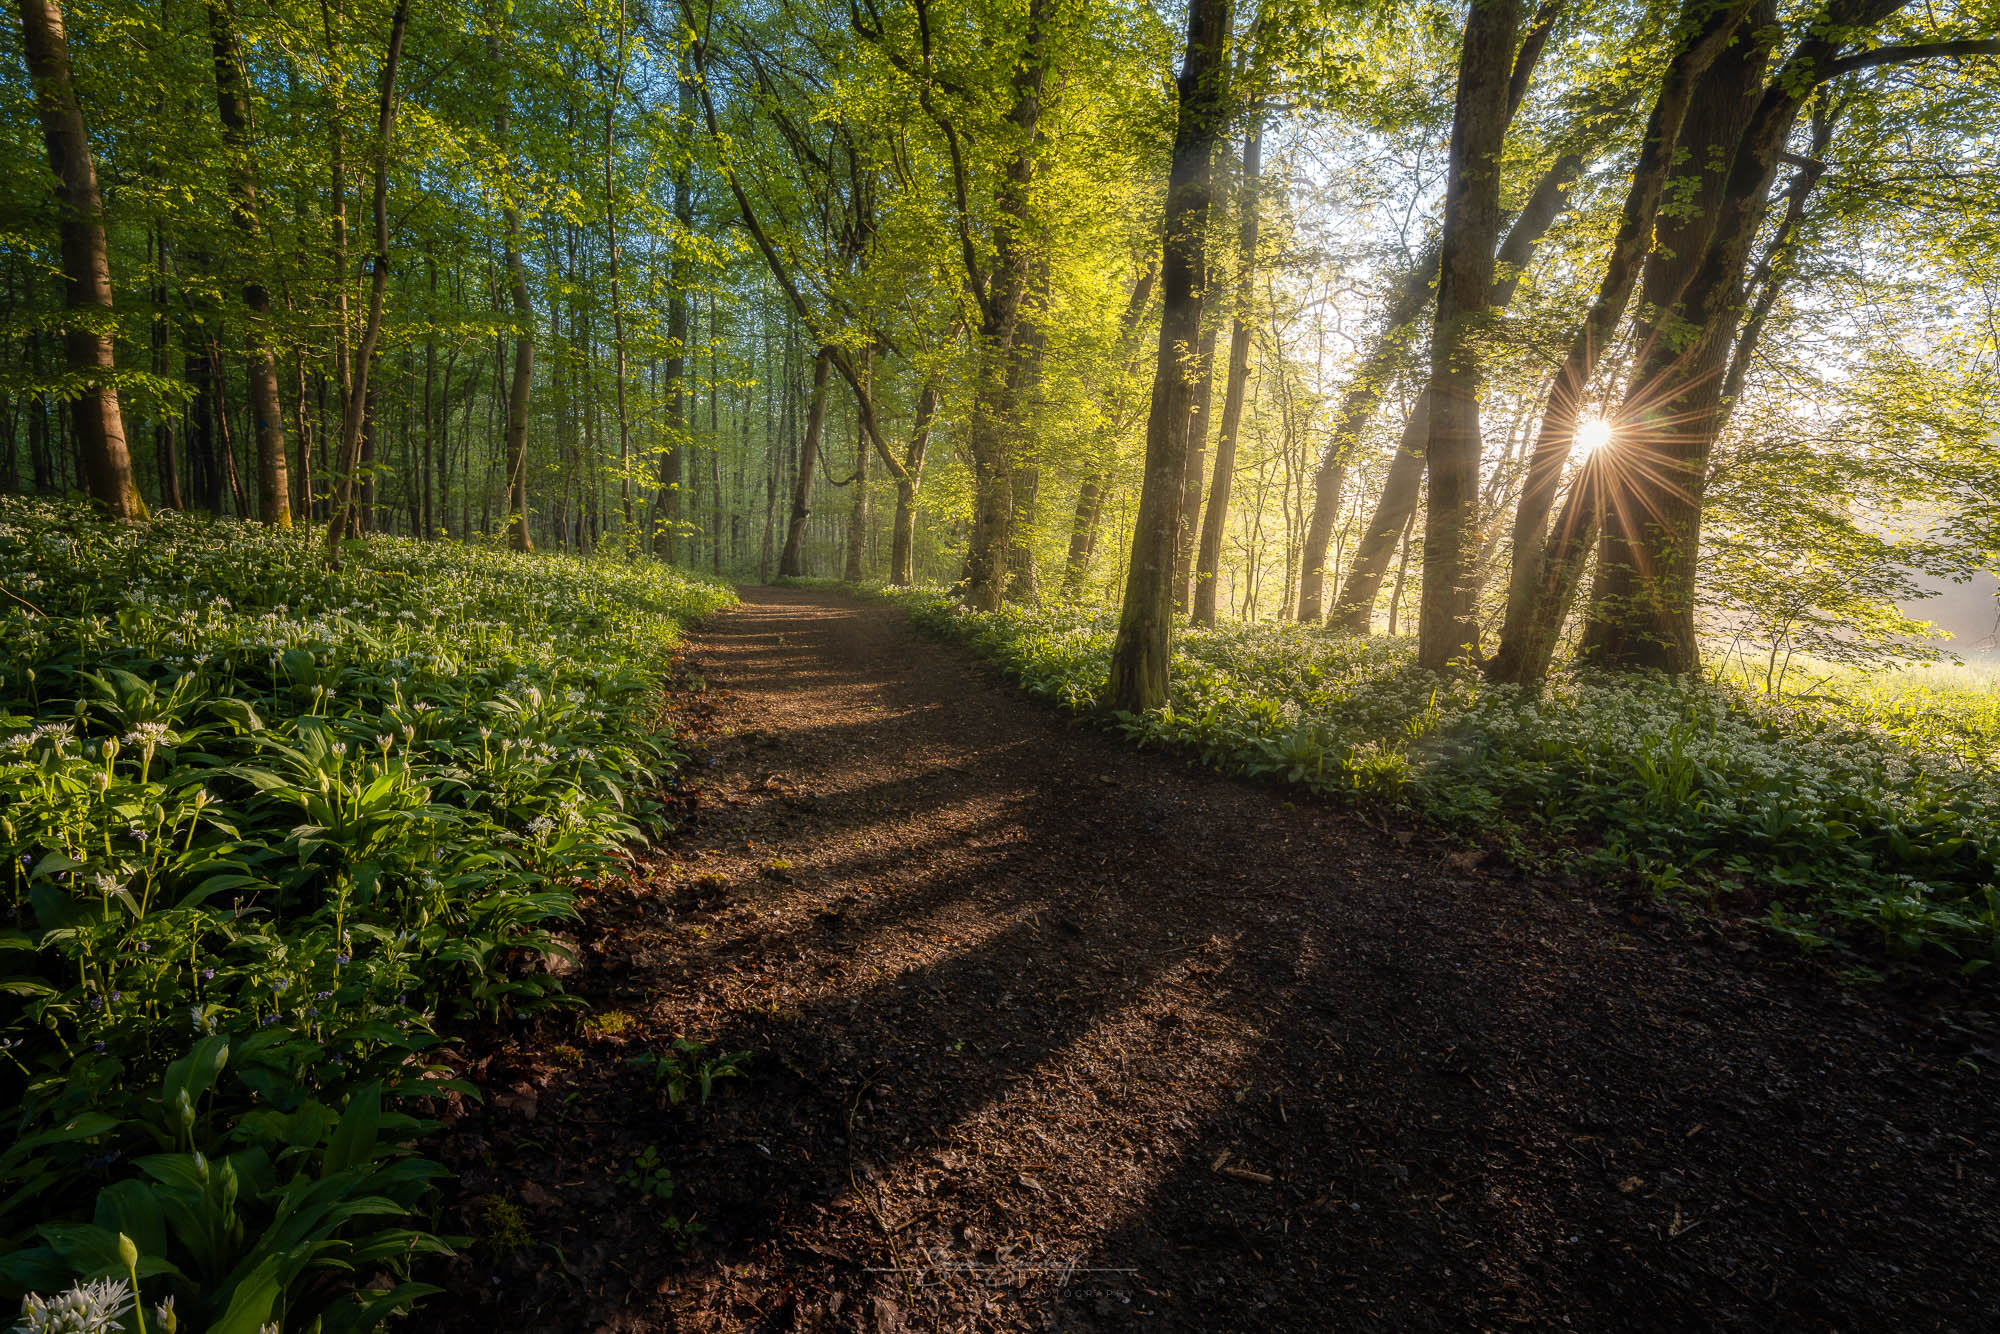
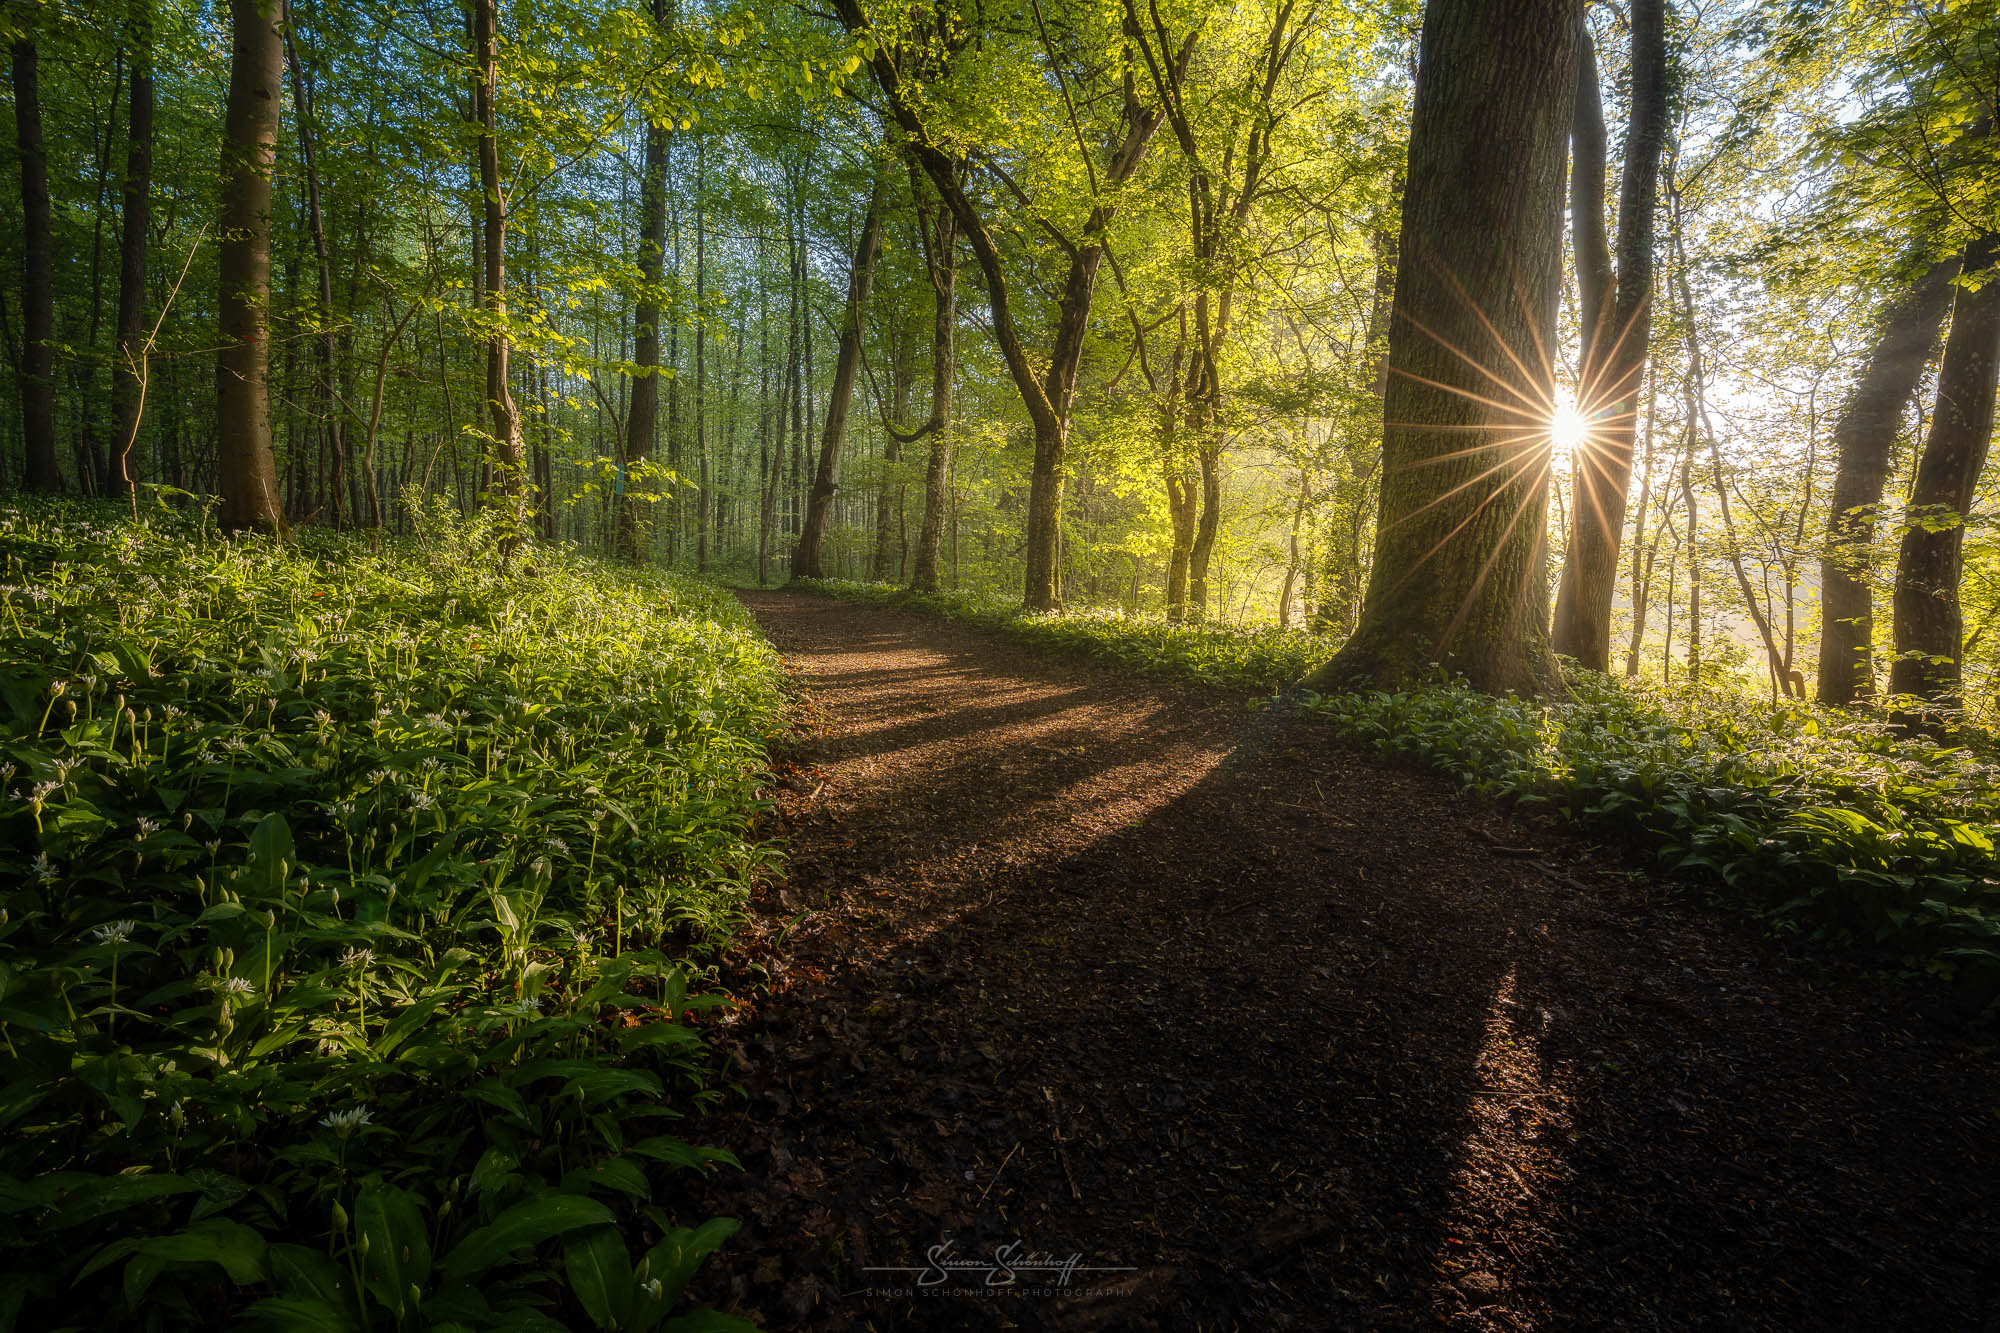
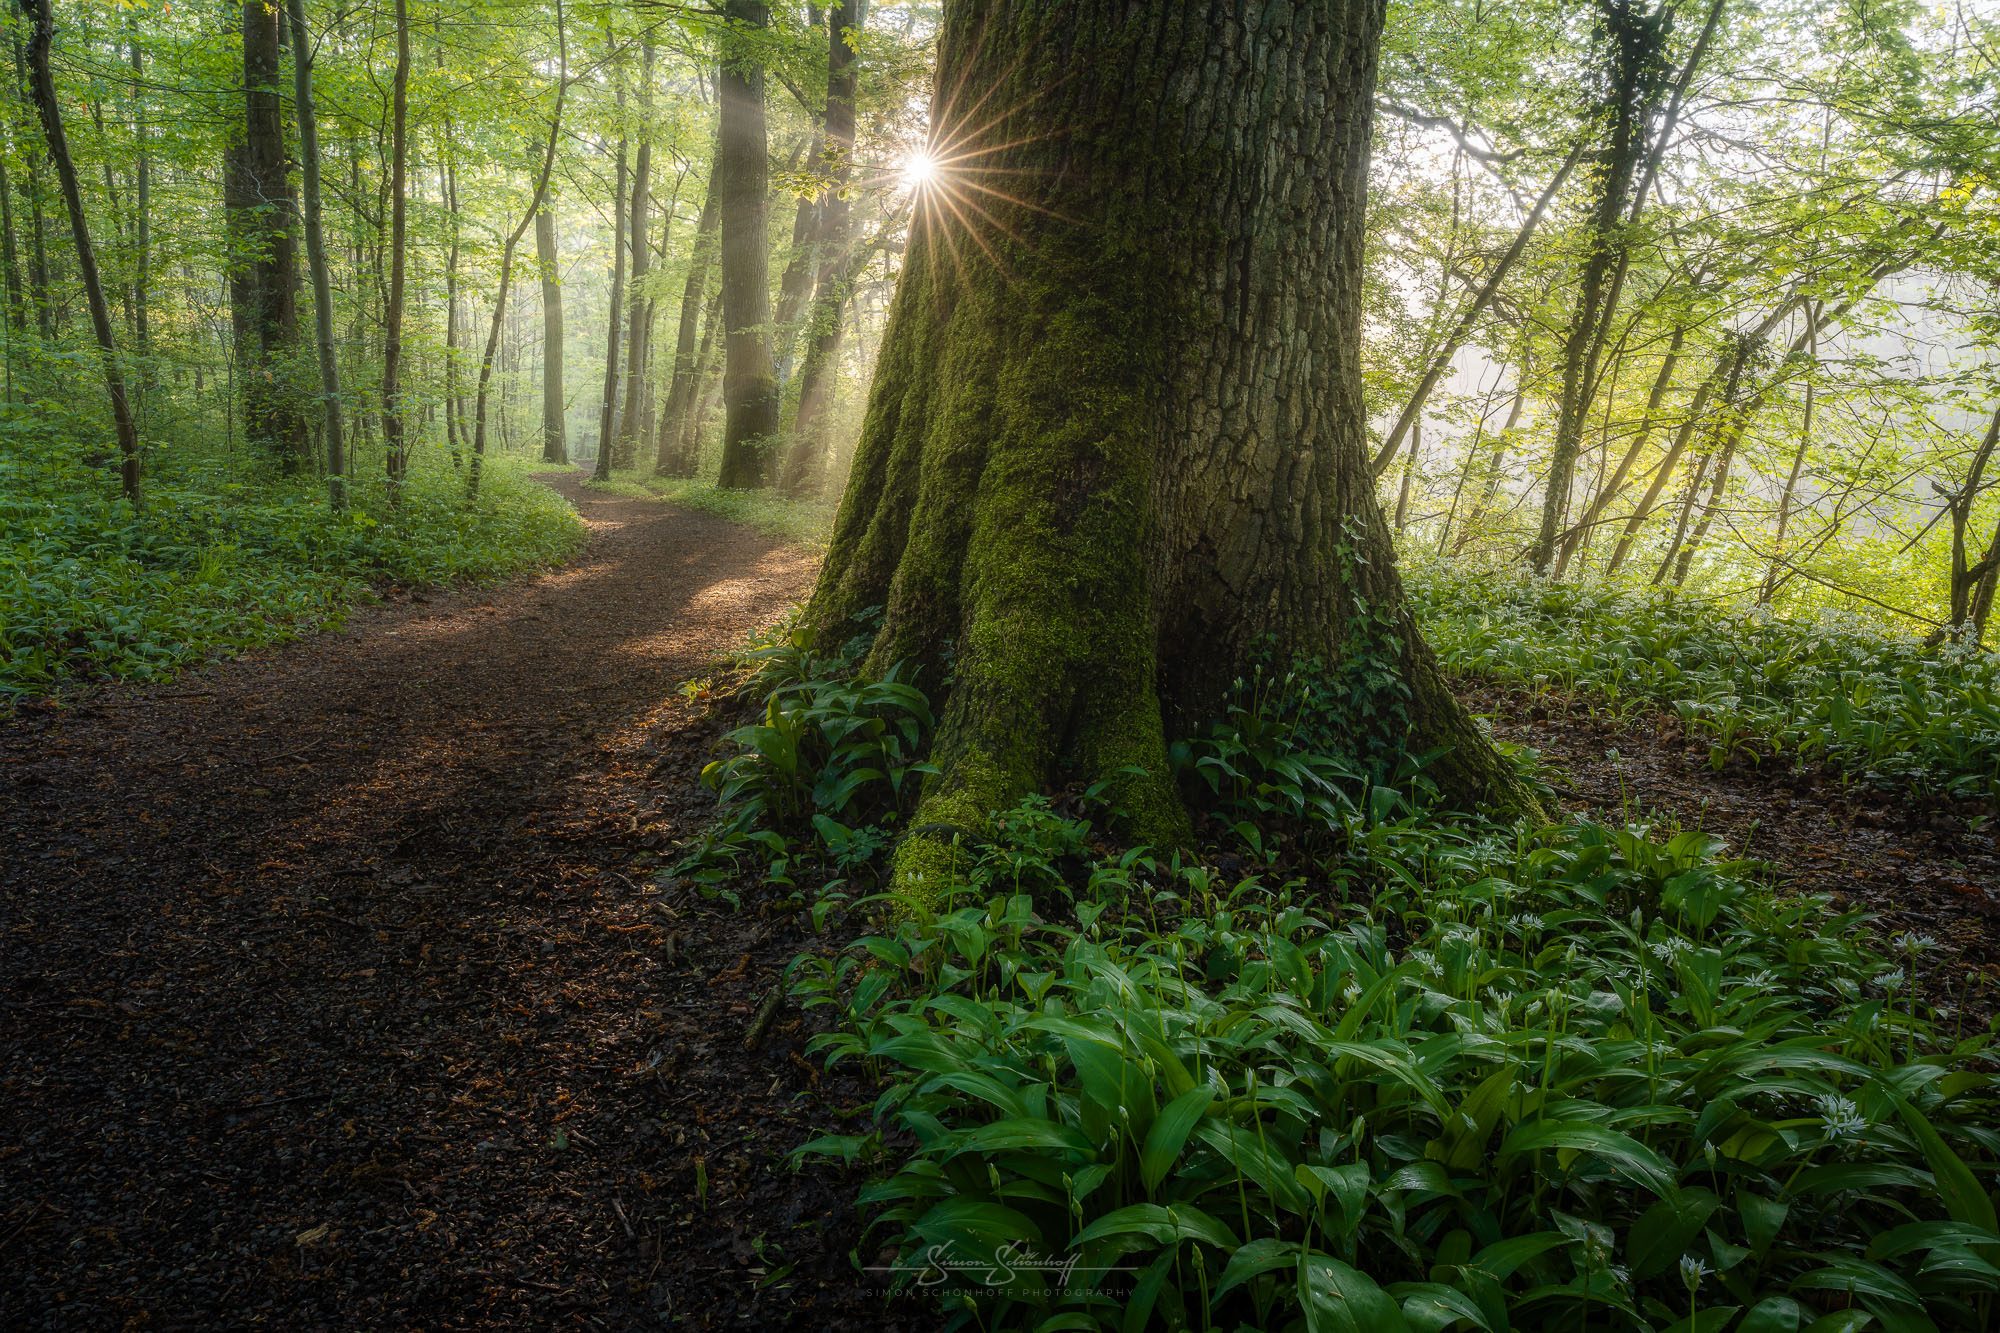
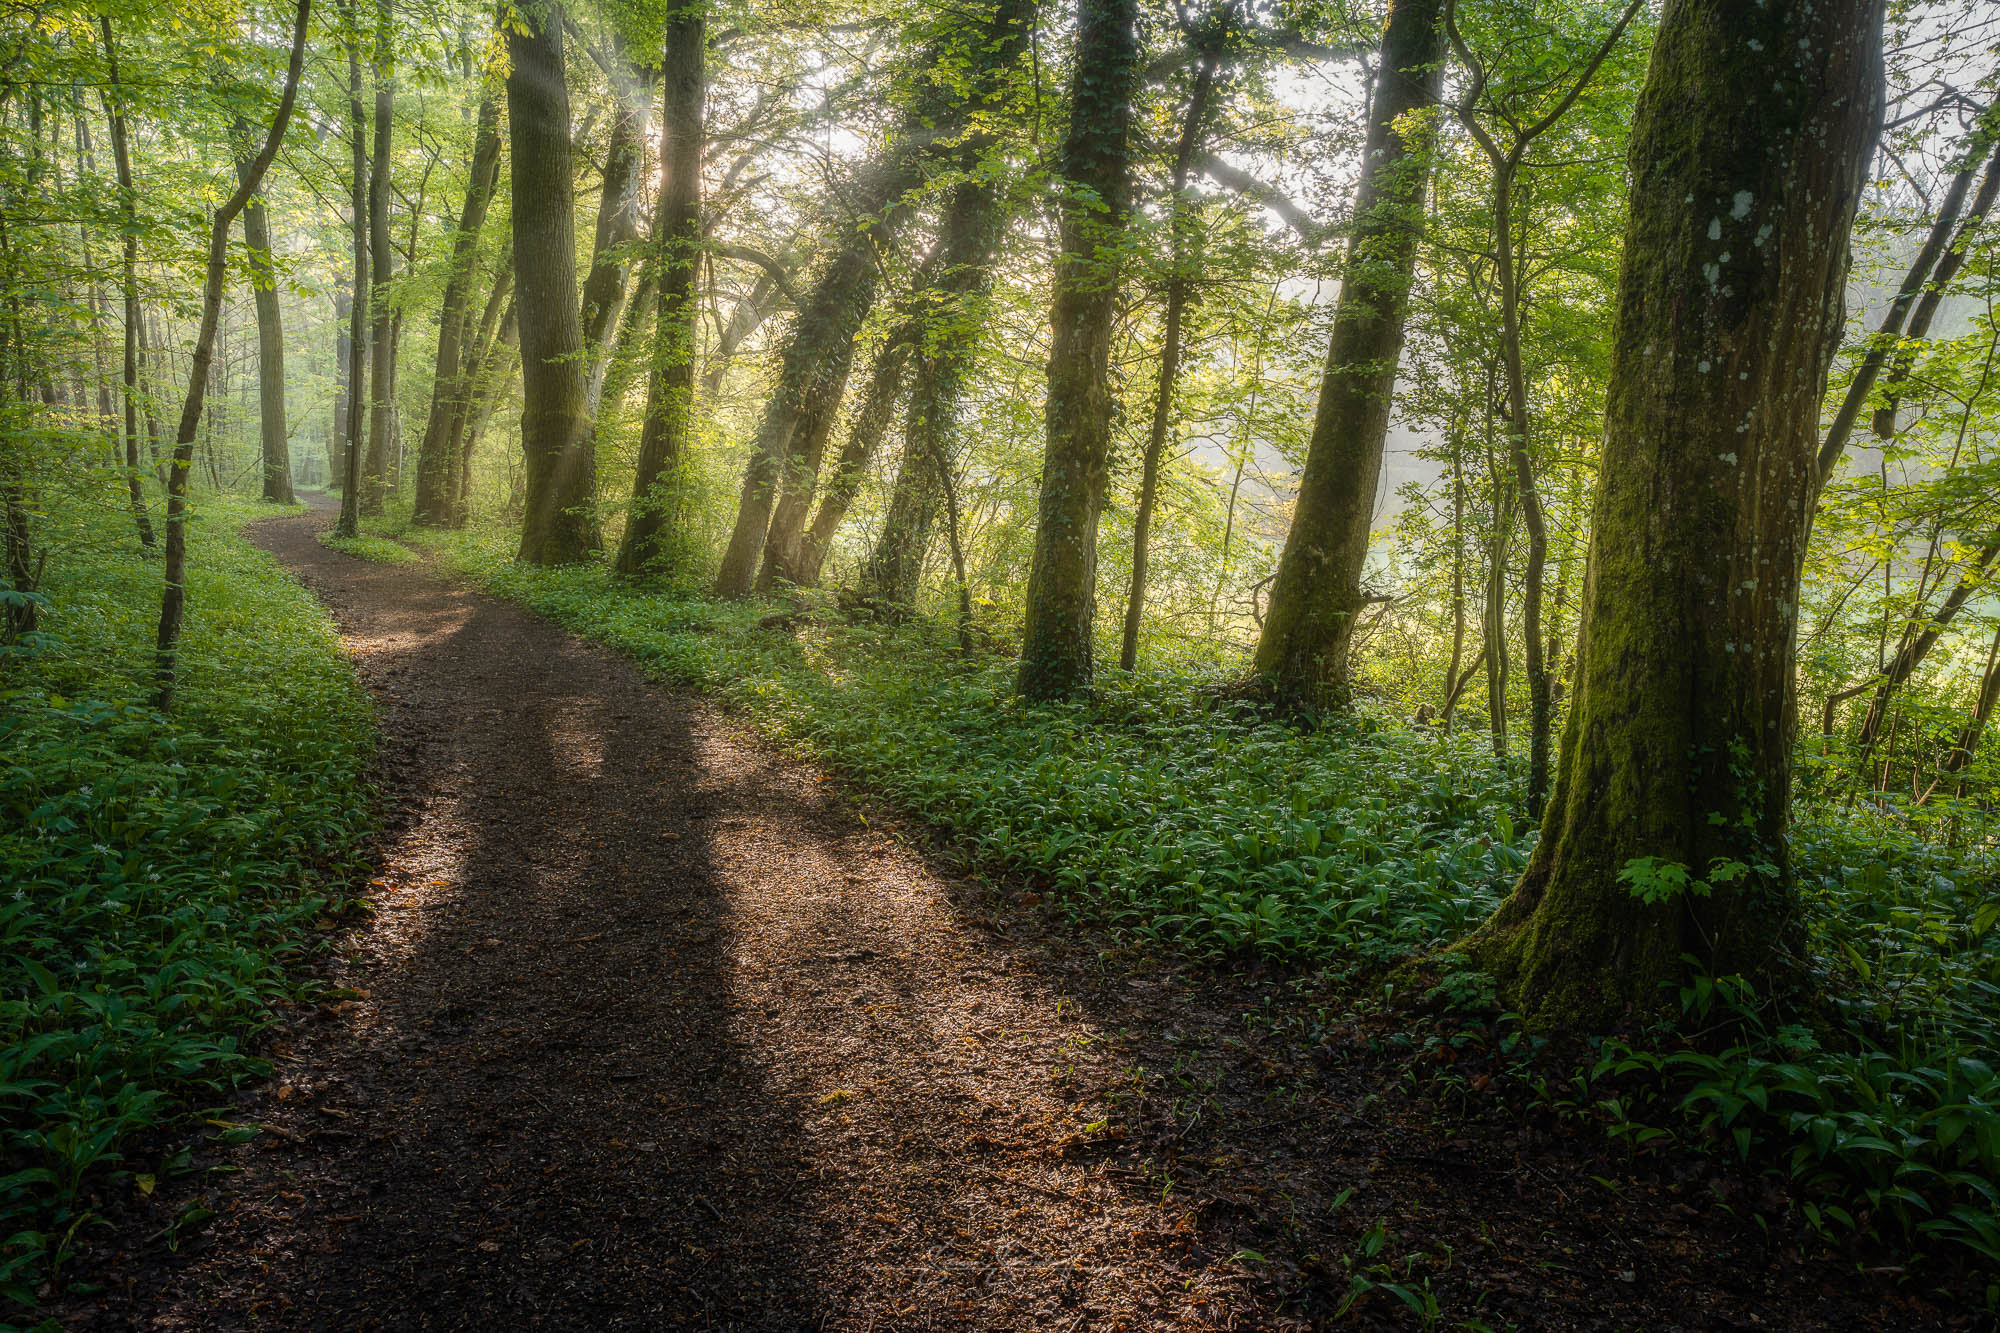
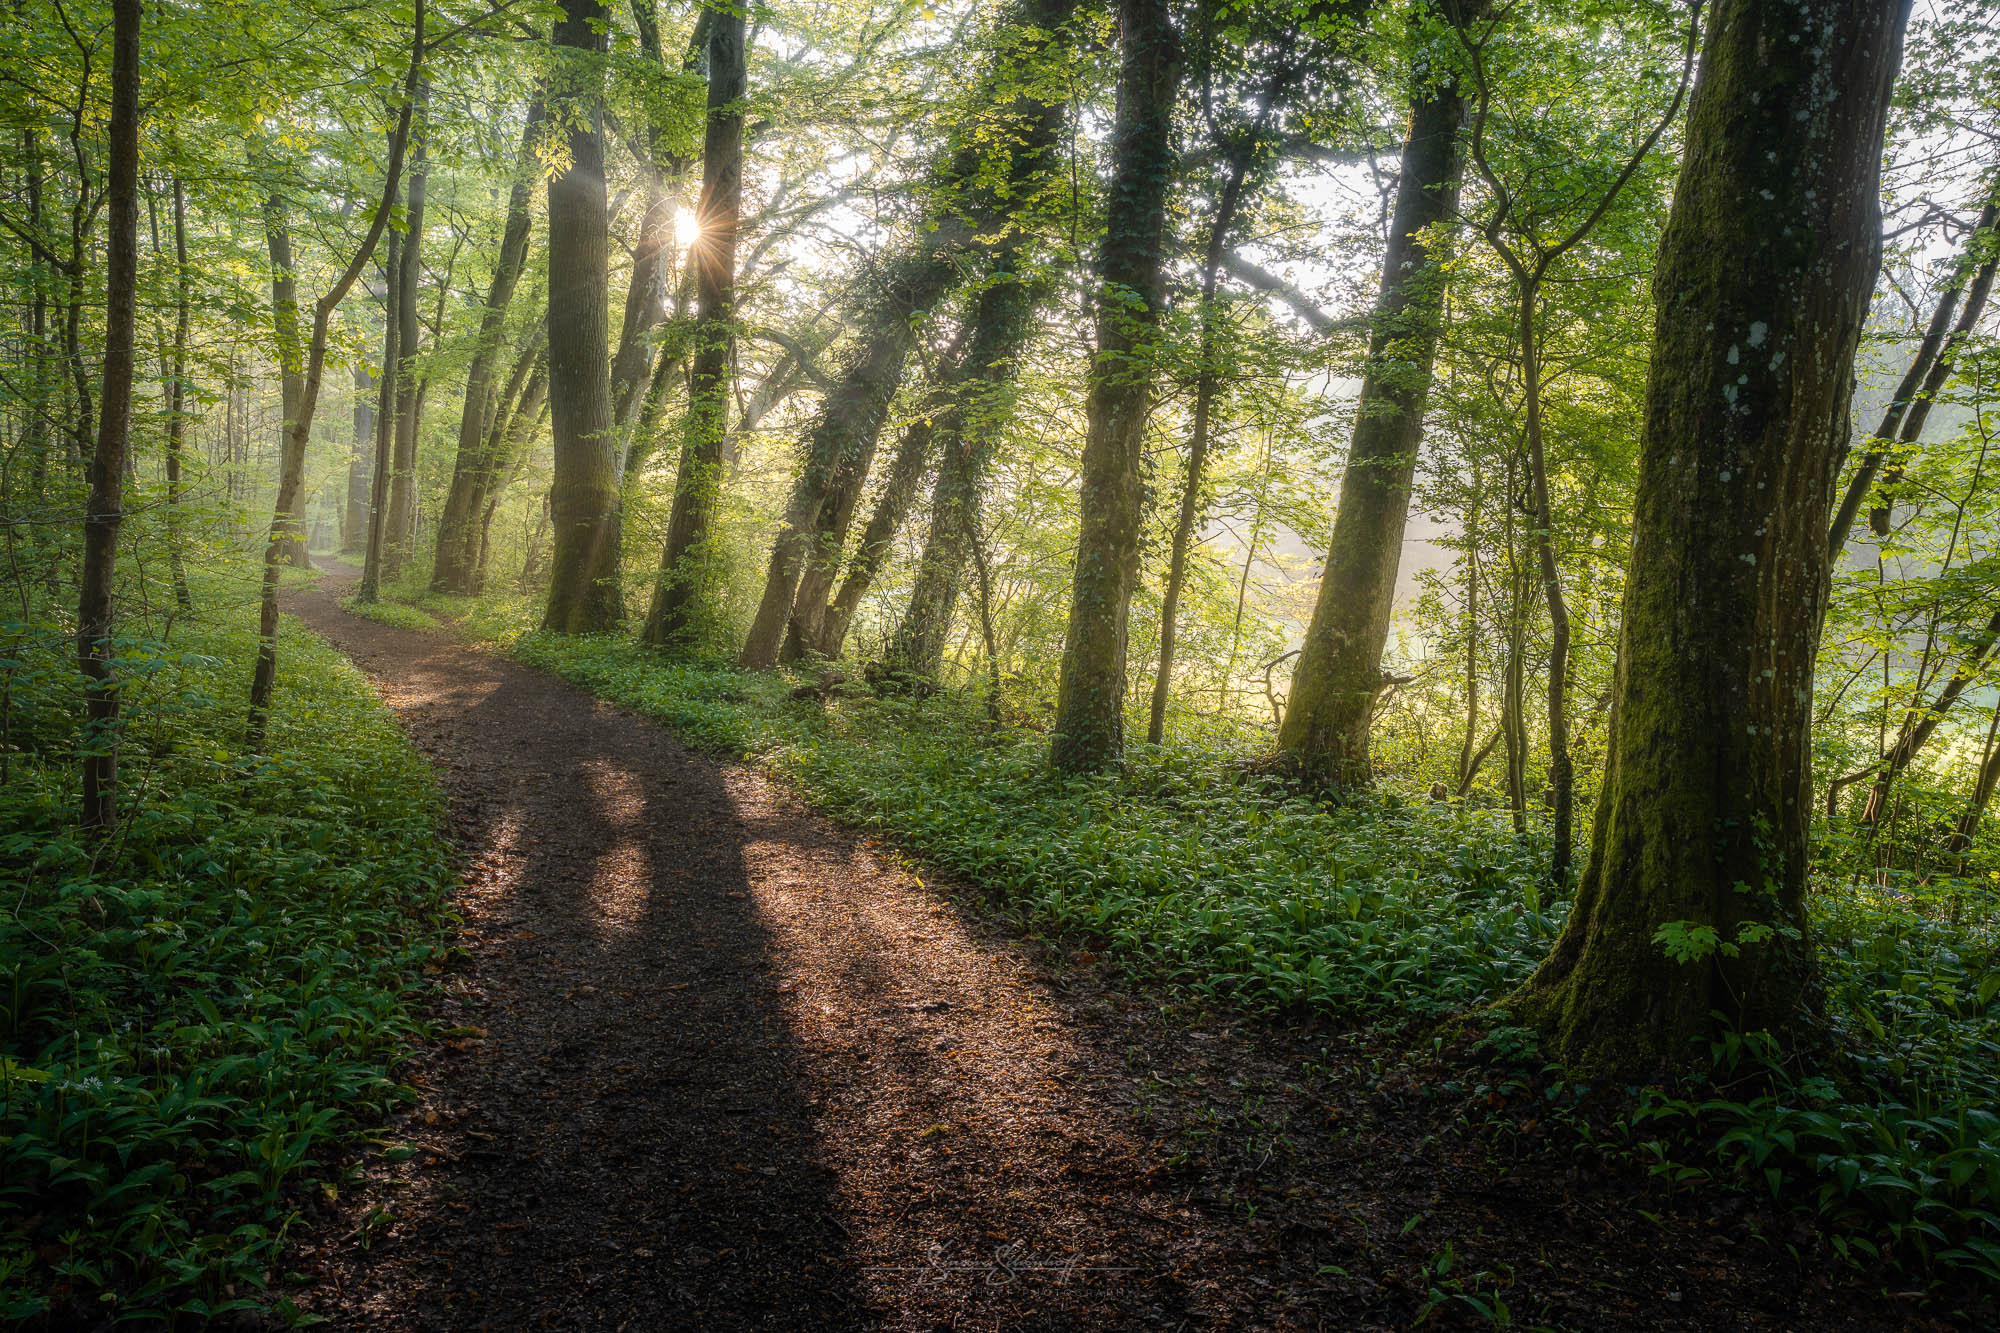
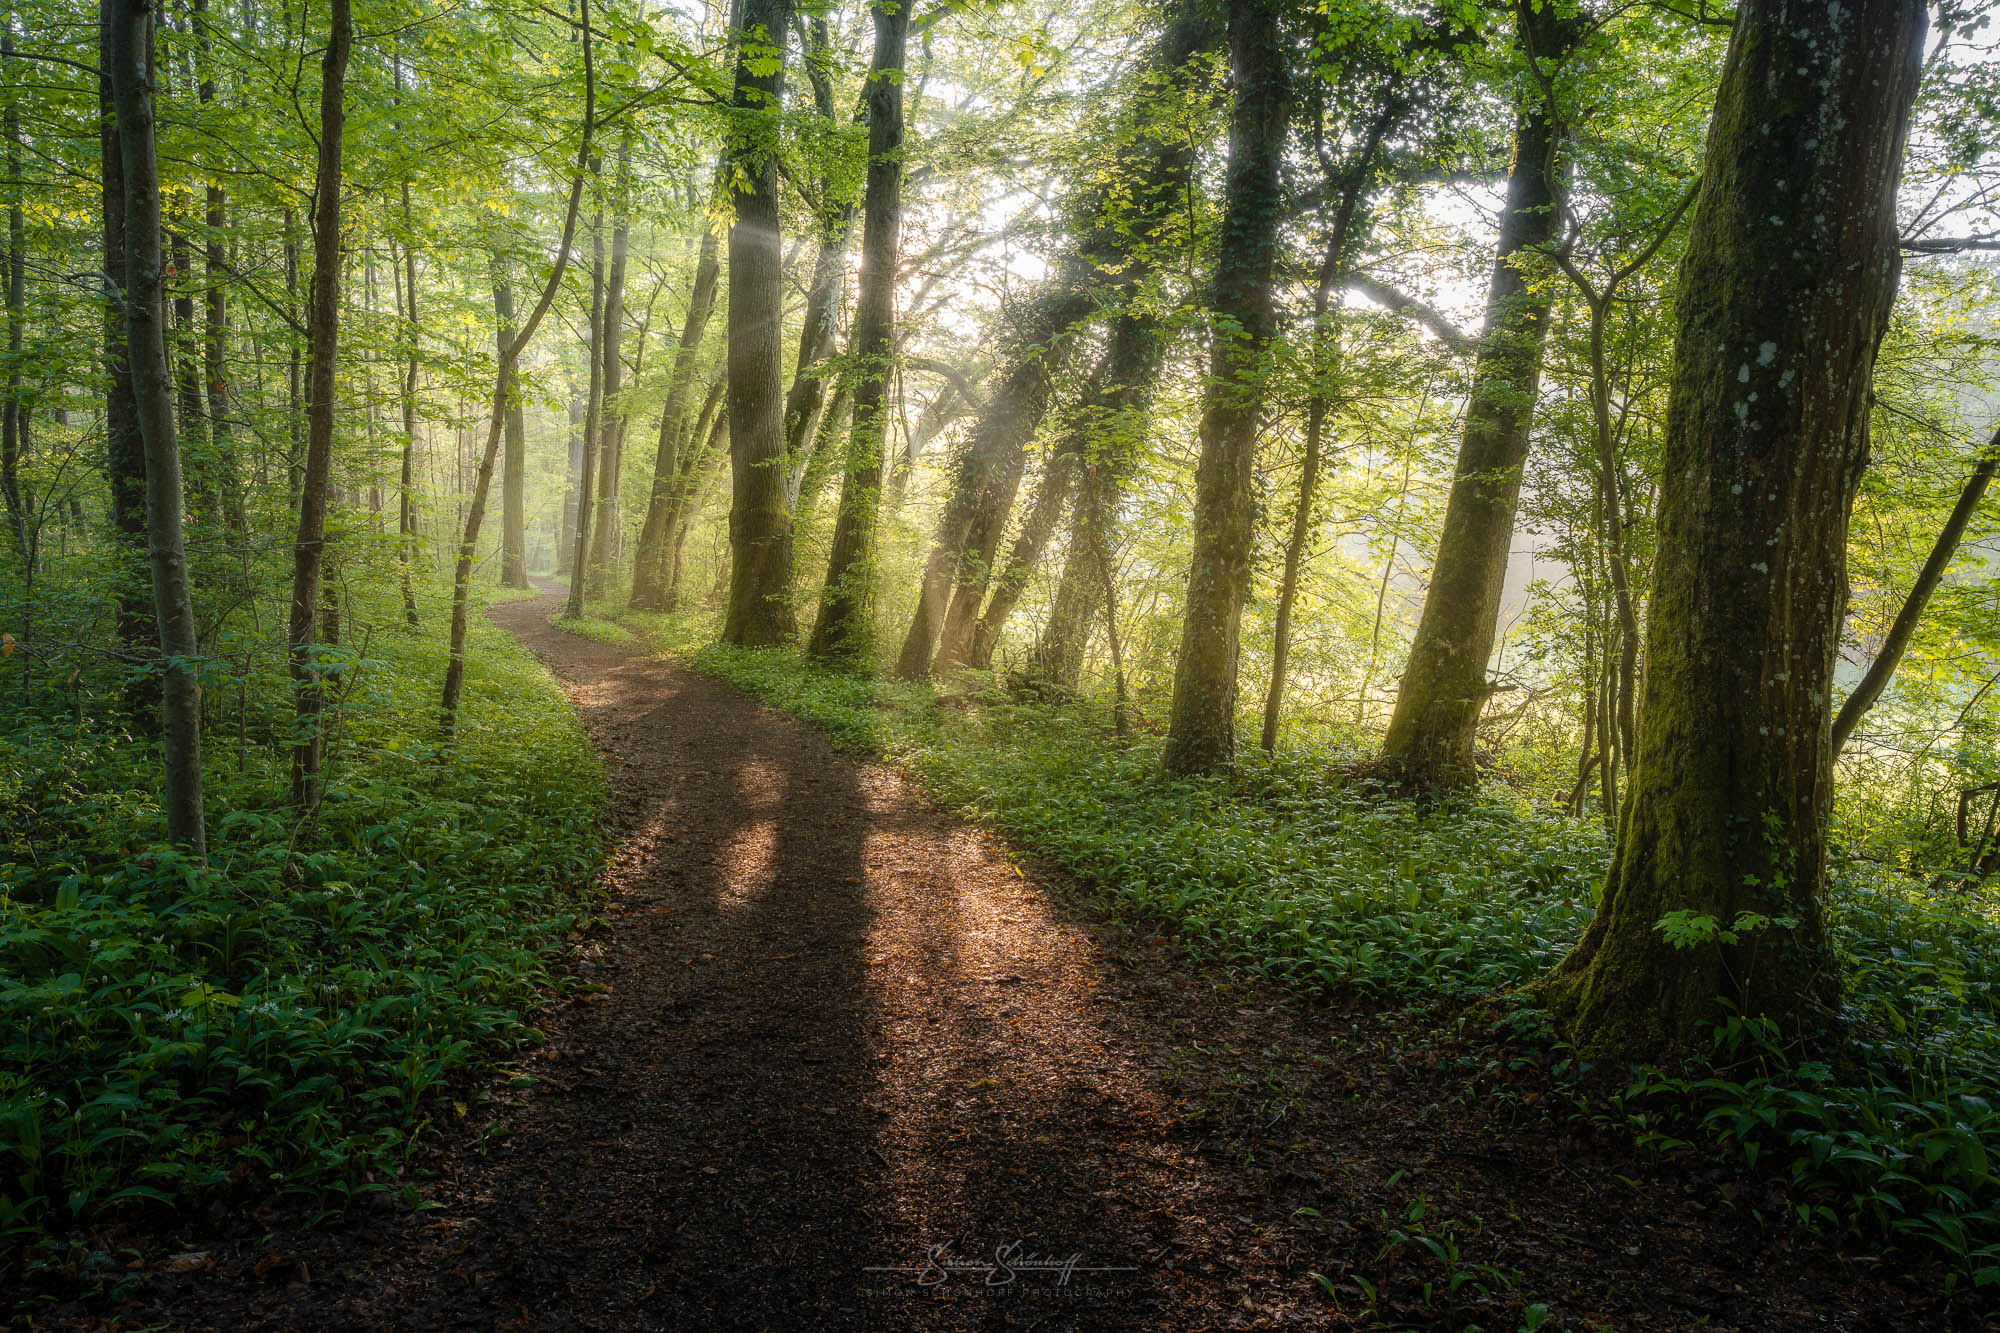
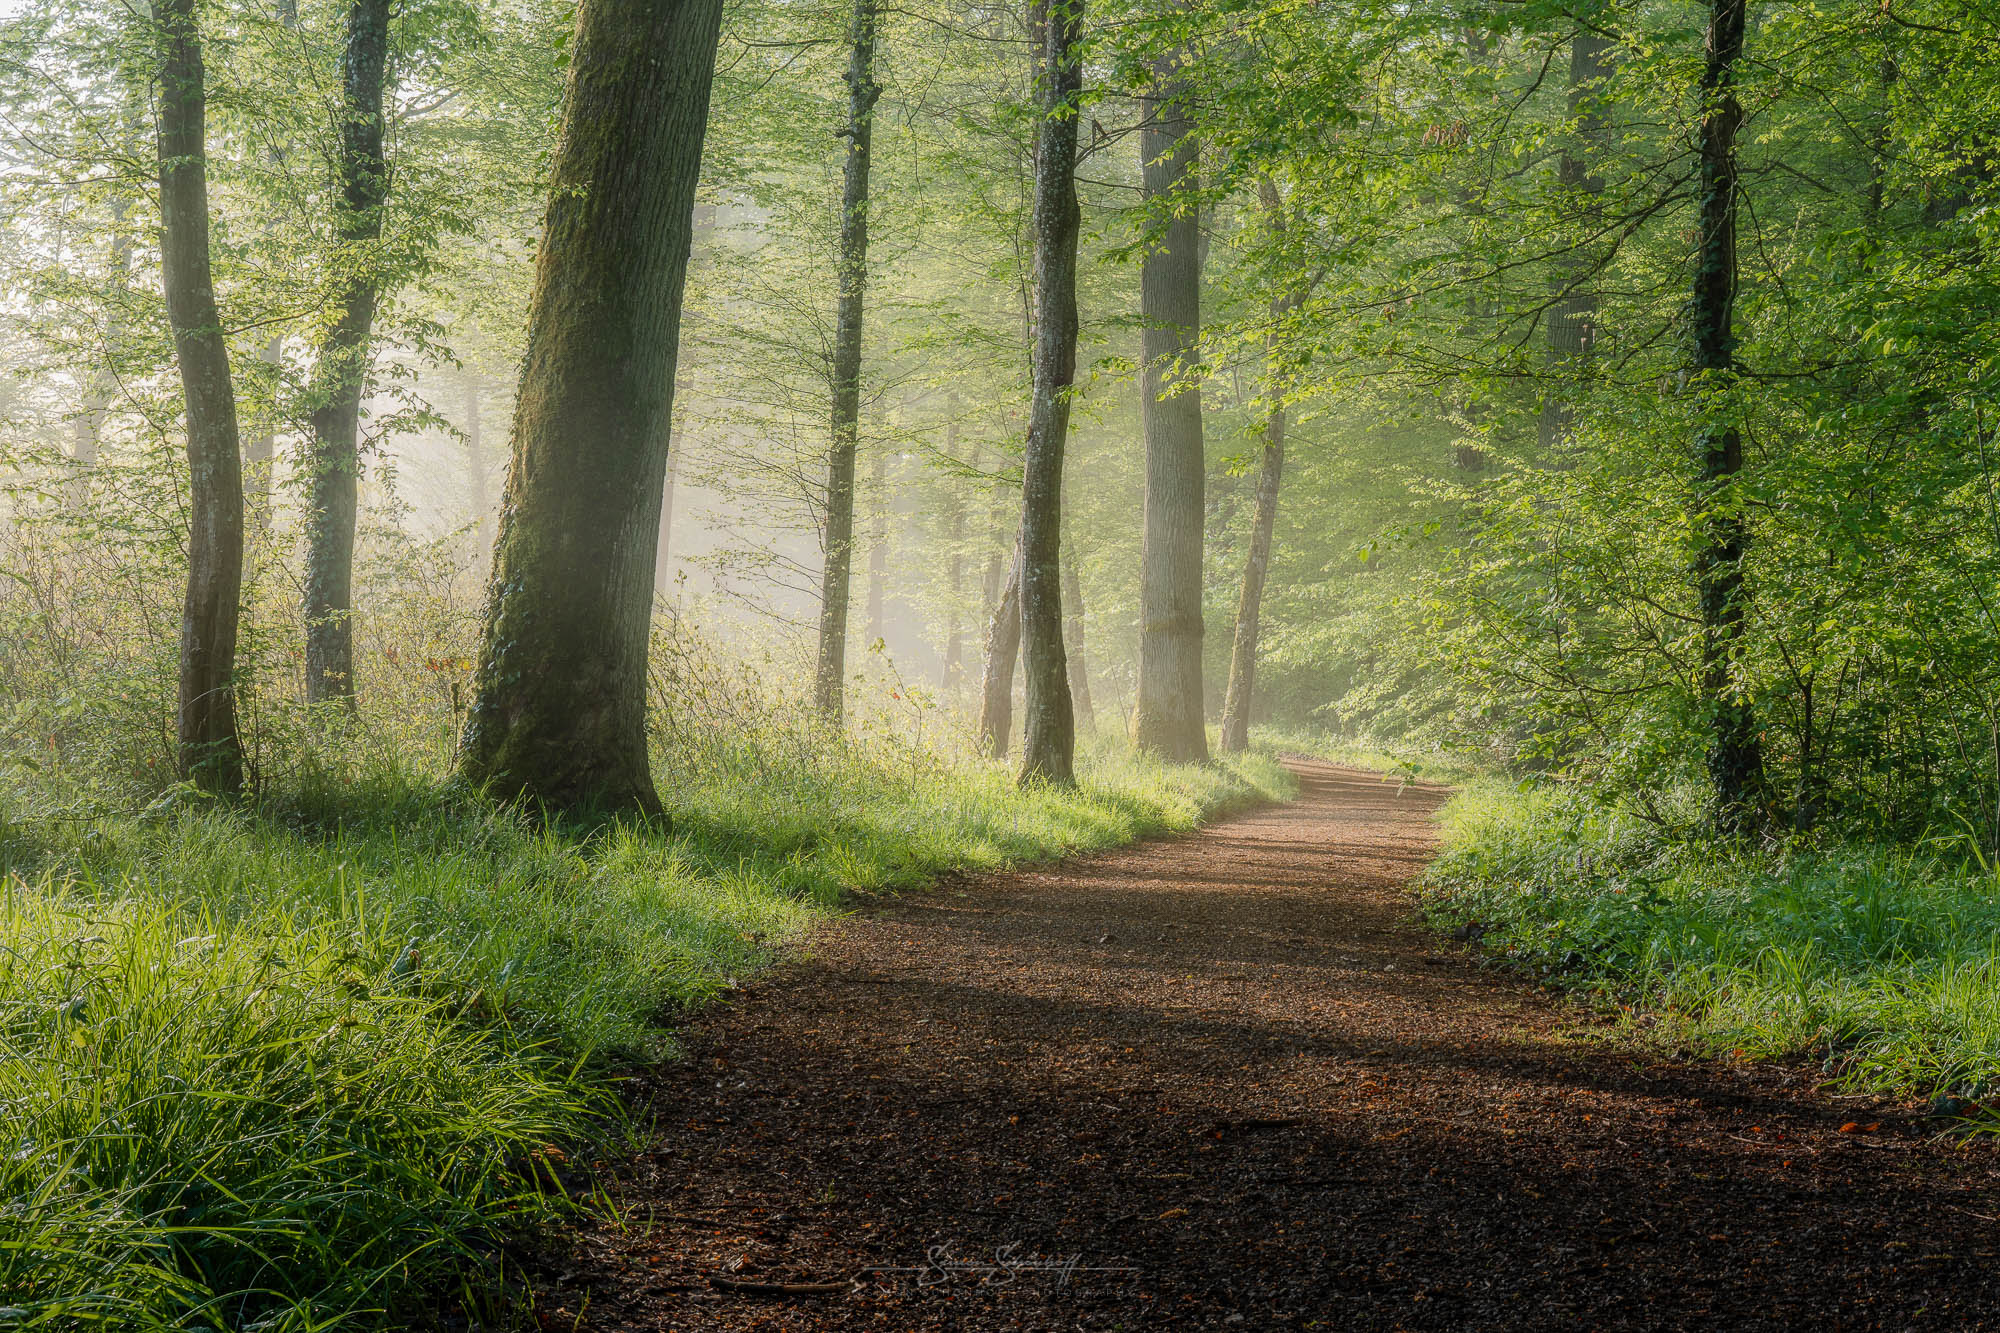
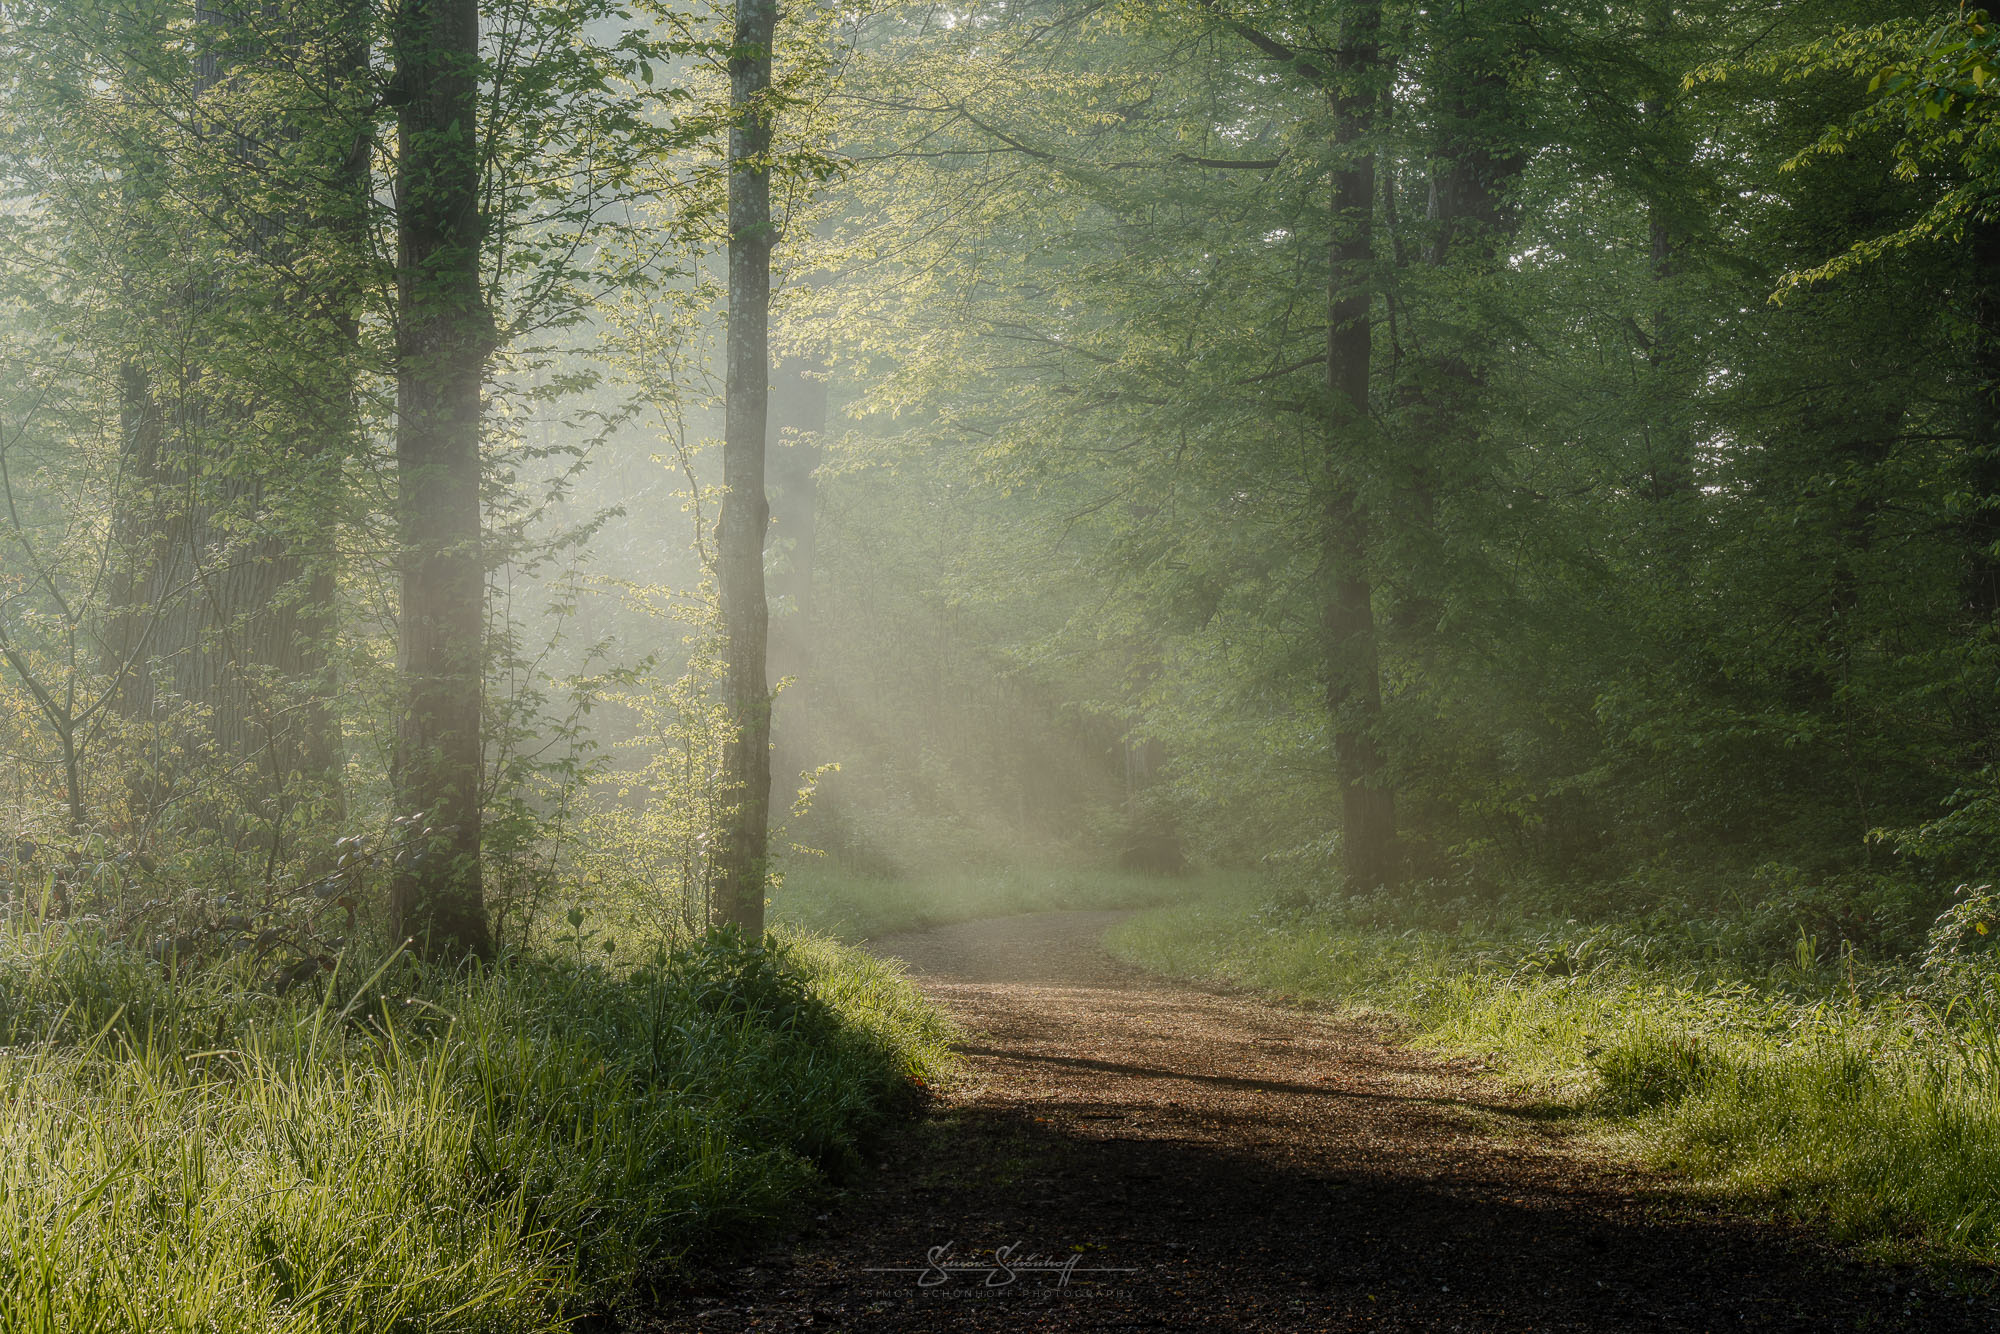
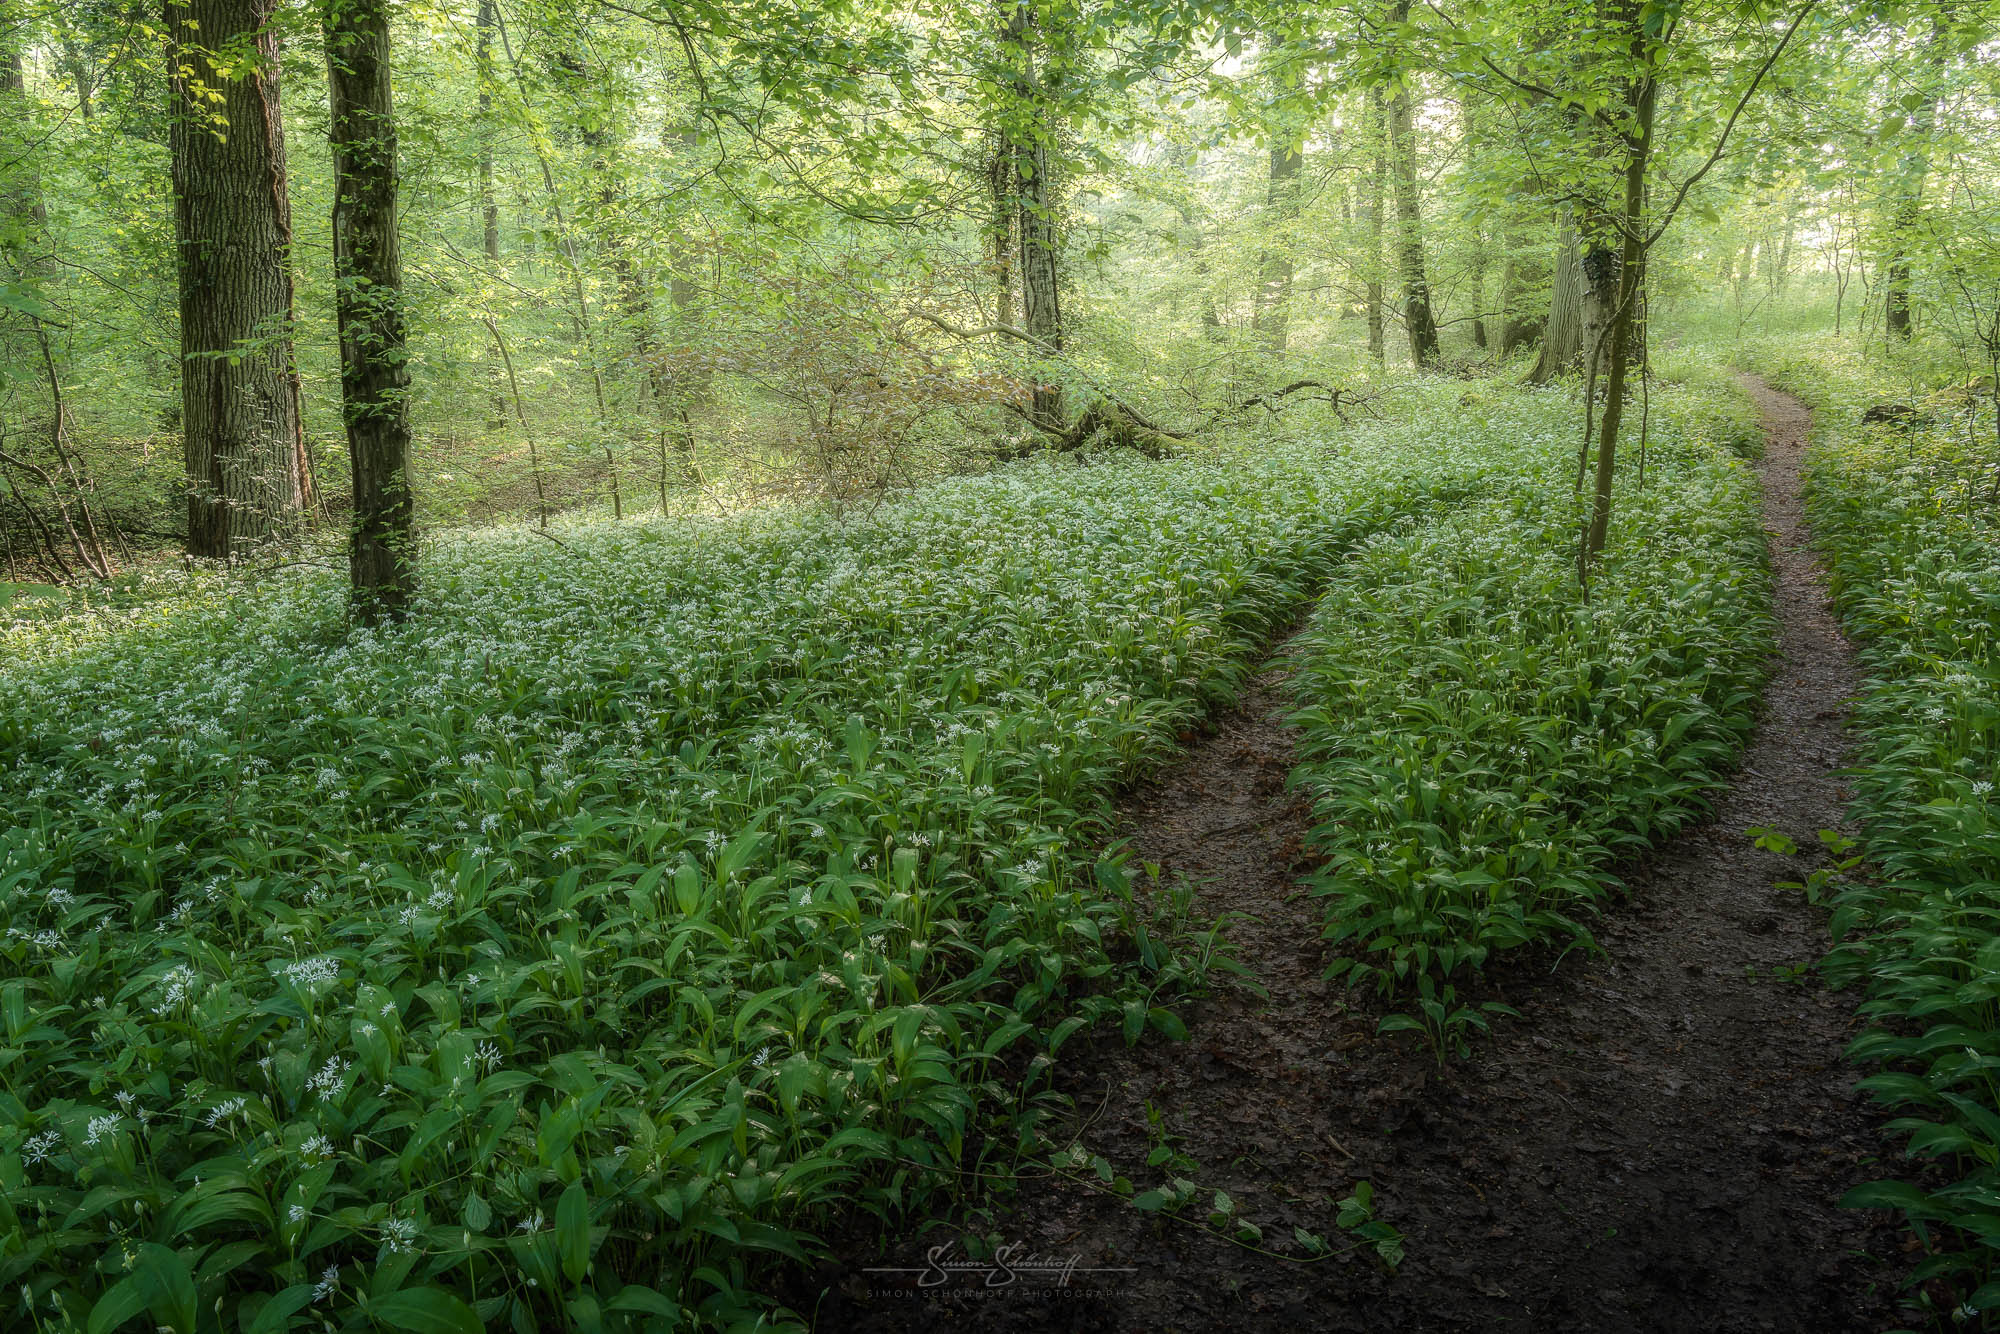
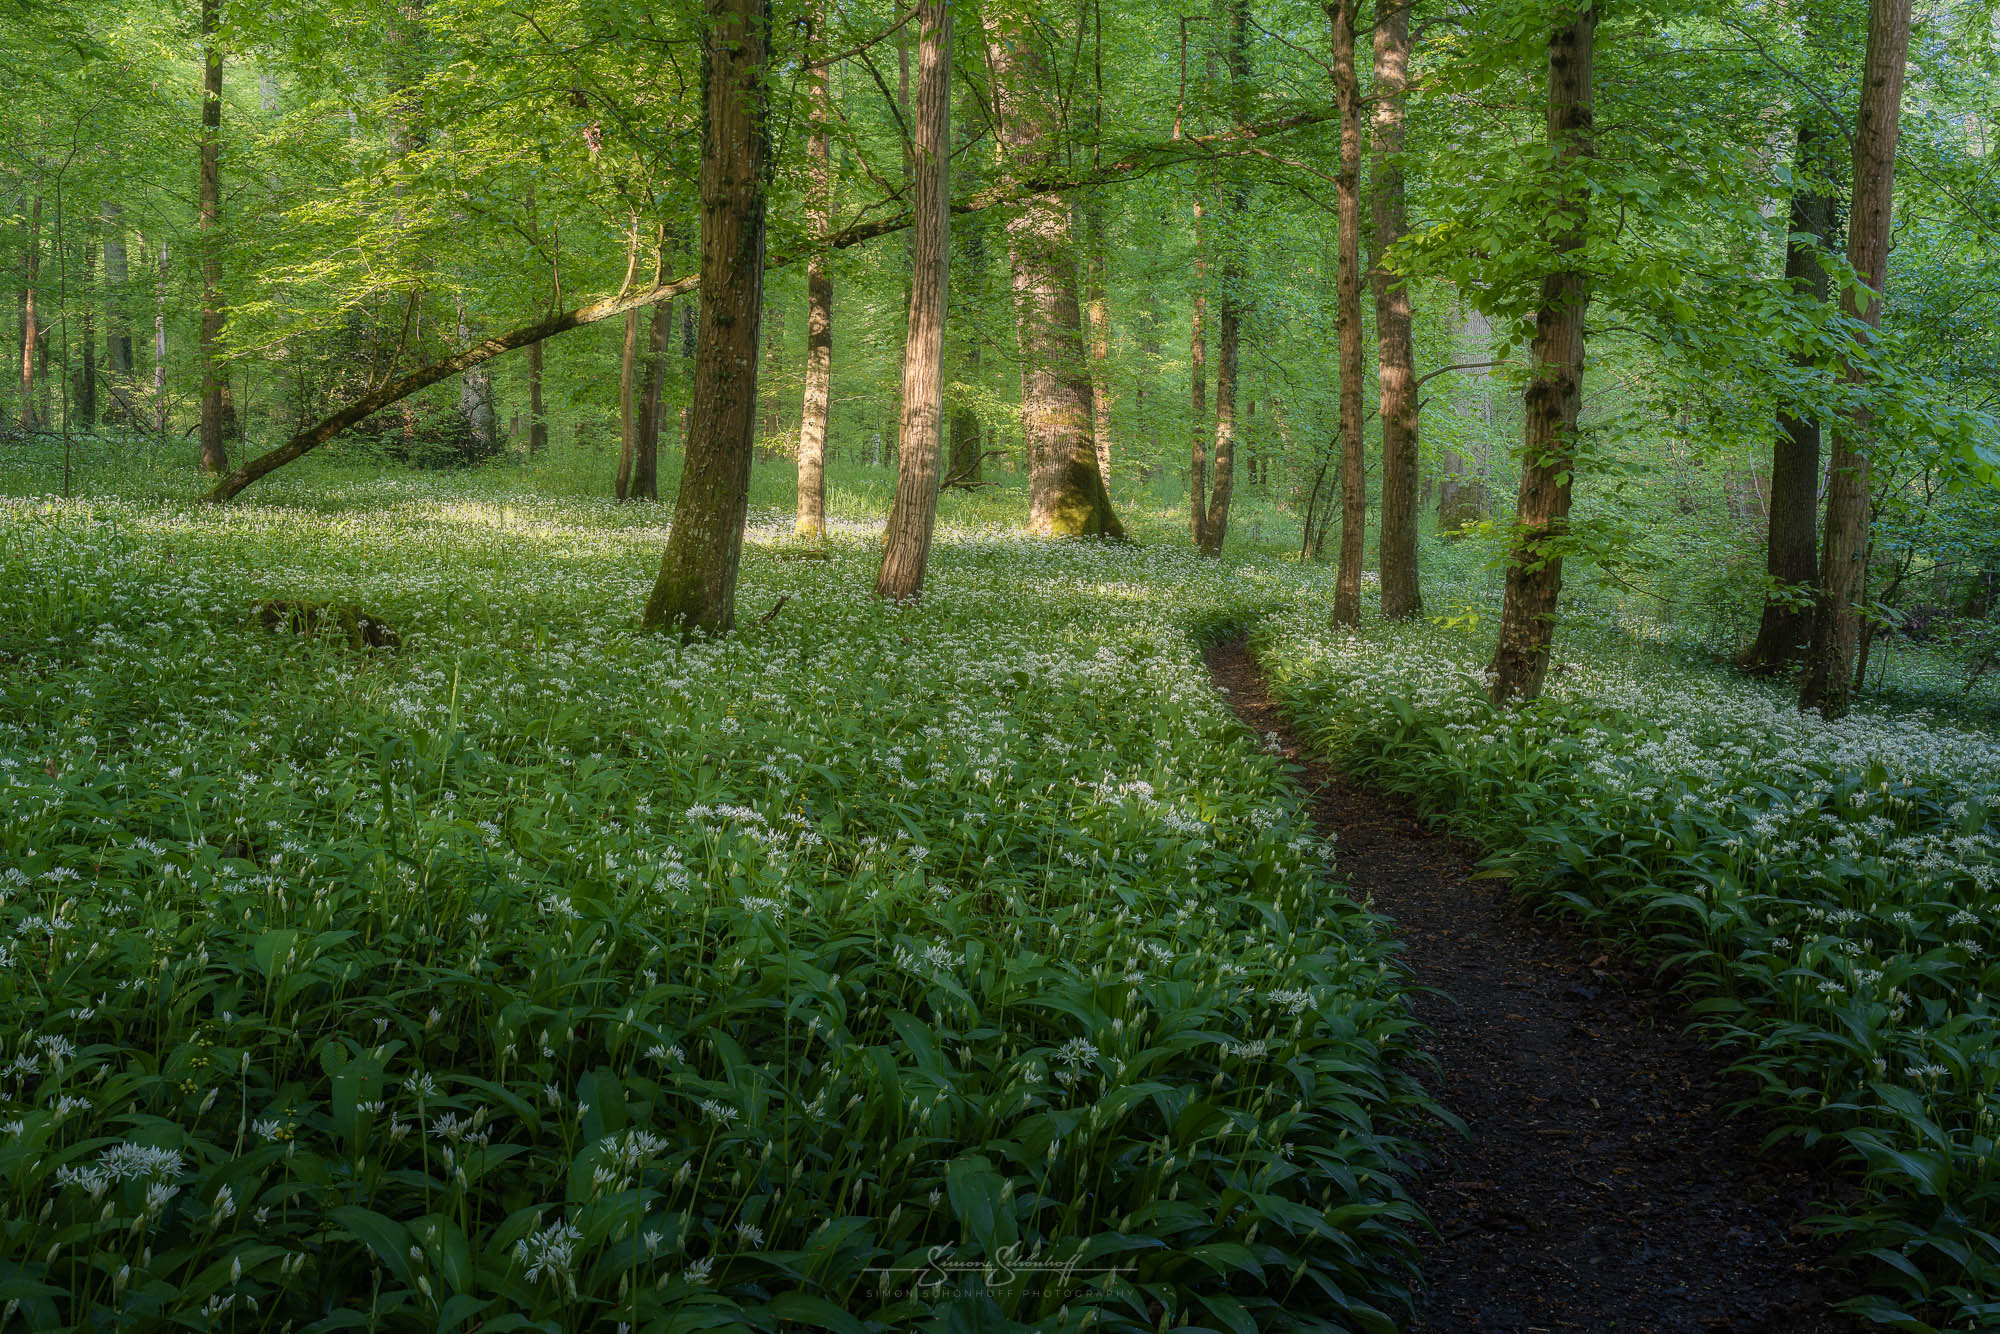
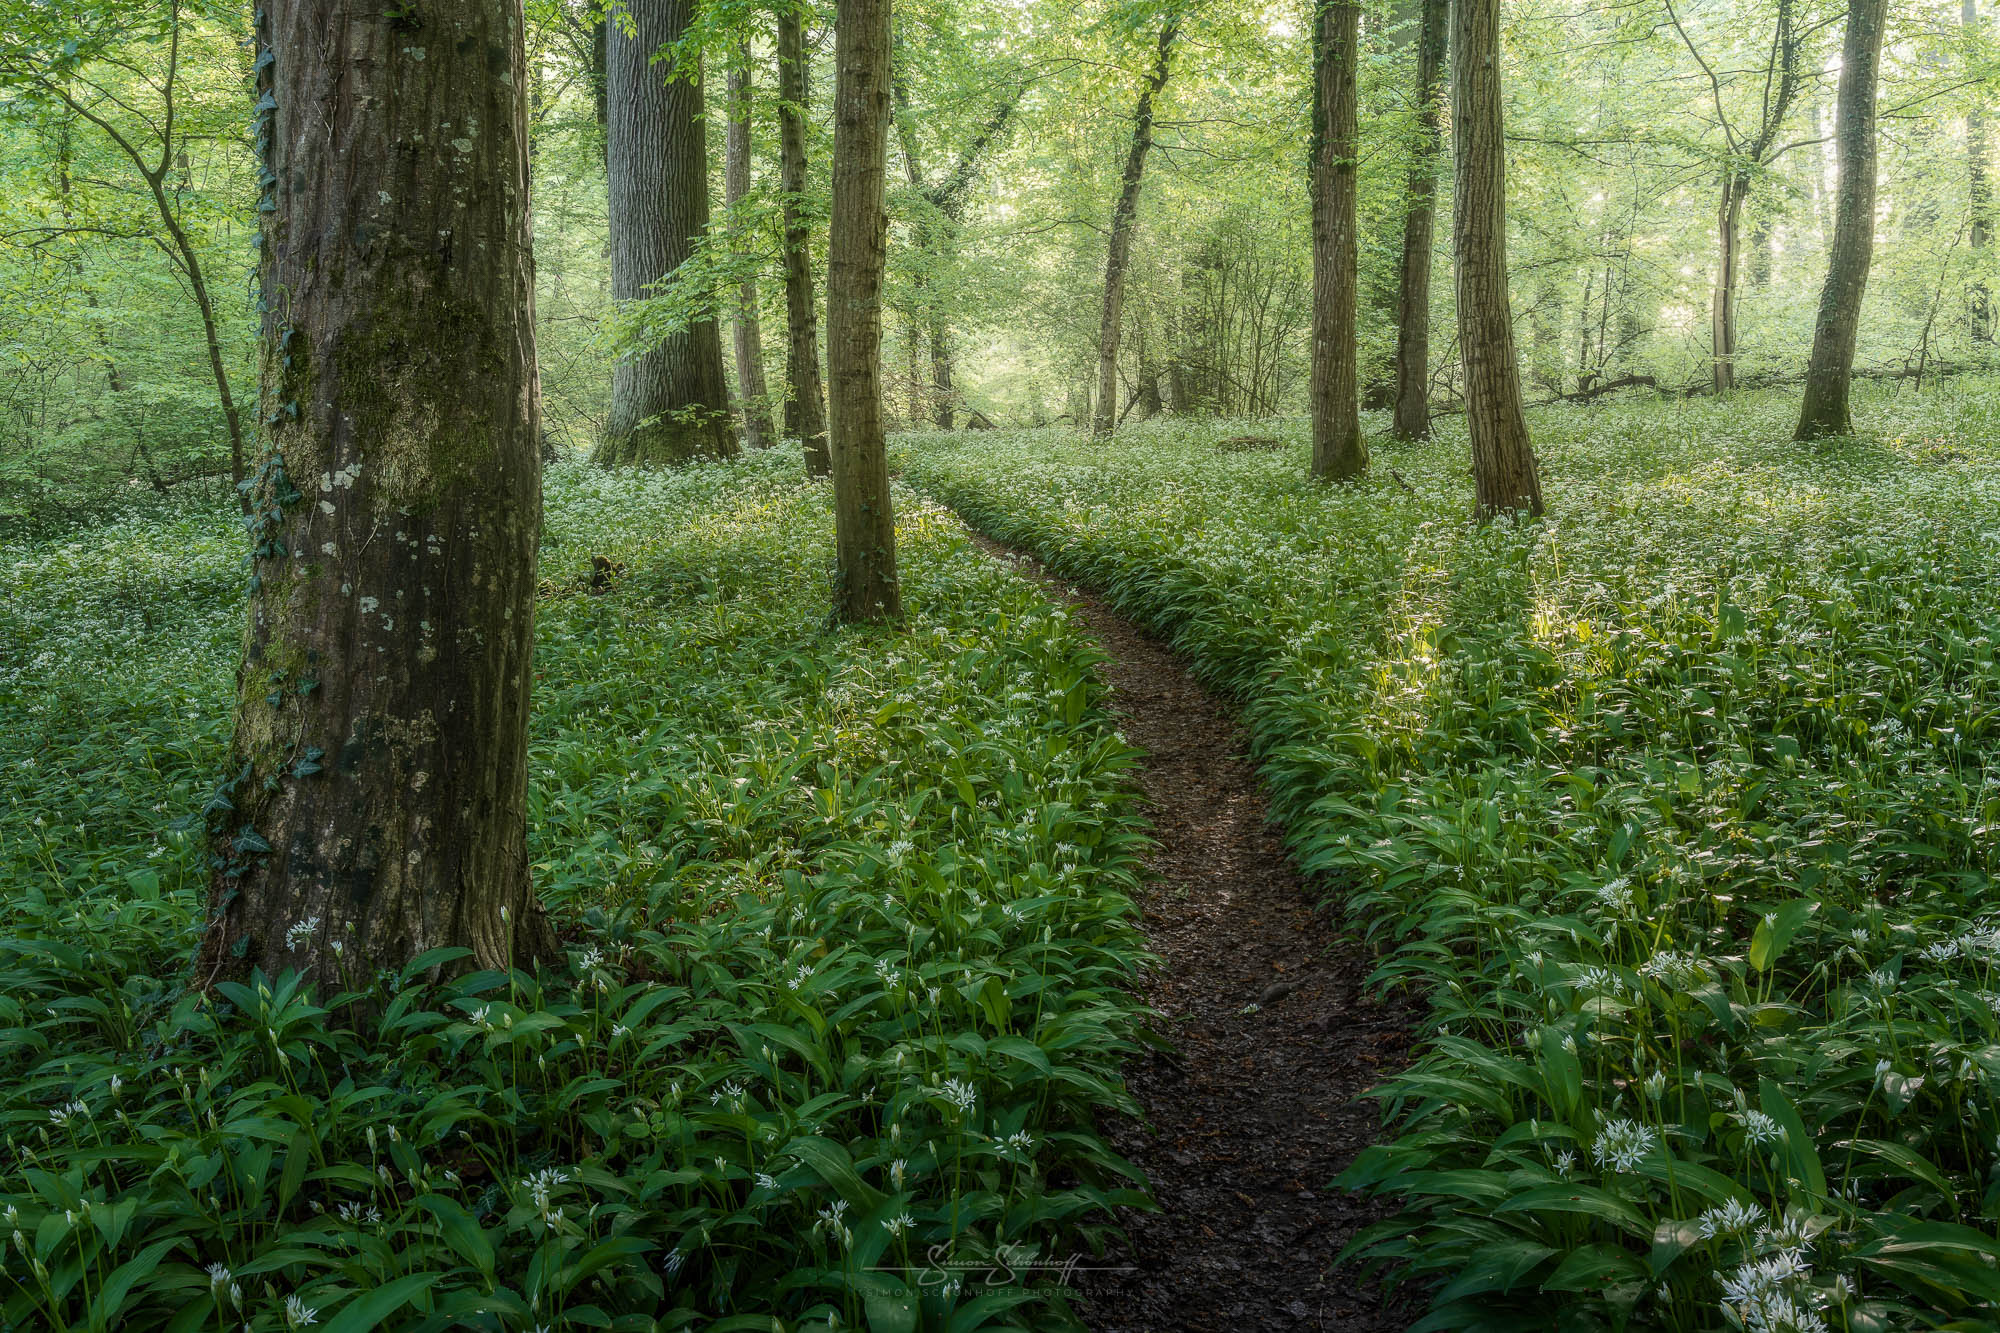
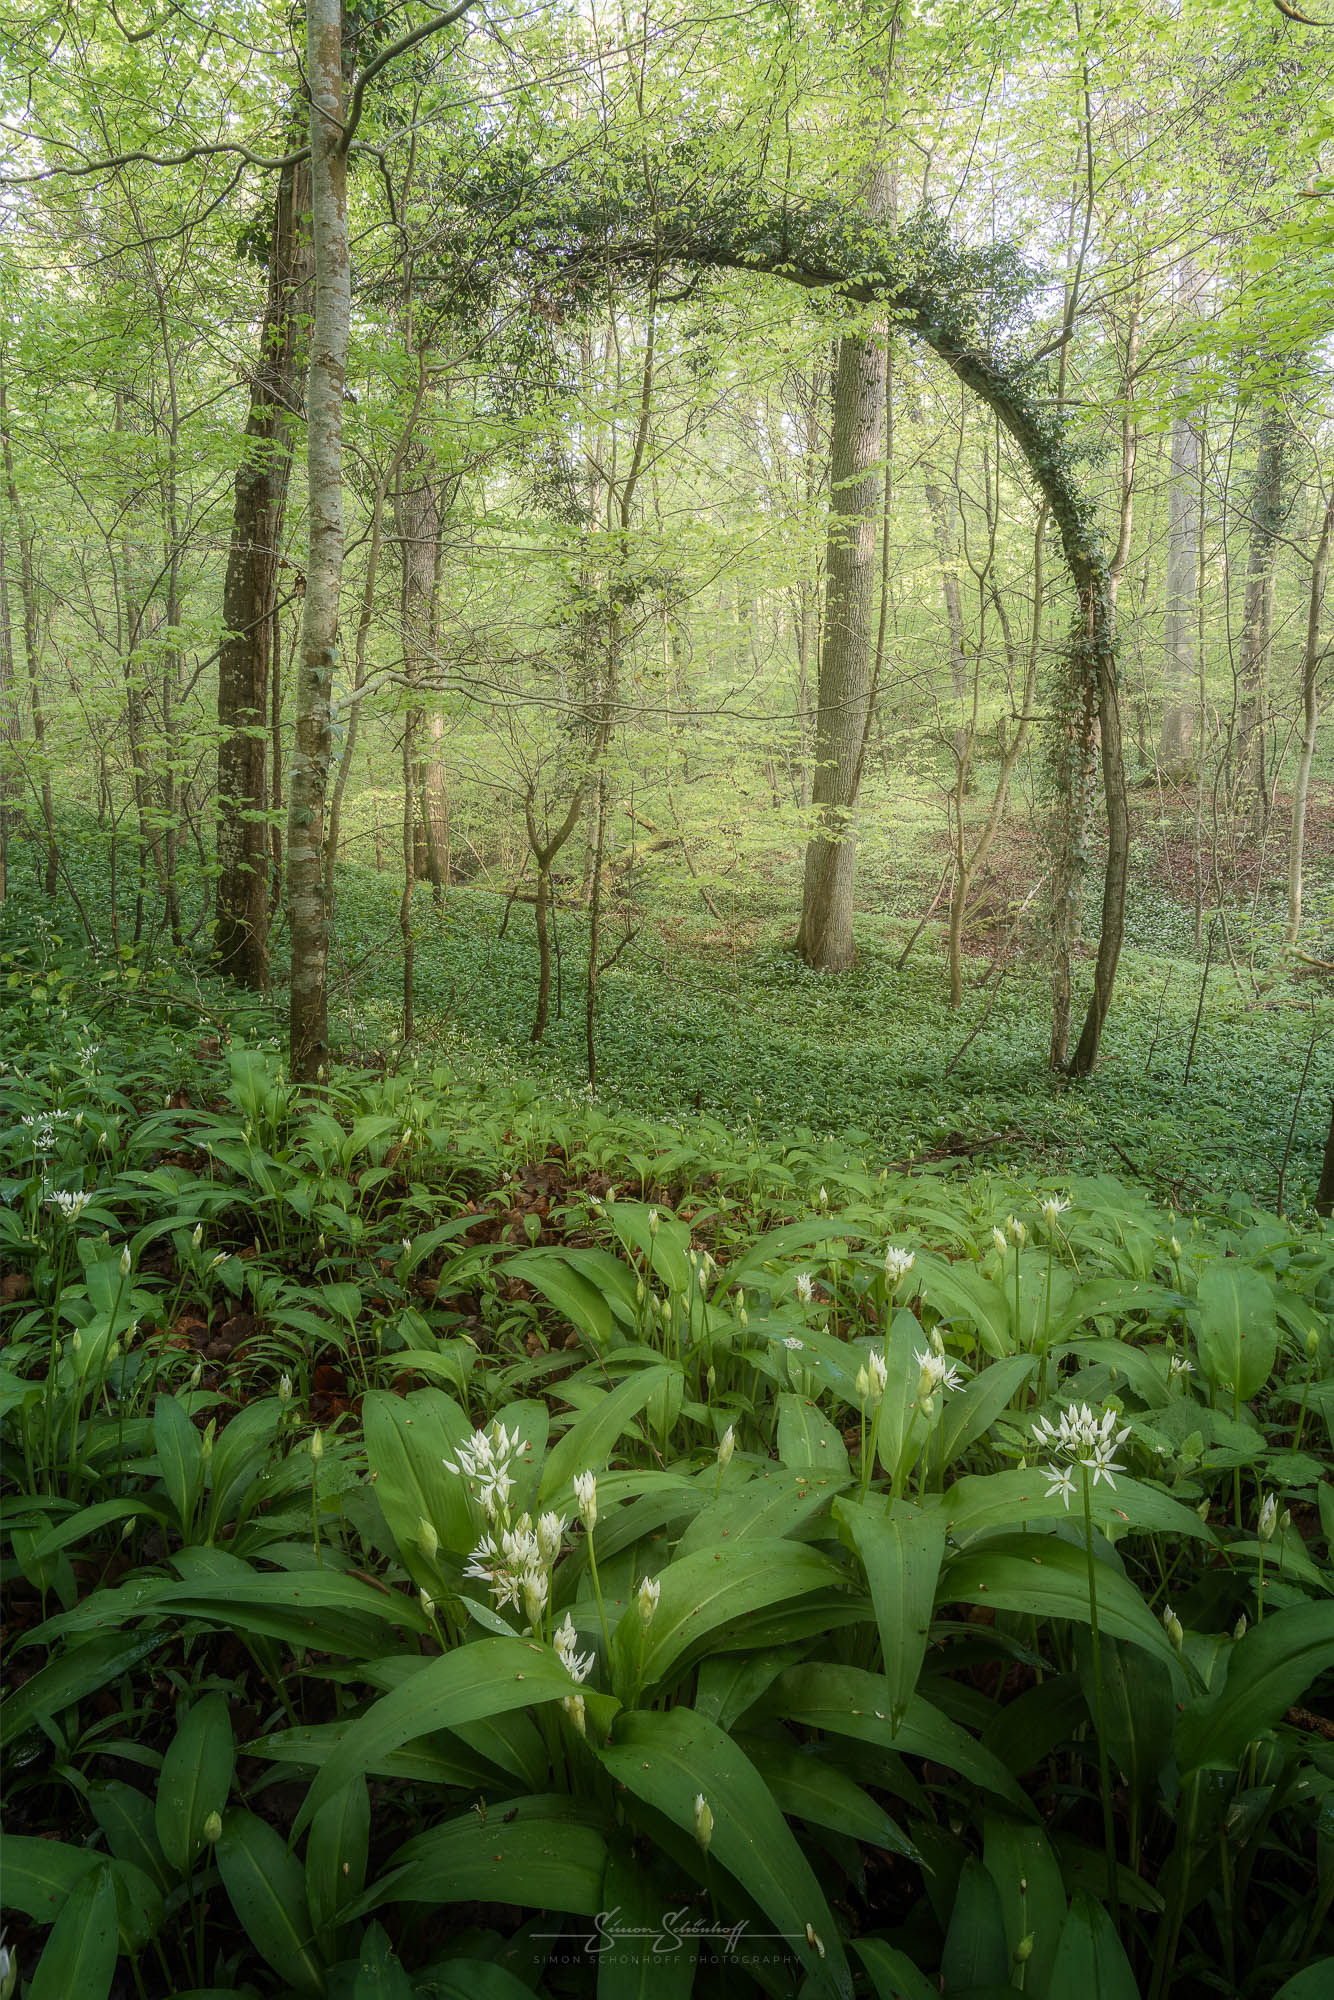
And so I had a bit of luck (in the form of my wife) this morning and I was able to stand here in the forest not far away in a neighbouring community, between sensational rays of light and rising sunlight at the time of the wild garlic blossom. And the very first pictures were simply marvellous. I could have packed up straight away and the day would have been a complete success. But that’s not me. Now I want to make the most of the light and photograph the wild garlic in bloom.
This and all other shots of this post you can request under “Prints” as an art print for your wall at home directly from me.
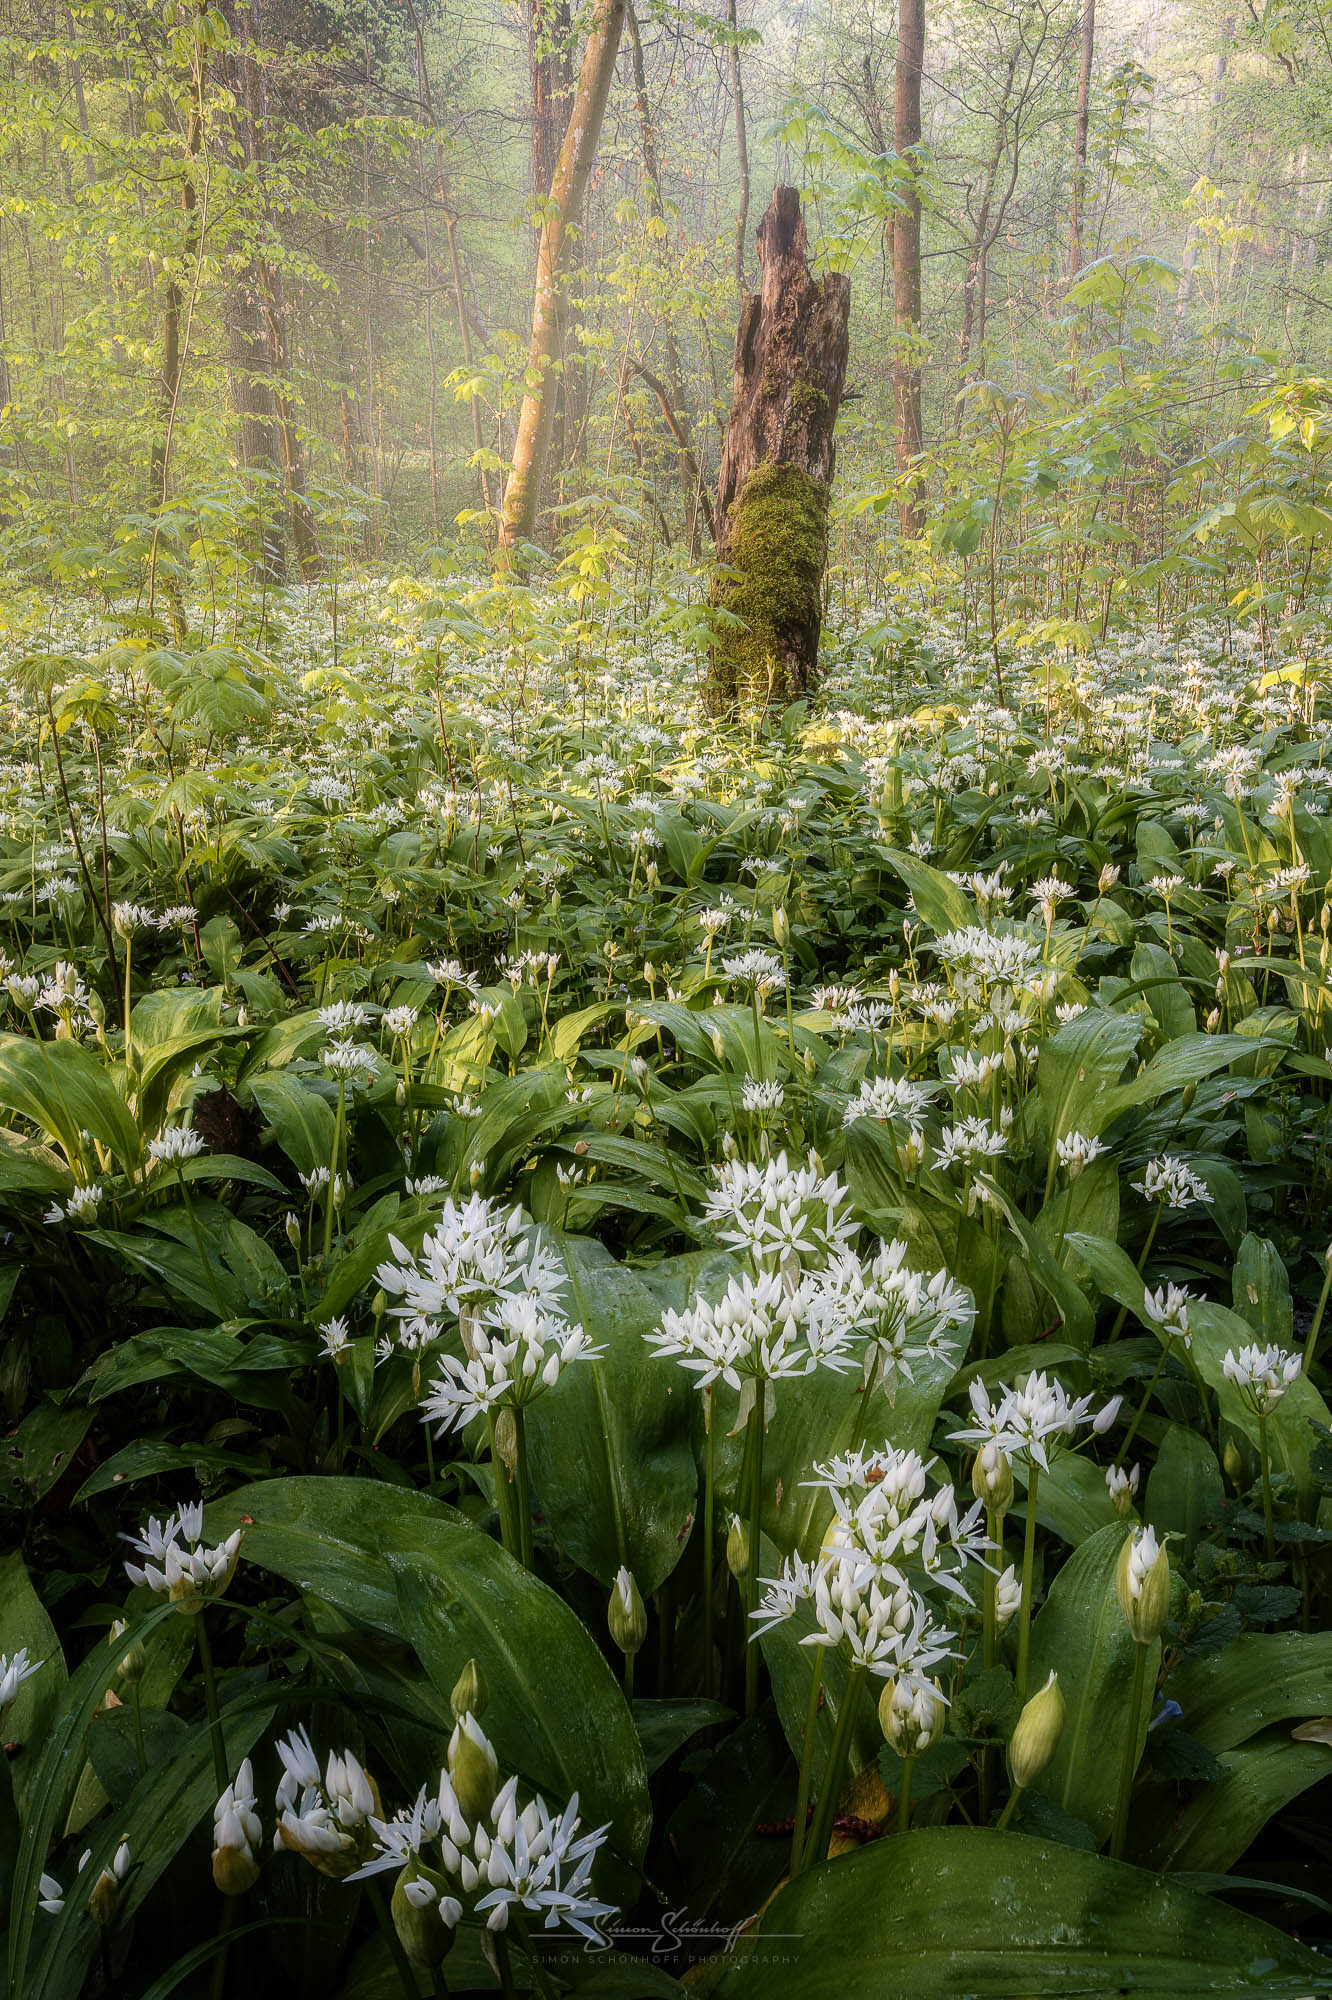
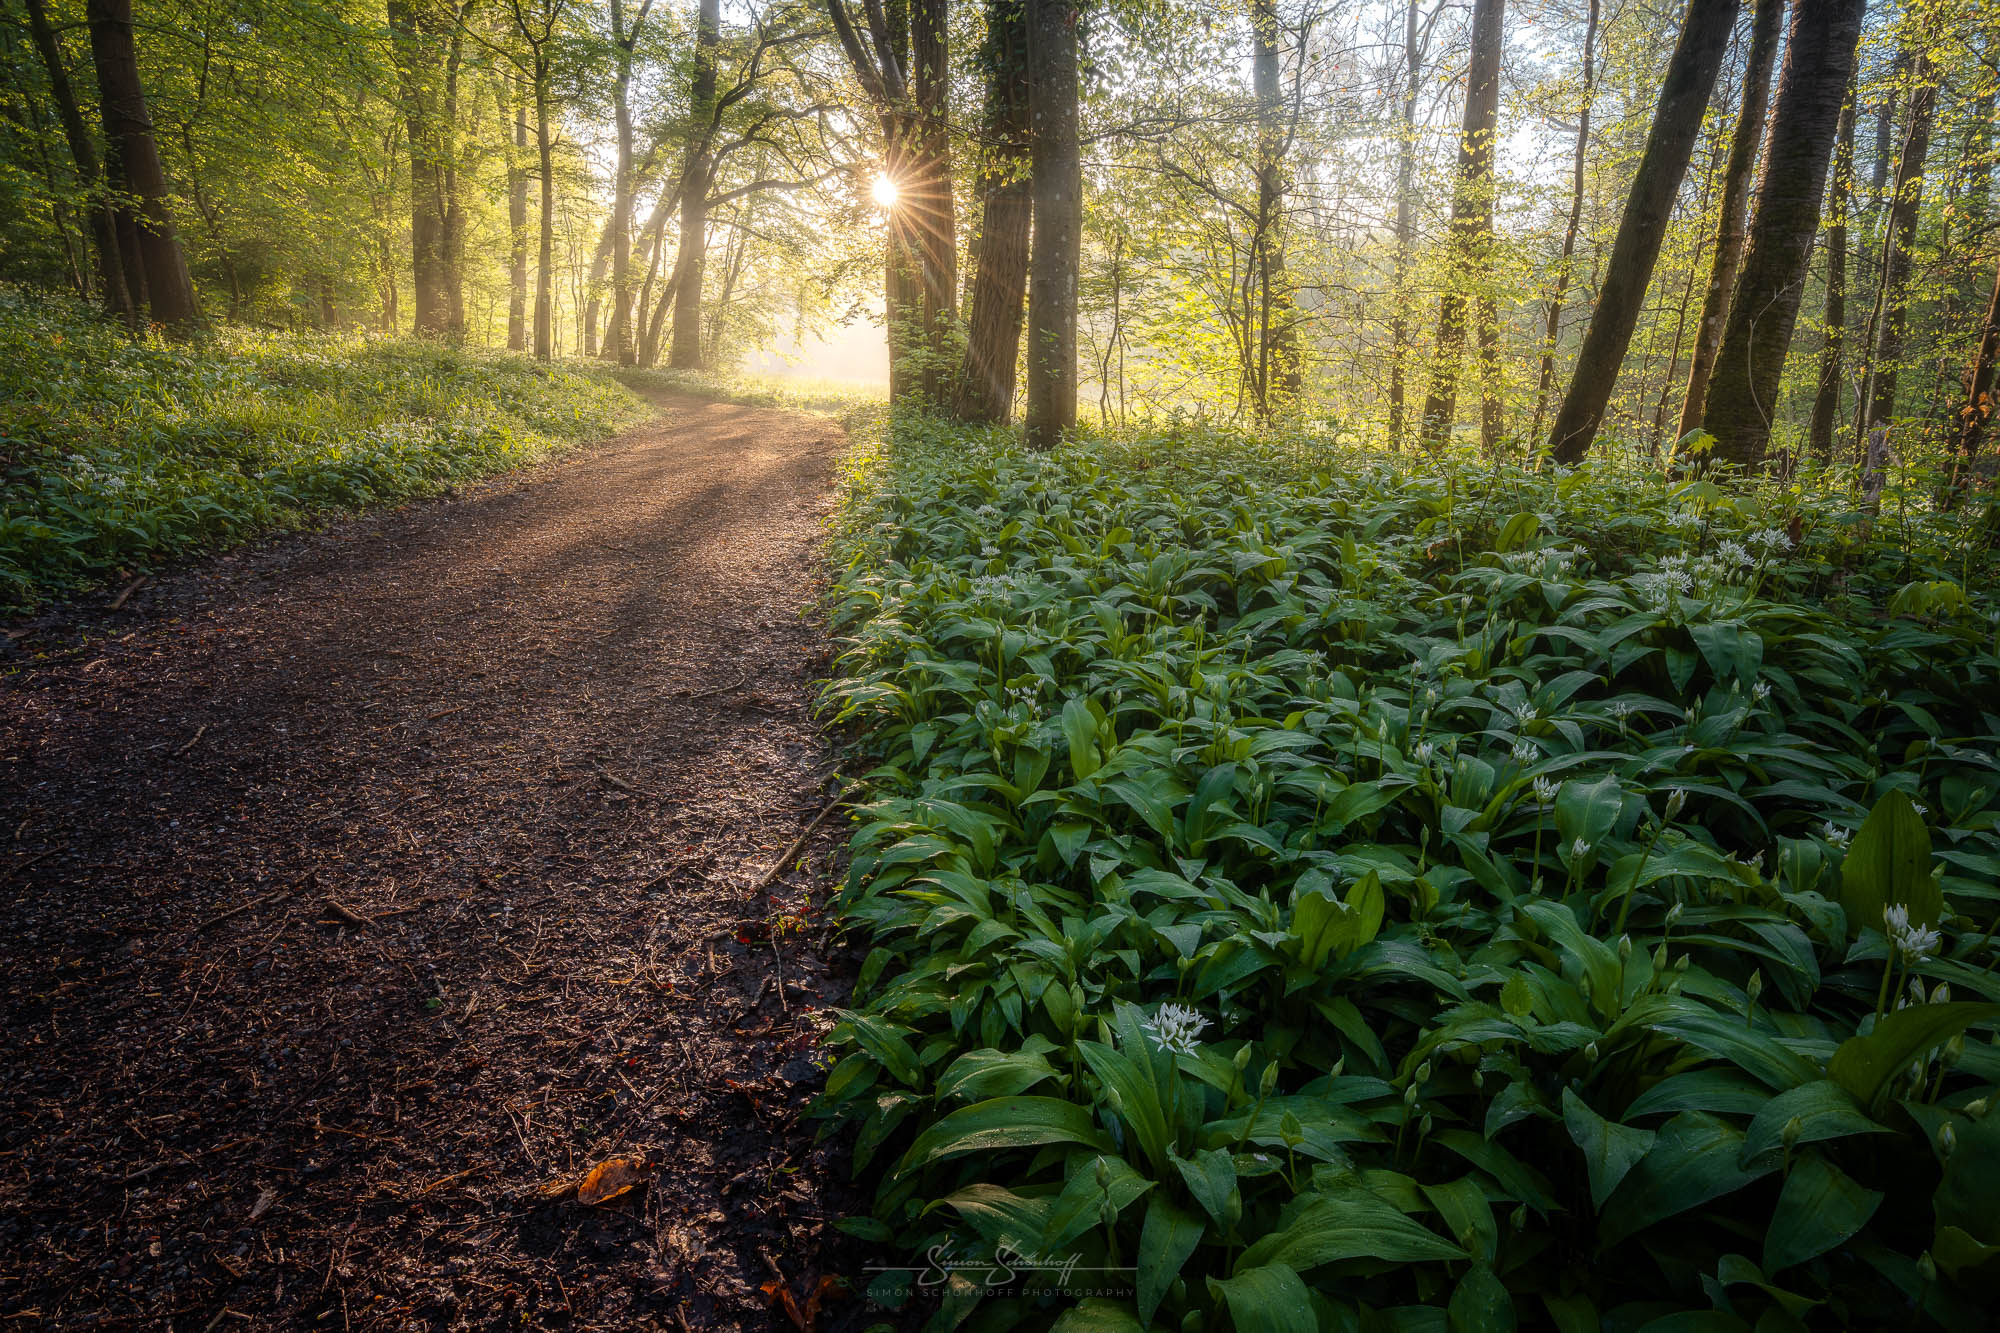
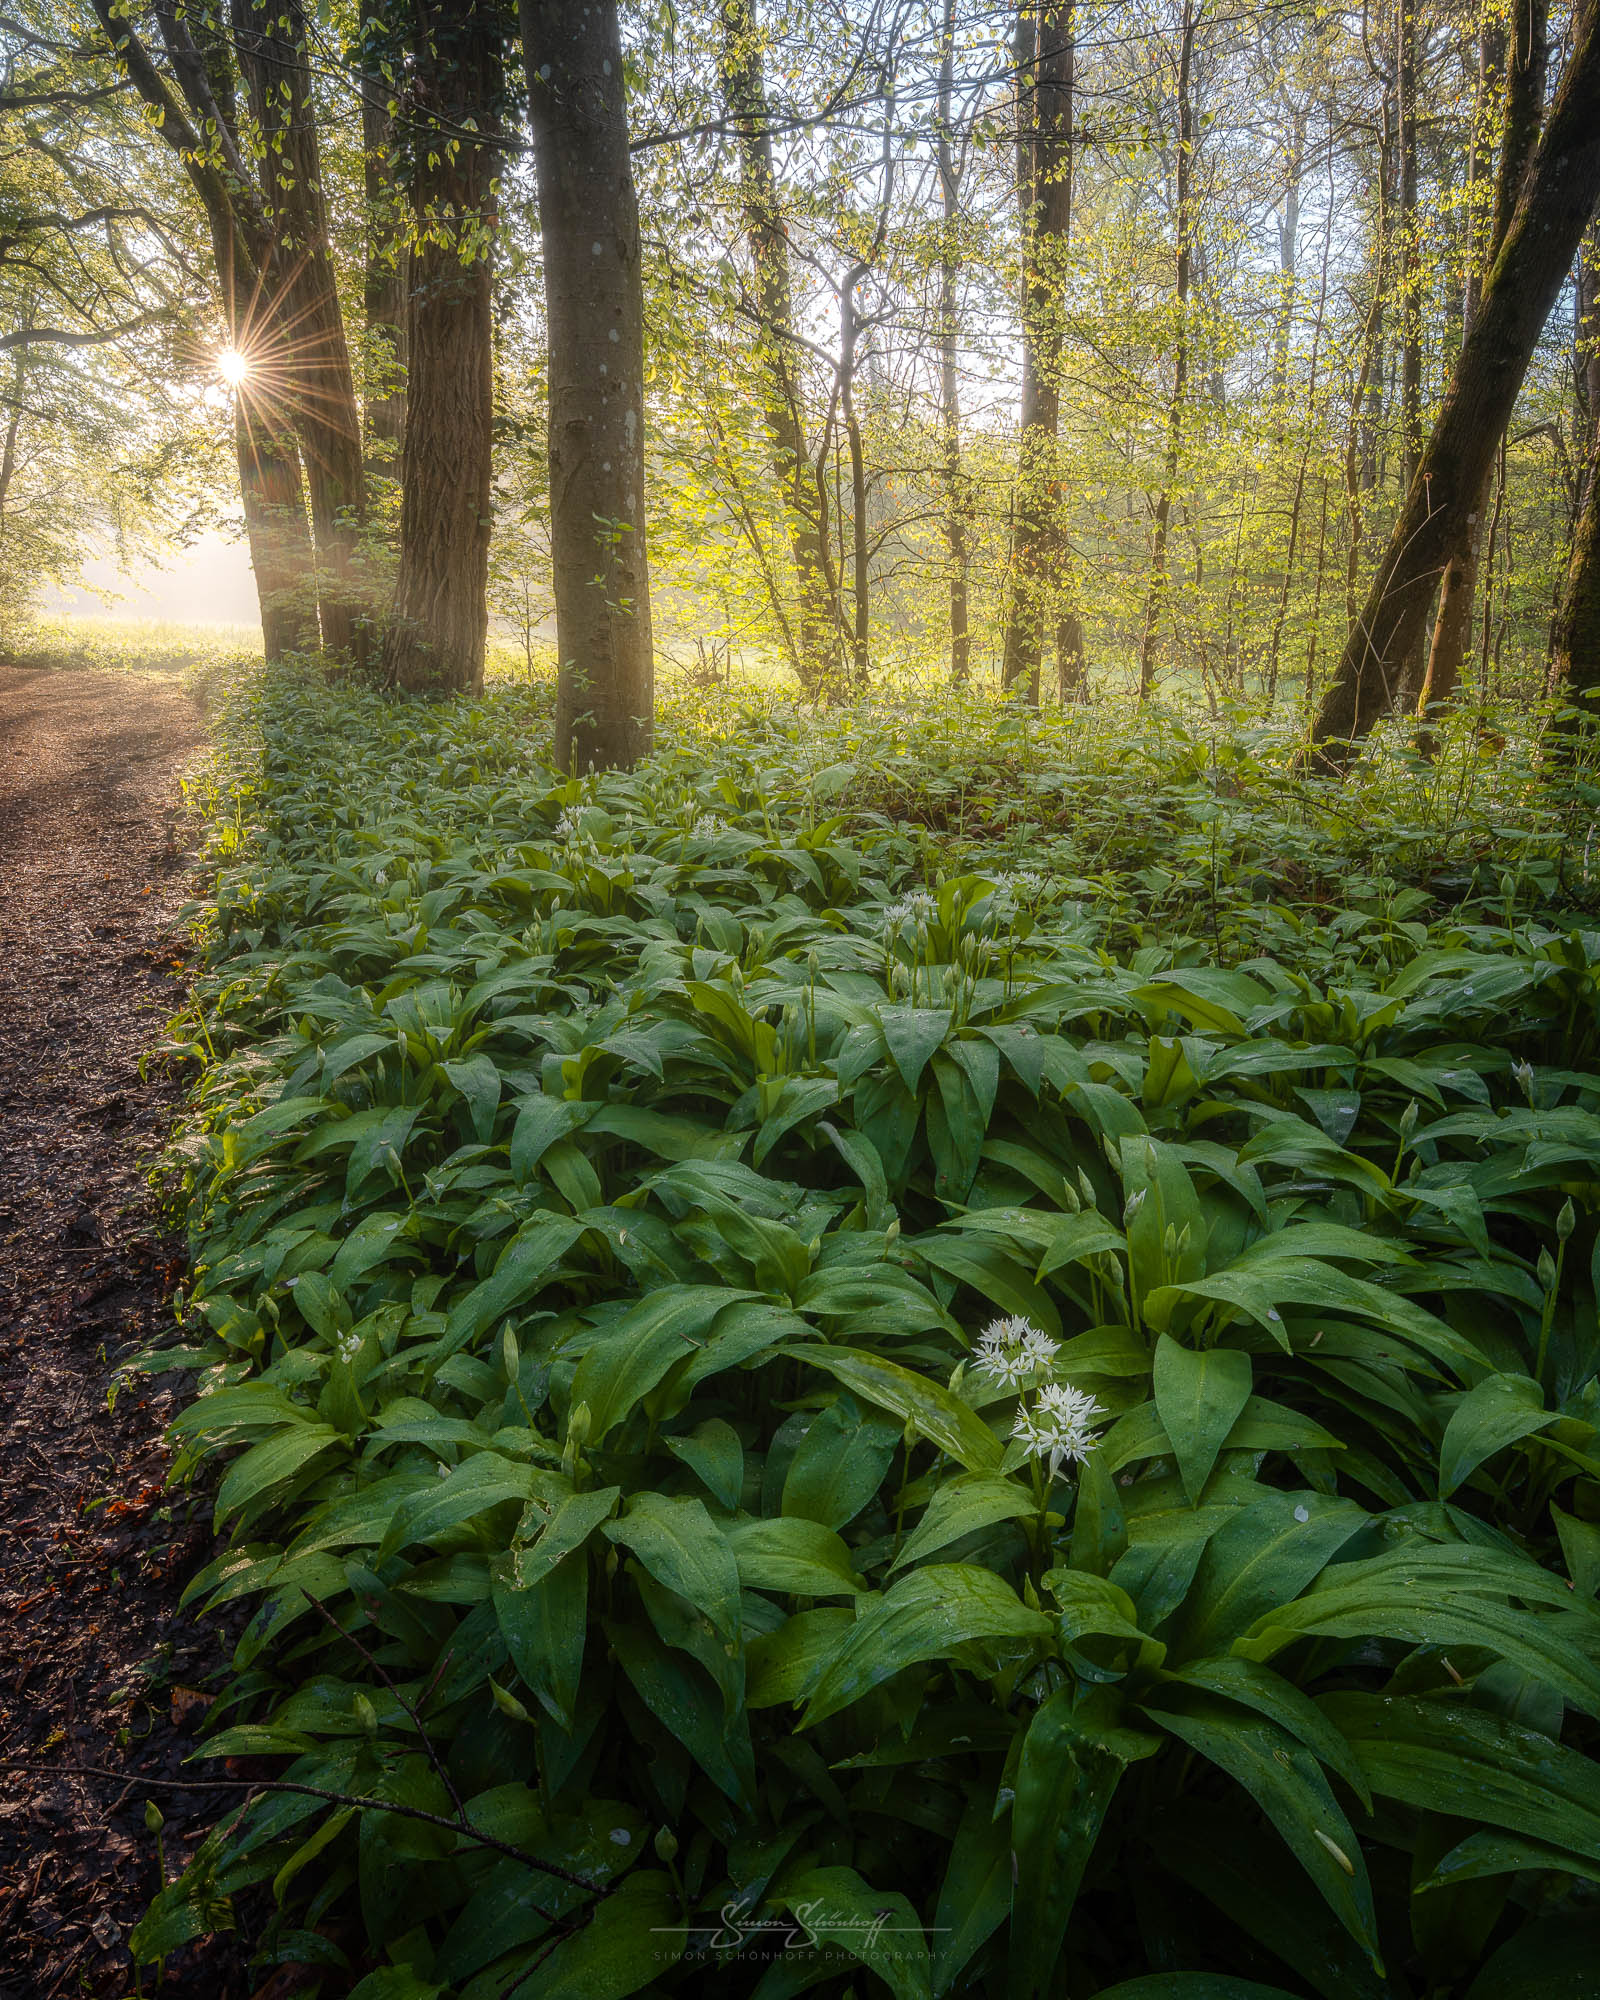
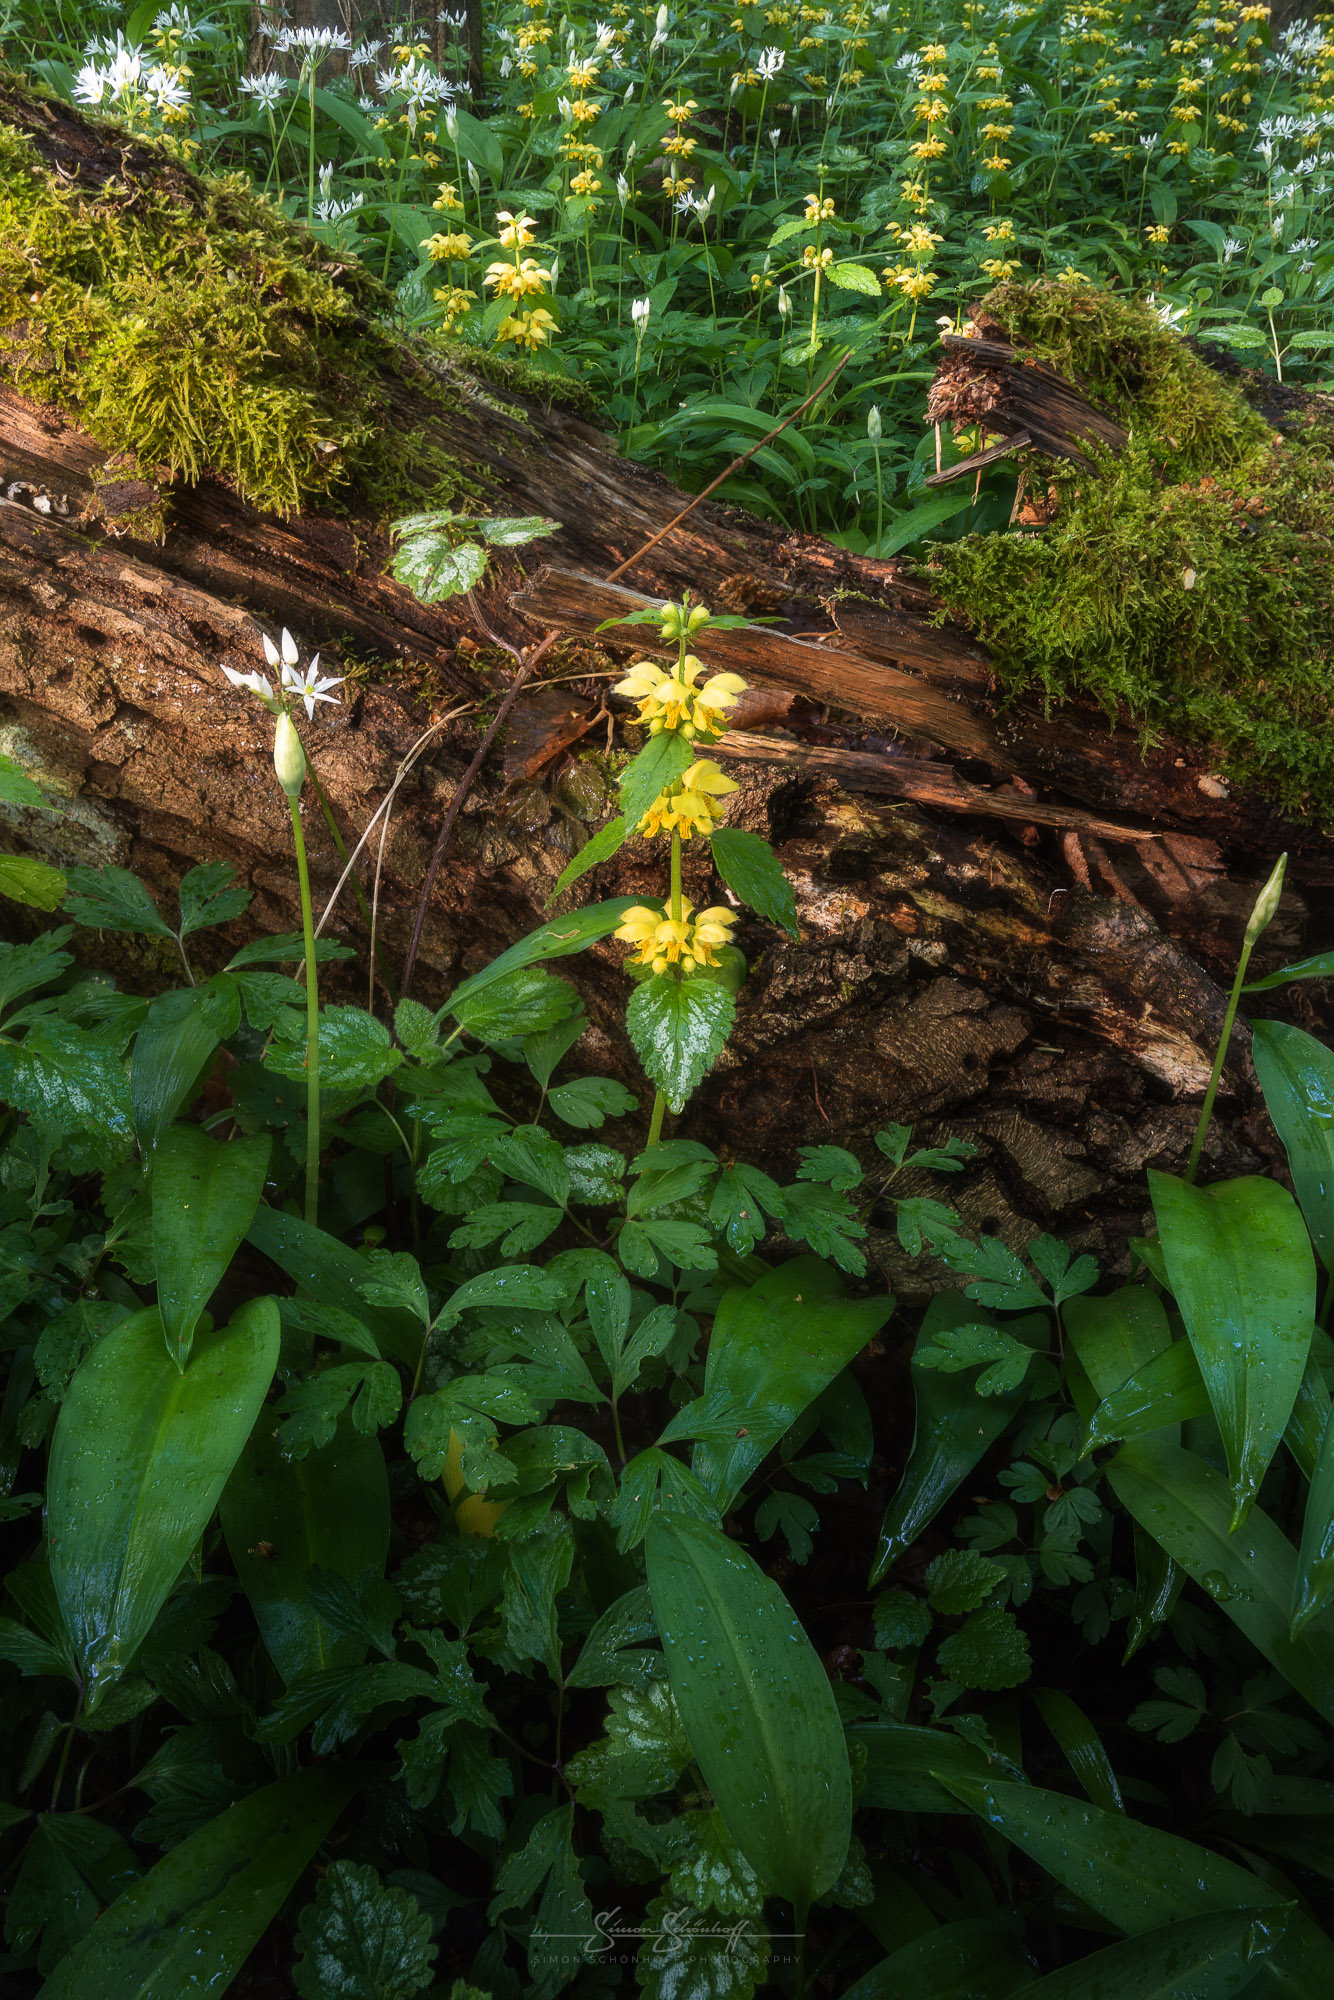
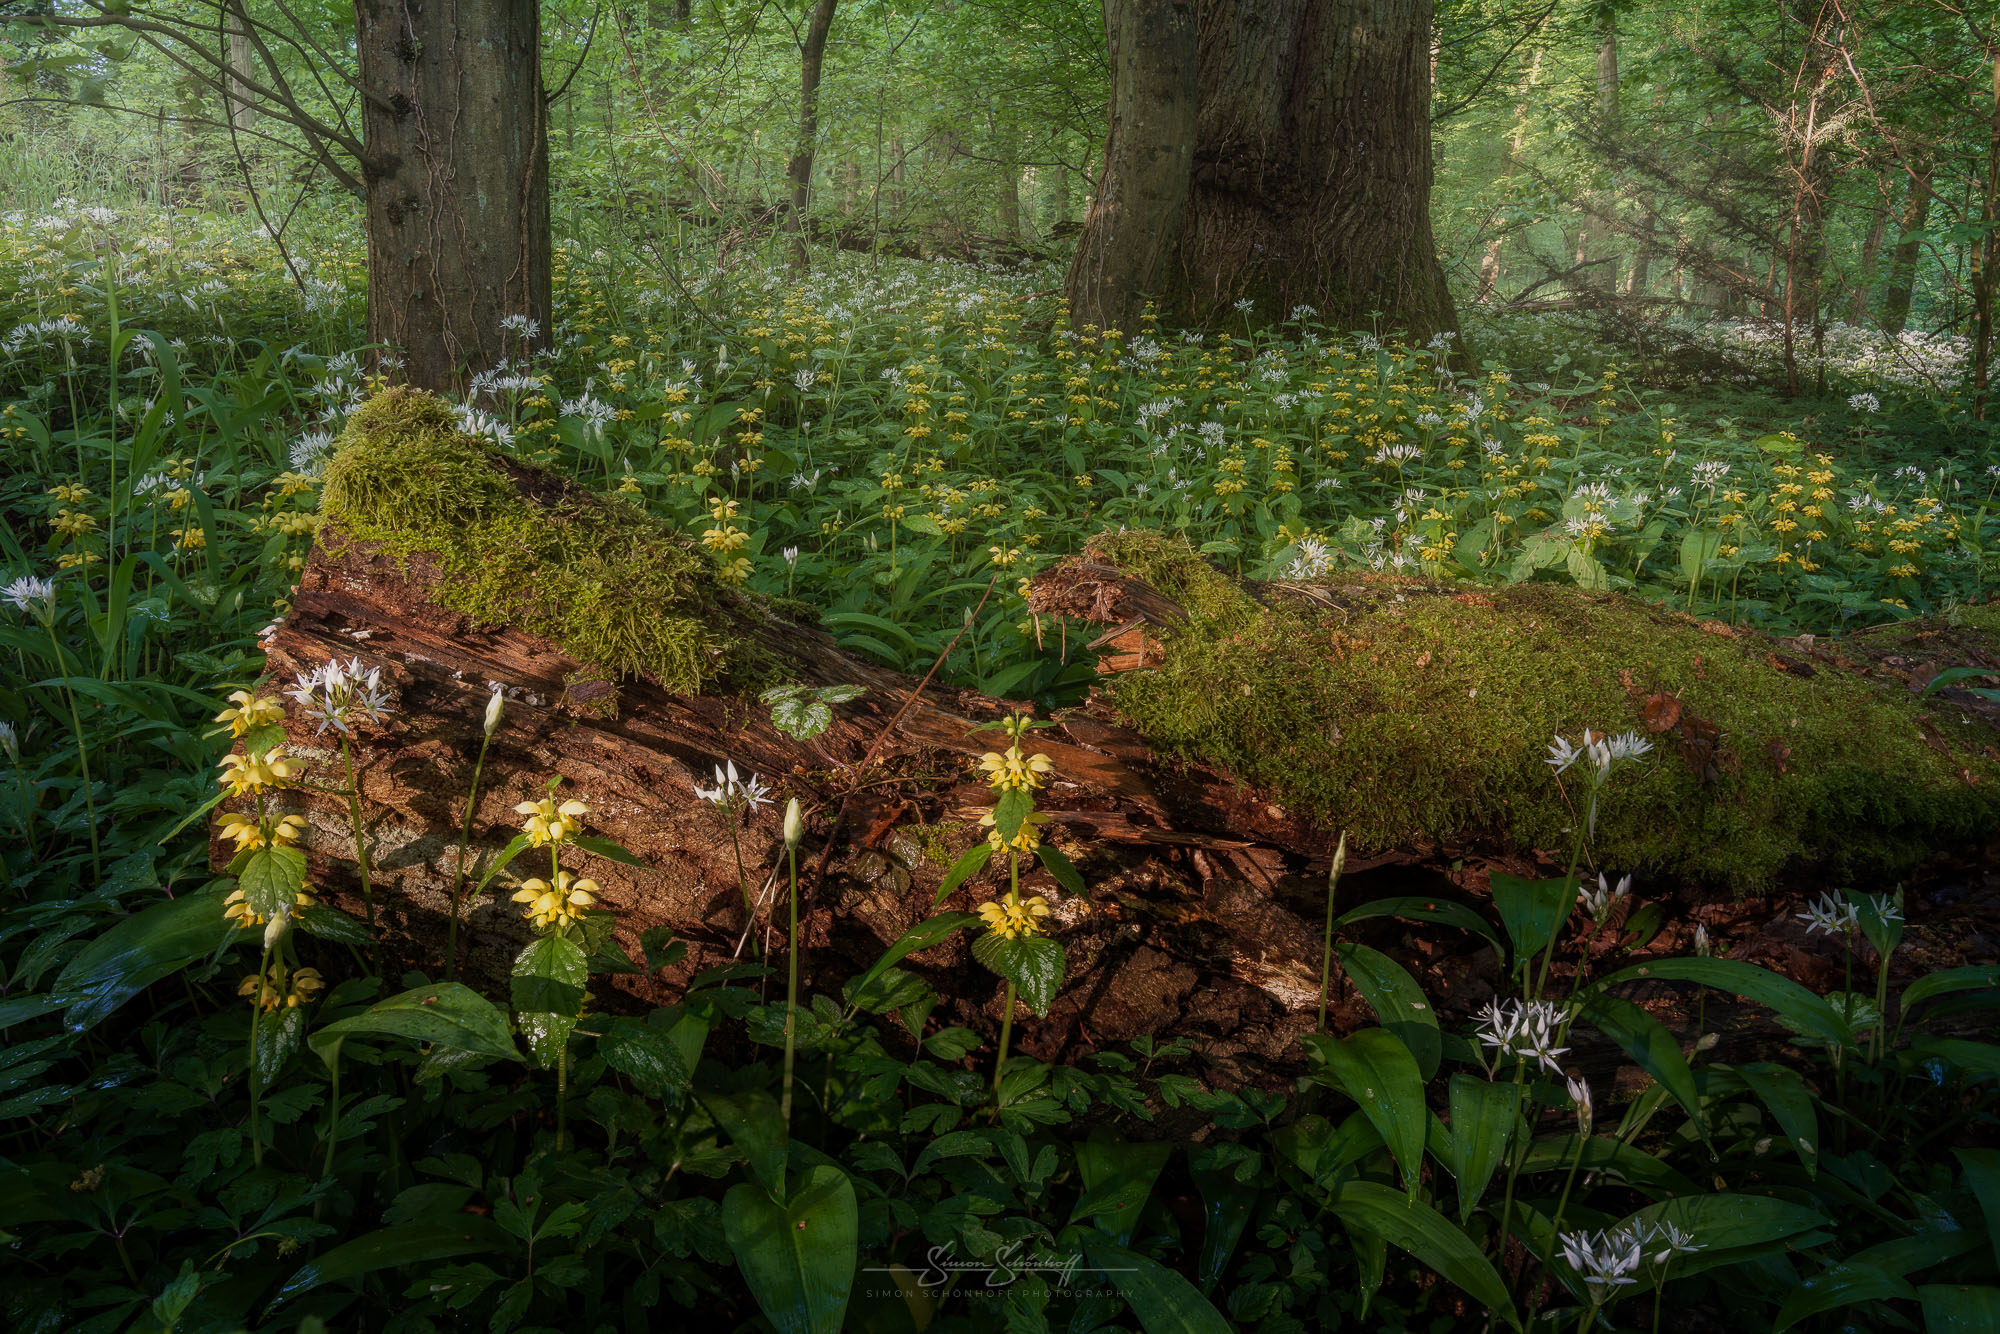
Now for the big but. In an imperfect world, perhaps there is simply no such thing as a perfect morning for me and wild garlic photography. In addition to the perfect conditions, I found one thing above all else that morning: closed wild garlic flowers. Yes, unfortunately it was still a bit early and the wild garlic didn’t want to bloom on this otherwise perfect morning, but only a week or two later. At least over a large area.
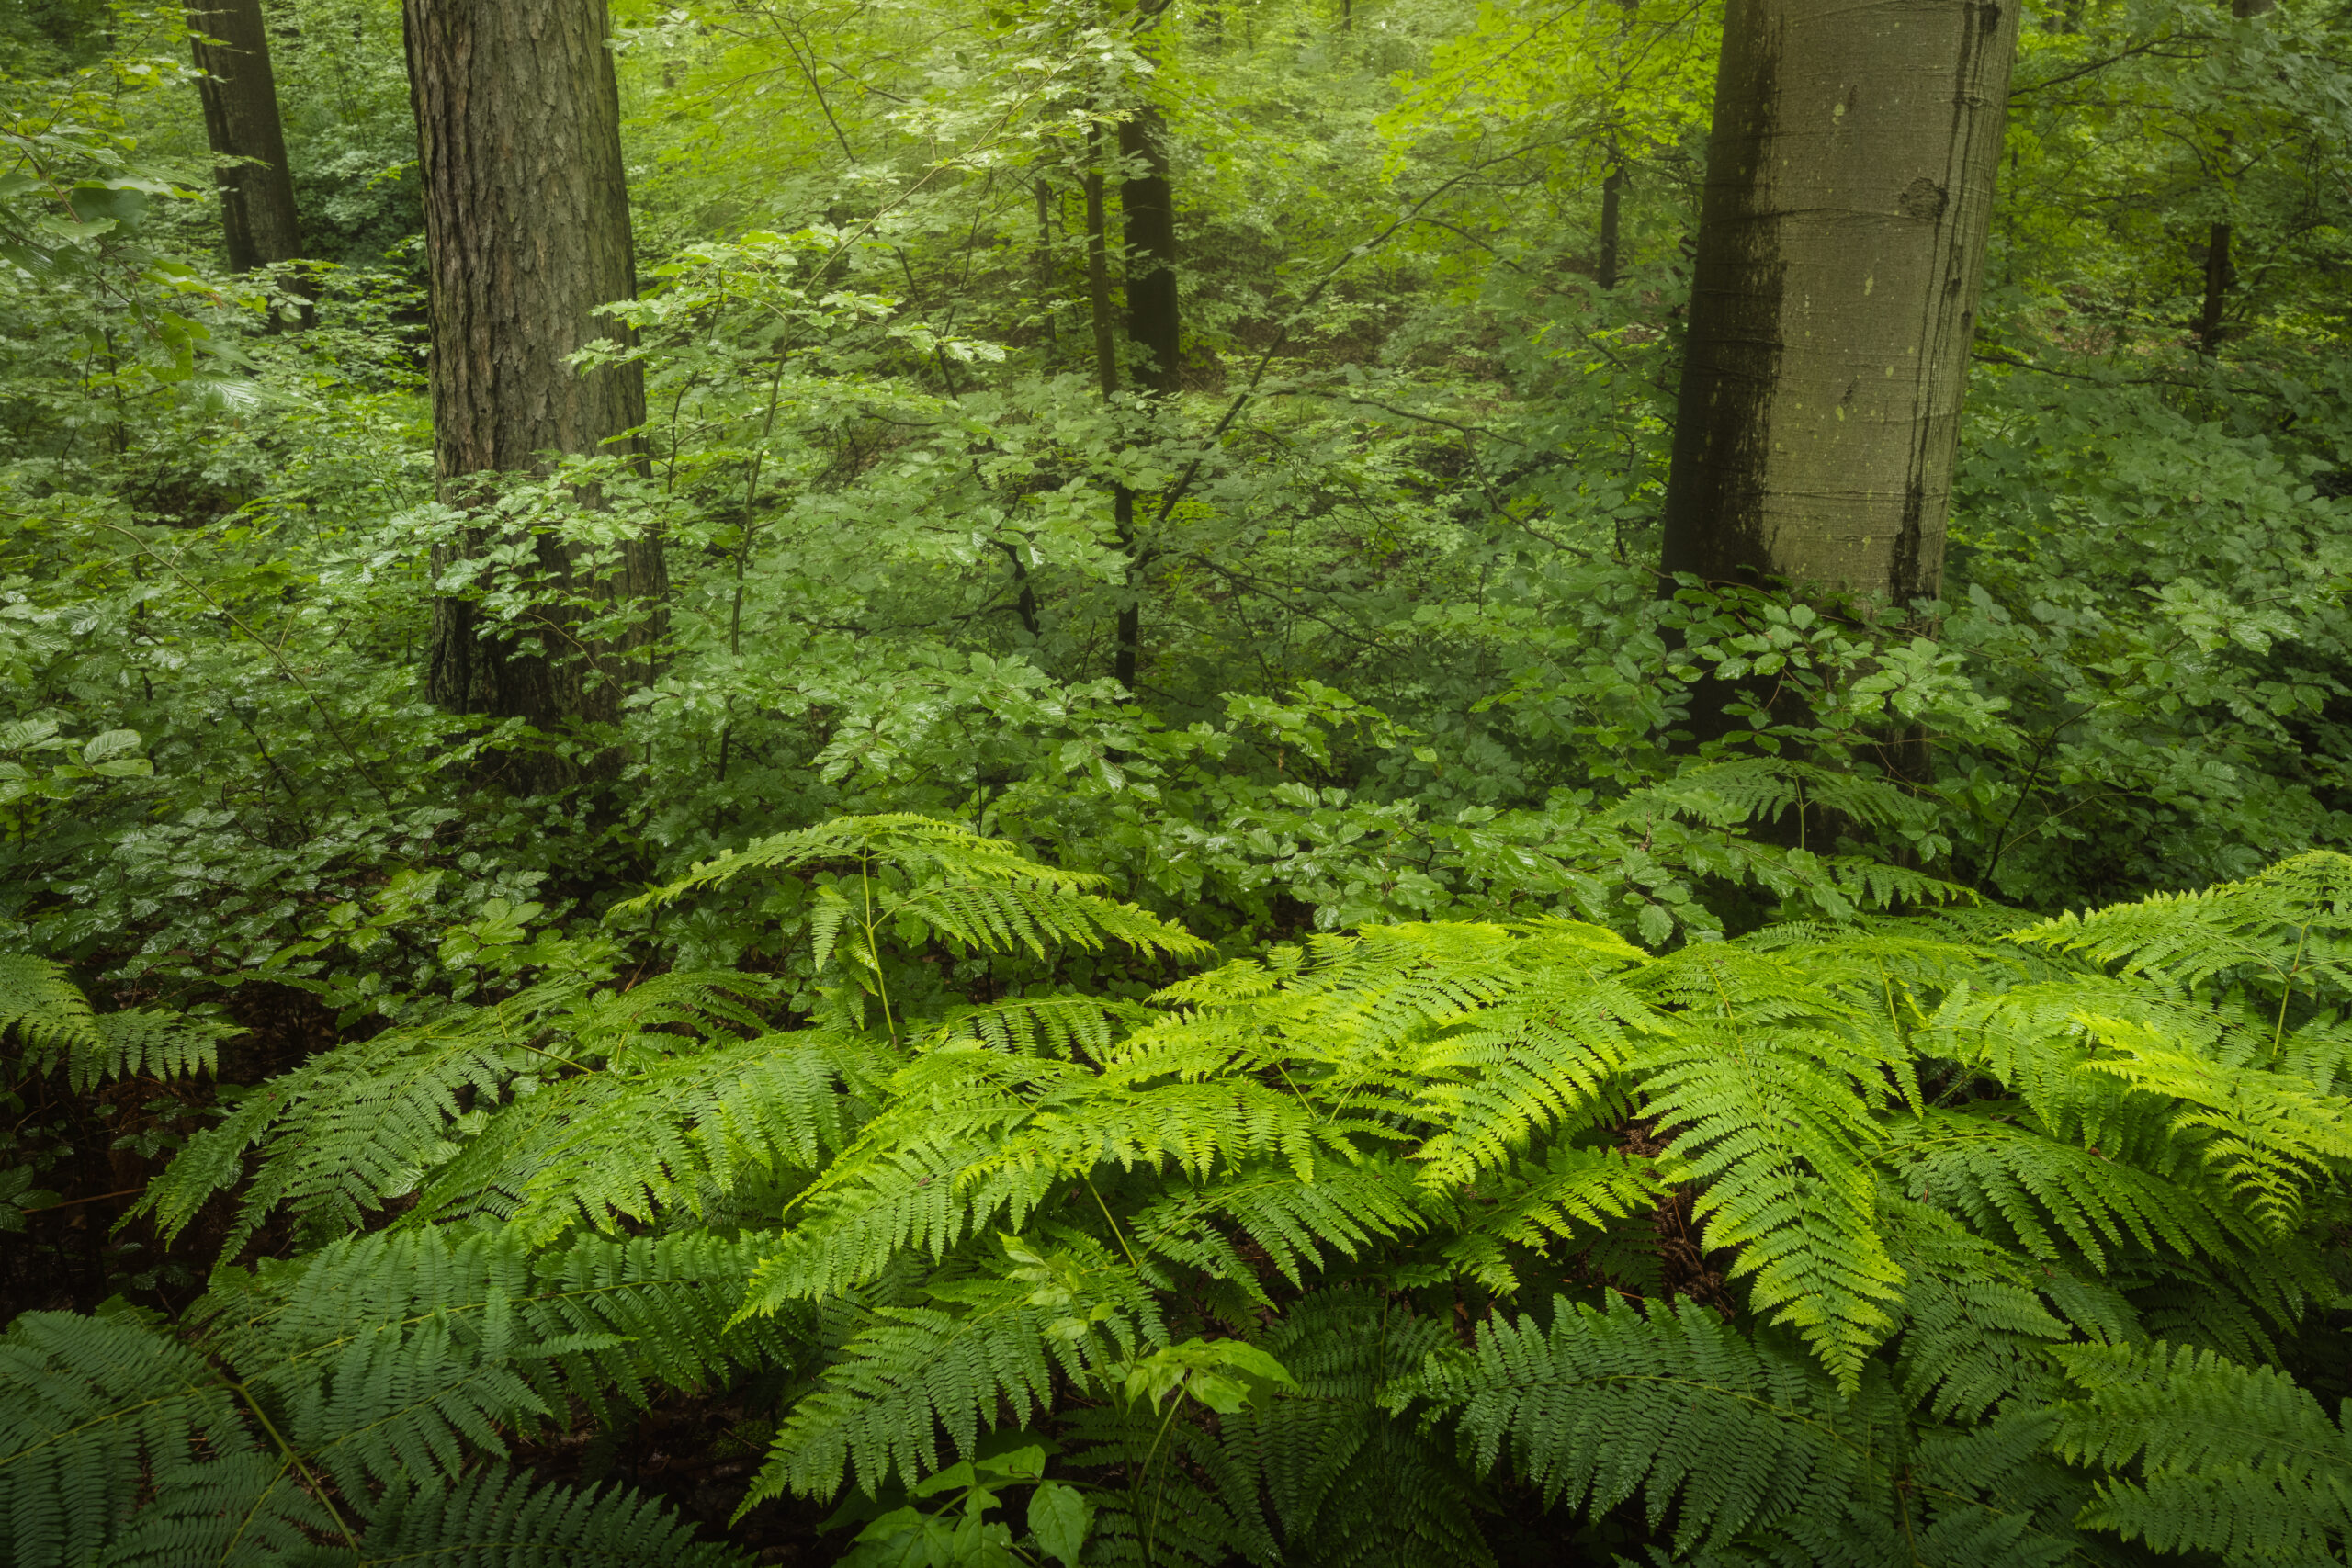
In addition, in winter the forestry workers had caused immense damage to the largest sea of wild garlic I had ever seen. Large areas of wild garlic had disappeared, trampled, rolled over, covered with huge felled tree trunks… It will probably take a few years for the wild garlic to recover.
But I persisted. I was able to discover open flowers in some places. Even if not in the most beautiful places lined with light, but a little deeper in the forest. Even though the wild garlic had not quite reached its peak, the conditions were all the more favourable, resulting in some wonderful pictures.
In this section, let’s also talk about how you can make the most of perfect conditions when you find them. There’s actually a golden rule for this: when taking photos on location, you need to collect all the data that you’ll need later in image processing. Because once you’re back home and you realise that you’re missing a focal plane, or an exposure, or a slightly adjusted composition to perfect the picture, then unfortunately it’s over. The moment will never come again, the picture in nature will be difficult to repeat. You may have to wait years for similar conditions, but that moment is gone.
So what does that mean for you when you’re out in field?
I personally used focus stacking and also took individual underexposed pictures that morning because I kept going down and close to the flowers in order to be able to correct very bright areas and highlights later in post-processing. I also sometimes took additional shots in backlighting and covered the sun with my thumb to avoid lens flares.
In next week’s VLOG, I’ll show you how I can use it to optimise the result in image processing. In a fortnight’ time, I’ve also prepared a video on how to work with the polarising filter and when I prefer to take it off to improve the image quality even further. So stay tuned!
A morning in the forest that could hardly have been more beautiful. The icing on the cake would have been if the wild garlic had already been in full bloom. I’ll probably visit it more often in the next few days, but I doubt I’ll find conditions like this again. But take a look for yourself, here are all the pictures from the VLOG.
Today we’re heading back into the forest, because the conditions are perfect and the wild garlic is blooming! Or not yet? In any case, today’s video gives you the only important photography tip you need to follow to get home with the best results! Be curious! Have fun watching. Next week there will be the next episode and we’ll take care of the image processing of some of today’s pictures!
Im zweiten Video bekommt ihr einen kleinen Einblick in die Bildbearbeitung meiner Bärlauchfotos. Mit besonderem Augenmerk auf die hellen, manchmal auch überbelichteten Stellen. Sind solche Lichtspots im Wald vorhanden ist es manchmal sinnvoll eine unterbelichtete Aufnahme oder HDR zu erstellen, um in der Bearbeitung noch etwas mehr Dynamikumfang zur Verfügung zu haben. Die Einarbeitung der dunkleren Aufnahmen der hellen Bereiche ist dann je nach Situation verschieden. Seht selbst, welche Möglichkeiten es gibt.
Feel free to share: