
You can see the VLOG to the BLOG at the bottom of the page or you can reach it via this button:
If you would like to try or buy Luminar Neo yourself, you can use the code ‘Sphoto10´ to save an additional 10% on Luminar Neo!
Click here for Luminar Neo (*)
Skylum? Luminar? Wasn’t that the program with the fake skies? Exactly, and with just one click! But not only that. It was the first image editing program that offered the editor quite a lot of calculations and adjustments more or less supported by AI. For some time now, the placement of a sun and sunbeams, which also look damn realistic, has also been quite impressive. And that too with more or less just one click. But it’s not just these functions in Luminar that always make you feel a bit bad — at least that’s how I feel, because it somehow smells of “fake”. You can also adjust all the “normal things” such as exposure, highs, lows, whites and blacks.
But the people at Skylum go their own way and remain true to themselves. So there is not the normal contrast, structure and clarity in the edit area, no, it is called smart contrast, because almost white parts of the image are not brightened any further, and small/medium/large details, because the program recognizes whether it should work out fine structures, medium or coarse ones and automatically runs the right filters in the background. Nothing that you couldn’t do with Photoshop, but the know-how that you have to display in such a case is equivalent to the knowledge of a professional image editor.
Admittedly, if you come from the world of Photoshop and Lightroom, you first have to find your way around Luminar a little. What does a slider called Twilight Enhancer(AI) do? Or Relight (AI) and Atmosphere(AI)? Some of the names give a rough idea of the functions behind them. But if you move the slider once, it usually becomes clear very quickly. Small info “i ”s also help. In such functions, the program usually changes not just one small specific thing, but several things at the same time. If you are new to Luminar, this can mess up one or two things that you have previously set, but after a little training, the program delivers fantastic results with just a few clicks.
An example: How do I create depth in an image? In Photoshop or Lightroom, I work with selective masks, I need to know that I have to darken the foreground a little, perhaps add a little more contrast and structure or sharpness, lighten more distant elements in another mask, reduce contrasts, perhaps use a little negative dehaze. I may have to mask out subjects, which can now be done quickly thanks to object recognition, but you have to think about it and use it that way. In Luminar, I have to set the Brightness Near and Brightness Far in Relight(AI) and the desired depth in Depth. As if by magic, Luminar Neo leaves out what should be left out. Who is sitting in the program and thinking? Amazing.
Of course, with such AI-supported functions, there are sometimes images where it works better and sometimes where it works less well. In the meantime, however, Luminar has also improved significantly in the area of masking, so that you can still do it yourself if it didn’t work perfectly in one place or another. In any case, changes can always be applied globally or locally.
Also, Luminar writes all changes as a kind of log (or are they layers like in Photoshop? I don’t know what it is yet. Maybe a bit of both?) In any case, you can adjust everything non-destructively afterwards. In my opinion, this also makes it a fully-fledged software for image editing.
You’re probably wondering: AI functions like this must take up a lot of computing power and time, right? That was my first thought too, but I was really amazed at how efficiently everything works. Changes to the sliders are quickly visible. Sometimes the image changes to a kind of preview in reduced resolution, but you can still see what the effects are. Sure, some functions are calculated and it takes a second, but with further adjustments there is usually no waiting time.
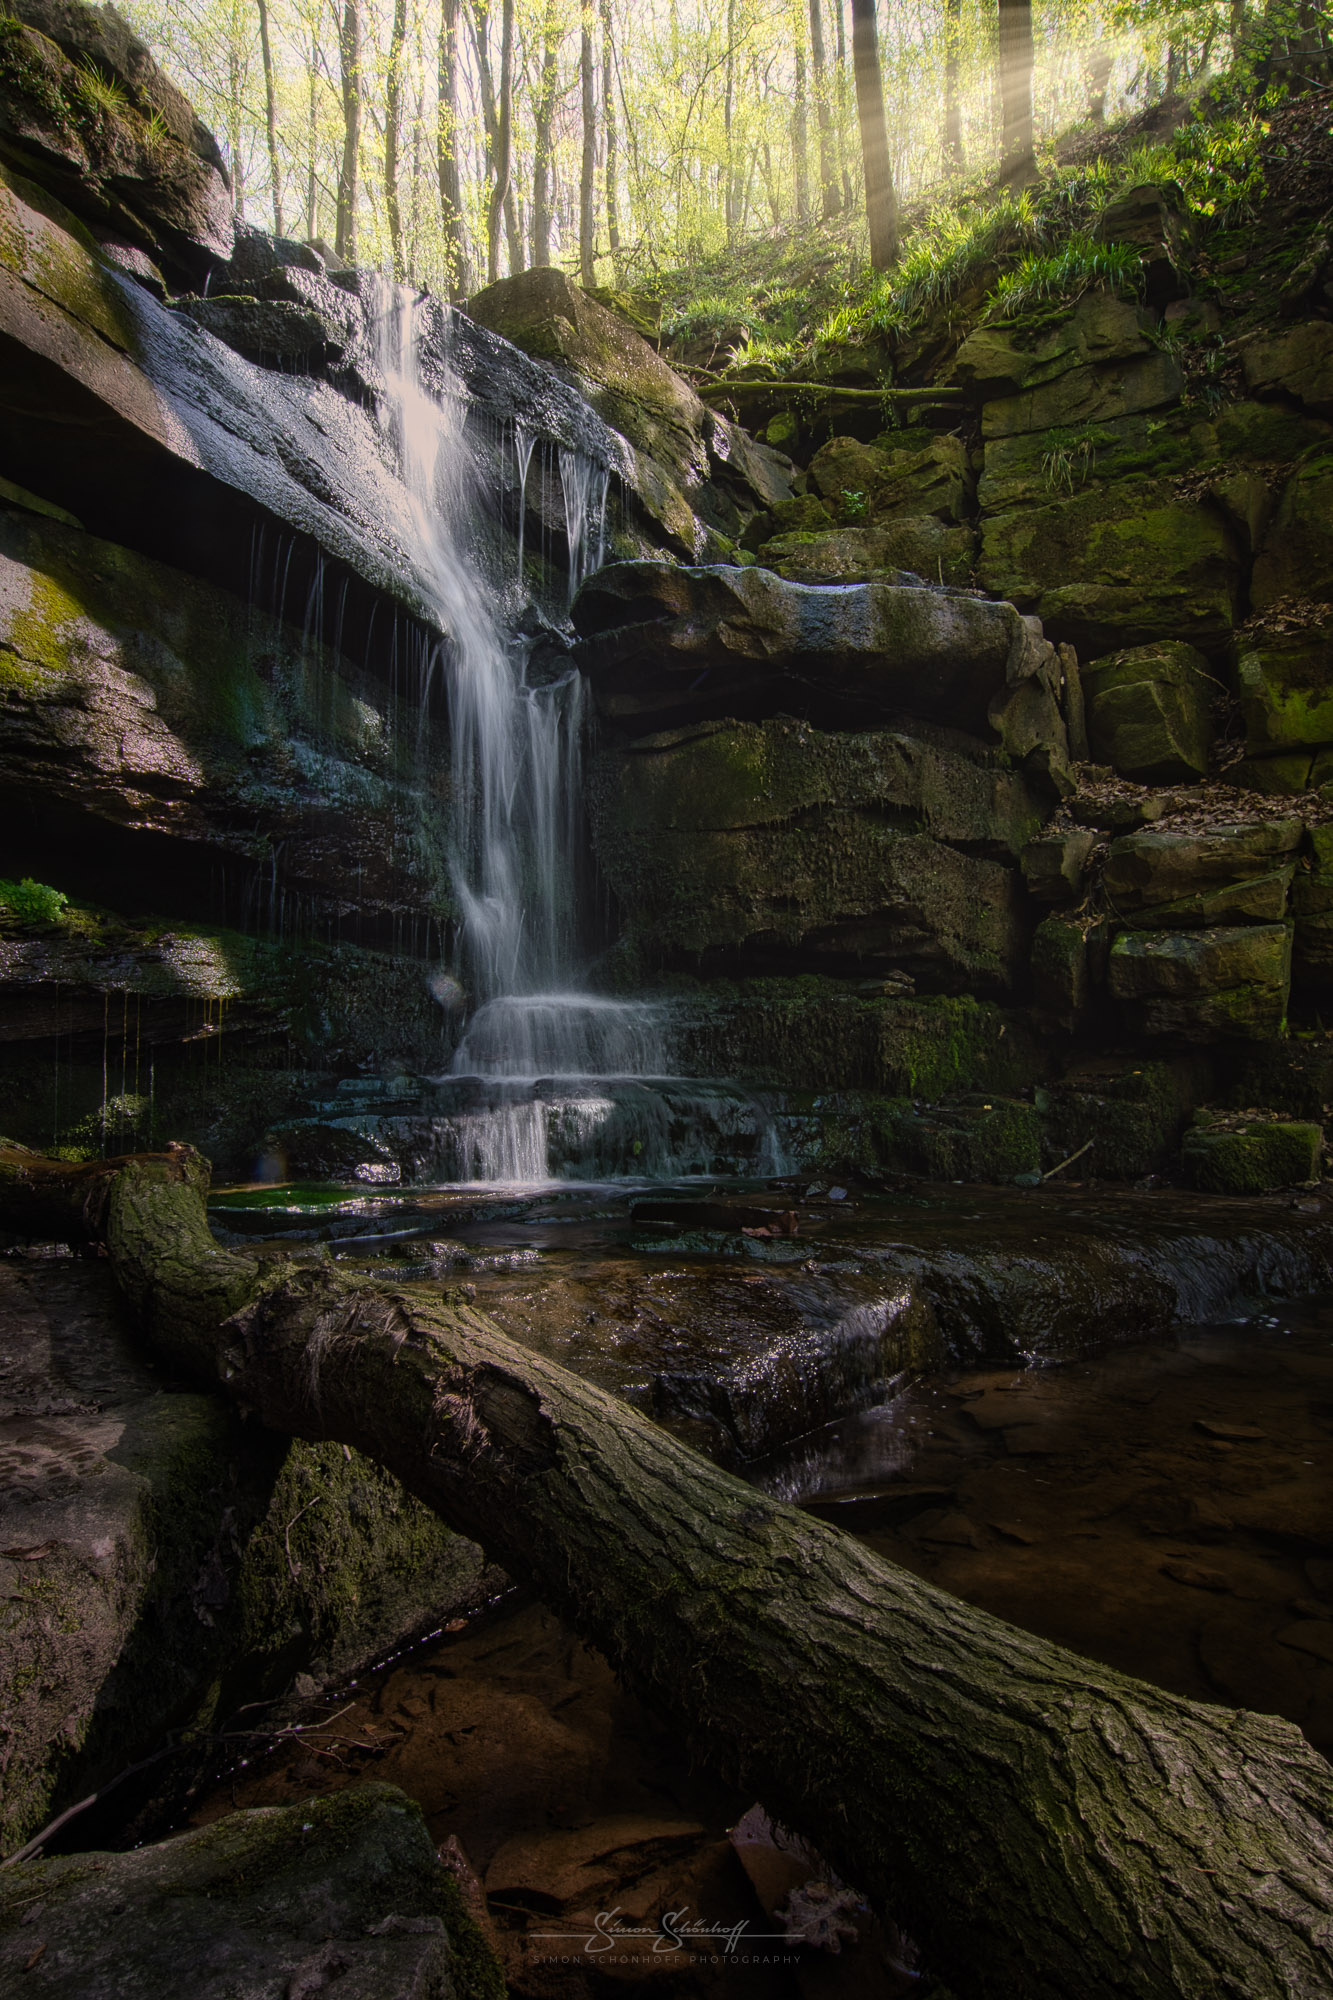
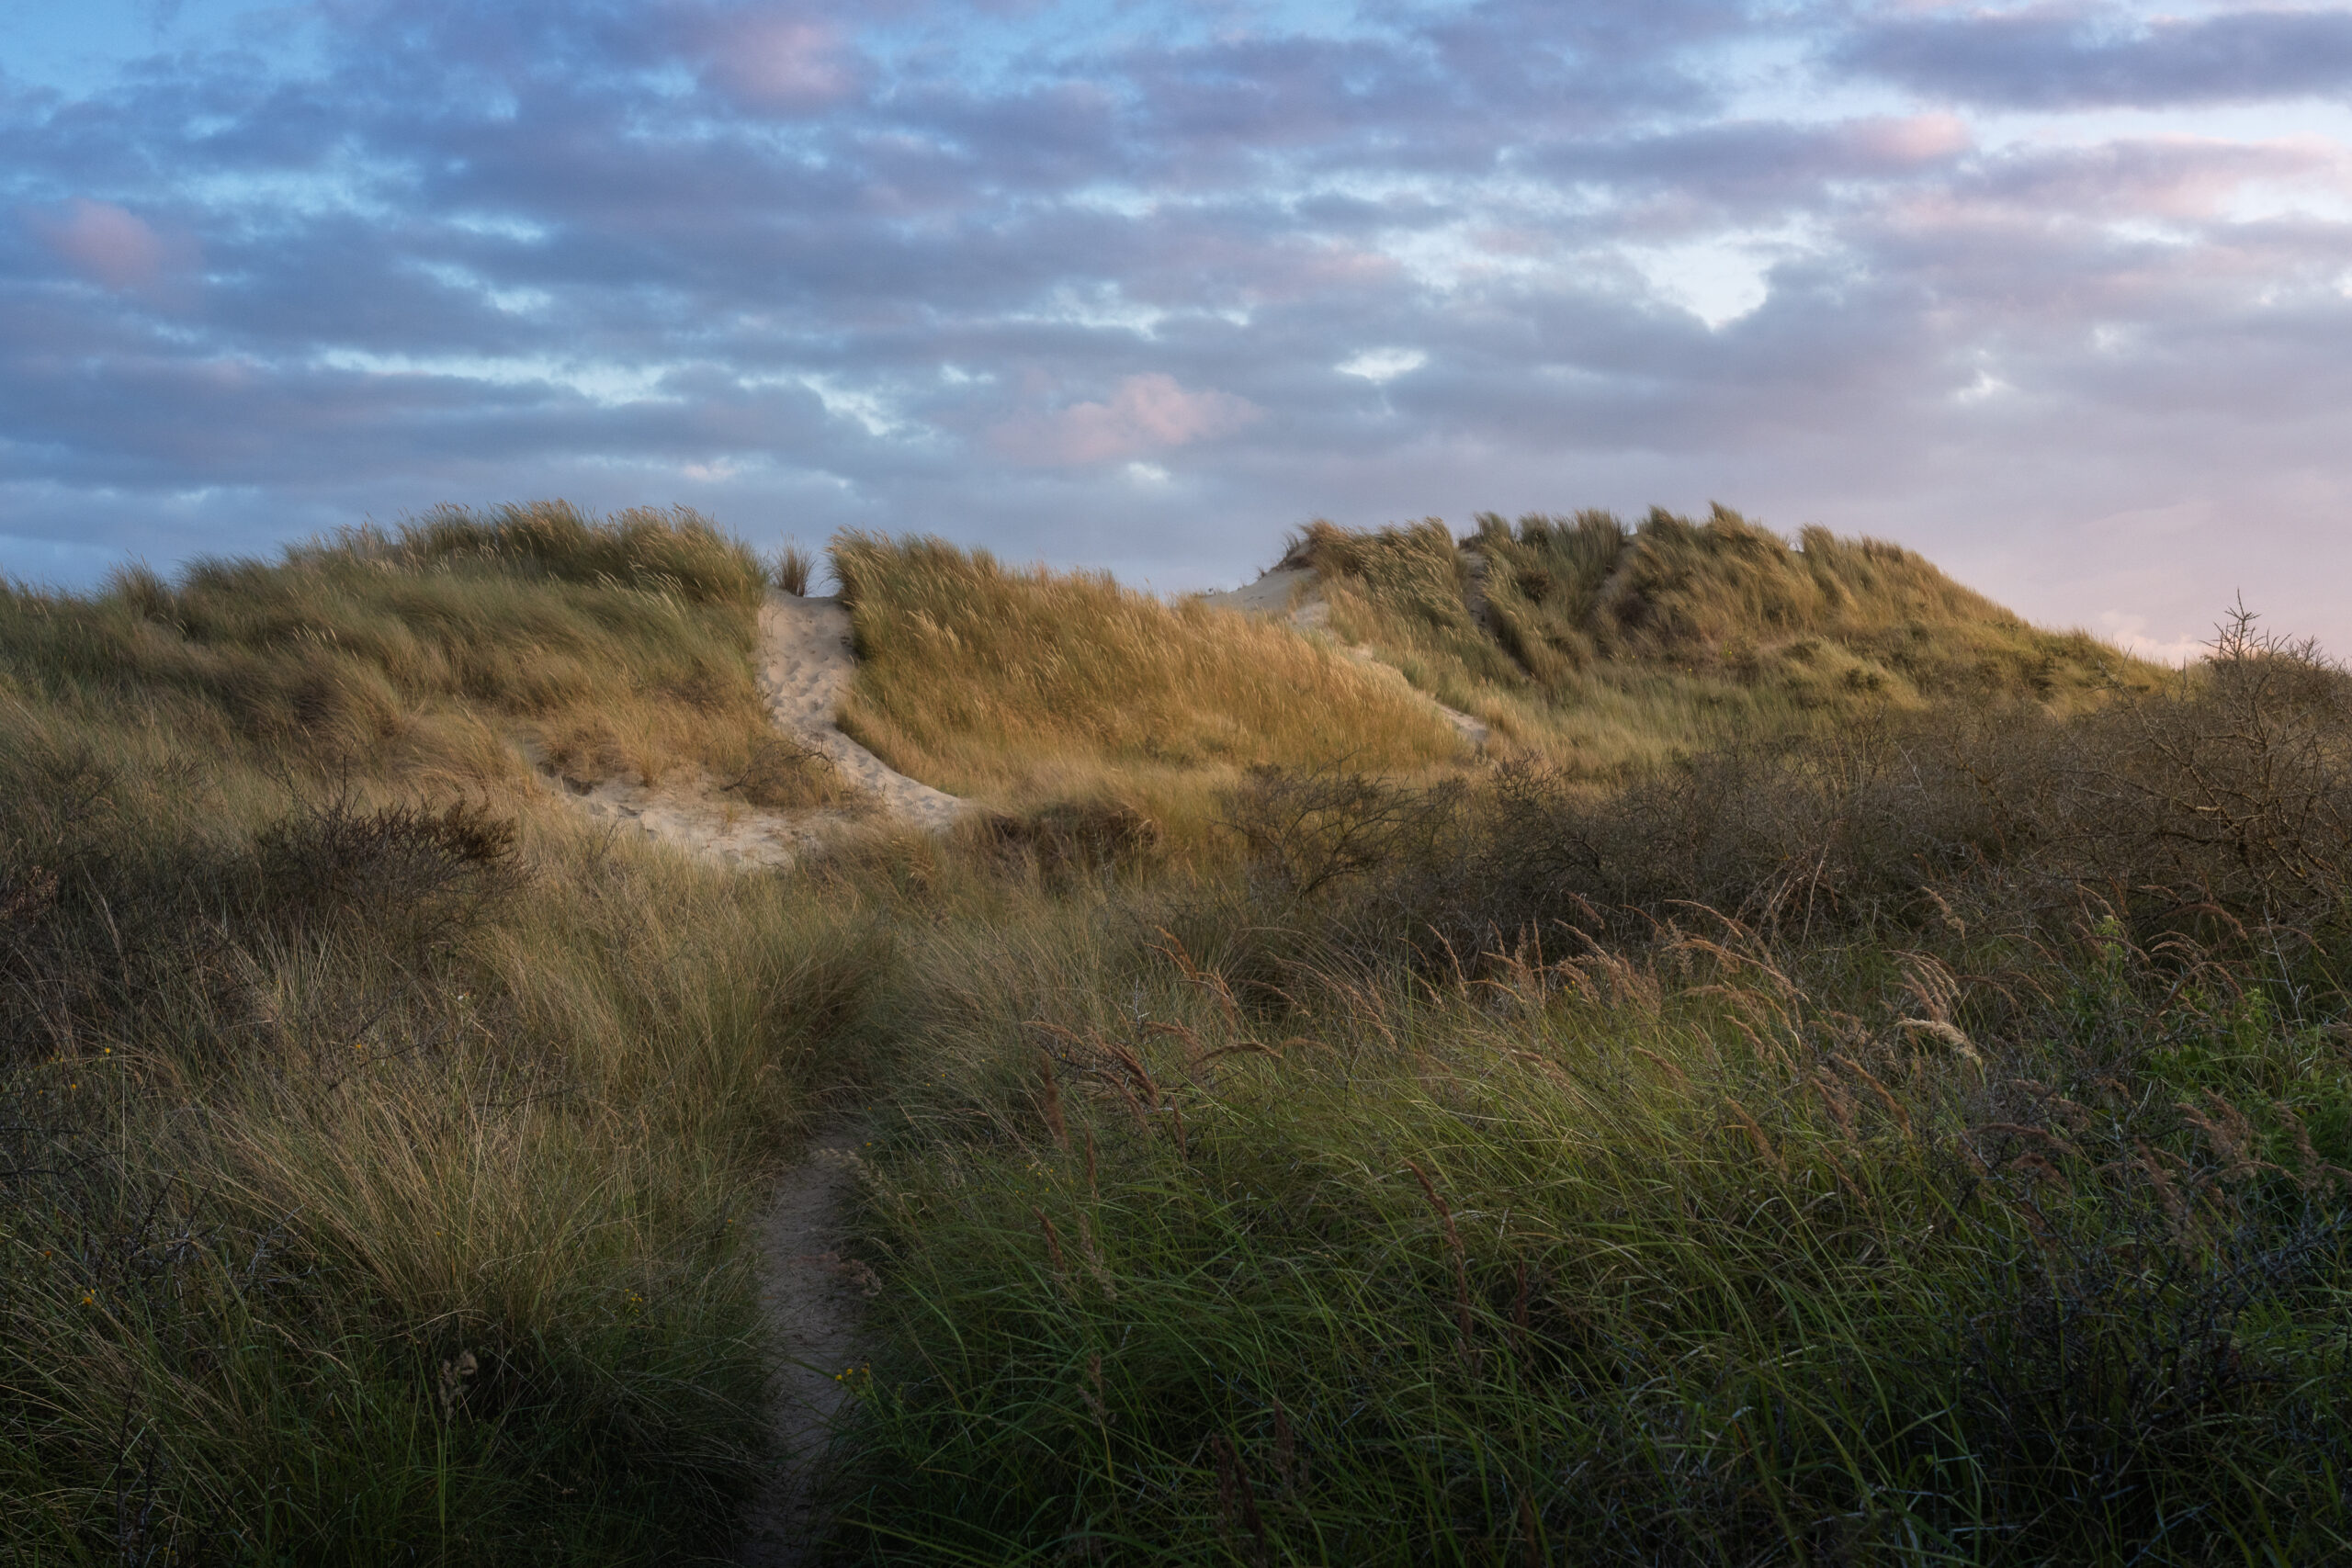
If you know your way around the functions (and I don’t know all of them yet), you can create a great edit in no time with the right controls. I edited the image below in 6 minutes (see video) and got the result I wanted with just a few functions. I also replaced the sky and played around a bit. Sorry, I just had to do it. The sky before was a yawning empty blue, please don’t hold that against me! 😉
I would cautiously say that many landscape images would get by with just a few functions:
Many other functions, especially in the Creative category, tend to be effects that contribute to the end result wisely and without being overused, but can also ruin images. Toning for “Split Toning”, Mystical, a kind of glowing soft focus, but somewhat different from the Orton Effect. This can be found under Glow. With Matte you can give the image an old look or a more matt look, etc.
You shouldn’t use them all at the same time, it quickly becomes kitschy. Instead, use one or two very discreetly to emphasize the message of the picture. As always, it is important to start with a certain plan or idea for the finished image. Make the right decisions about which functions should be used to achieve the desired result and then you can achieve this in just a few steps.

This and all other shots of this post you can request under “Prints” as an art print for your wall at home directly from me.
Luminar has definitely evolved. And by that I mean a real alternative to Photoshop and Lightroom as far as image editing is concerned. So if you’re tired of Adobe’s paid model, you should take a look at Luminar.
Unfortunately, there is nothing going on in Luminar in the area of metadata handling or image management. This is a pity, but not a problem. In this case, you could simply use Adobe Bridge for image management. Bridge gave rise to Lightroom and is still available free of charge from Adobe, you just need to create a user account.
But Luminar Neo is also a useful plugin for all those who want to stick with Adobe. If you work with Smart Objects in Photoshop, you can use Luminar functions as your own filters, for example. Also non-destructive and sometimes simply faster than with many clicks and in-depth knowledge in Photoshop.
Skylum is currently having a “Spring Sale” with a substantial discount on the Lifetime version and with my coupon code ‘Sphoto10’ you can save another 10%. You can find the link to the software below.
If you would like to try or buy Luminar Neo yourself, you can use the code ‘Sphoto10´ to save an additional 10% on Luminar Neo!
Click here for Luminar Neo (*)
In the video I give a first overview of Luminar Neo and I edit 2 old pictures of mine that I never showed anyone. I just didn’t like them. With Luminar Neo I was able to get a lot out of them. I did all the image editing in Neo. For the first image, I’ll go through the individual functions in quite a bit of detail and show you what the program does. I edited the second image in just 6 minutes, but see for yourself.
Feel free to share:

2 Responses
Ich habe Luminar neo gekauft, aber schnell ein bild zum versenden, bearbeiten, kann ich noch nicht. ich muss die gebrauchsanleitung ausdrucken, und dann gezielt vorgehen.
Ist verständlich, gerade in den ersten Schritten ist Luminar Neo nicht ganz so einleuchtend, da es sich von anderen Programmen doch schon unterscheidet. Aber wenn man nach einigen Versuchen verstanden hat, was die Regler machen, kommt man außerordentlich schnell zu tollen Ergebnissen. Viel Erfolg! Ich werde in der nächsten Zeit auch noch weitere Videos zu Luminar Neo machen, also gerne meinen Youtube-Kanal abonnieren!