Gear:
Sony a7IV
Sony FE 2.8/16–35 mm GM
Sony FE 4/24–105 mm G
Sony FE 100–400 mm GM
You can see the VLOG to the BLOG at the bottom of the page or you can reach it via this button:
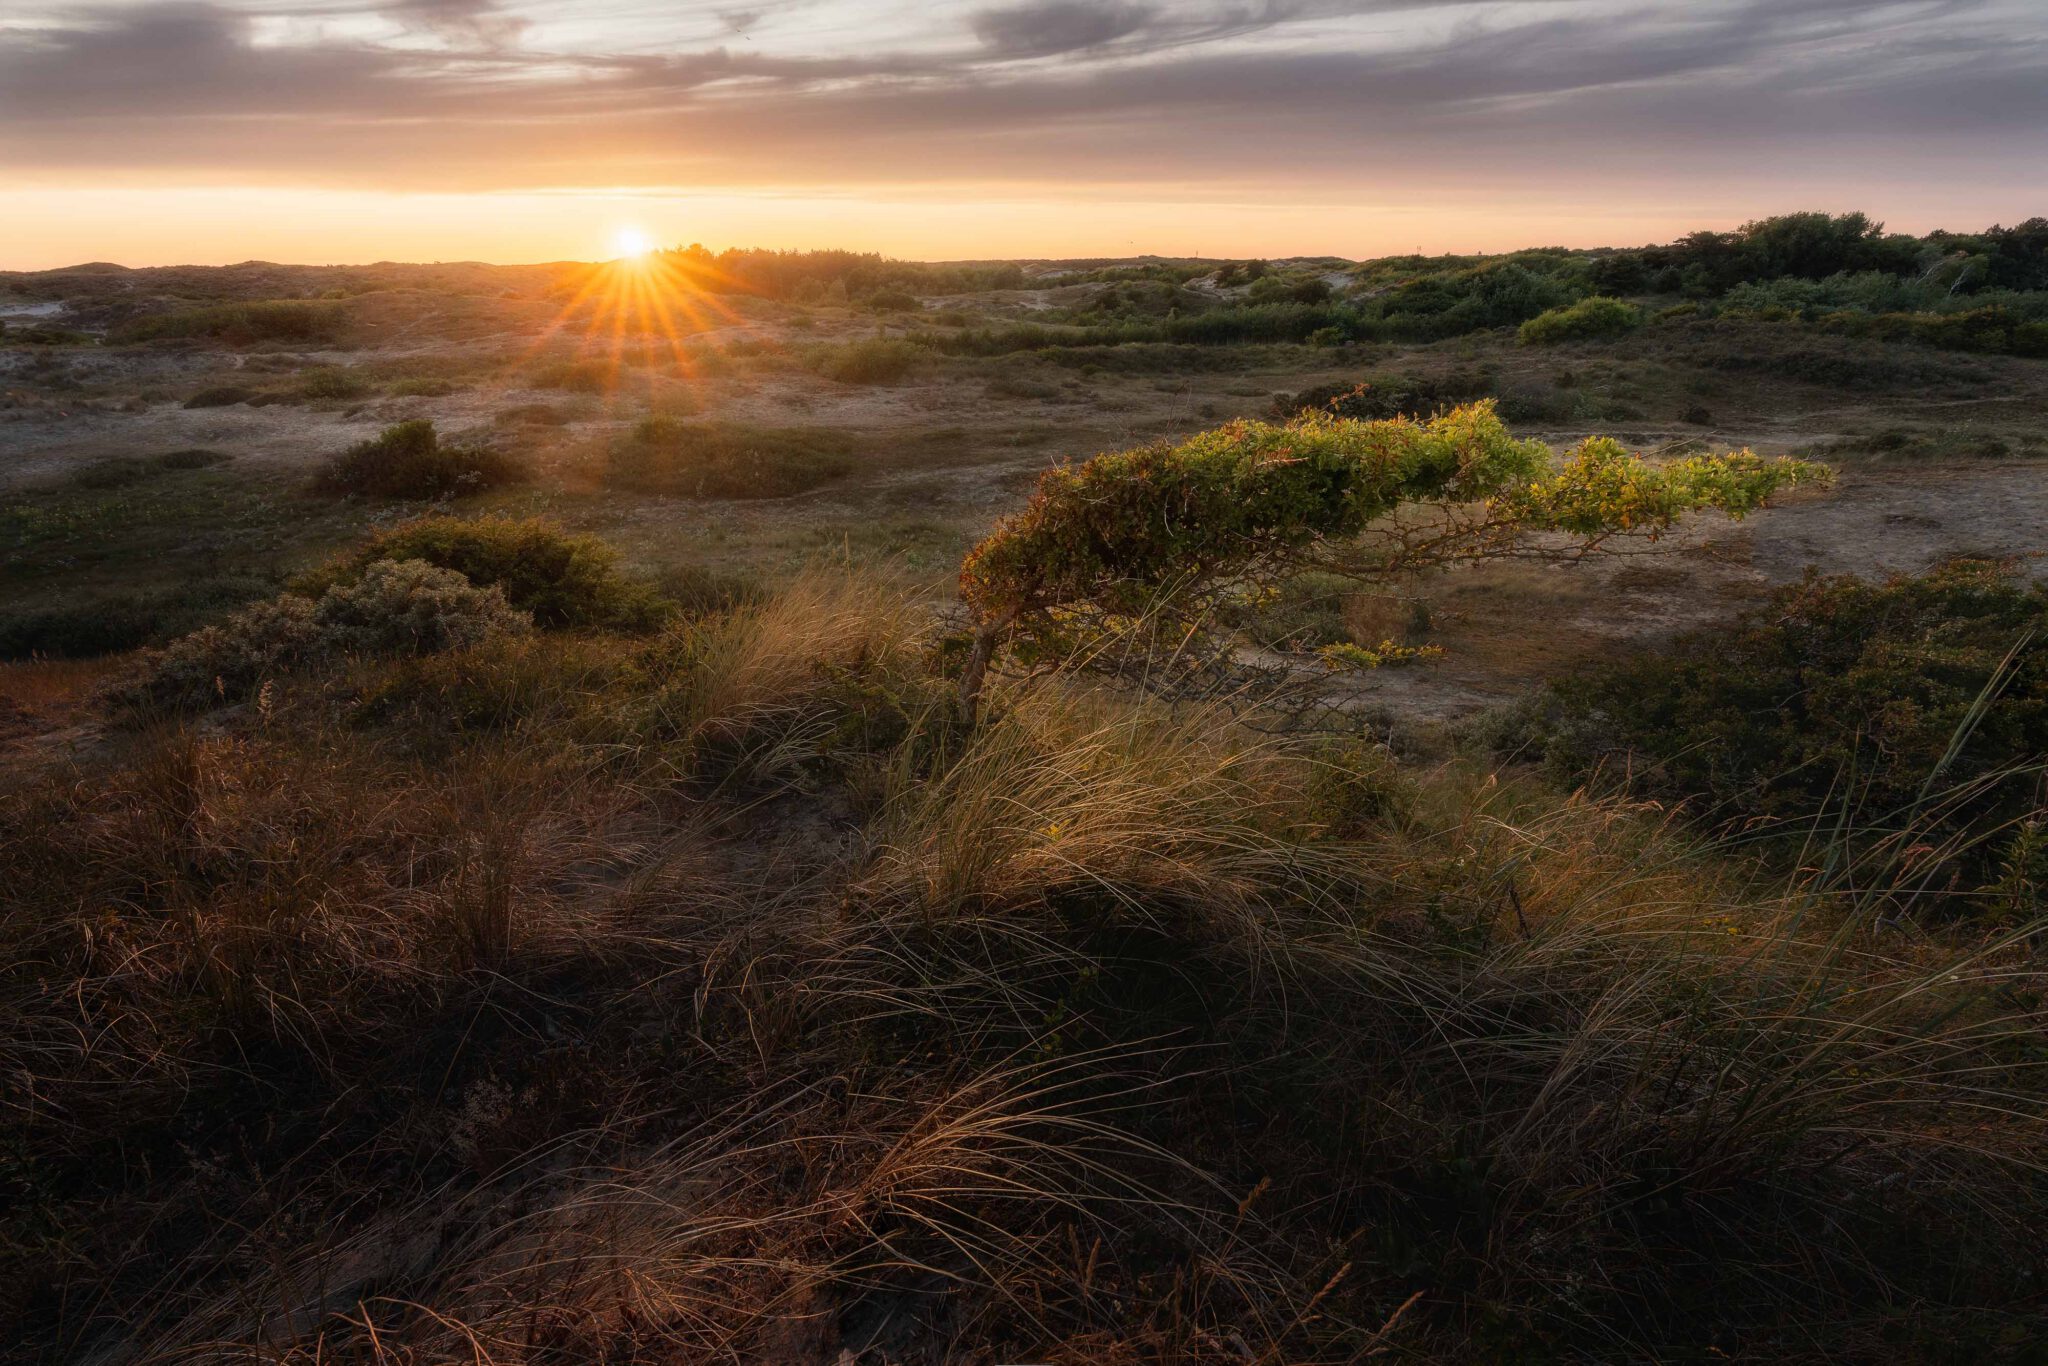
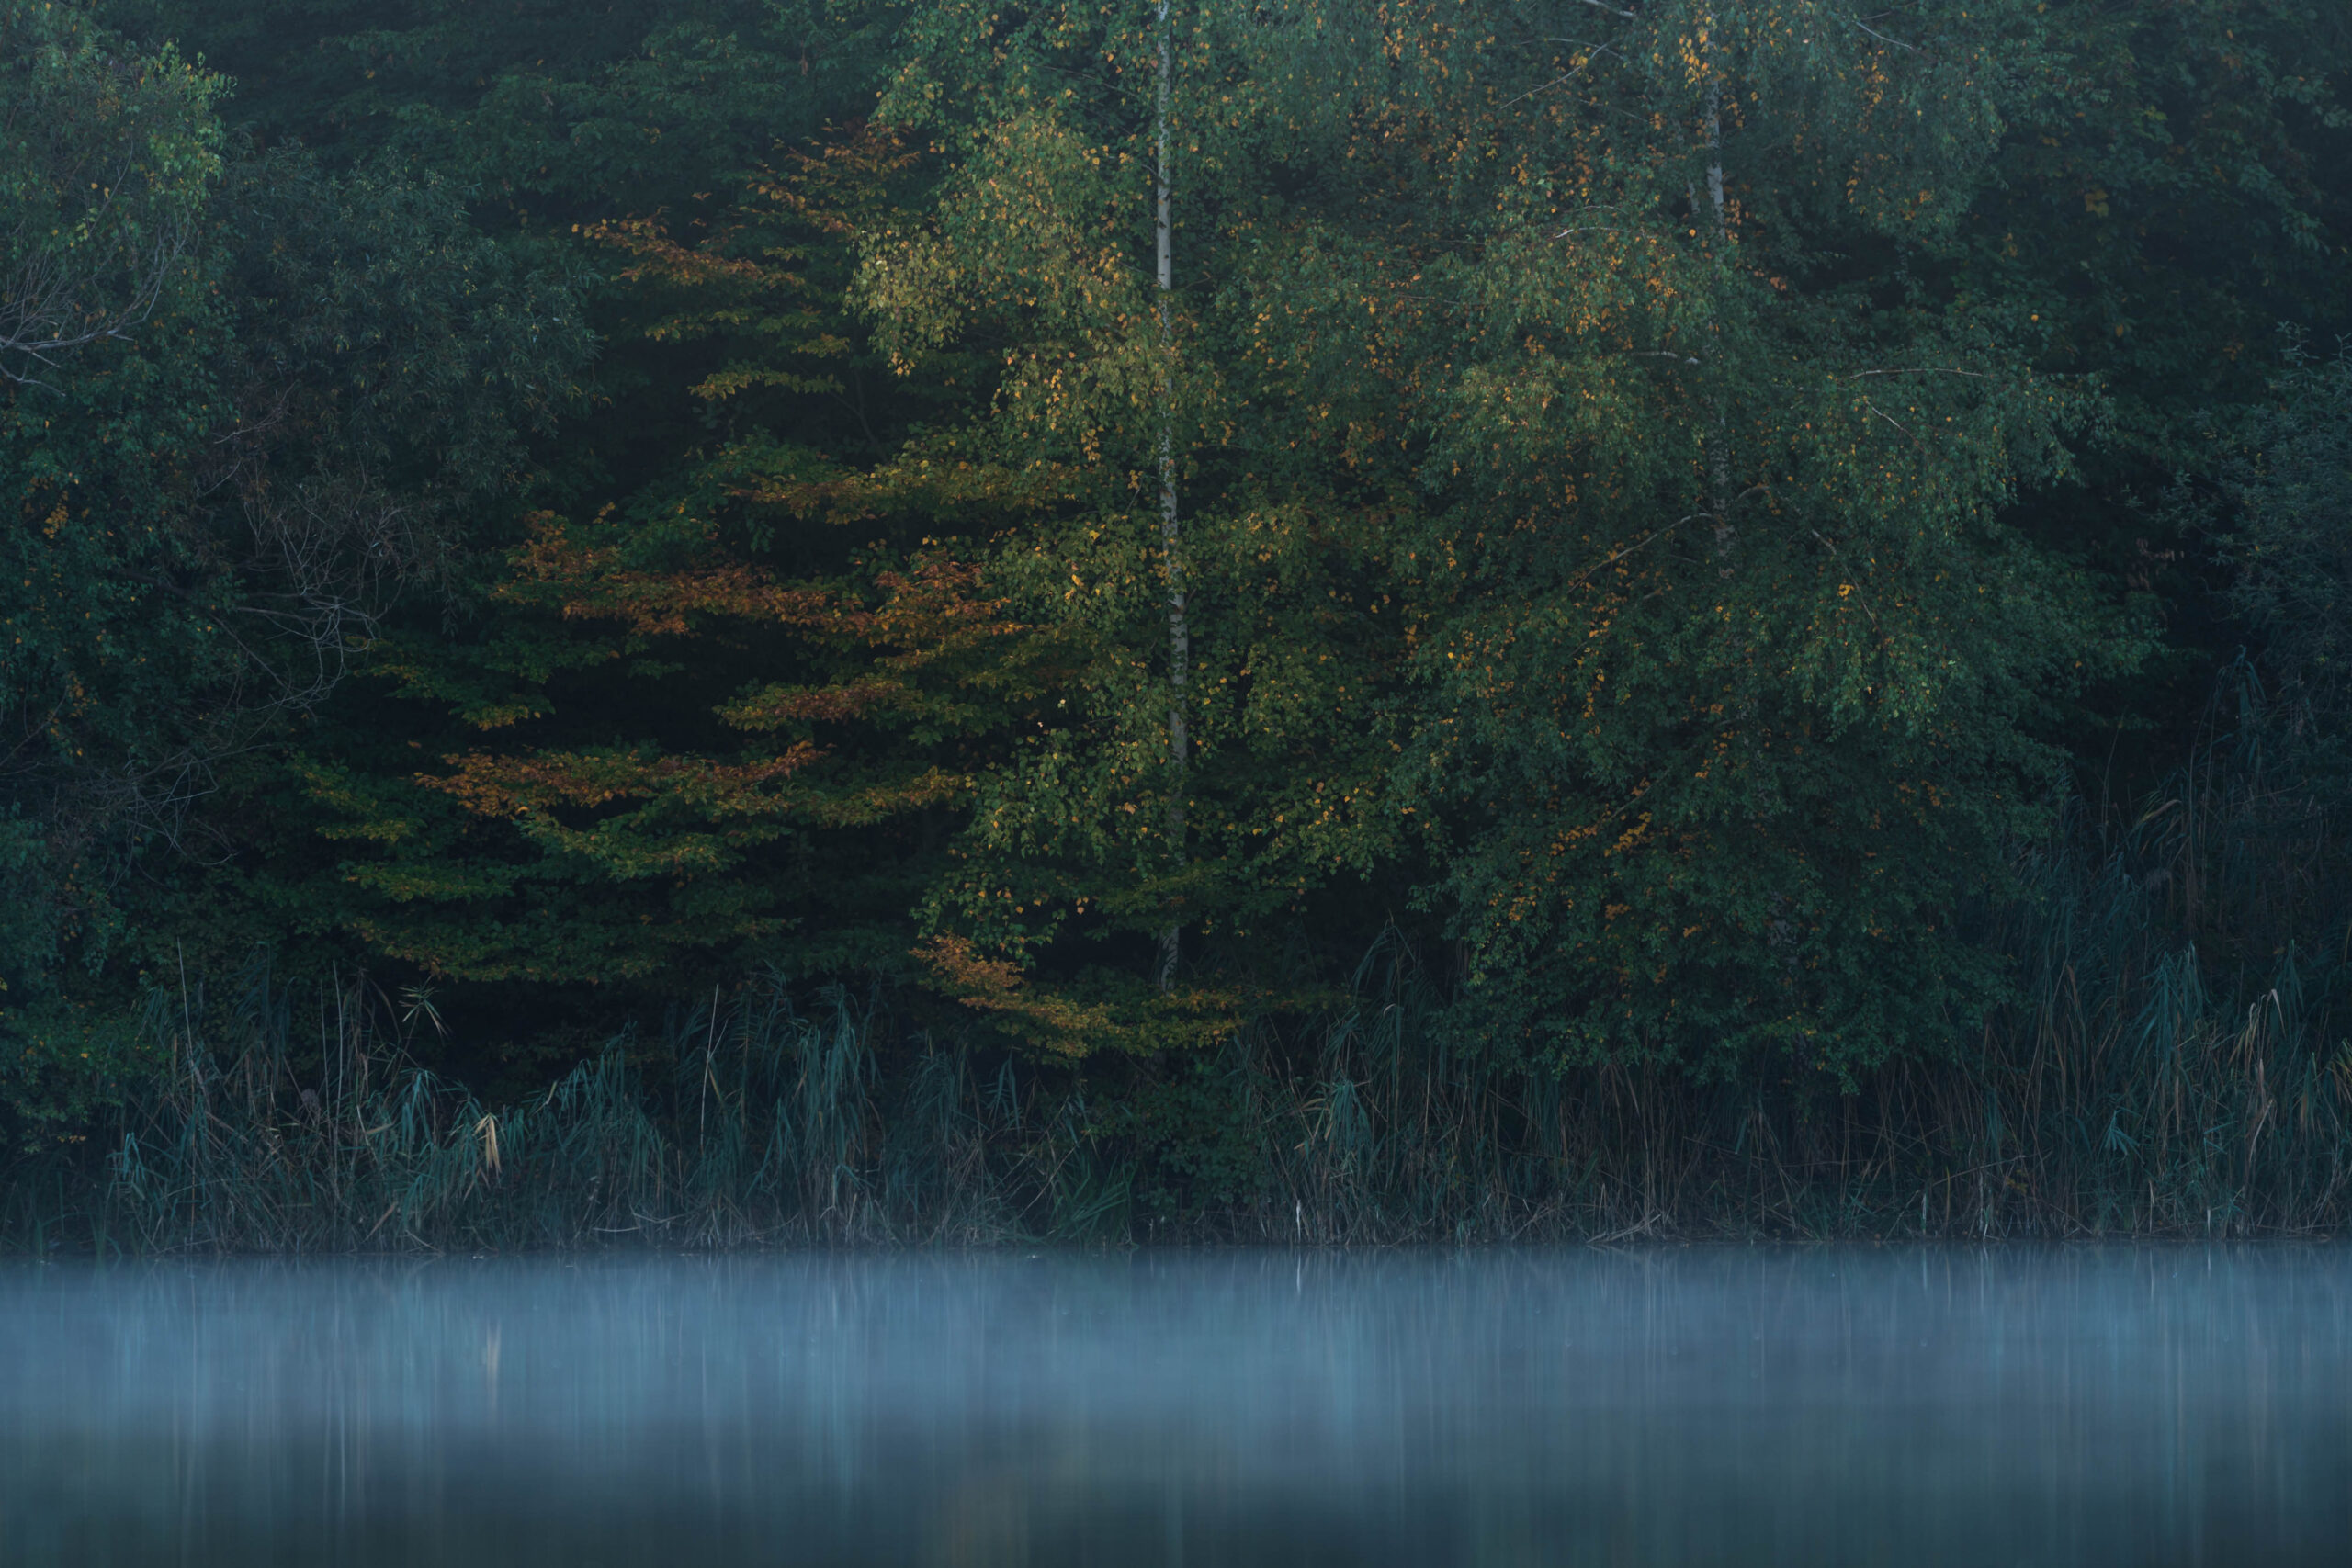
Wow, it’s been a year since I was last here. Or has it been longer? In any case, a lot has happened since my last visit. Nature is always in motion, always changing. But it’s not just nature that has changed here. As a welcome, you are greeted by a large, newly erected sign that tells you everything you are not allowed to do here (anymore). I glance over the pictograms and wonder whether I’m at least still allowed to go for a walk, or even take photographs.
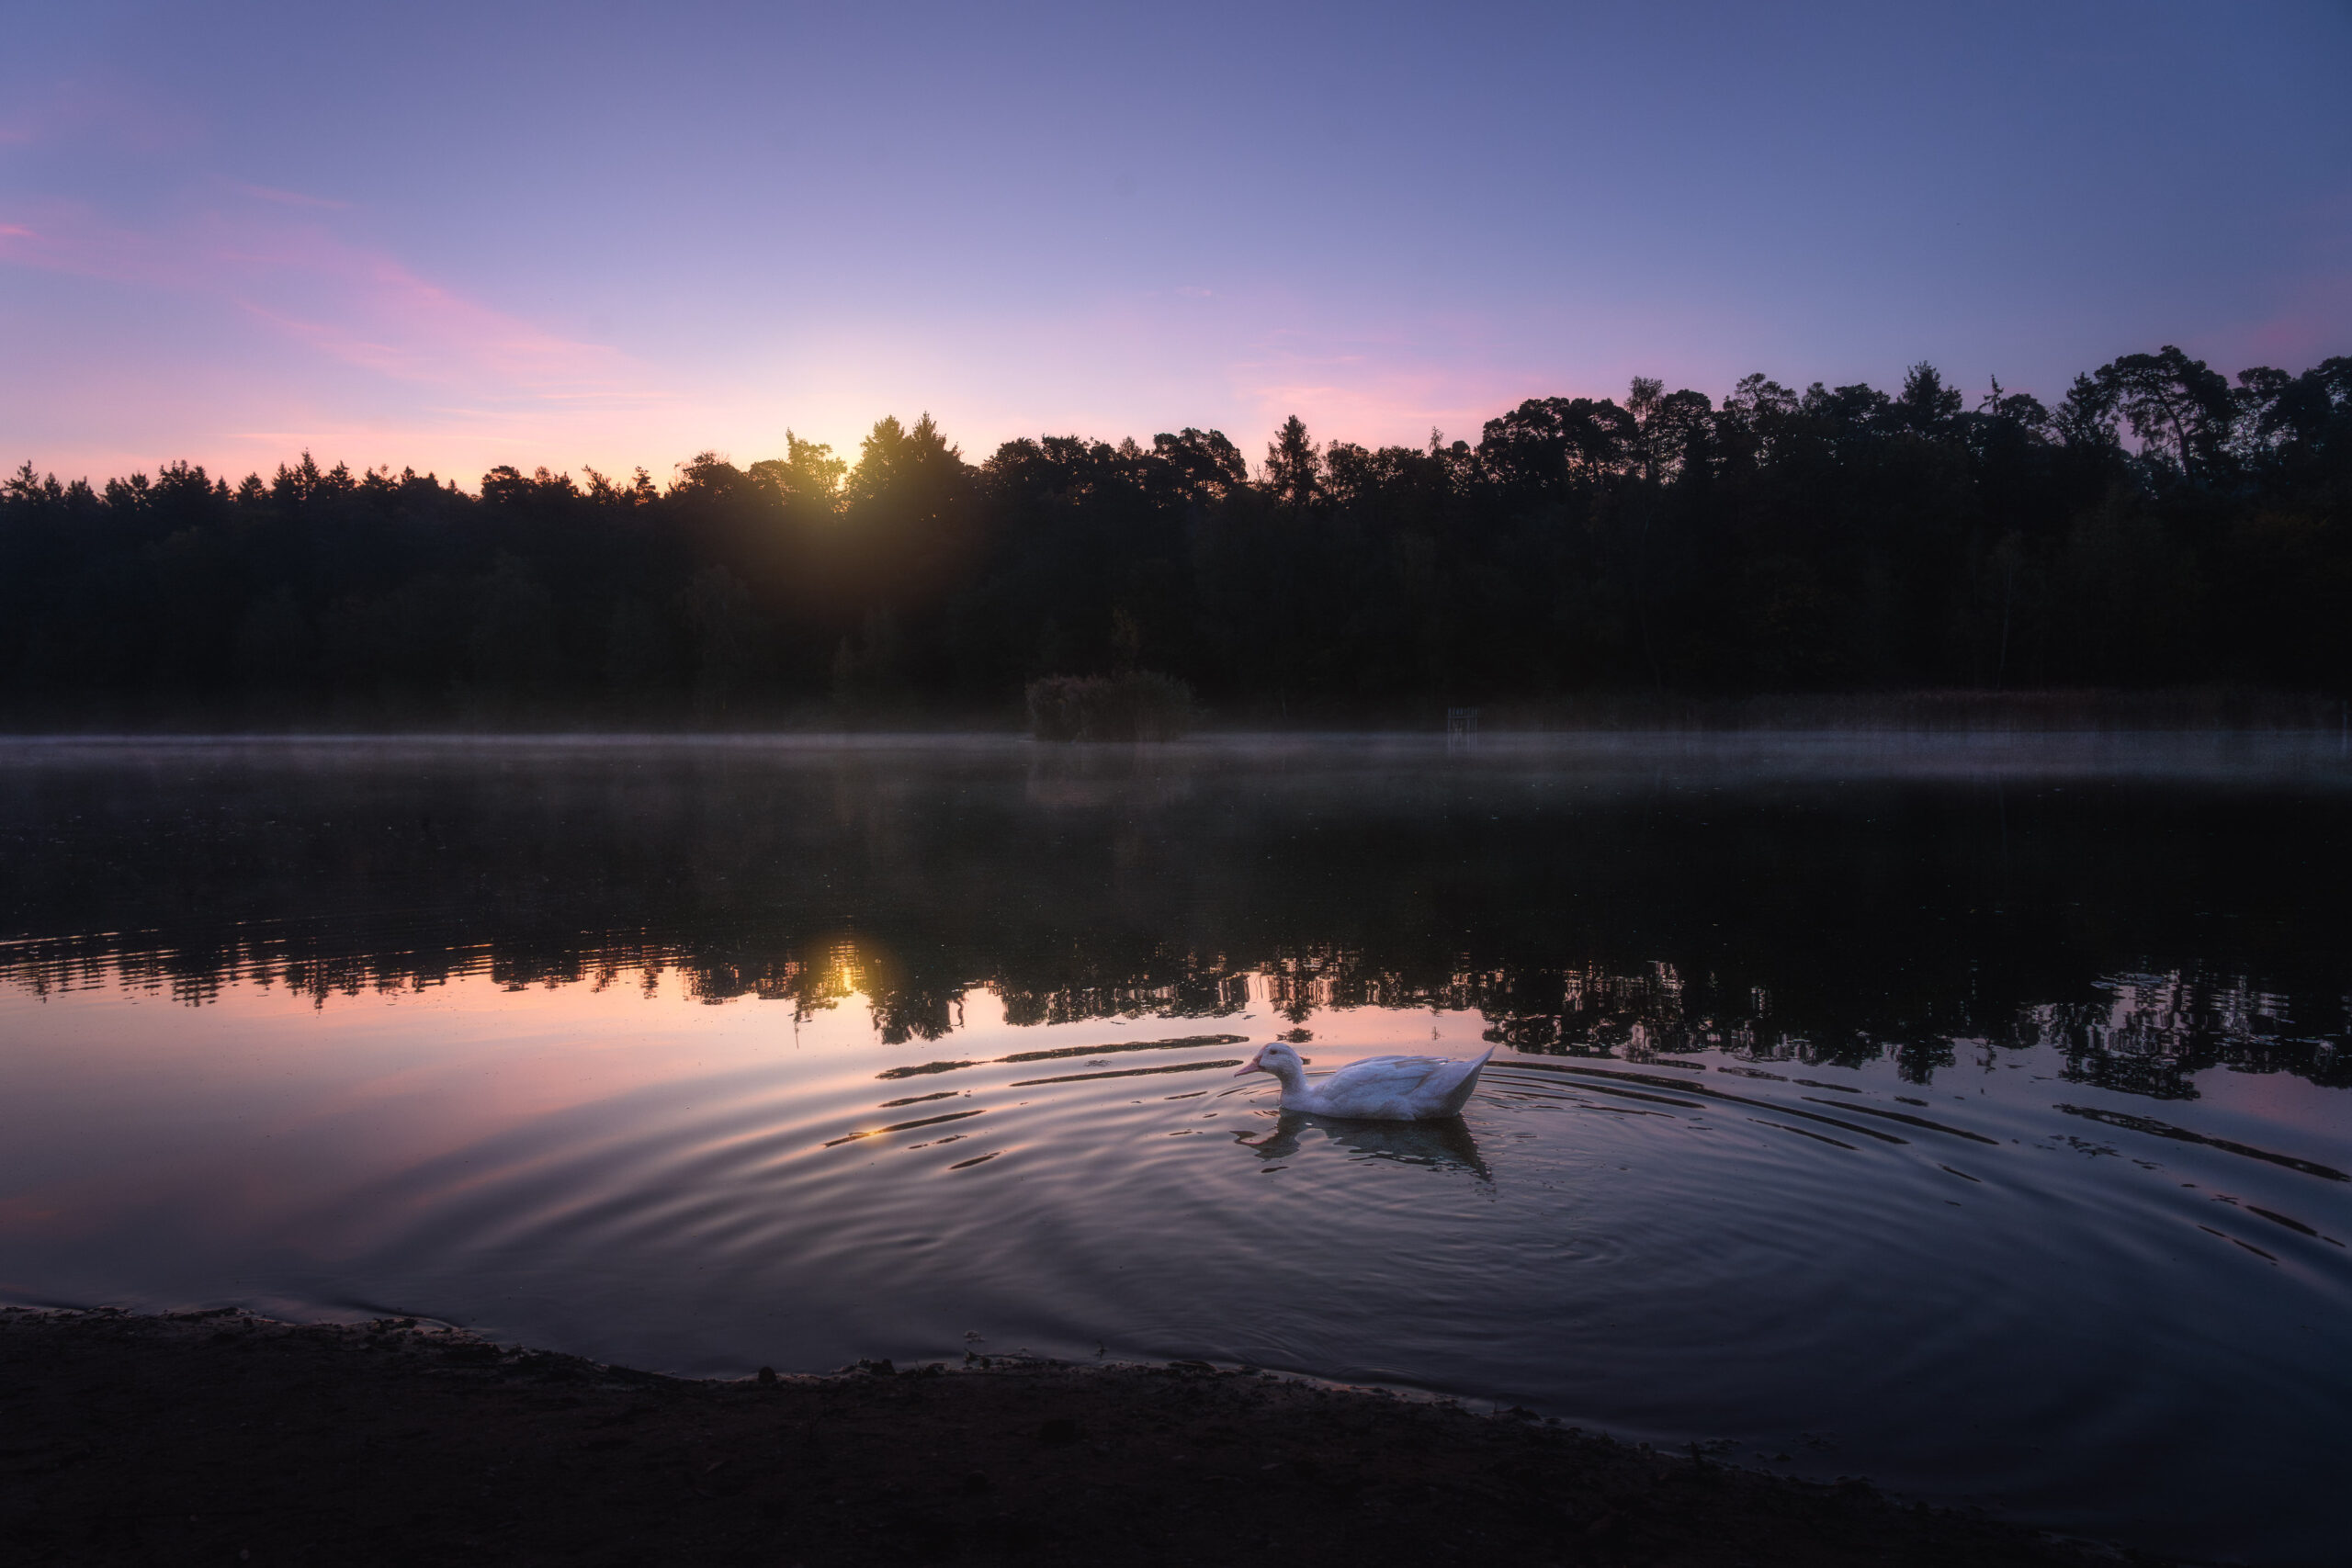
Flying drones is now prohibited. A few years ago, it was still permitted here. It wasn’t a nature reserve either. Now it is. That’s fine by me. If I had known beforehand, I would have left the drone at home, but the little thing doesn’t weigh much anyway, so it doesn’t matter. It’s understandable. Many birds live on this lake. I’ve spotted ducks, coots and even a kingfisher here a few years ago. But it usually sits so far out on the small island that I haven’t dared to take a photo of it yet. I haven’t been able to spot it in the last two years either. That’s why I’ve been cautious here in the past when it comes to flying my drone. But that’s the end of that topic at this location.
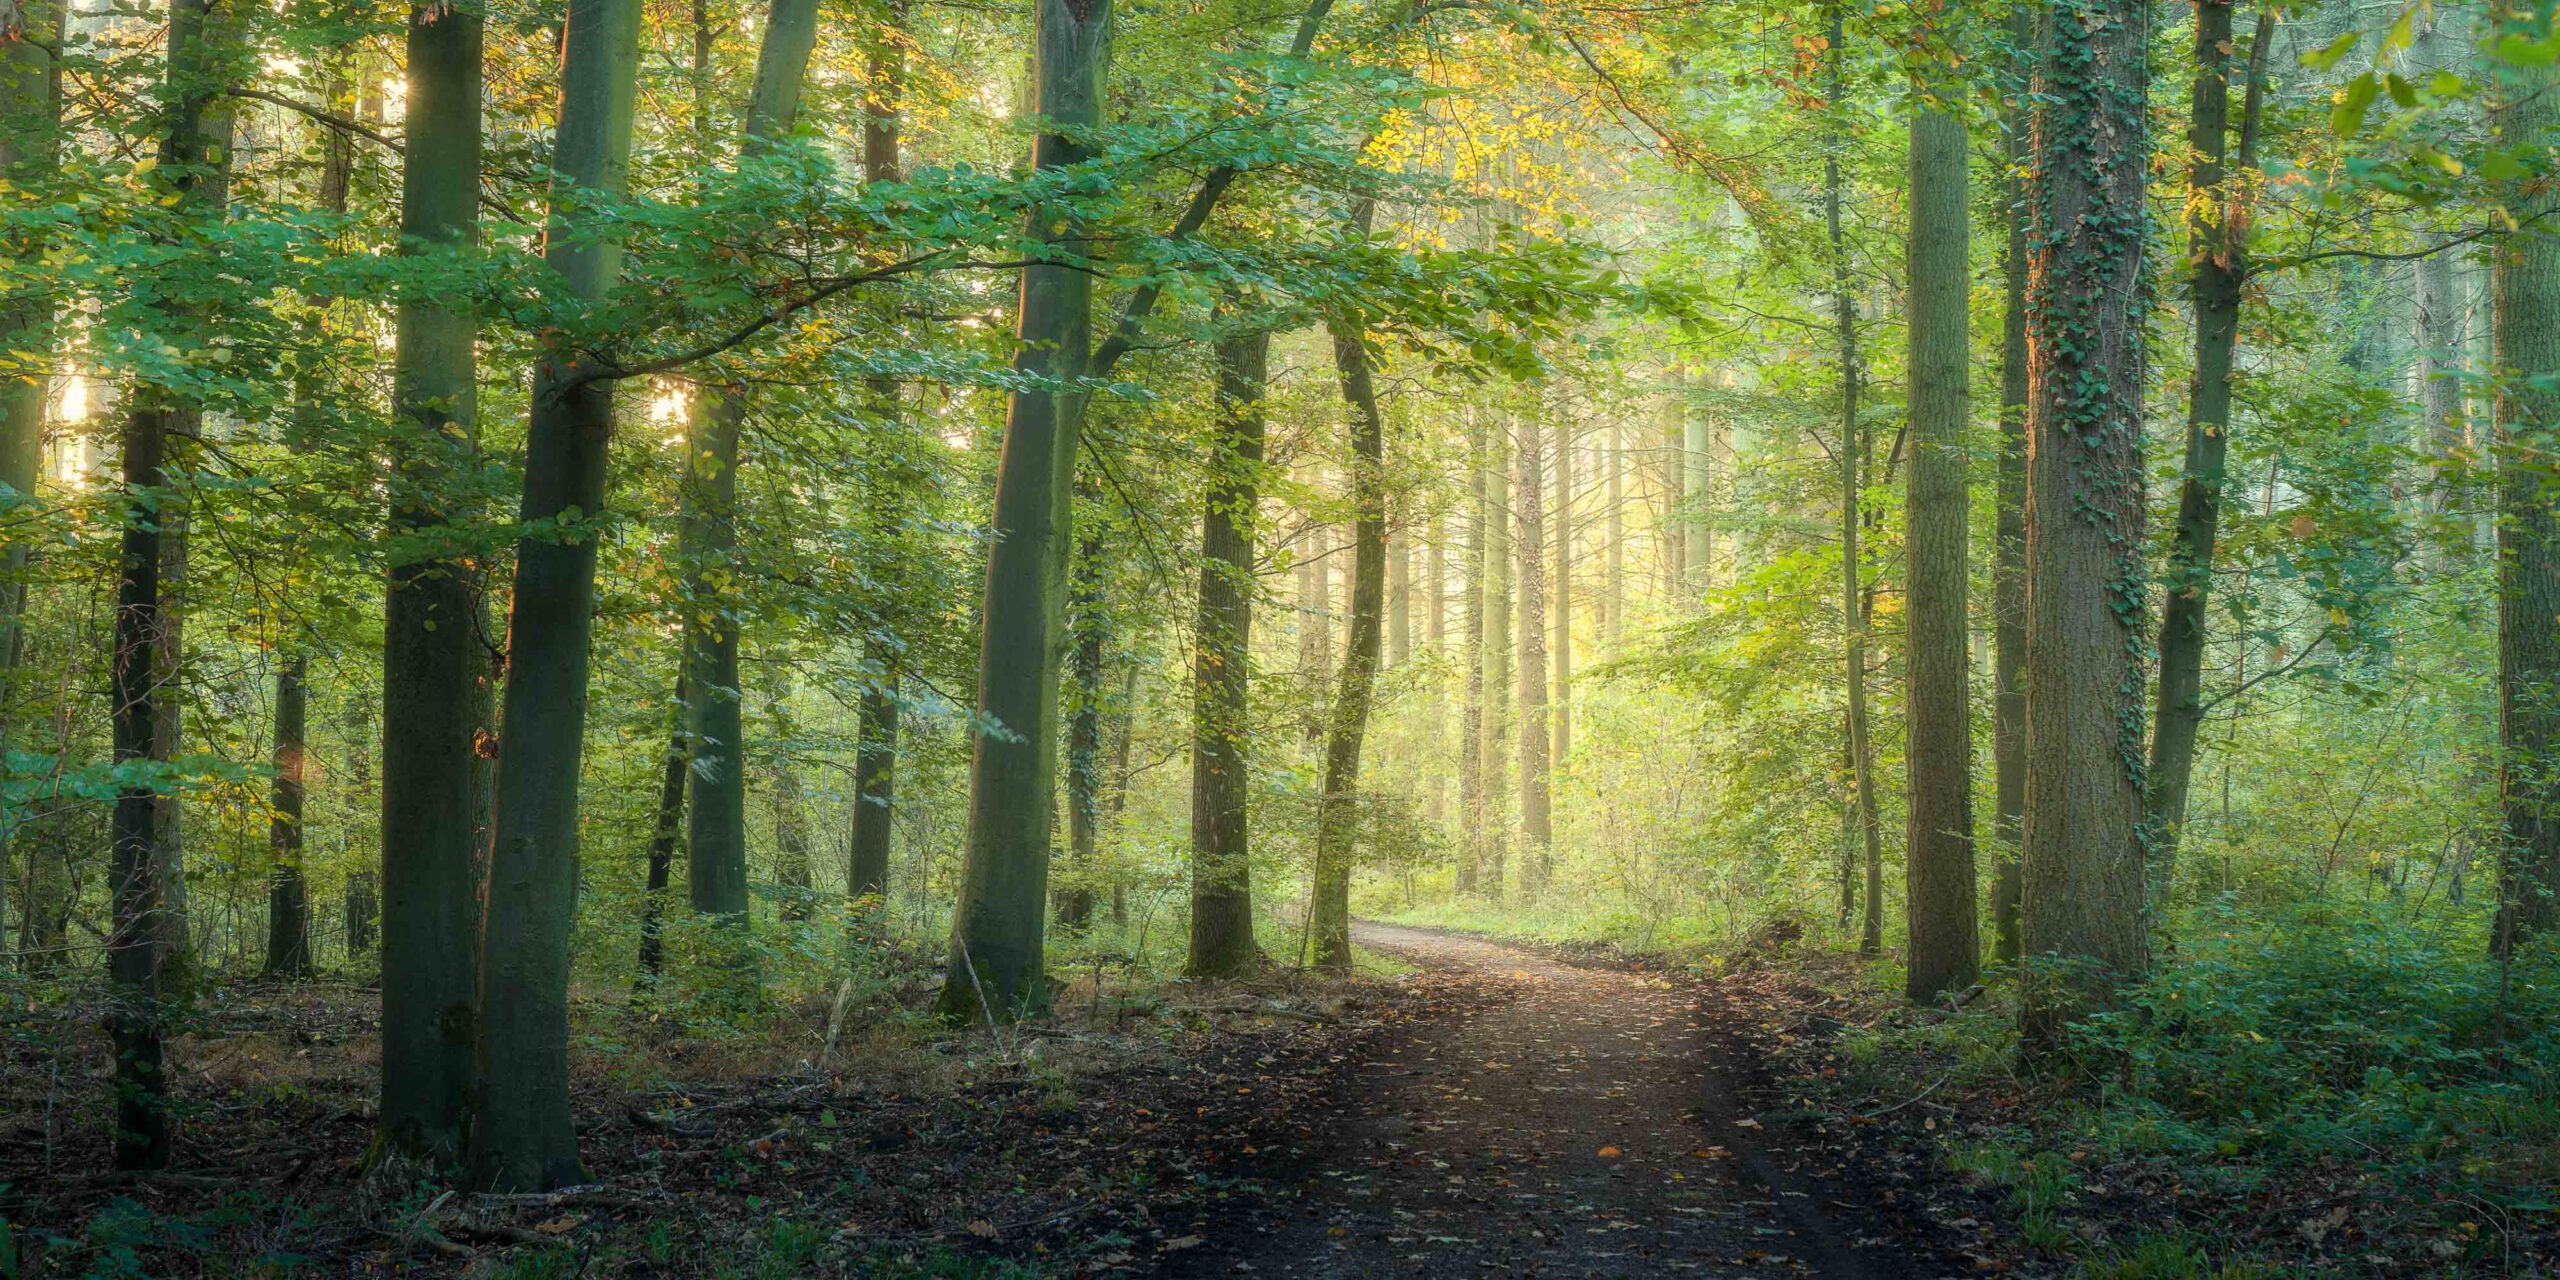
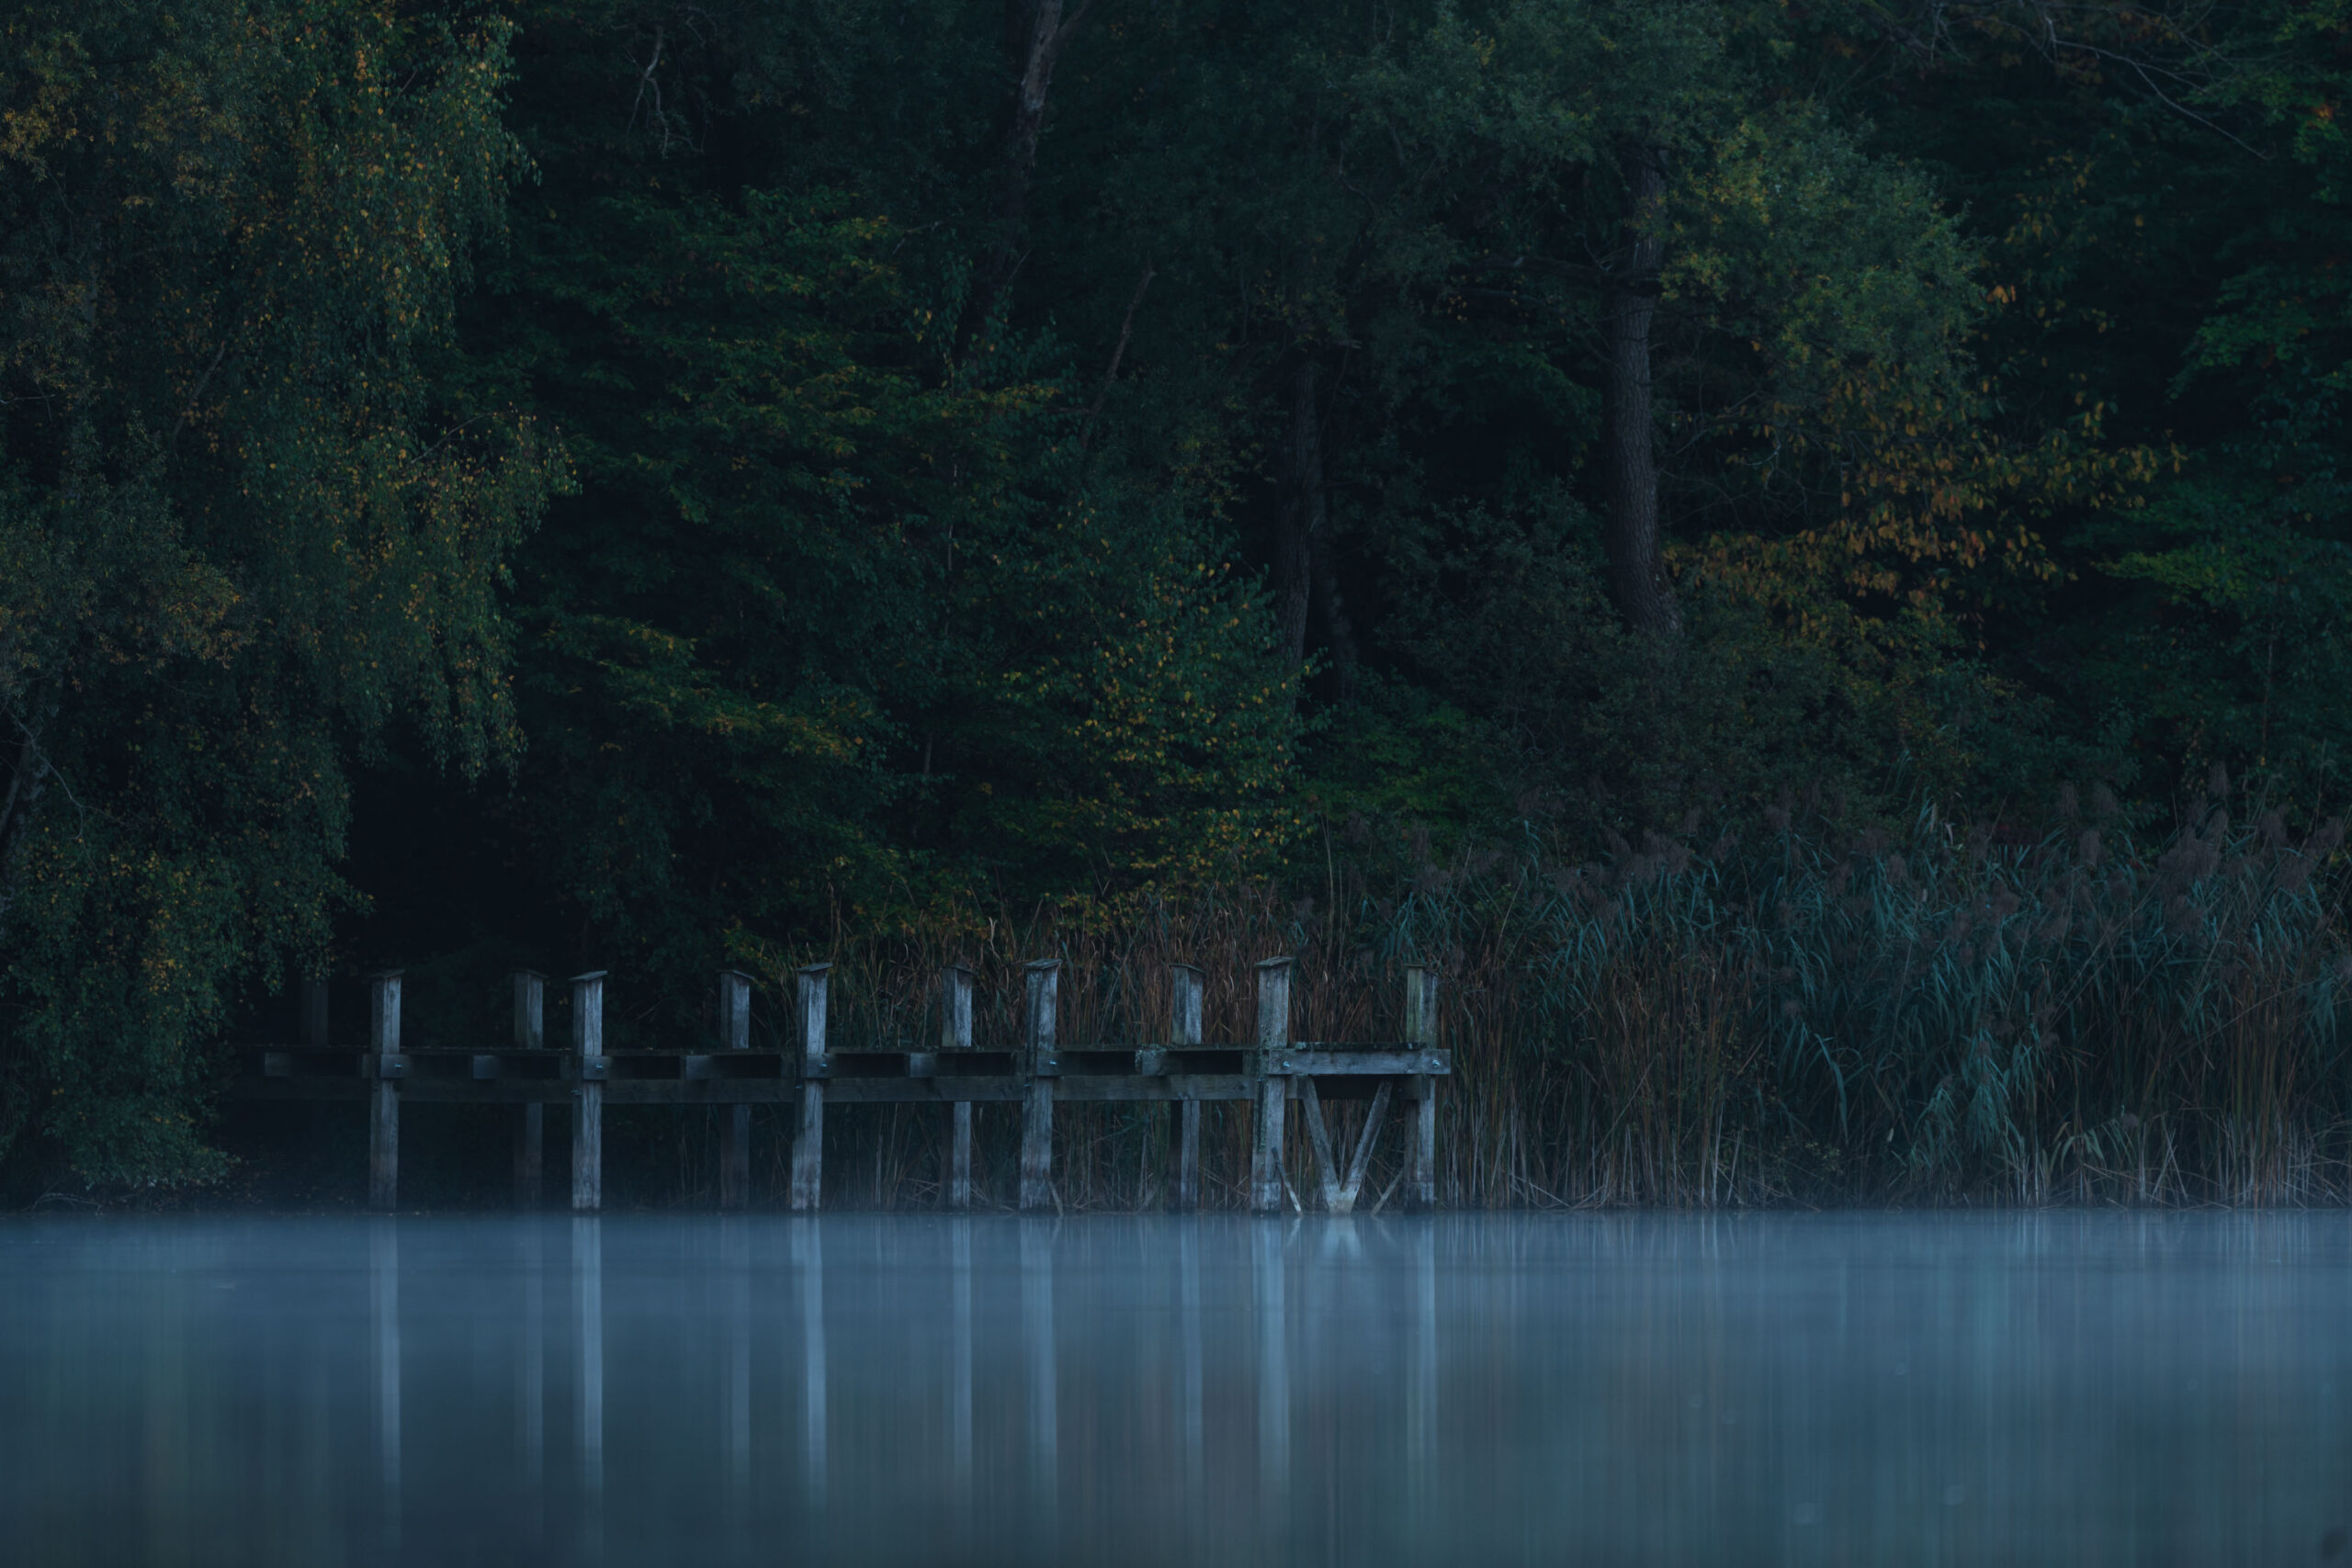
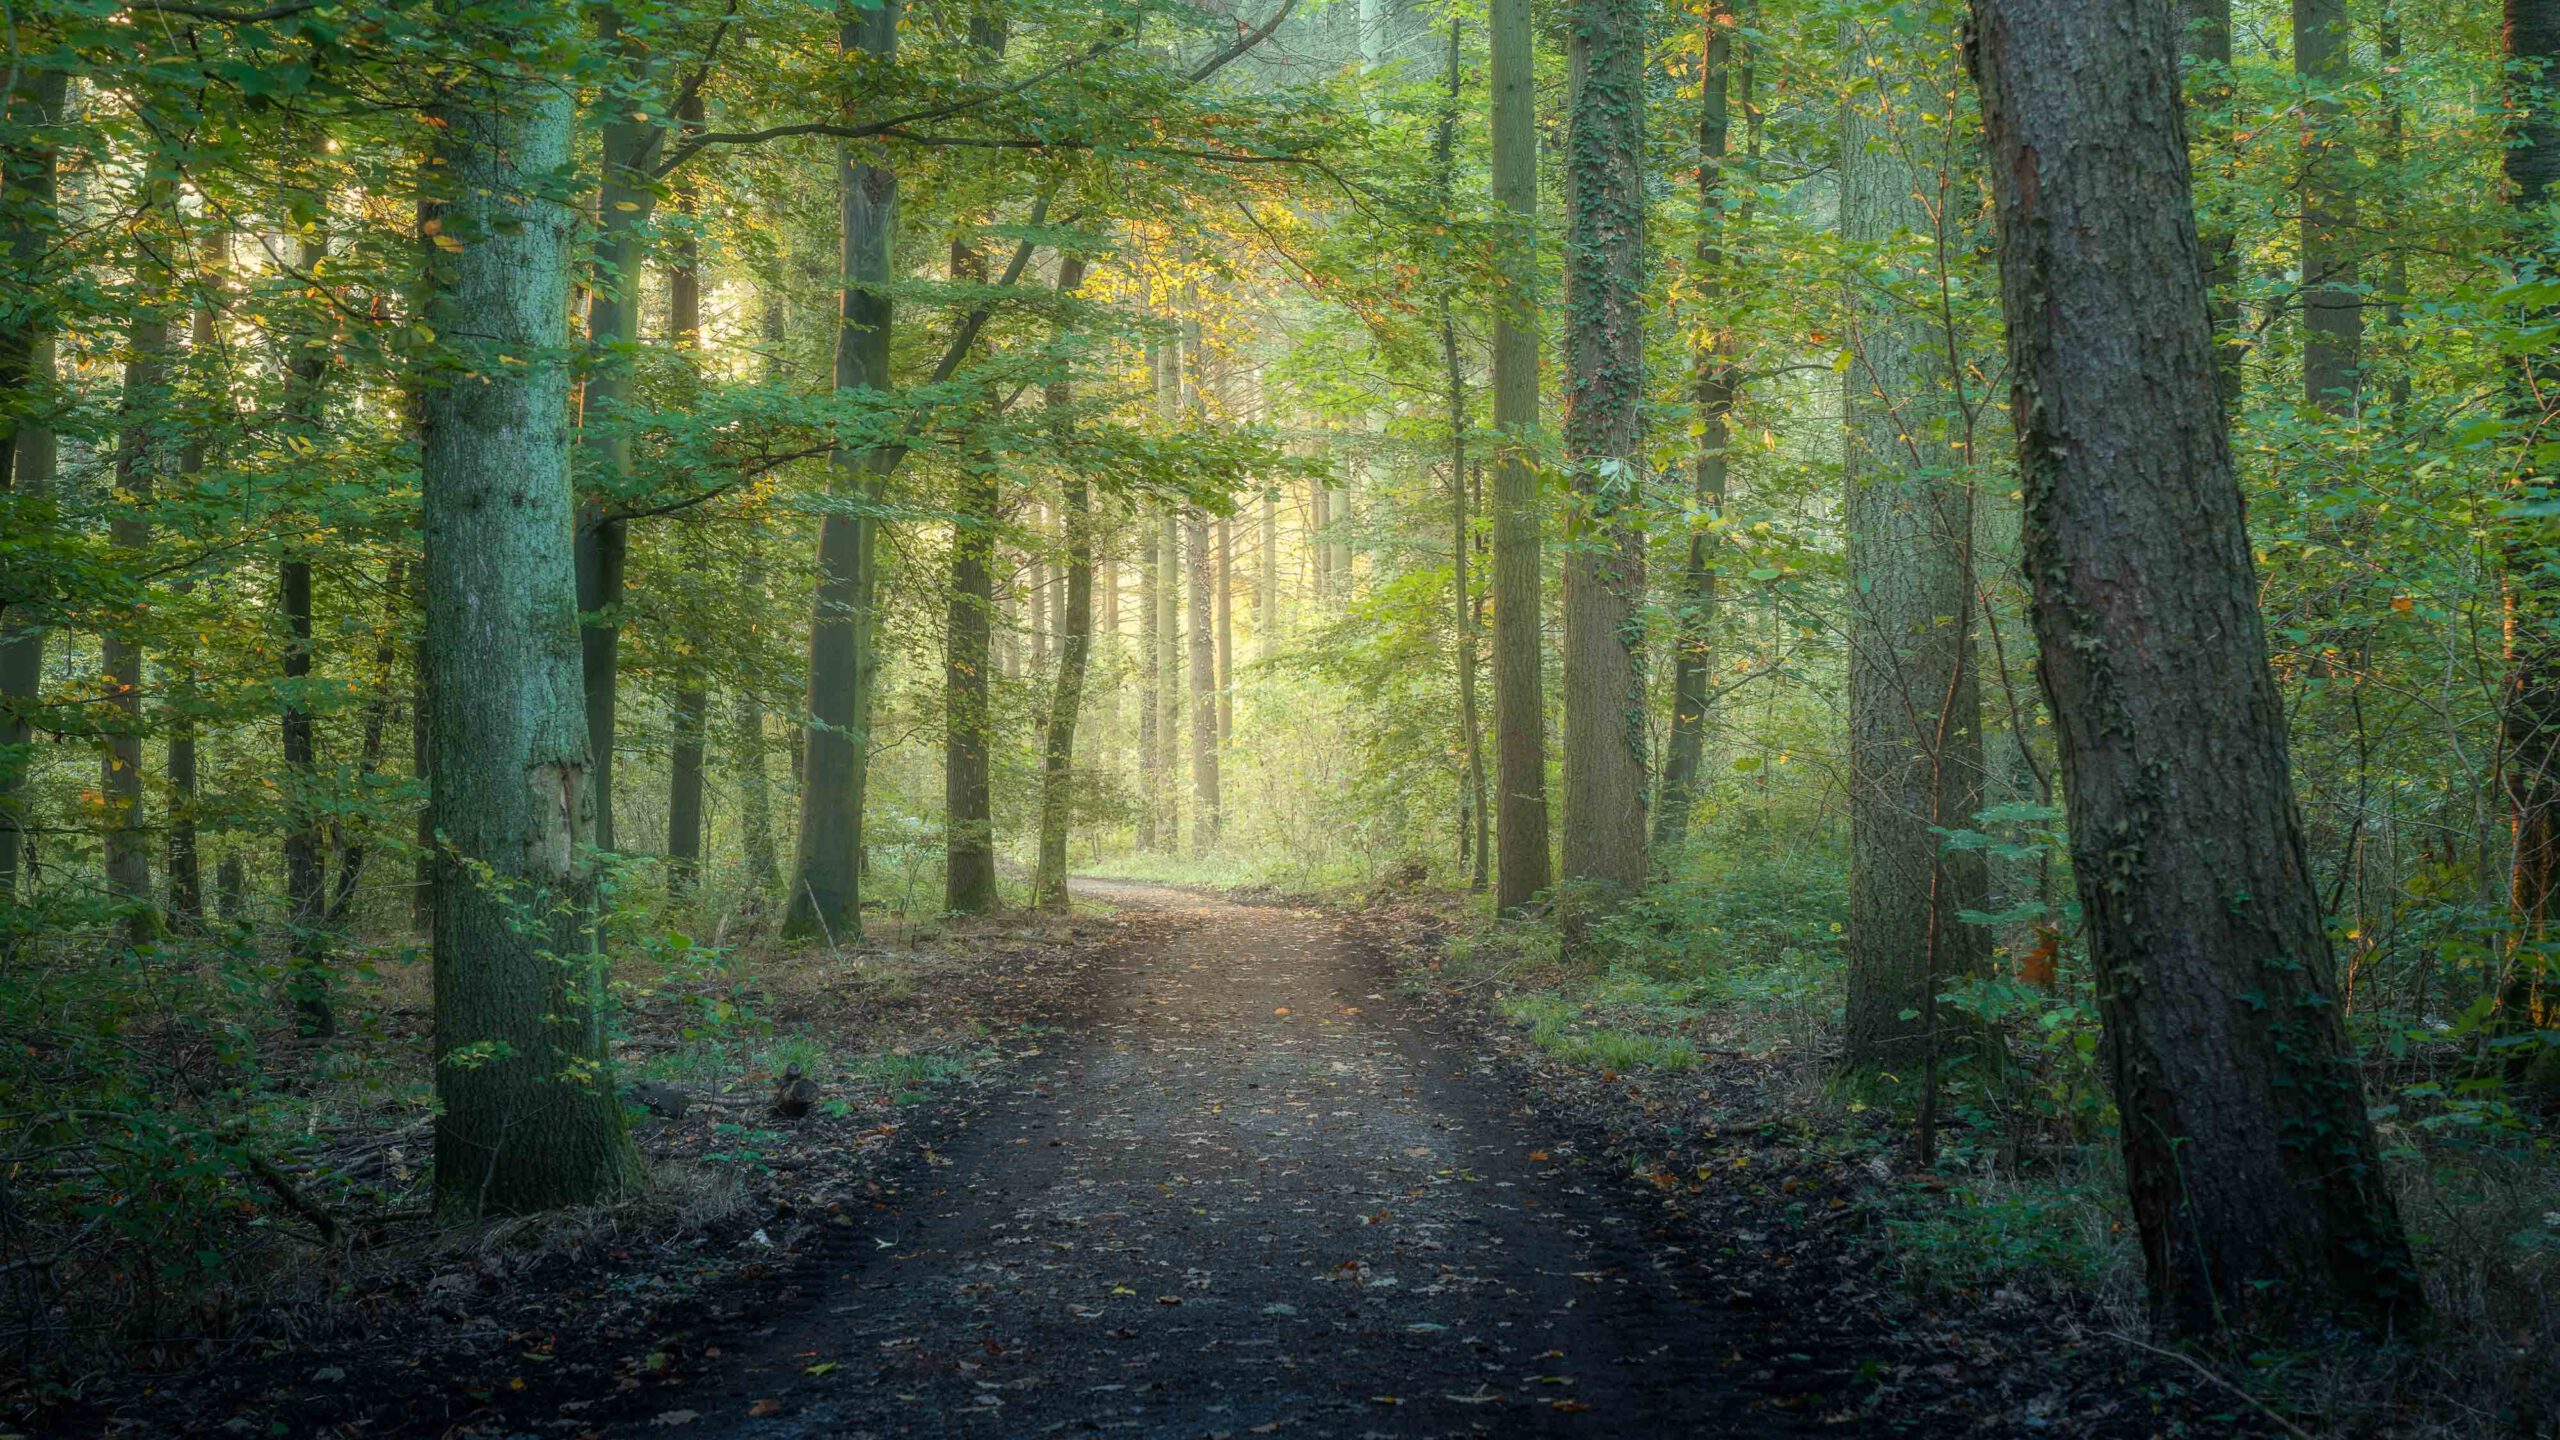
But something else has changed. Heavy equipment must have been brought in. The forest has been thinned out considerably in some places. Deep tyre tracks indicate this, at any rate. There was also quite a bit of brushwood still lying around. The paths have been widened. Some of them seemed almost twice as wide as before. I remembered a few spots where I had taken great pictures 4–5 years ago under similar conditions, at almost the same time of year. The same picture is no longer convincing today. As I walked around the lake looking for pictures, it slowly dawned on me that it wasn’t going to be as easy today as I had imagined.
This and all other shots of this post you can request under “Prints” as an art print for your wall at home directly from me.
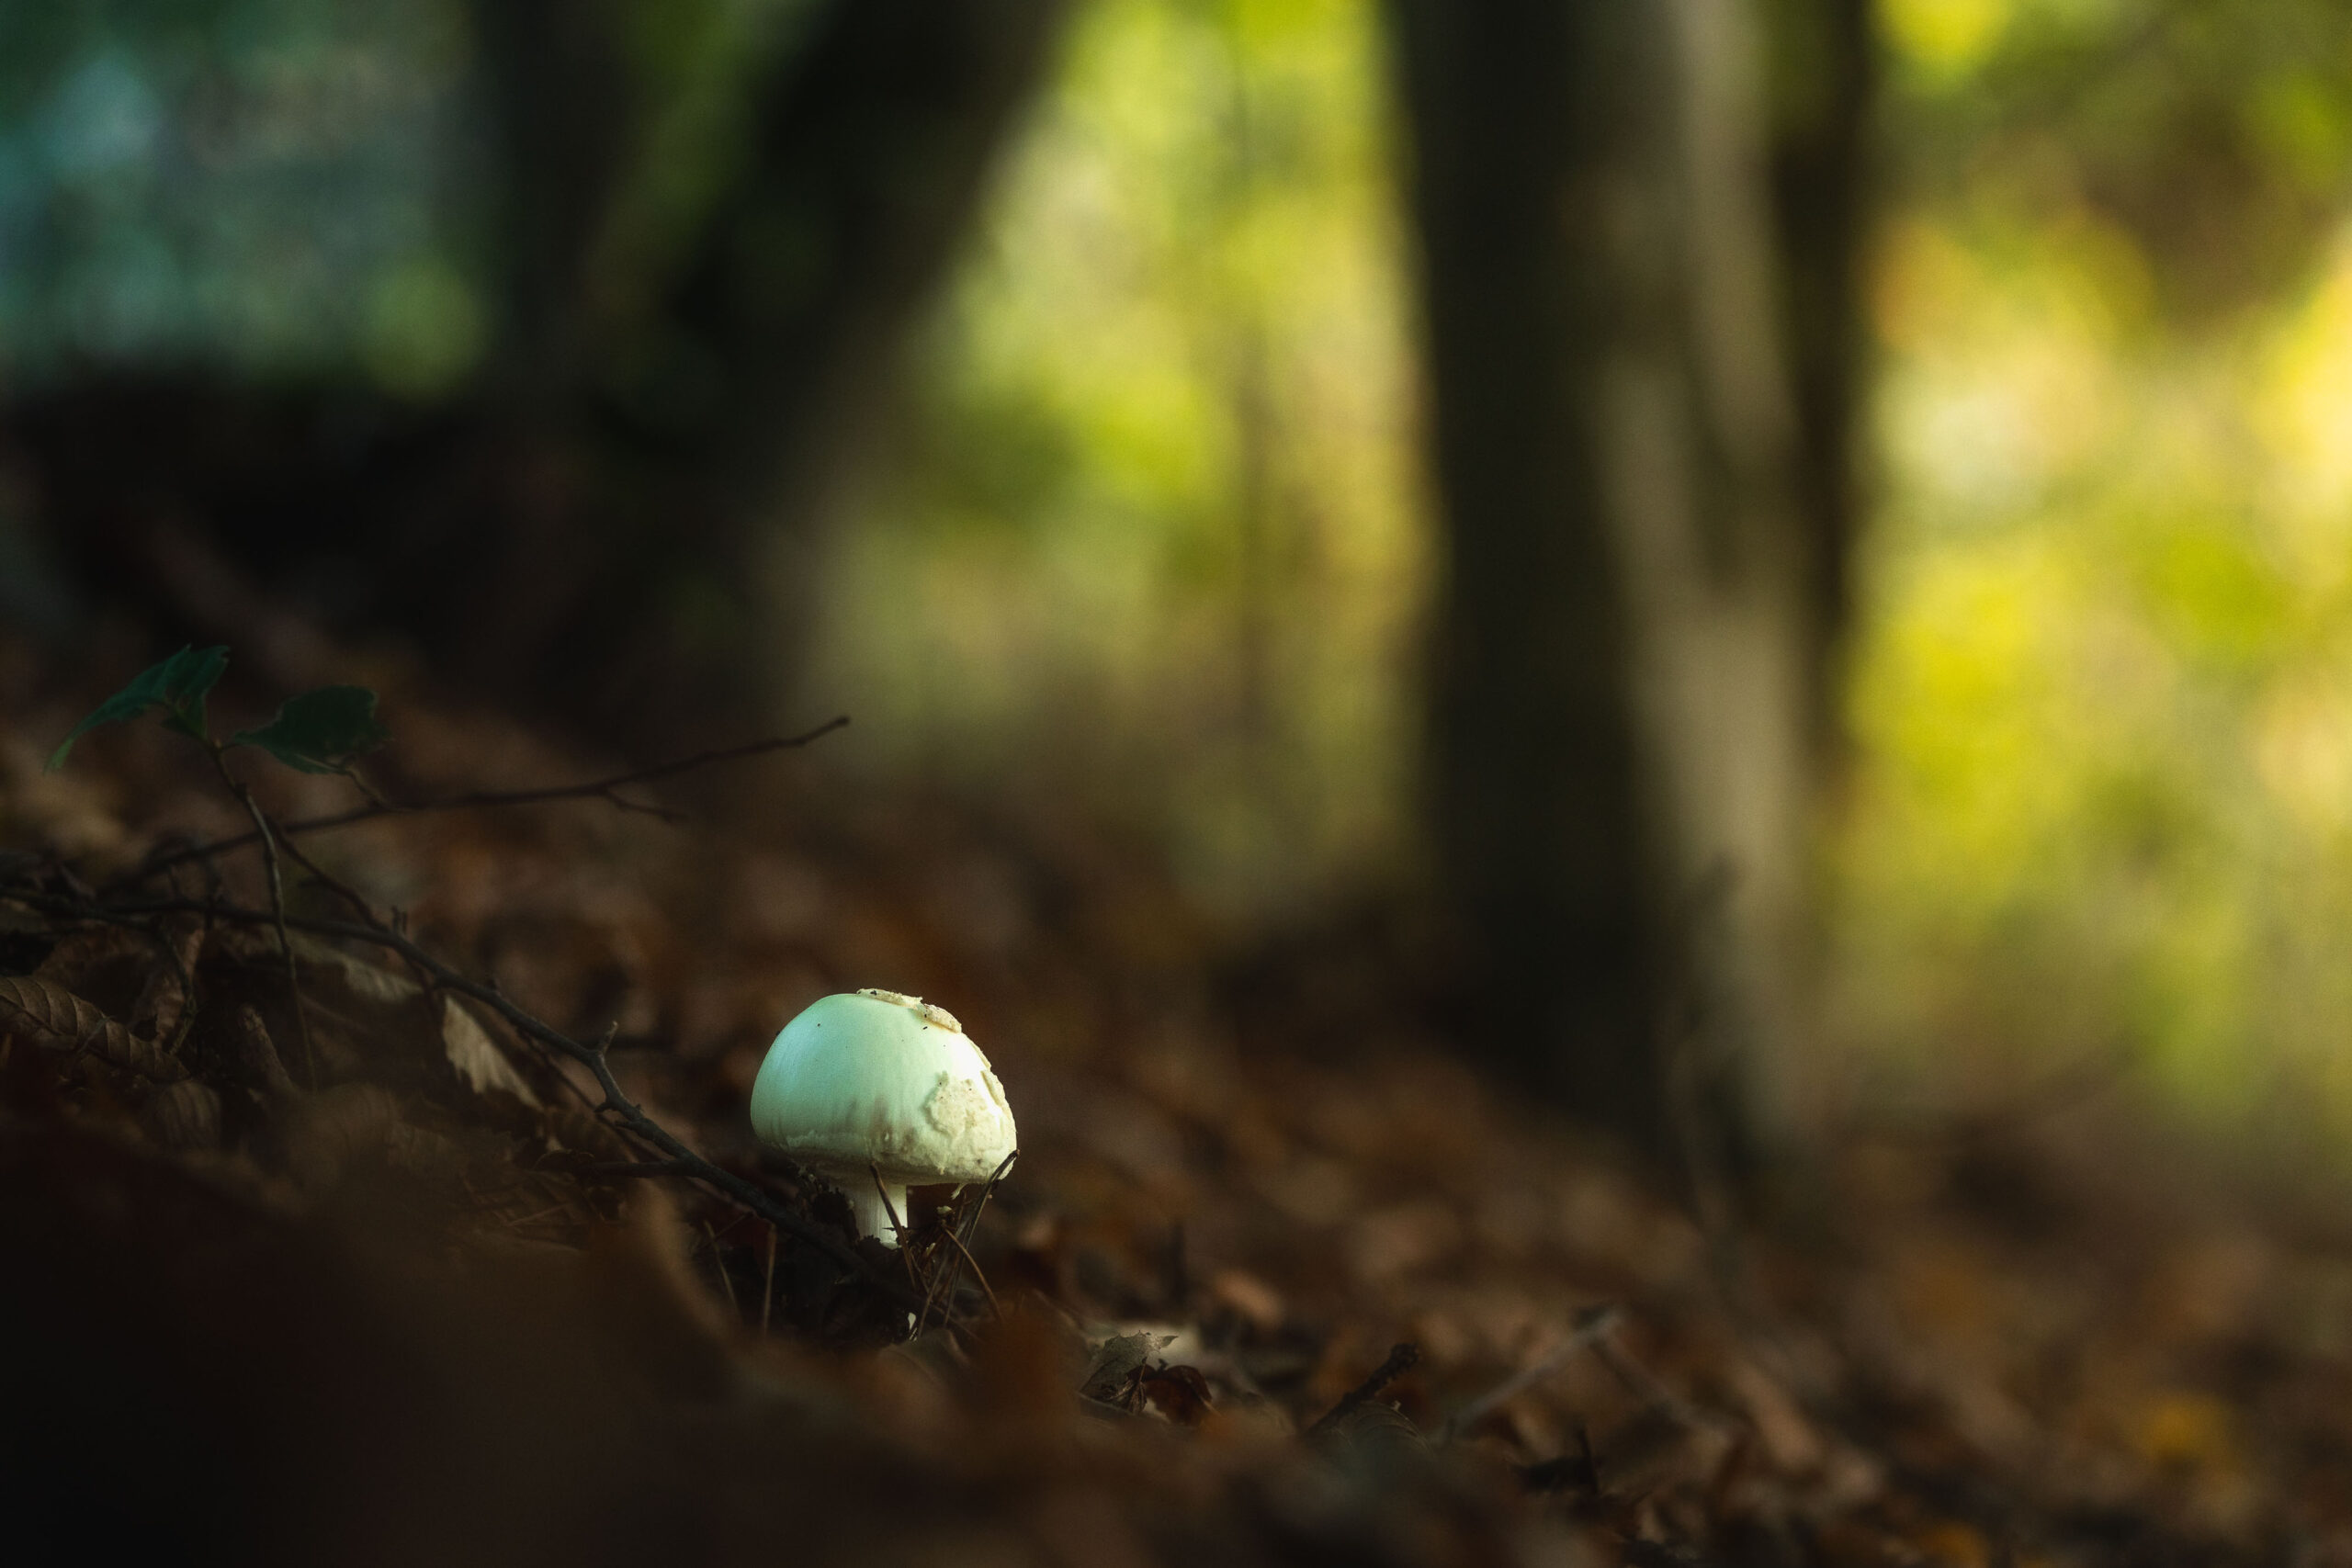
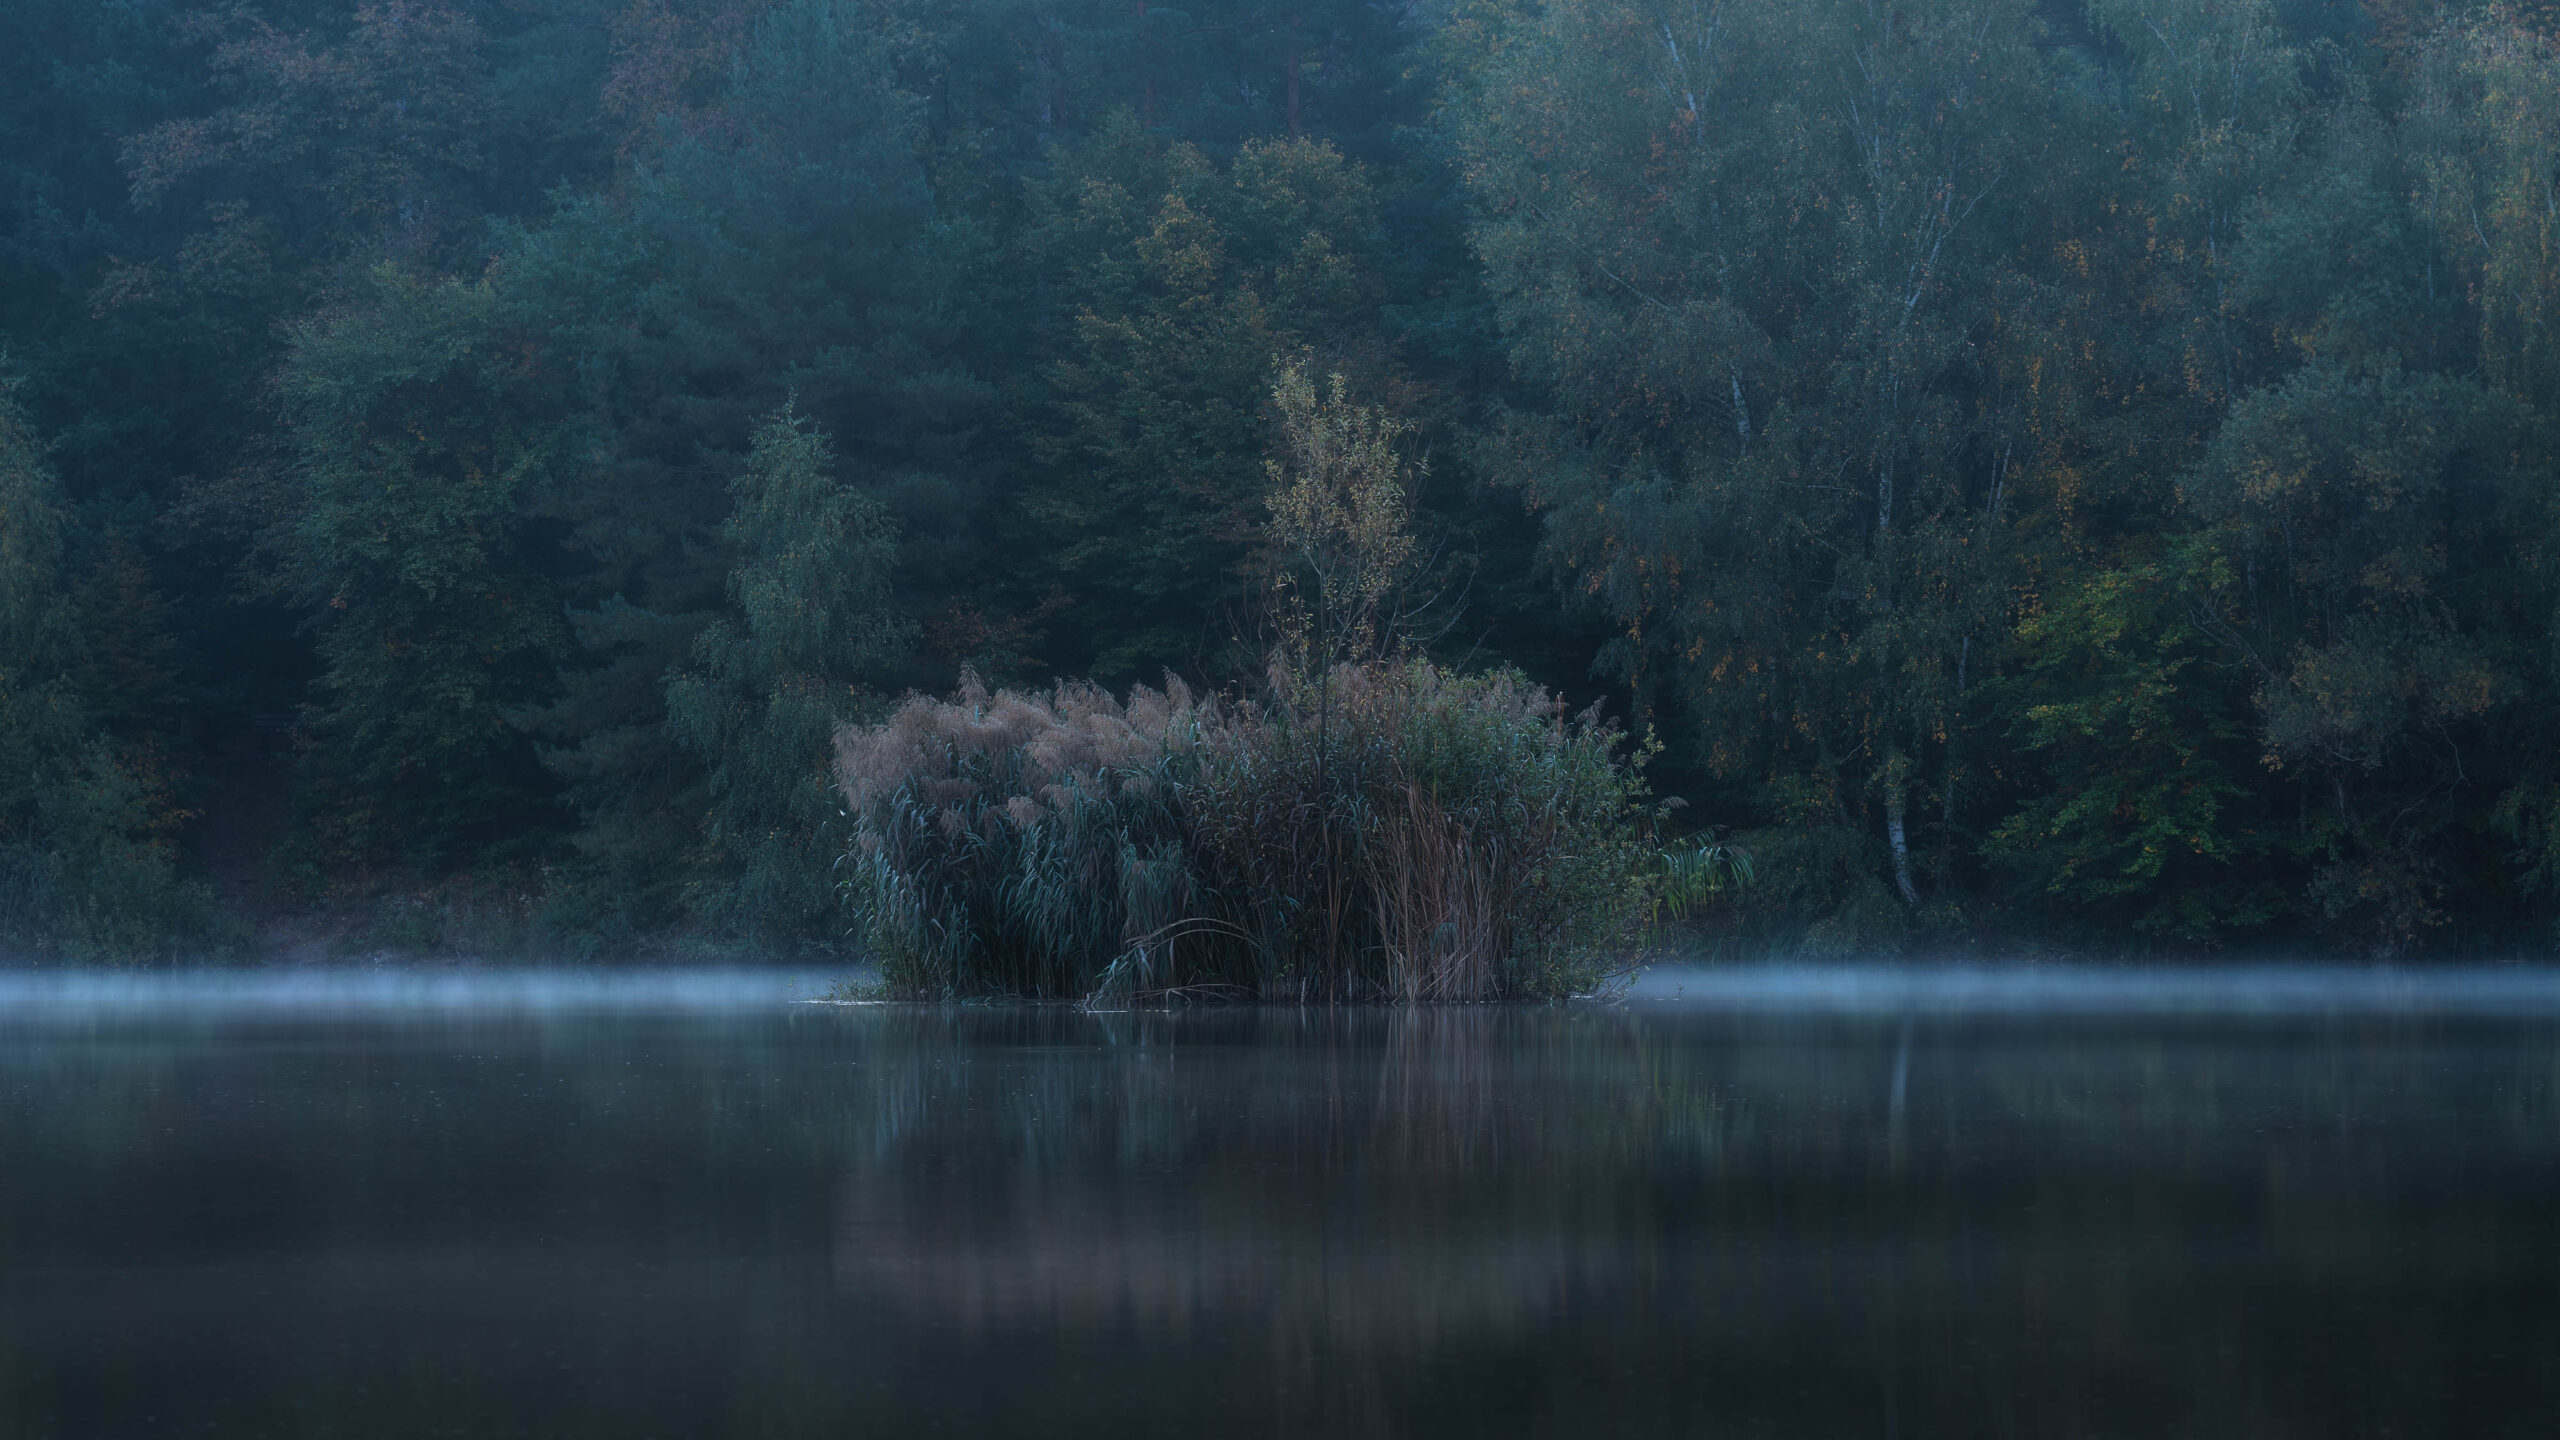
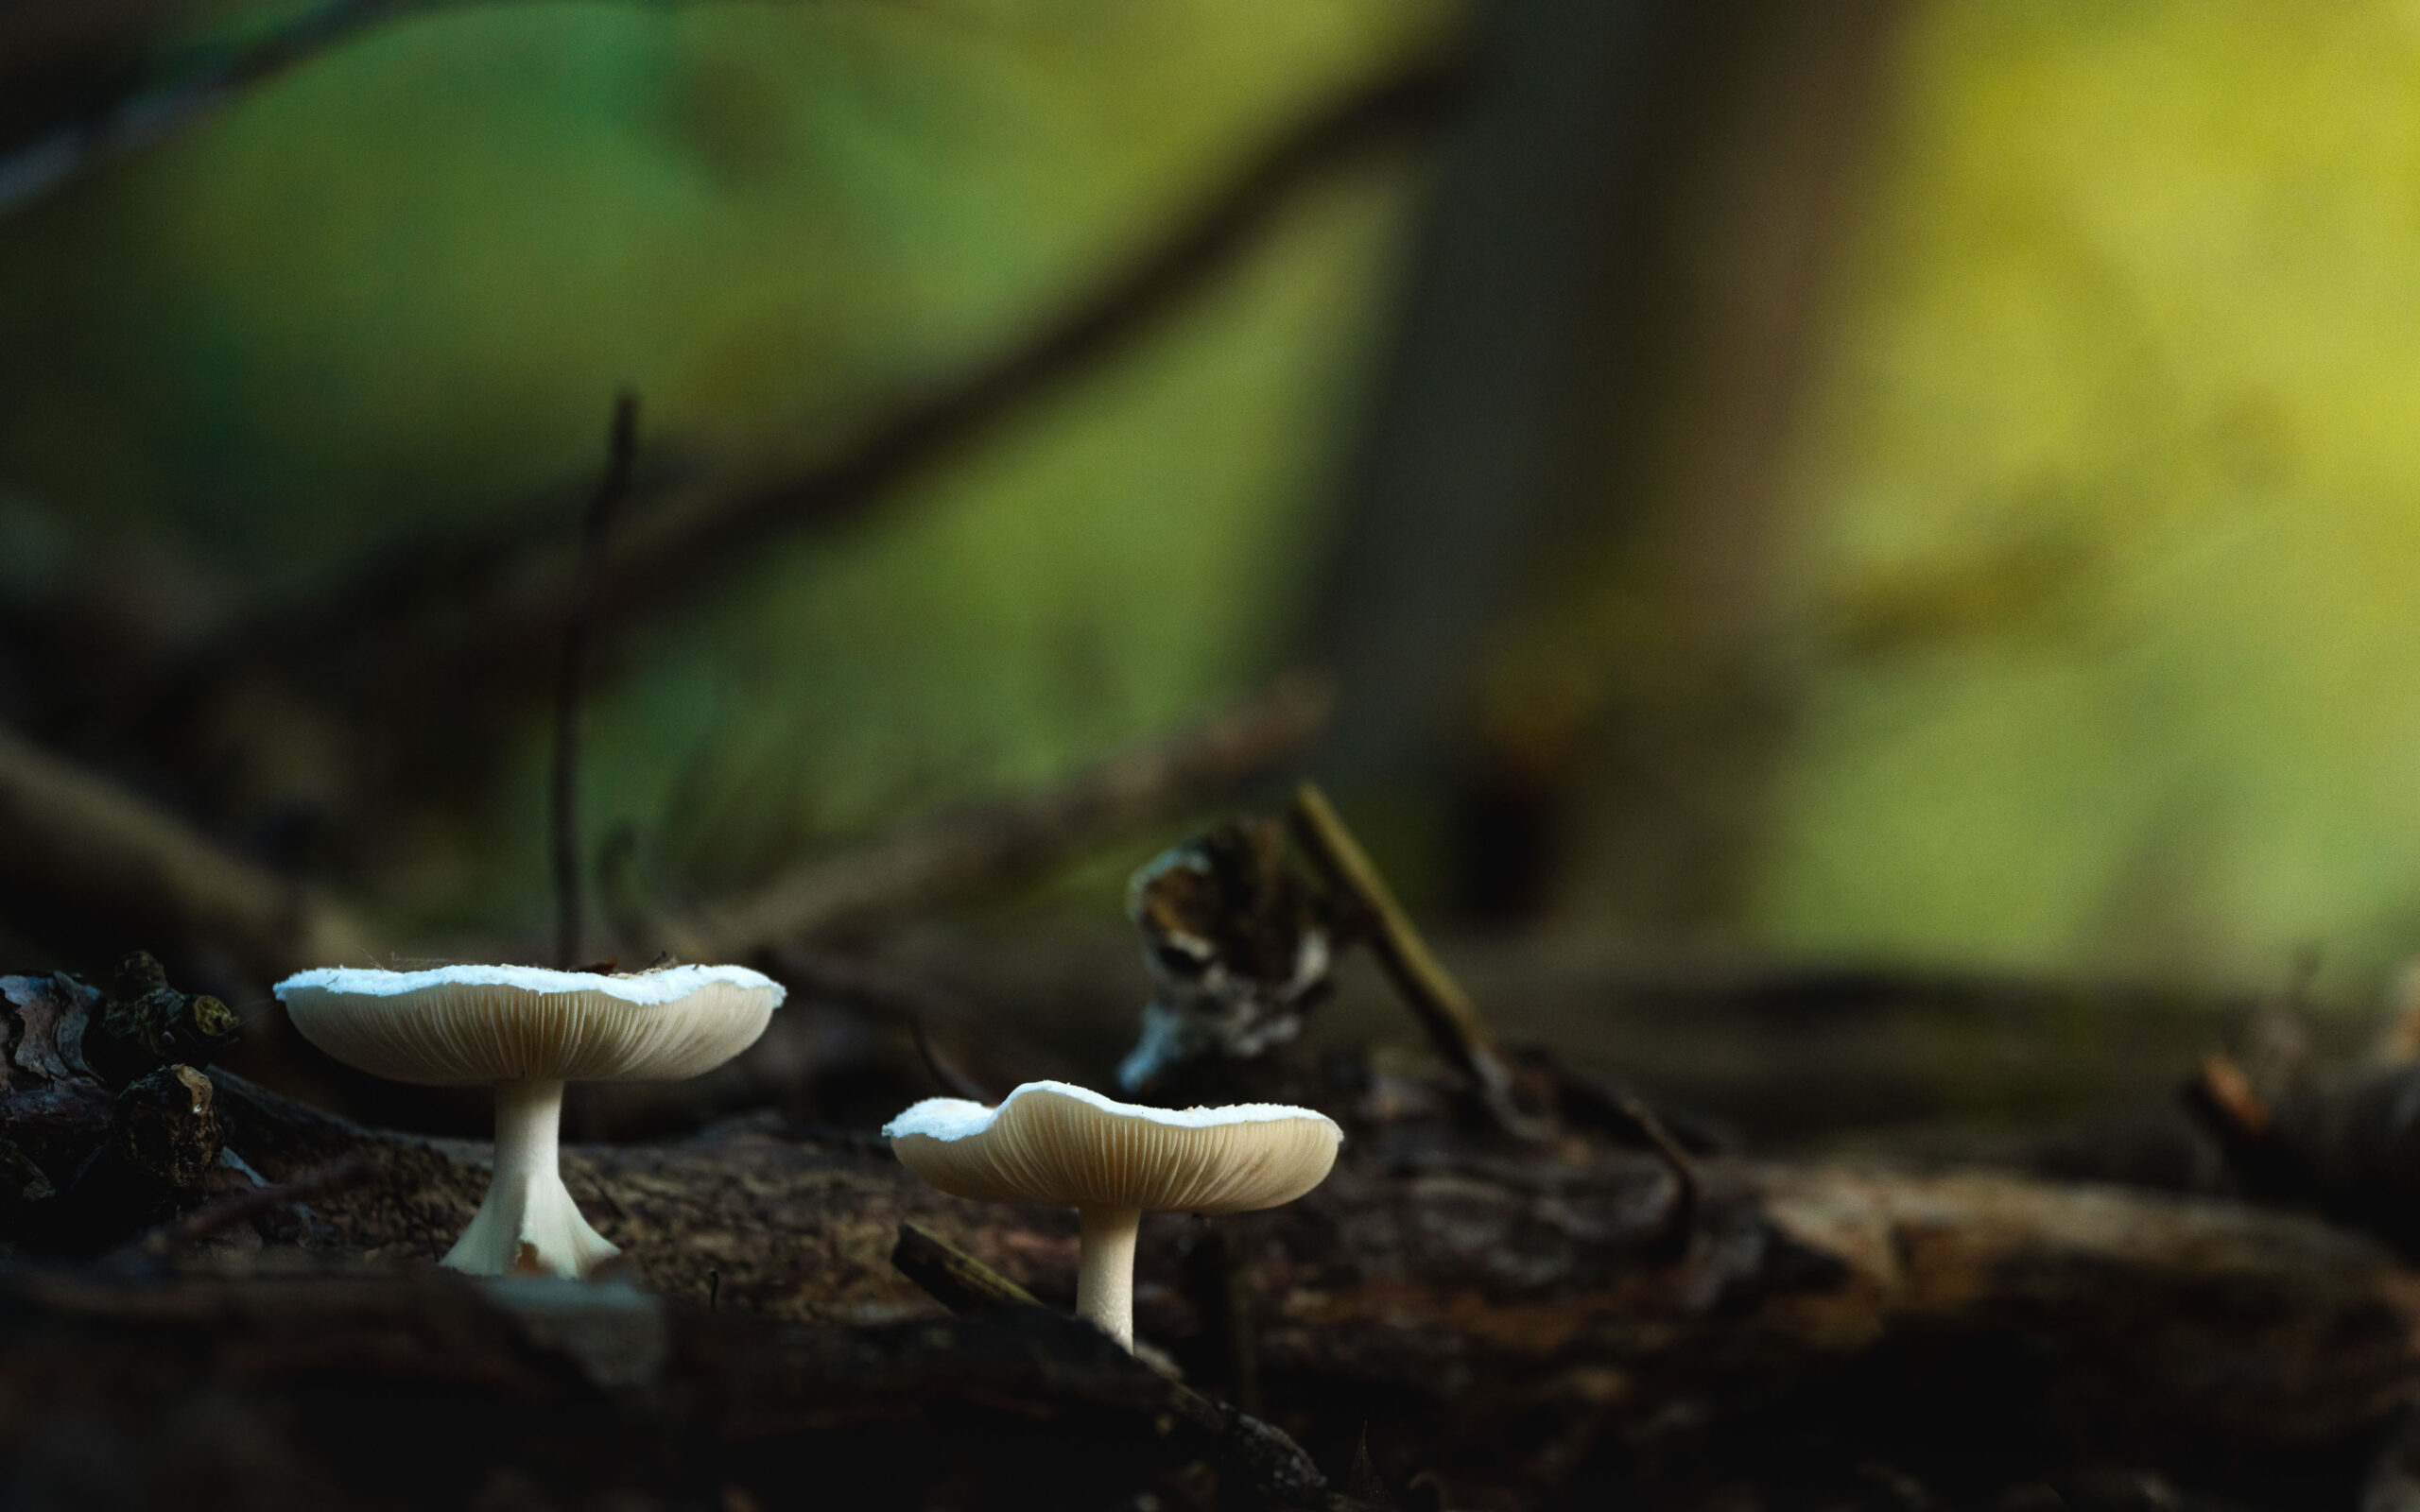
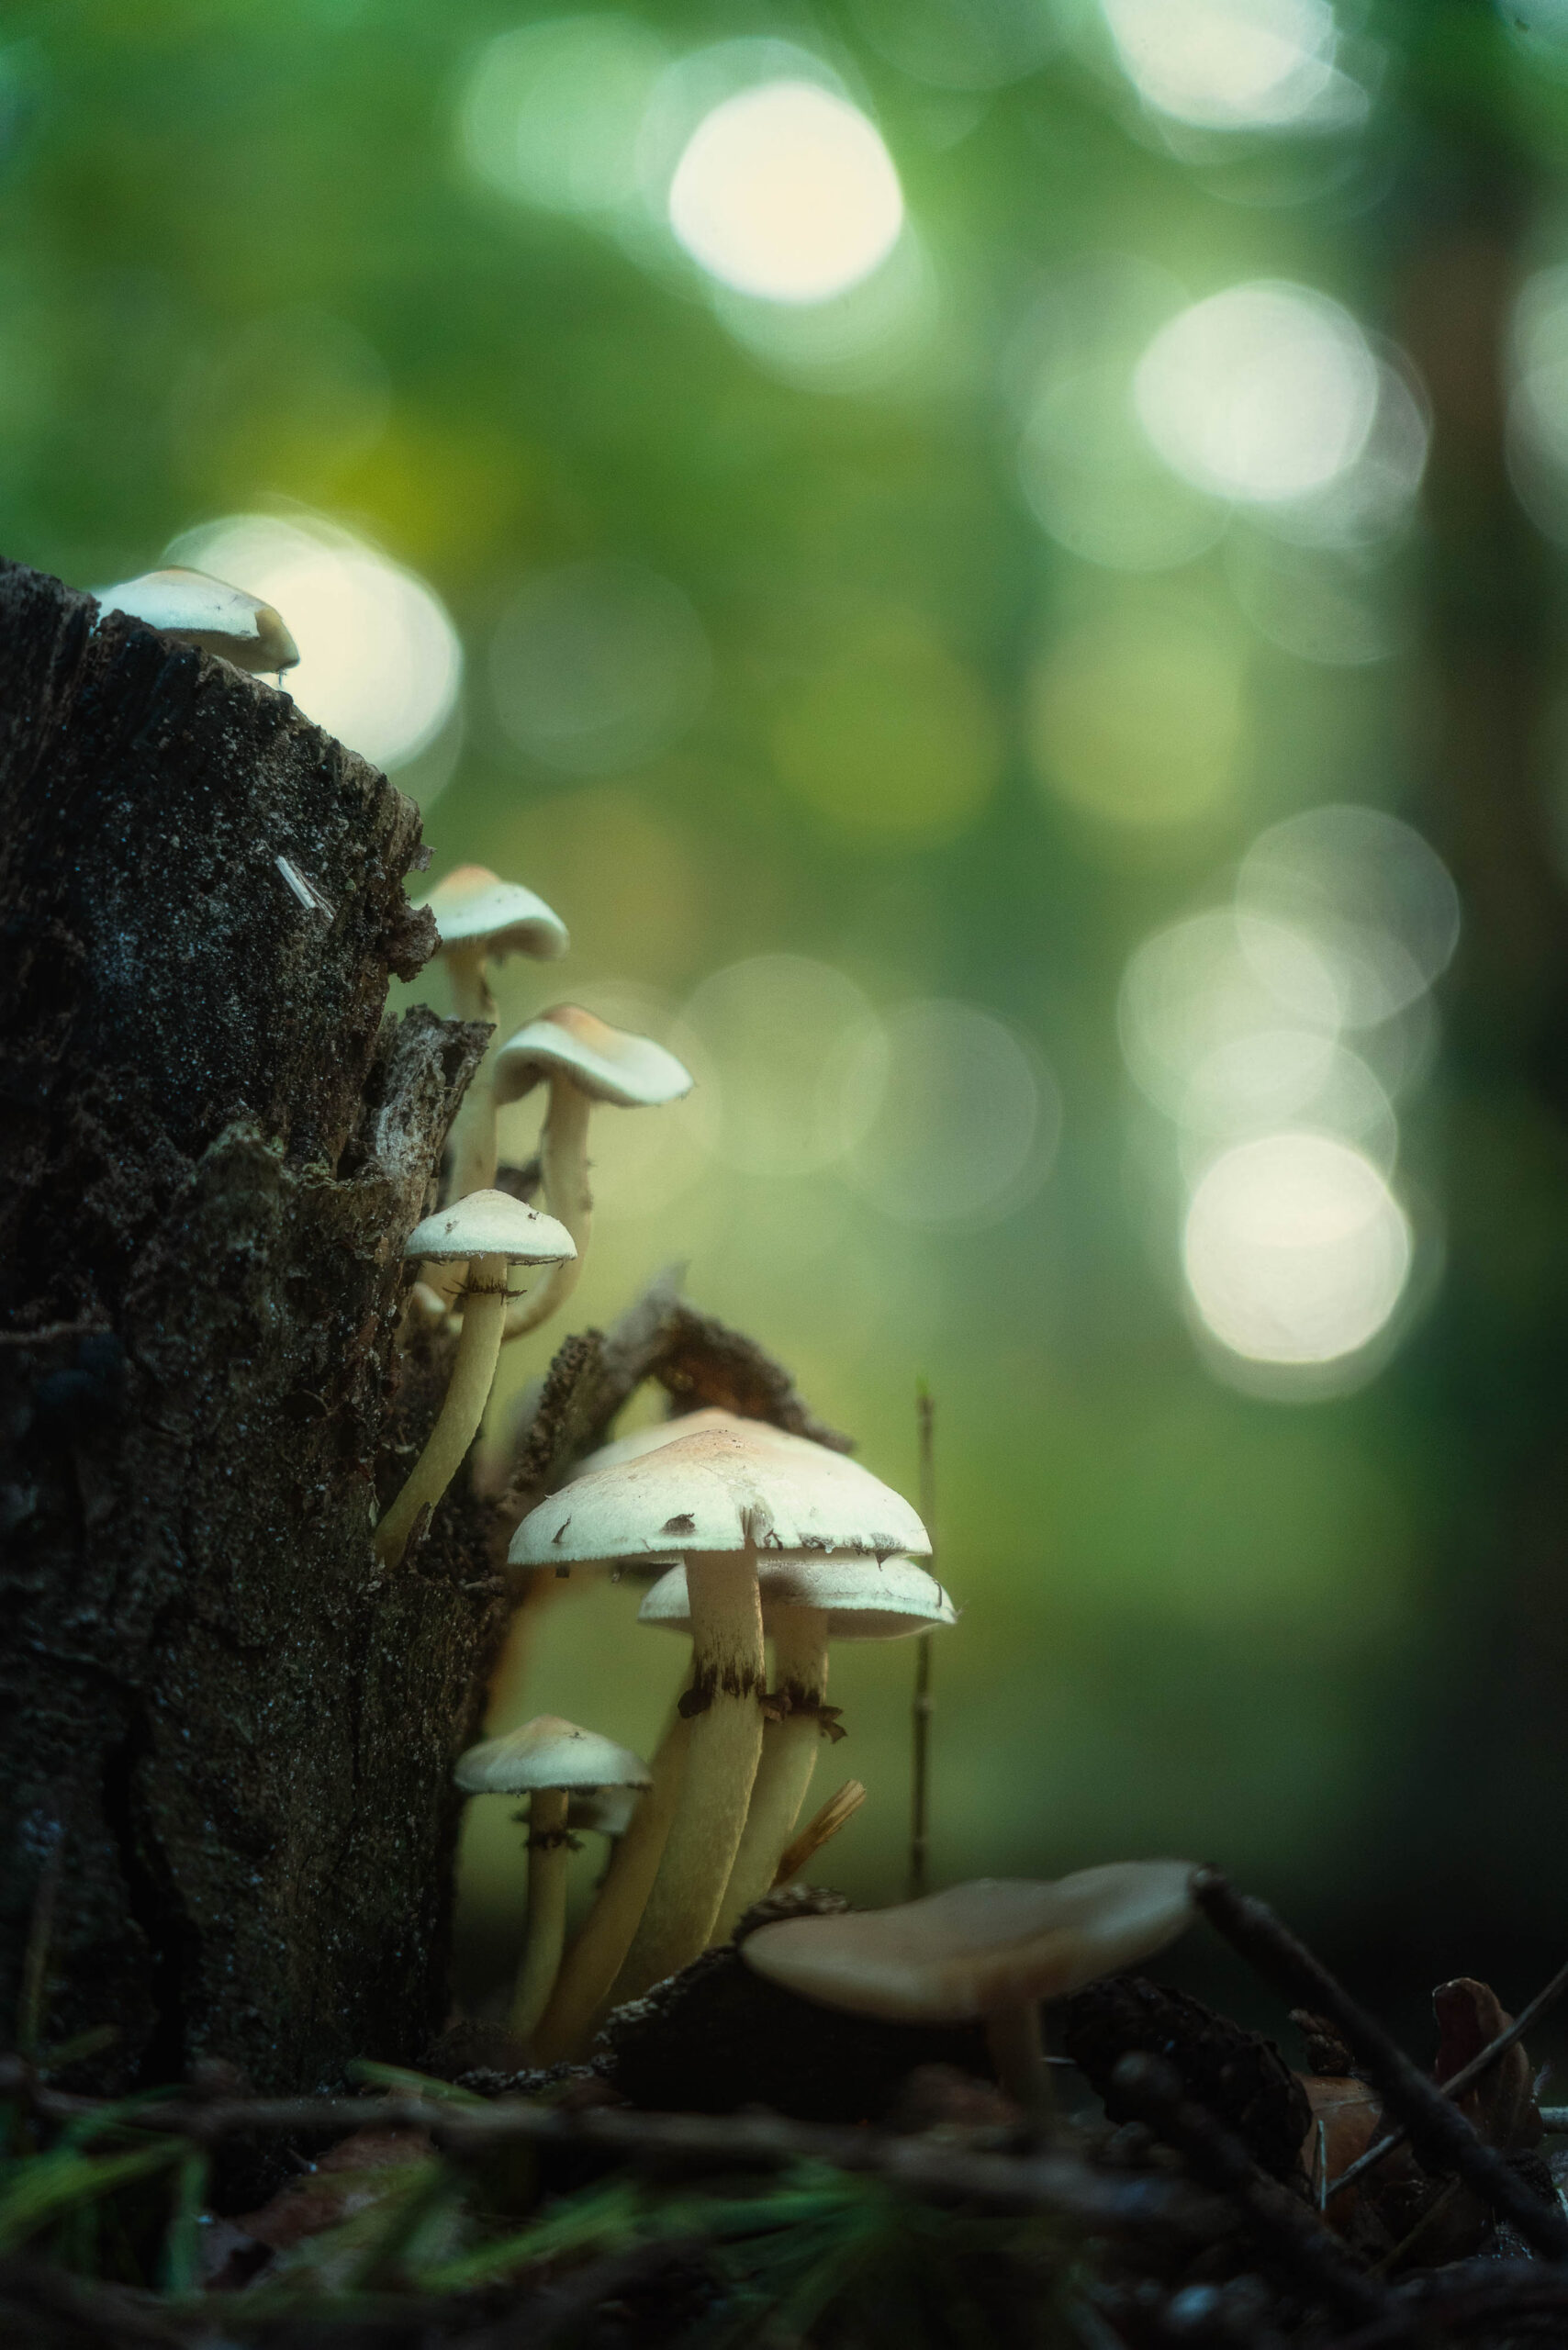
The forest around the lake became denser in many places. The mixed forest is doing its job. This results in more shrubbery and slightly fewer opportunities for photos. In other places, as mentioned, there are many unsightly ruts and wide tracks. This makes it difficult. Amongst all the remnants of forestry work, dead wood and branches, I was able to find a few mushrooms. To get an appealing picture, I paid particular attention to two things. Firstly, the mushroom should be as free-standing as possible and secondly, it should have as calm a background as possible.
In the picture below, I deliberately did not take a close-up of the mushroom, but included a little more of the surroundings in the picture. The effect is much better. The small white mushroom in the large, dark and deep forest conveys a little story rather than just a ‘mushroom portrait’.
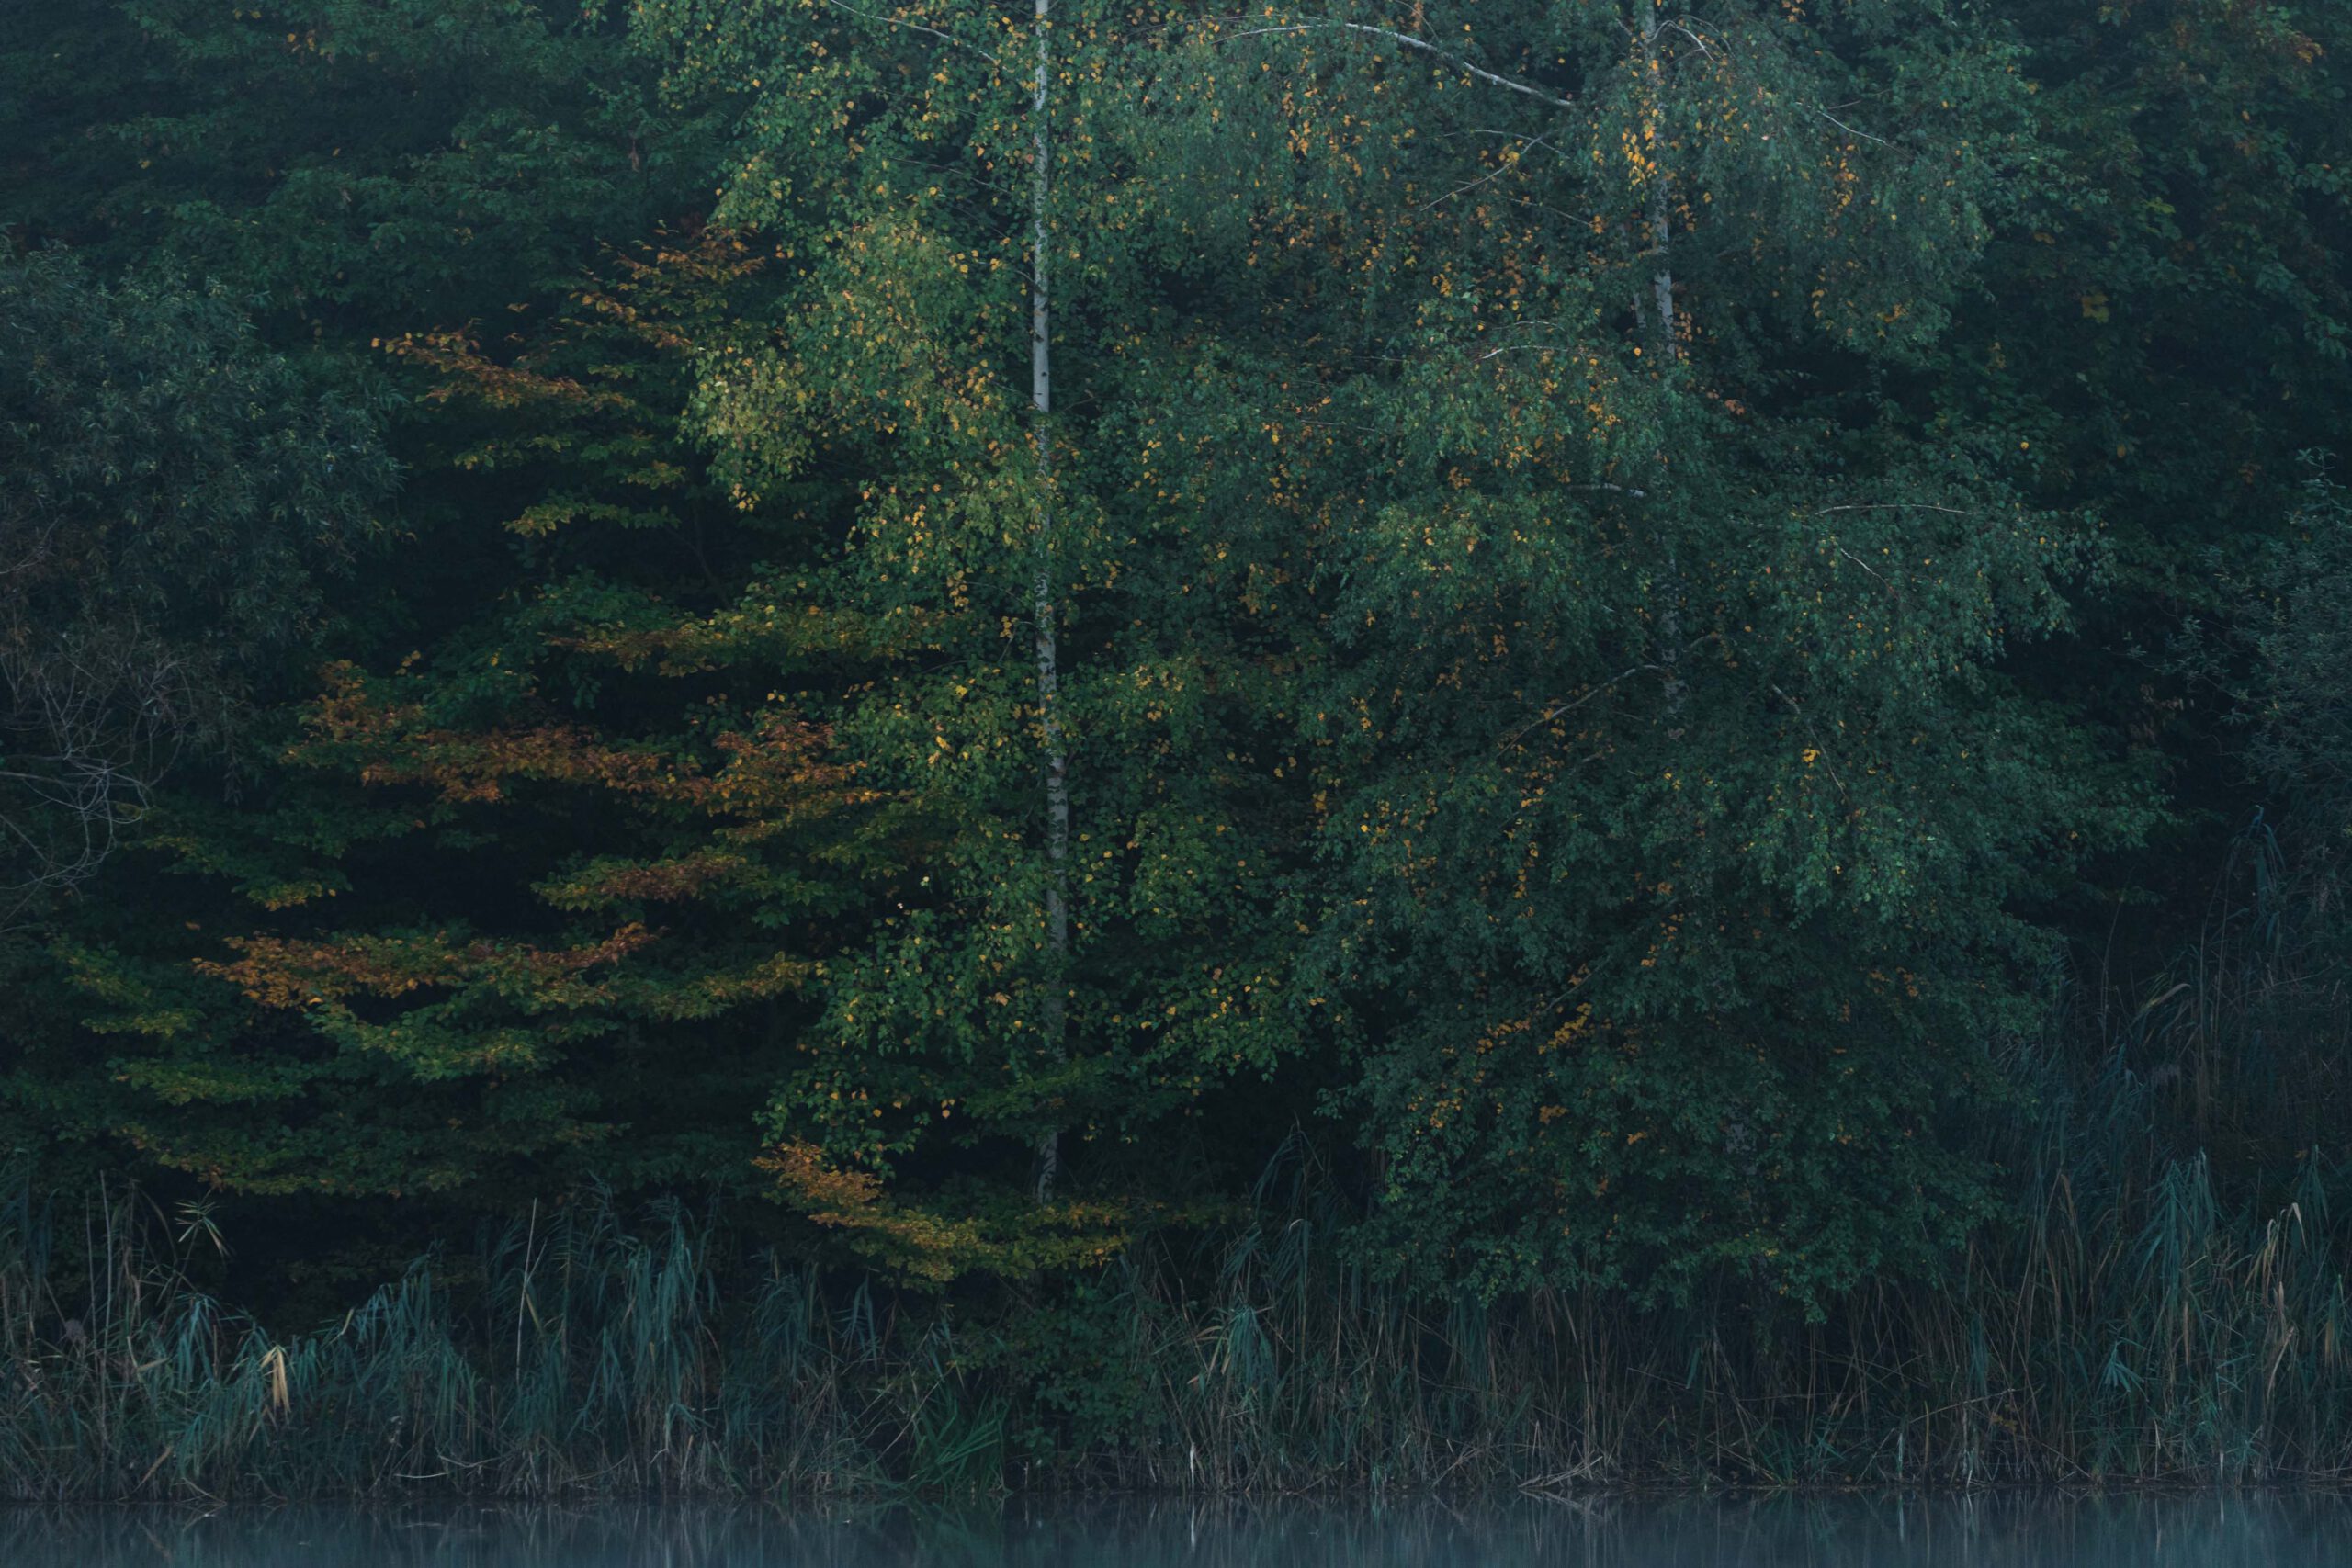
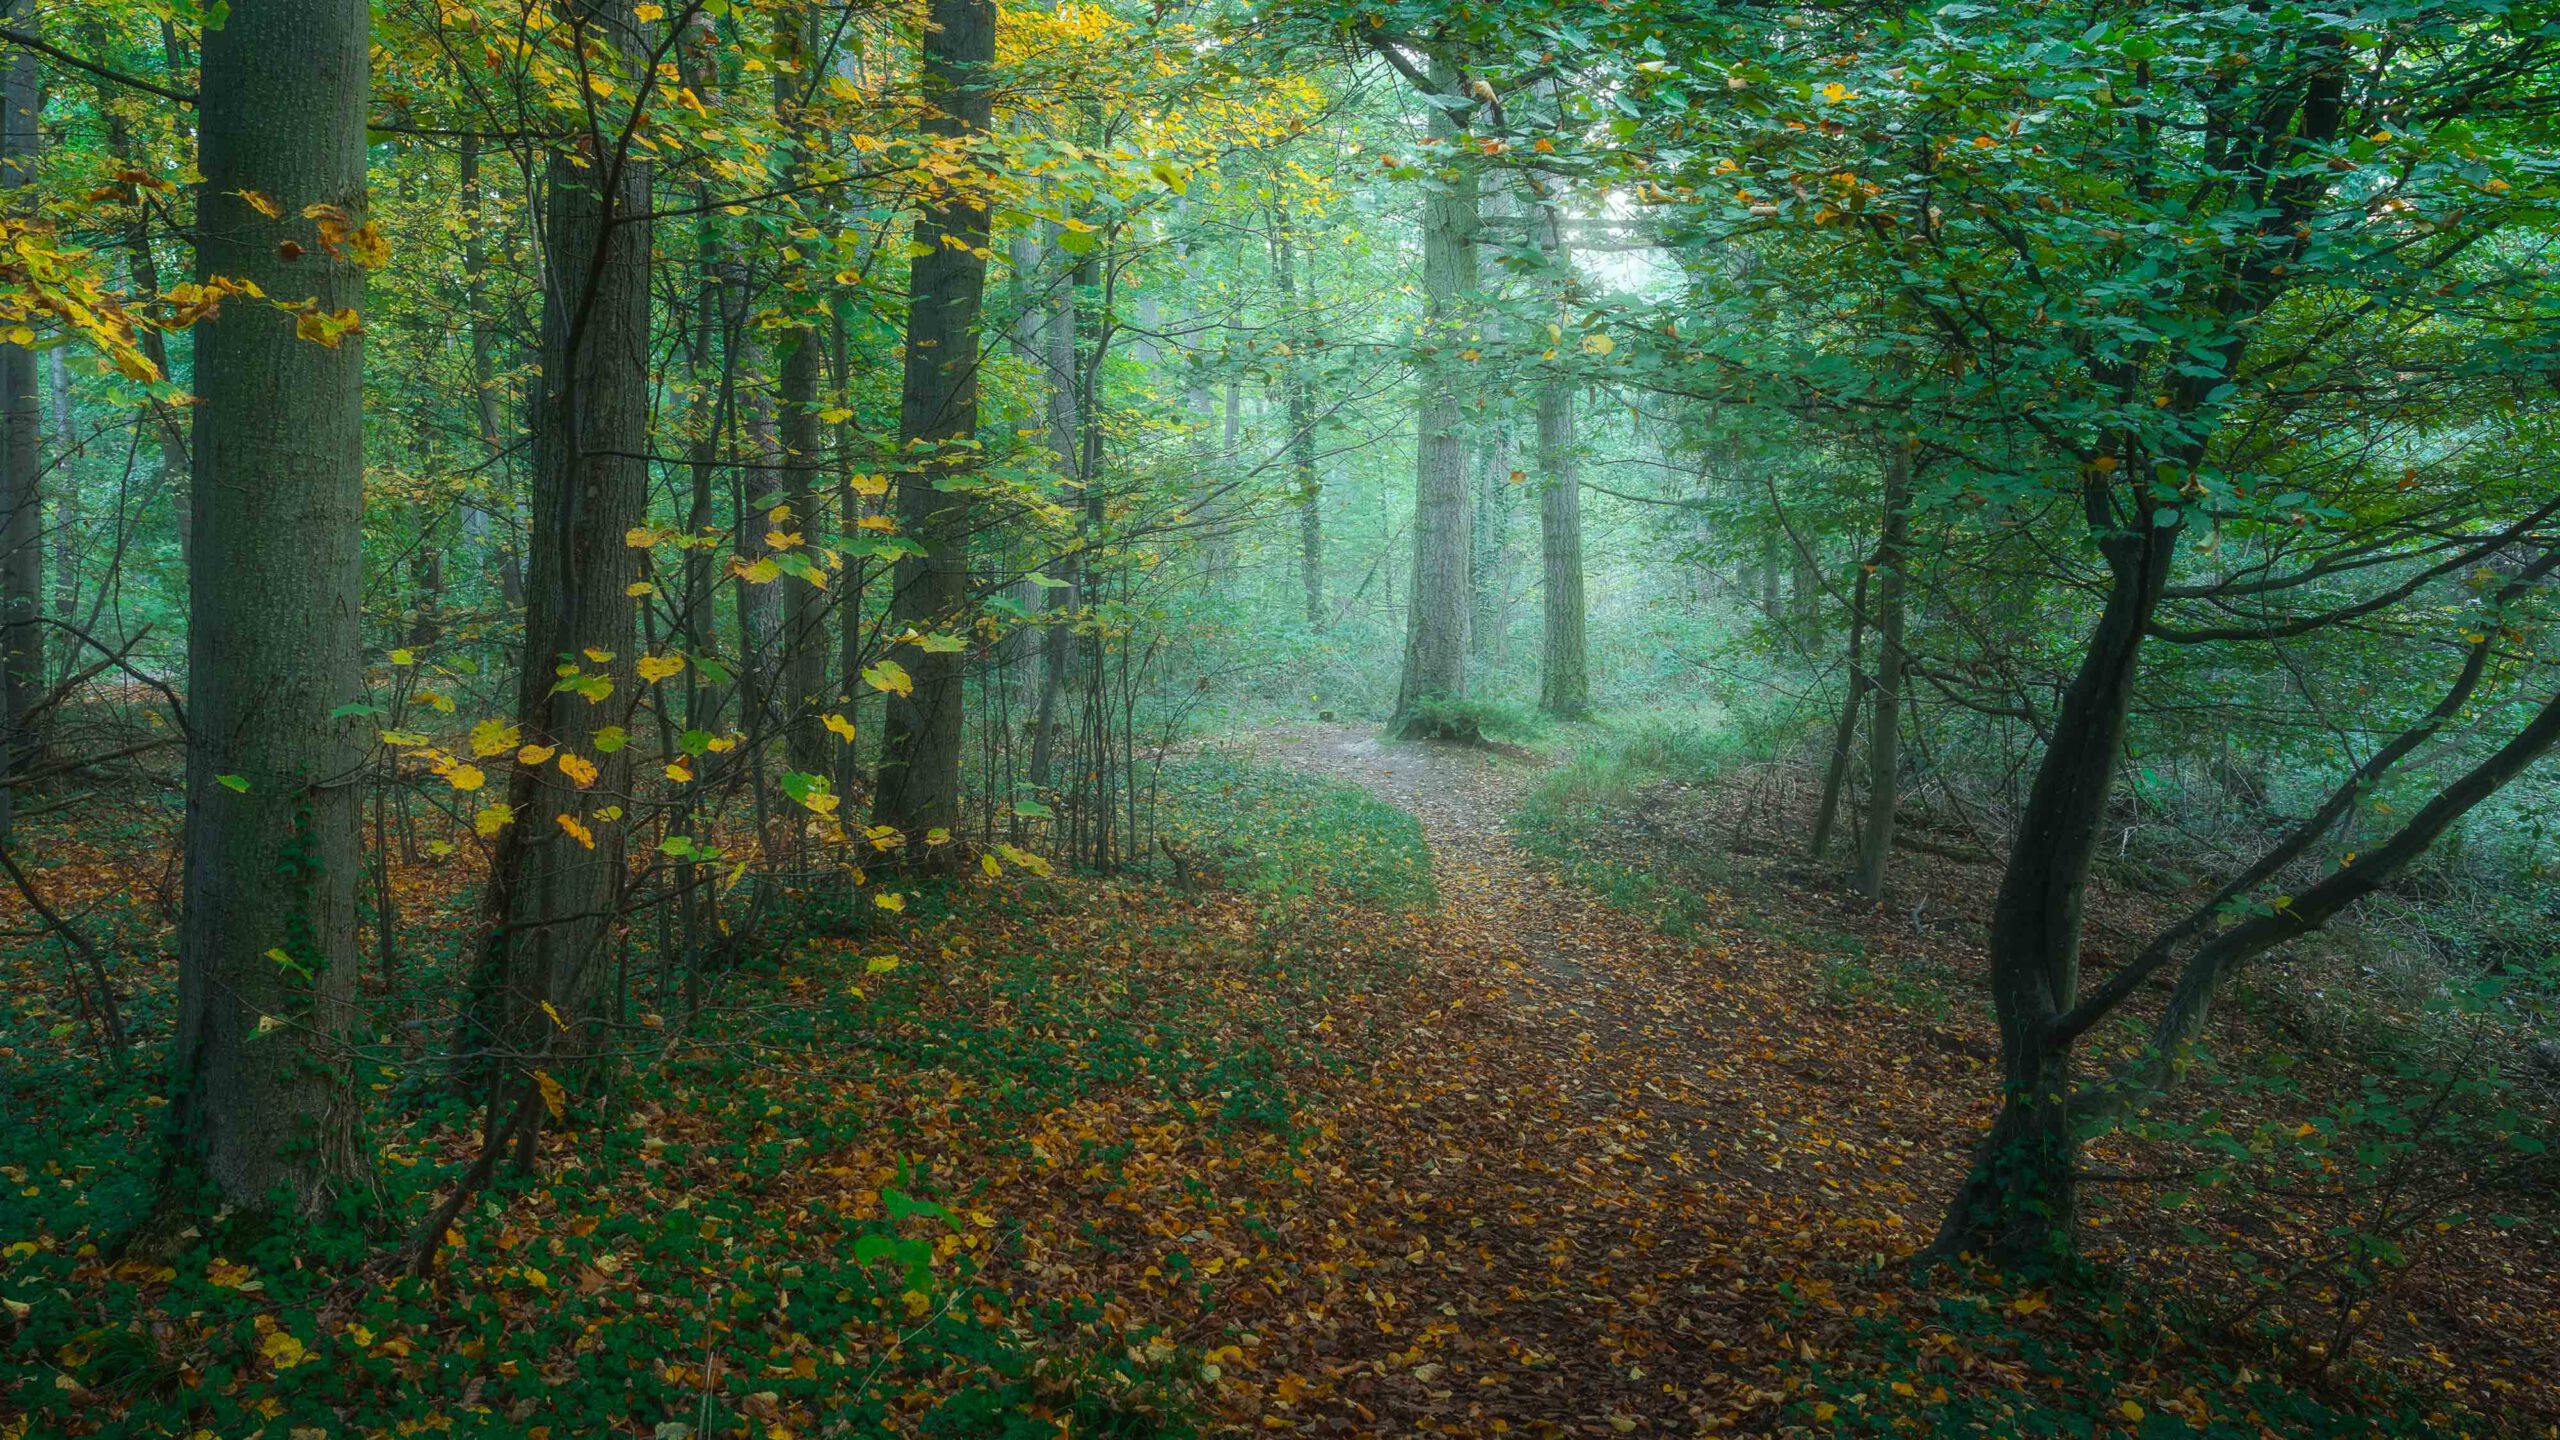
However, many other details were difficult to find. Perhaps I simply wasn’t open enough that morning. Most of the time, the lack of good pictures is not necessarily due to a lack of subjects, but also to a mental block. For this reason, I began to focus on the autumn colours. Where are there already beautiful splashes of colour? With the circular polarising filter, I was able to bring these out a little more. The main thing was not to include too much of the unattractive, flattened forest floor covered with ruts in the picture. The easiest way to do this is with a longer focal length.
The dense forest helped in some places to ensure that not too much sky was visible. In other places, I was able to achieve this by planning for a flatter cut with 16:10, 16:9, or even 2:1.
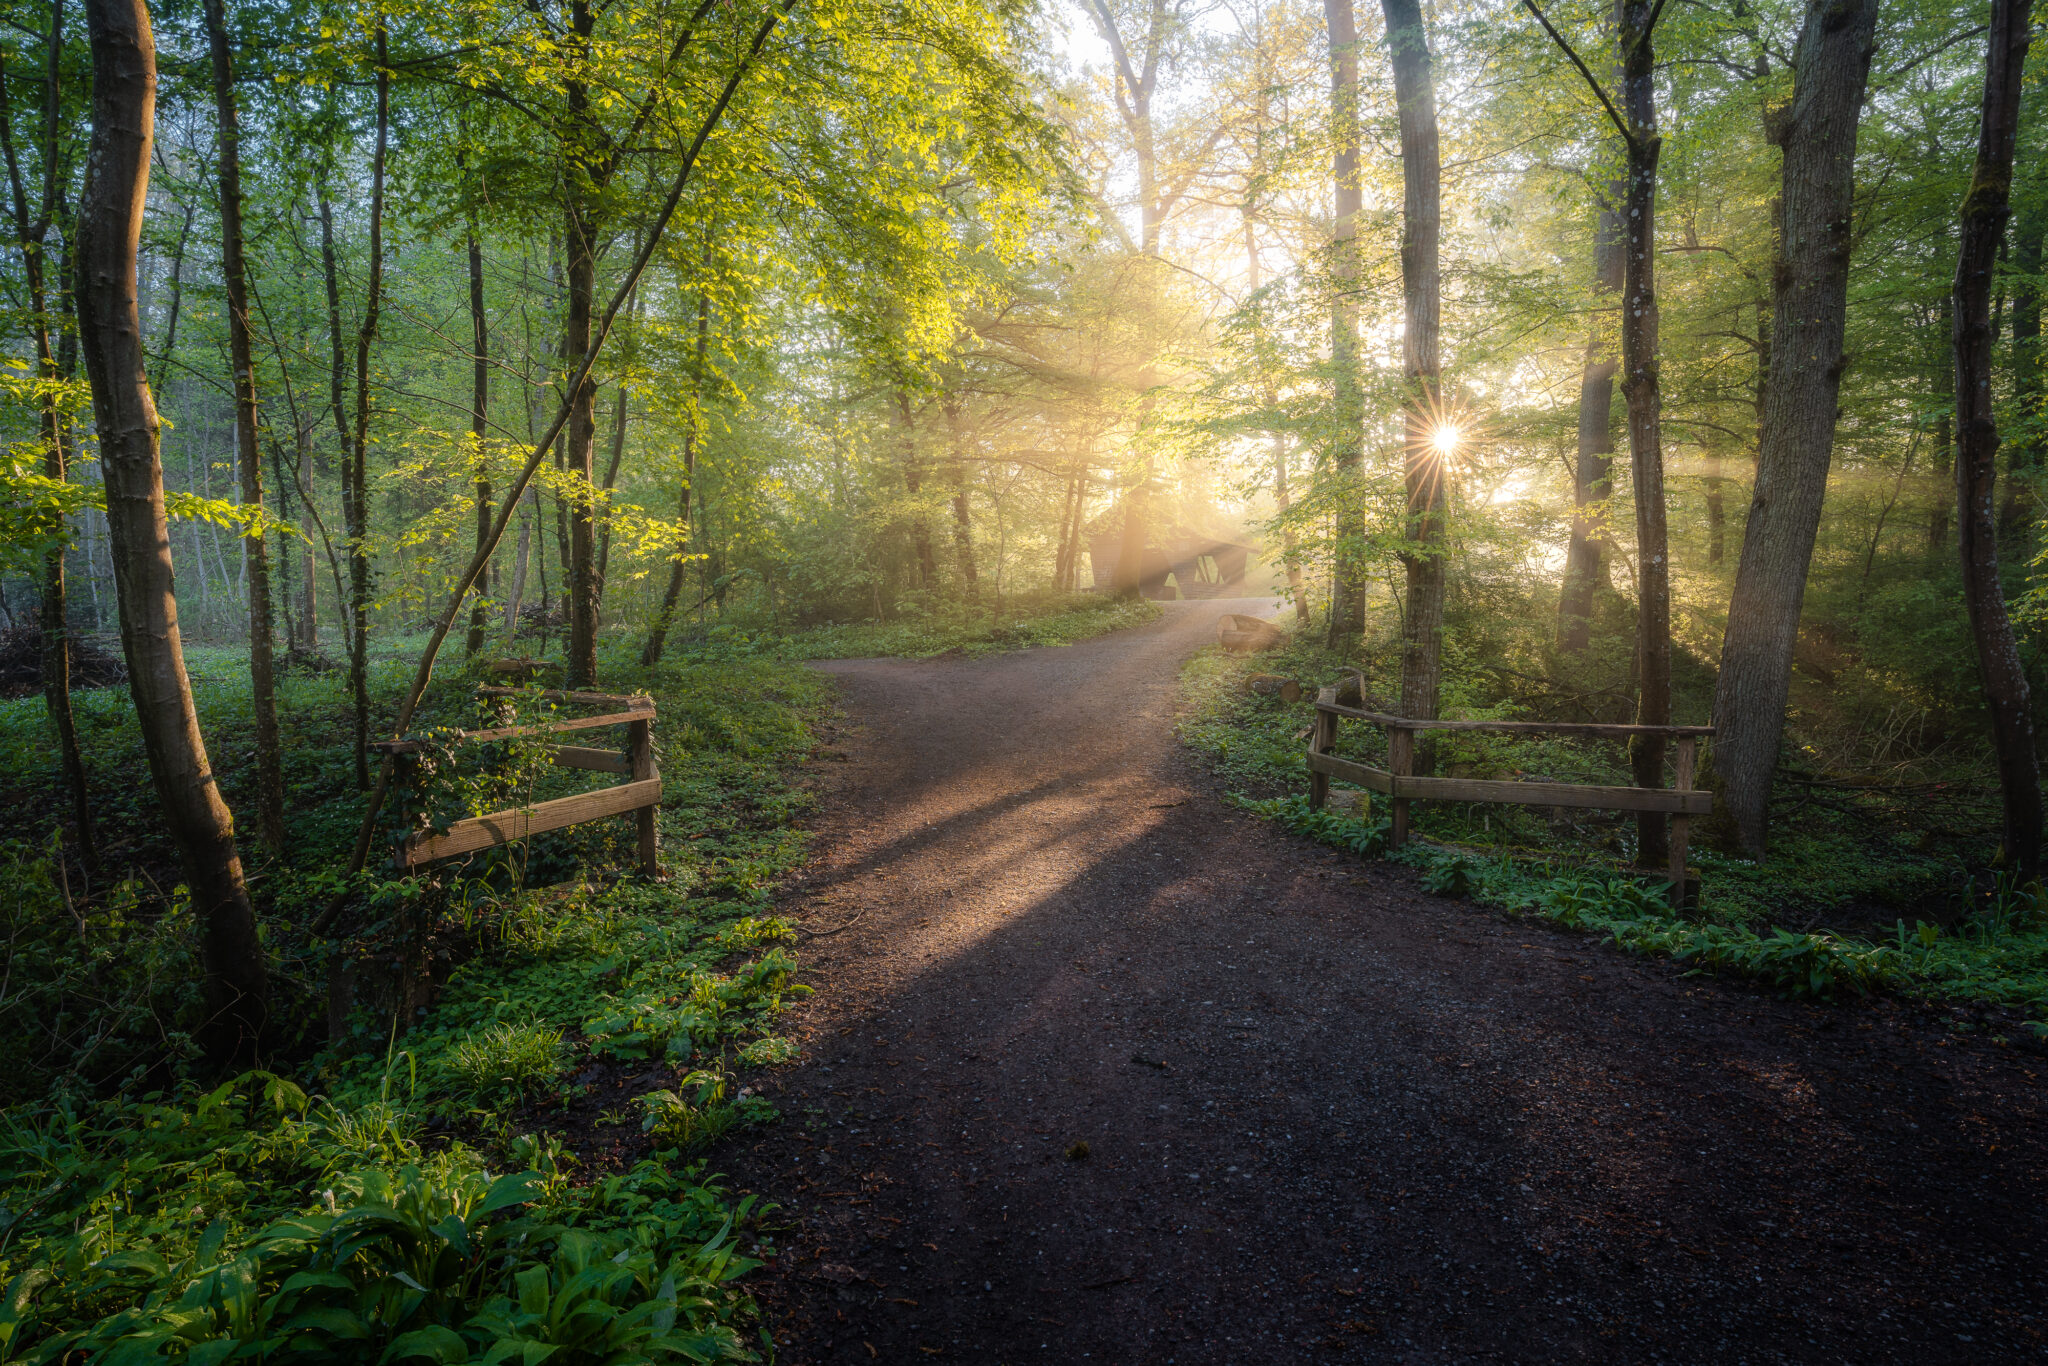
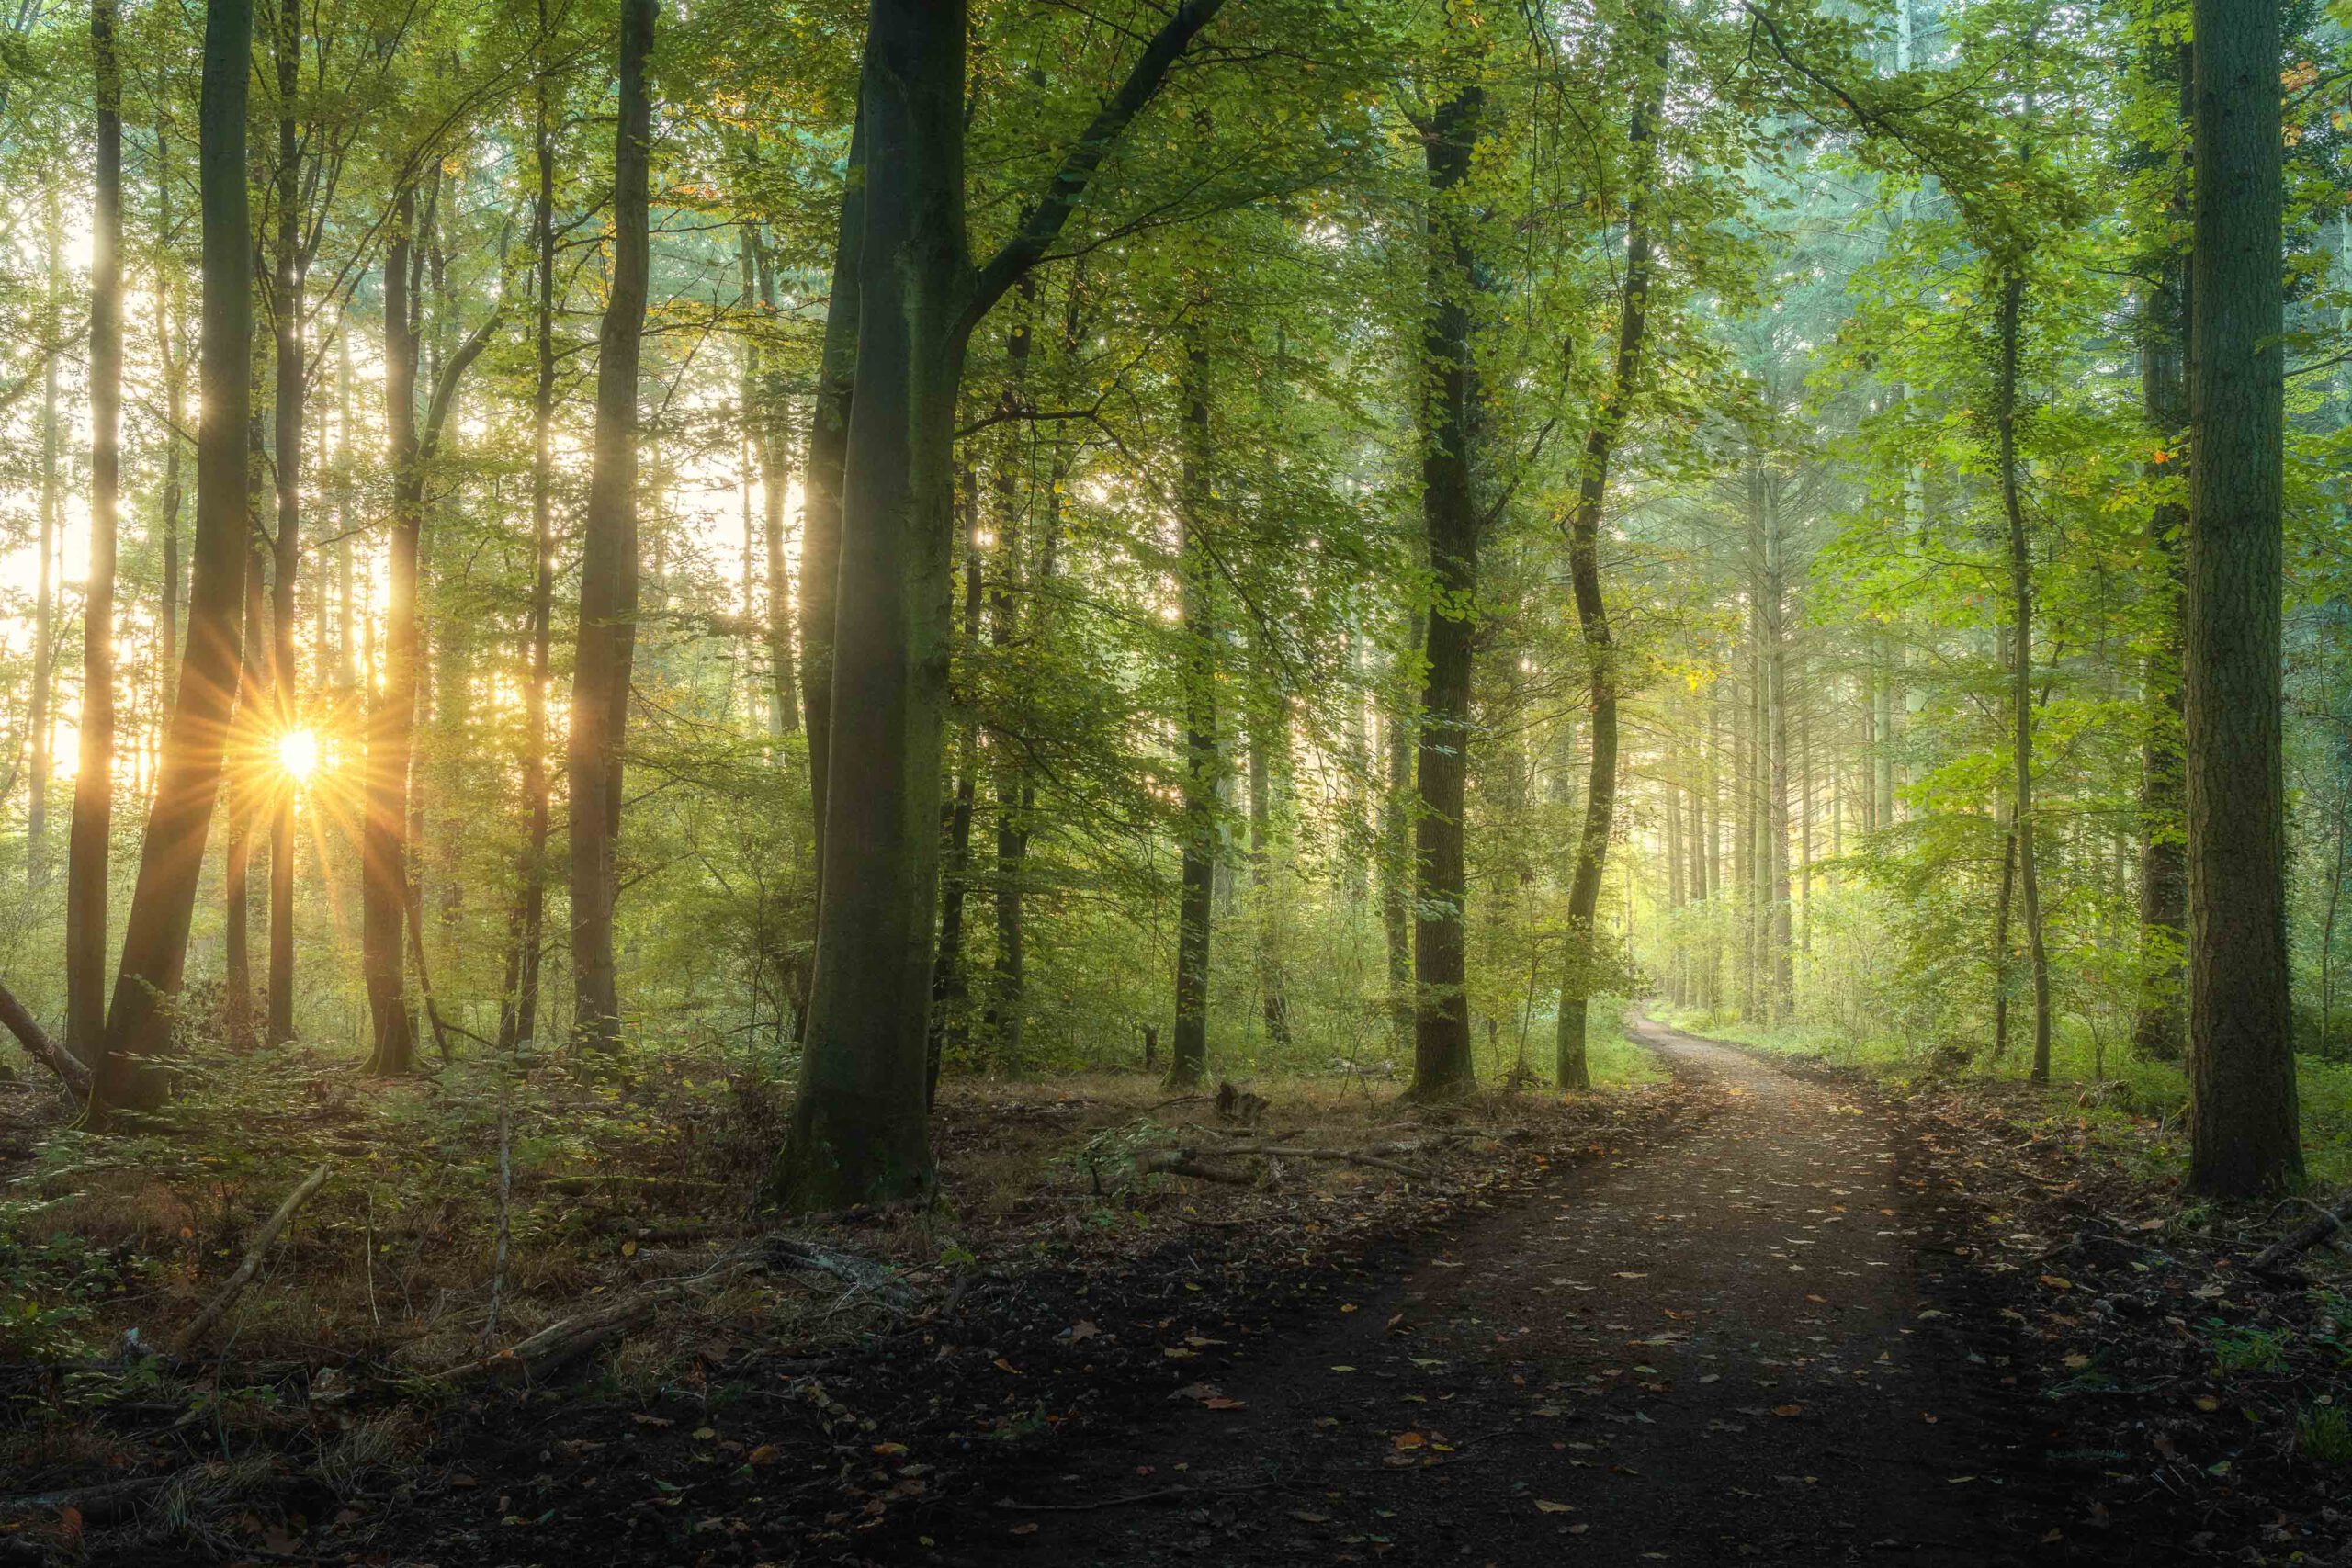
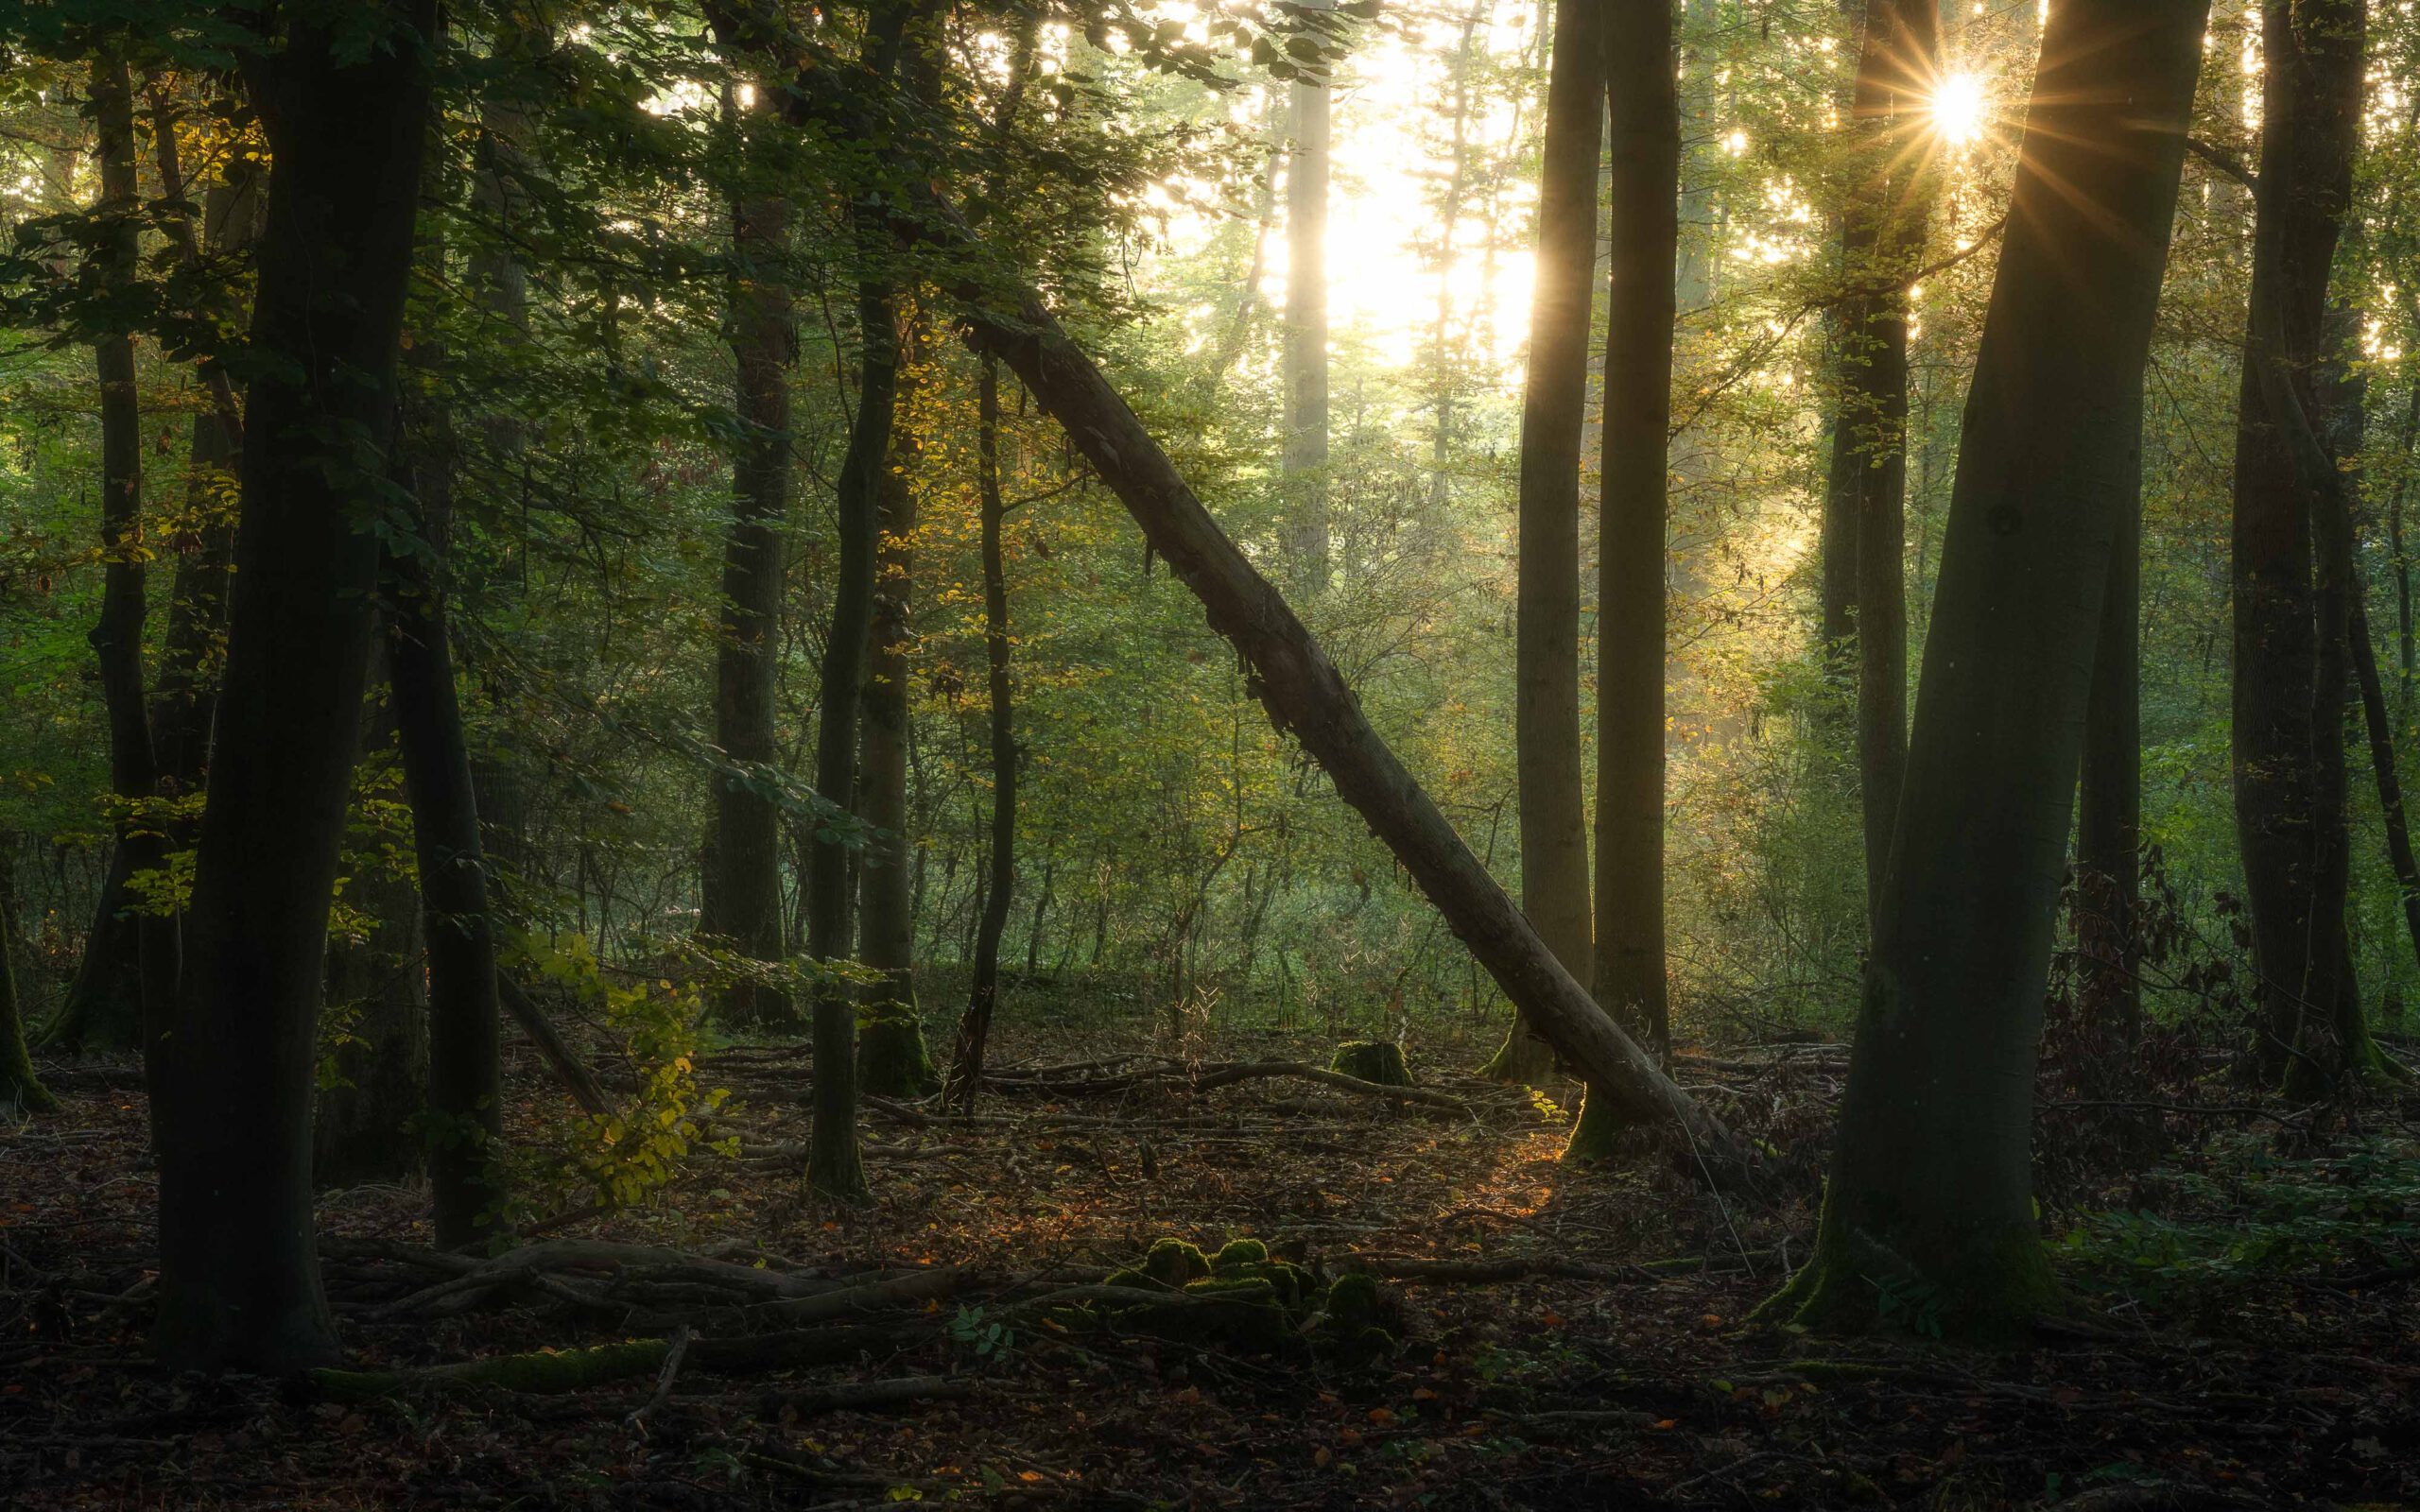
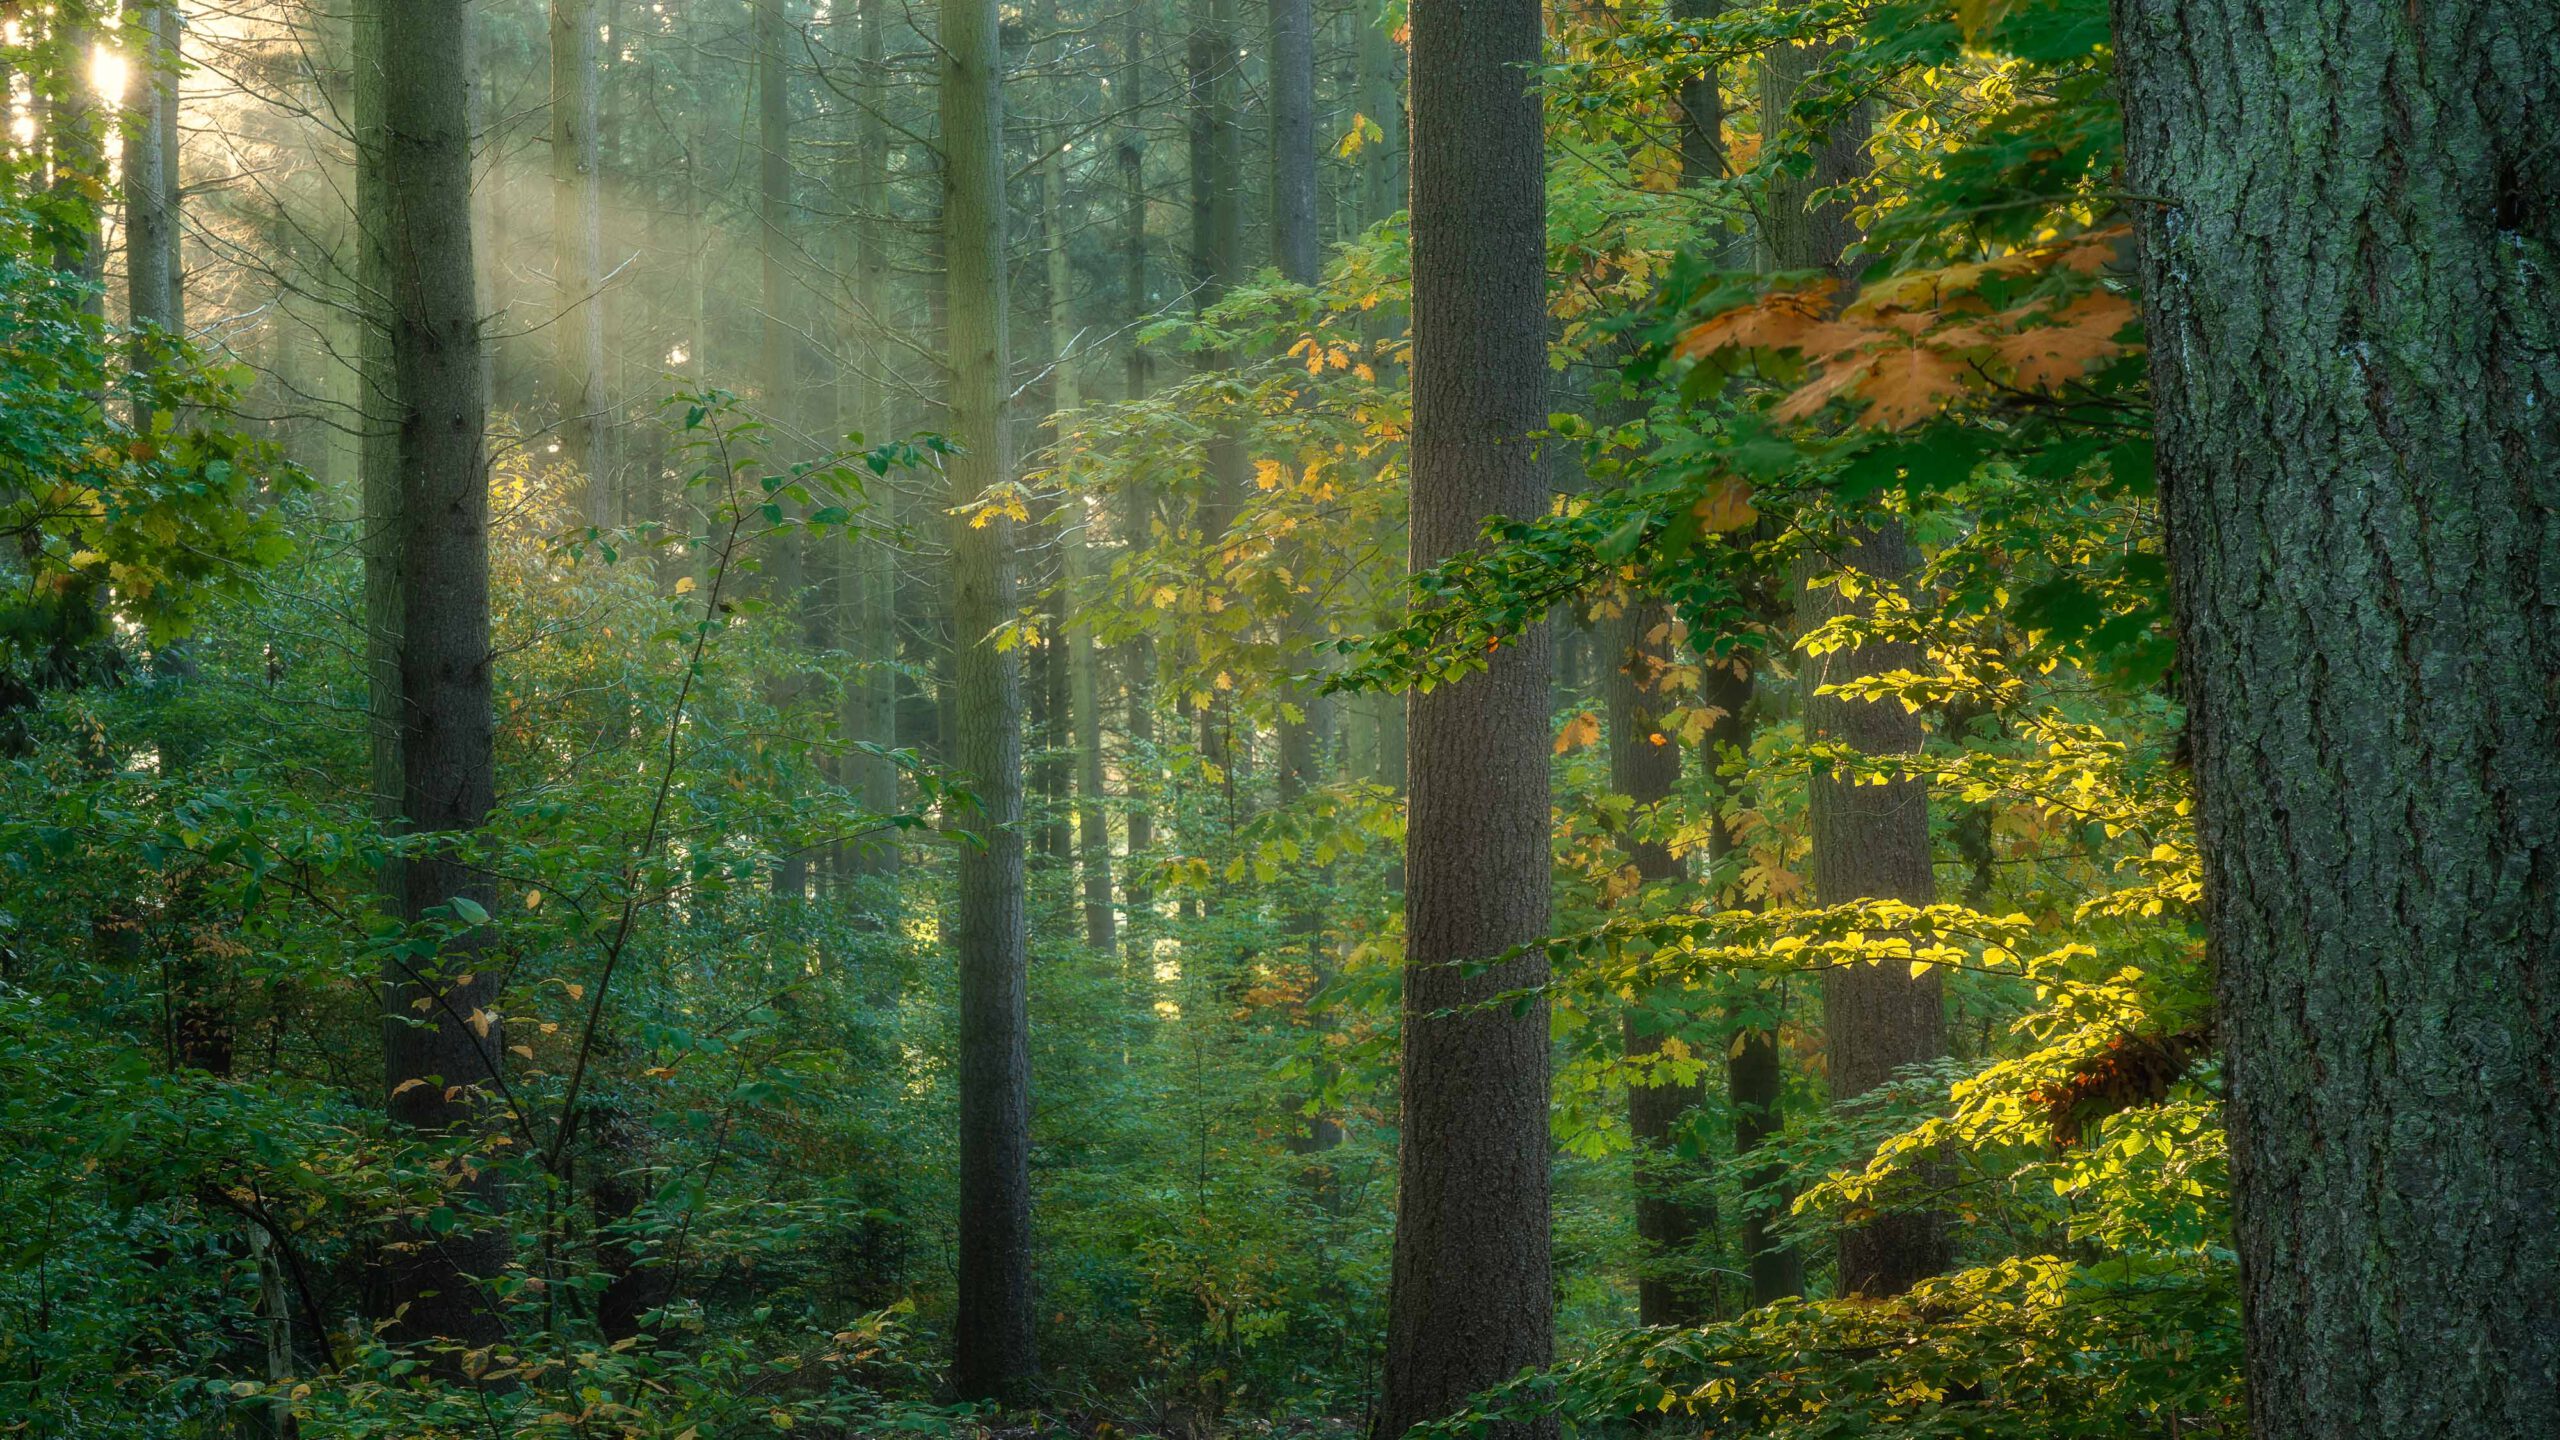
One advantage of knowing the location well is that you know where and when the sun will be. Since many of my ideas, indeed seemingly the entire intention with which I had travelled to this place on this day, had already evaporated shortly after my arrival, I had to hope for a plan B. This was to wait until the sun was high enough to shine into the forest. Perhaps there would be light rays, or at least foliage glowing in the sun, or a sun star. These details can make all the difference in a landscape photo, even in the forest, so you should always pay attention to such things.

If you would like to try or buy Luminar Neo yourself, you can use the code ‘Sphoto10´ to save an additional 10% on Luminar Neo!
Click here for Luminar Neo (*)
Sometimes you don’t expect much, and nature, the landscape or even the weather reward you with breathtaking scenes that you just have to capture on camera. Sometimes everything is set and it should be a sure-fire success, but then you realise that it’s going to be more difficult than expected and you have to be really creative to get a good photo. Sometimes nothing fits together and nothing goes according to plan. But if you end up with just one beautiful picture, then the morning was worth it. Ansel Adams once said that 12 good pictures a year is a fantastic yield. If you go out to take photographs with this mindset, you are much more likely to enjoy the moment and be happy with what you get to photograph, whether it’s portfolio-ready or not.
What have you got to lose? Nothing. In the worst case scenario, you just got some fresh air. And that alone was worth getting up for, wasn’t it?

Phew… it’s not that easy to get great pictures this morning, even though the conditions are actually right. However, the location has been quite badly damaged since my last visit. In this video, you’ll see how you can get better pictures in the forest with a few simple tips and how you can get the most out of your images with a little image editing.
Feel free to share: